


前言
ORM之前的JDBC操作步骤
- 注册数据库驱动类:url,username,password等连接信息
- DriverManager打开数据库连接connection
- 通过连接创造statement对象
- 通过statement执行sql语句得到resultSet对象
- 通过resultSet对象读取数据转化成javaBean对象
- 关闭resultSet,statement,connection
在上述步骤中1~4以及步骤6在每次执行查询语句中都是重复的,在增删改中也会出现类似的代码,一般会把前四个步骤和第六步分装成DBUtil类,步骤5是完成了关系模型到对象模型的转换,不好封装。为了解决繁琐的代码ORM框架由此而生
1.简介
ORM(object relation mapping 对象关系映射)
主要功能 :
根据映射配置文件,完成数据库在对象模型和关系模型之间的映射,况且前言中的步骤都是粗暴的完成了访问数据库然后关闭连接,在实际开发中需要 集成缓存,数据源,数据库连接池等组件进行优化 ORM的数据源和缓存都可在配置文件中自己进行配置,不需要修改源代码,提高了维护性和开发效率。
mybatis优点
动态的拼接sql,比如说多个条件查询时,要判断参数为不为空,哪里要加and 加in 加where 等等,如果是普通的jdbc是一个很繁琐的过程且没有技术含量,mybatis根据执行时传入的参数拼凑成完整的,可以执行的sql
支持代码生成器
在学习第2章 Mybatis的基本用法时,我们写了很多单表的增、删、改、査方法,基本上每个表都要有这些方法,这些方法都很规范并且也比较类似。
当数据库表的字段比较少的时候,写起来还能接受,一旦字段过多或者需要在很多个表中写这些基本方法时,就会很麻烦,不仅需要很大的代码量,而且字段过多时很容易出现错乱。尤其在新开始一个项目时,如果有几十个甚至上百个表需要从头编写,这将会带来很大的工作量,这样的工作除了能让我们反复熟练这些基本方法外,完全就是重复的体力劳动。
2 springboot集成mybatis
1. 集成步骤
配置数据源和文件放的位置
spring:
  datasource:
    driver-class-name:
    url: jdbc:mysql://localhost:3306/mybatis_study?useUnicode=true&characterEncoding=utf8&useSSL=true&&useJDBCCompliantTimezoneShift=true&useLegacyDatetimeCode=false&serverTimezone=UTC&serverTimezone=GMT%2B8
    username: root
    password: 123456

mybatis:
  mapper-locations: classpath:mapper/*.xml
  type-aliases-package: com.yogurt.mybatis_study.pojo
  configuration:
    #驼峰模式到羊肉串模式
    map-underscore-to-camel-case: true
编写mapper类并在启动类上加上 @MapperScan 注解
@Repository
public interface CountryMapper {
    List<Country> selectAll();
}
在resource/mapper/文件夹下编写文件
<?xml version="" encoding="UTF-8" ?>
<!DOCTYPE mapper
        PUBLIC "-//mybatis.org//DTD Mapper 3.0//EN"
        "">
<mapper namespace="">
    <select resultType="country">
        select * from mybatis_study.country
    </select>
</mapper>
测试
@Autowired
CountryMapper countryMapper;
@Test
void contextLoads() {
    List<Country> countries = ();
    for (Country country : countries) {
        (());
    }
}
2. springboot+mybatis打印sql日志
Spring Boot官方推荐优先使用带有 -spring 的文件名作为你的日志配置(如使用 ** ,而不是),命名为的日志配置文件,spring boot可以为它添加一些spring boot特有的配置项
根据不同的日志系统,你可以按如下规则组织配置文件名,就能被正确加载:Logback:,logback-spring.groovy, , logback.groovyLog4j:log4j-spring.properties, log4j-spring.xml, log4j.properties, log4j.xmlLog4j2:log4j2-spring.xml, log4j2.xmlJDK (Java Util Logging):
默认的命名规则,并且放在 src/main/resources 下如果你即想完全掌控日志配置,但又不想用作为Logback配置的名字,可以通过属性指定自定义的名字
logging:
  config: classpath:
针对DAO的包进行DEBUG日志设置 TRACE的level可以打印结果Debug只能打印sql语句
<logger name="" level="TRACE" />
完整配置请看springboot常用的配置文件
也可在需要打印的类上加上lombok的注解@SLF4J来控制日志打印
(());
基础
1.需要注意的点
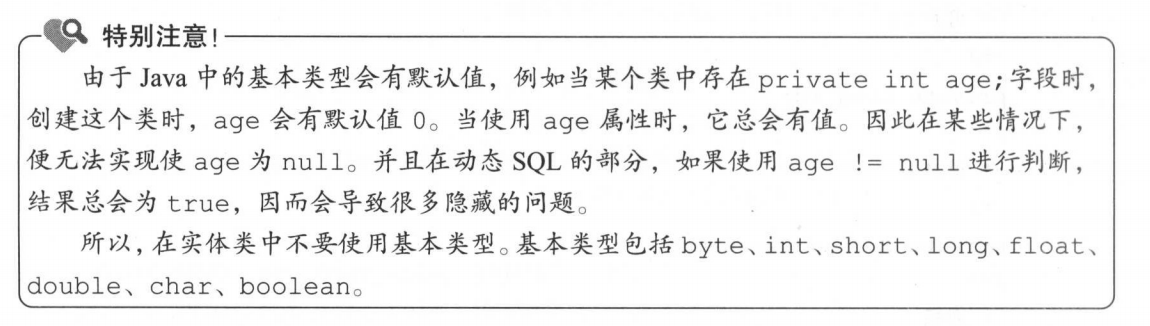
特殊的类型“byte[]”。这个类型一般对应数据库中的BLOB、 LONGVARBINARY以及一些和二进制流有关的字段类型
因为接口方法是可以重载的,所以接口中可以出现多个同名但参数不同的方法,但是XML中id的值不能重复,因而接口中的所有同名方法会对应着XML中的同一个id的方法。最常见的用法就是,同名方法中其中一个方法增加一个 Rowbound类型的参数用于实现分页查询。
2.增删改查
根据用户id获取用户拥有的所有角色
SysUser selectById(Long id);
<resultMap type="">
    <id property="id" column="id"/>
    <result property="createTime" column="create_time" jdbcType="TIMESTAMP"/>
</resultMap>
//不推荐使用*号,效率慢
<select resultMap="userMap">
    select * from mybatis_study.sys_user where id = #{id}
</select>
<select>:映射查询语句使用的标签。
id:命名空间中的唯一标识符,可用来代表这条语句。
resultMap:用于设置返回值的类型和映射表的列表名和bean类字段之间的关系
select标签中的 select+ from sys user where id=#{id}是查询语句
#{id}: Mybatis SQL中使用预编译参数的一种方式,大括号中的id是传入的参数名。
resultMap包含的所有属性如下:
    id:必填,并且唯一。在 select标签中,resultMap指定的值即为此处id所设置的值。
    type:必填,用于配置查询列所映射到的Java对象类型。
    extends:选填,可以配置当前的 resultmap继承自其他的 resultmap,属性值为继承 resultmap的id
    automapping:选填,可选值为true或 false,用于配置是否启用非映射字段(没有在 resultmap中配置的字段)的自动映射功能,该配置可以覆盖全局的automappingbehavior配置。
resultMap包含的所有标签如下
    constructor:配置使用构造方法注入结果,包含以下两个子标签。
     idArg:id参数,标记结果作为id(唯一值),可以帮助提高整体性能。
     arg:注入到构造方法的一个普通结果。
    id:一个id结果,标记结果作为id(唯一值),可以帮助提高整体性能。
    result:注入到Java对象属性的普通结果
    association:一个复杂的类型关联,许多结果将包成这种类型。
    collection:复杂类型的集合。
    discriminator:根据结果值来决定使用哪个结果映射
    case:基于某些值的结果映射。
constructor:通过构造方法注入属性的结果值。构造方法中的 idArg、arg参数分别对应着 resultmap中的id、 result标签,它们的含义相同,只是注入方式不同。
resultmap中的id和 result标签包含的属性相同,不同的地方在于,id代表的是主键(或唯一值)的字段(可以有多个),它们的属性值是通过 setter方法注入的。
id、result标签包含的属性:
    column:从数据库中得到的列名,或者是列的别名。
    property:映射到列结果的属性。可以映射简单的如“ username”这样的属性,也可以映射一些复杂对象中的属性,
    	例如“ ”,这会通过“.”方式的属性嵌套赋值。
    Javatype:一个Java类的完全限定名,或一个类型别名(通过 typealias配置或者默认的类型)。
    	如果映射到一个 Javabean, Mybatis通常可以自动判断属性的类型。如果映射到Hashmap,则需要明确地指定Javatype属性。
    jdbctype:列对应的数据库类型。JDBC类型仅仅需要对插入、更新、删除操作可能为空的列进行处理。这是 JDBC jdbctype的需要,而不是 Mybatis 的需要。
    typehandler:使用这个属性可以覆盖默认的类型处理器。这个属性值是类的完全限定名或类型别名。
名称映射规则:
    可以通过在resu1tMap中配置 property属性和 column属性的映射,或者在SQL设置别名这两种方式实现将查询列映射到对象属性的目的。
使用id查找该用户的所有角色
//根据用户id获取用户拥有的所有角色
List<SysRole> selectRolesByUserId(Long userId);
<select resultType="SysRole">
    select r.id,r.role_name,r.create_by,r.create_time
    from mybatis_study.sys_user u
    inner join mybatis_study.sys_user_role ur on u.id = ur.user_id
    inner join mybatis_study.sys_role r on r.id = ur.role_id
    where u.id = #{userId}
</select>
除了查询所有的role之外还要找到该用户名和用户密码
方法
直接在SysRole类中添加SysUser字段
//根据用户id获取用户拥有的所有角色还有用户名和密码
List<SysRole> selectRolesByUserId2(Long userId);
<select resultType="SysRole">
    select r.id,r.role_name,r.create_by,r.create_time,u.user_name as "",u.user_password as ""
    from mybatis_study.sys_user u
             inner join mybatis_study.sys_user_role ur on u.id = ur.user_id
             inner join mybatis_study.sys_role r on r.id = ur.role_id
    where u.id = #{userId}
</select>
需要注意的点:u.user_name as "",u.user_password as "" 要对这两列进行名称映射
插入一条数据返回受影响的行数
//插入提条记录
int insert(SysUser sysUser);
    <insert>
        insert into mybatis_study.sys_user(id,user_name, user_password, user_email, user_info, head_img, create_time)
        values (#{id},#{userName},#{userPassword},#{userEmail},#{userInfo},#{headImg, jdbcType=BLOB},#{createTime, jdbcType=TIMESTAMP})
    </insert>
<insert>元素,这个标签包含如下属性:
id:命名空间中的唯一标识符,可用来代表这条语句
parametertype:即将传入的语句参数的完全限定类名或别名。这个属性是可选的,因为 Mybatis可以推断出传入语句的具体参数,因此不建议配置该属性。
flushCache:默认值为true,任何时候只要语句被调用,都会清空一级缓存和二级缓存
timeout:设置在抛出异常之前,驱动程序等待数据库返回请求结果的秒数
statementtype:对于 STATEMENT、 PREPARED、 CALLABLE, Mybatis会分别使用对应的 Statement、 Preparedstatement、Callablestatement,默认值为PREPARED.
useGeneratedKeys:默认值为 false。如果设置为true, Mybatis会使用JDBC的 getgeneratedkeys方法来取出由数据库内部生成的主键
keyproperty: Mybatis通过 getgeneratedkeys获取主键值后将要赋值的属性名。
如果希望得到多个数据库自动生成的列,属性值也可以是以逗号分隔的属性名称列表。
keycolumn:仅对 INSERT和 UPDATE有用。通过生成的键值设置表中的列名,这个设置仅在某些数据库(如 Postgresql)中是必须的,当主键列不是表中的第一列时需要设置。如果希望得到多个生成的列,也可以是逗号分隔的属性名称列表。
databaseId:如果配置了 databaseidprovider(节有详细配置方法), Mybatis会加载所有的不带 databaseid的或匹配当前 databaseid的语句。如果同时存在带databaseid和不带 databaseid的语句,后者会被忽略。
为了防止类型错误,对于一些特殊的数据类型,建议指定具体的 jdbcType值。例如headImg指定BLOB类型, createTime指定 TIMESTAMP类型。
插入一条数据返回自增的主键值到UserId中
方式一:userGneratedKeys
/**
 *useGeneratedKeys这种方法只适用于支持主键自增的数据库
 * @param sysUser user对象
 * @return 返回数据库生成的自增主键值
 */
int insert2(SysUser sysUser);
<!--
由于要使用数据库返回的主键值,所以SQL上下两部分的列中去掉了id列和对应的#(id}属性。
这种回写方法只适用于支持主键自增的数据库
-->
<insert useGeneratedKeys="true" keyProperty="id" keyColumn="id">
    insert into mybatis_study.sys_user(user_name, user_password, user_email, user_info, head_img, create_time)
    values (#{userName},#{userPassword},#{userEmail},#{userInfo},#{headImg},#{createTime})
</insert>
测试
@Test
void userTest4() {
    SysUser user = new SysUser();
    ("test1");
    ("123456");
    ("123@");
    ("test info");
    (new byte[]{1,2,3});
    (new Date());
    int insertID = (user);
    ("insertID -> "+insertID);
    (user);
    //id回写,所以id不为空
    (());
}
方式二:selectKey
<!--
selectKey适用于数据库不支持主键自增的情况,还能返回主键的值
order="AFTER"
    mysql数据库是在语句插入到数据库之后才生成主键的值
    oracle是在插入之前生成主键的值
    select LAST_INSERT_ID()是mysql的写法。oracle的写法不一样,可以百度
-->
<insert>
    insert into mybatis_study.sys_user(user_name, user_password, user_email, user_info, head_img, create_time)
    values (#{userName},#{userPassword},#{userEmail},#{userInfo},#{headImg},#{createTime})
    <selectKey keyColumn="id" keyProperty="id" resultType="Long" order="AFTER">
        select LAST_INSERT_ID()
    </selectKey>
</insert>
根据id修改user
int UpdateById(SysUser sysUser);
<update>
    update mybatis_study.sys_user set user_name = #{userName}, user_password = #{userPassword}
                                    , user_email = #{userEmail} ,user_info = #{userInfo},
                                      head_img = #{headImg,jdbcType=BLOB},
                                      create_time = #{createTime,jdbcType=TIMESTAMP}
    where id = #{id}
</update>
4. delete
根据id删除user
int deleteById(Long id);
<delete>
    delete from mybatis_study.sys_user where id = #{id}
</delete>
3. 多参数的解决办法
通过@param注解来实现多参数传递
给参数配置@param注解后, Mybatis就会自动将参数封装成Map类型,@ Param注解值会作为Map中的key,因此在SQL部分就可以通过配置的注解值来使用参数。当只有一个参数的时候,mybatis不关心参数叫什么名字,而是把这个唯一参数值拿来用
根据用户id和角色的enabled状态来查询角色列表
Enabled需要自定义typeHandler之后再说
List<SysRole> selectRolesByUserIdAndEnabled(@Param("userId") Long id,@Param("enabled") Enabled enabled);
<select resultType="SysRole">
    select r.id,r.create_time,r.enabled,r.role_name,r.create_by
    from mybatis_study.sys_user u
             inner join mybatis_study.sys_user_role ur on u.id = ur.user_id
             inner join mybatis_study.sys_role r on ur.role_id = r.id
    where u.id = #{userId} and r.enabled = #{enabled}
</select>
4. 使用注解开发
1.select
select中resultMap的实现是基于resluts注解
根据id查找Role
//配置resultMap
@Results(id = "roleResultMap", value = {
        @Result(property = "id", column = "id", id = true),
        @Result(property = "roleName", column = "role_name"),
        @Result(property = "enabled", column = "enabled"),
        @Result(property = "createBy", column = "create_by"),
        @Result(property = "createTime", column = "create_time")
})
@Select("select * from mybatis_study.sys_role where id = #{id}")
SysRole selectById(Long id);
在.xml文件中有id和reslutType属性 这边省略了reslutType属性个人猜测是通过反射方法的返回值实现的
Results可以通过id属性全局复用的
//使用resultMap
@ResultMap("roleResultMap")
@Select("select * from mybatis_study.sys_role")
List<SysRole> selectAll();
这边即使不填resultMap也没事,就想知道为啥能拿到reslutType因为泛型是运行时擦除的???
插入一条记录,不回写id值
@Insert("insert into mybatis_study.sys_role(id, role_name, enabled, create_by, create_time)\n" +
        "VALUE(#{id},#{roleName},#{enabled},#{createBy},#{createTime})")
int insert(SysRole role);
插入一条记录,回写id值
方式一 指定useGeneratedKeys
@Insert("insert into mybatis_study.sys_role(role_name, enabled, create_by, create_time)\n" +
        "VALUE(#{roleName},#{enabled},#{createBy},#{createTime})")
@Options(useGeneratedKeys = true,keyProperty = "id")
int insert2(SysRole role);
方式二 : selectKey
@Insert("insert into mybatis_study.sys_role(role_name, enabled, create_by, create_time)\n" +
        "VALUE(#{roleName},#{enabled},#{createBy},#{createTime})")
@SelectKey(statement = "SELECT LAST_INSERT_ID()",keyProperty = "id",keyColumn = "id",resultType = Long.class,before = false)
int insert3(SysRole role);
方式一和方式二的区别在上一节中讲了
和delete
@Update("update mybatis_study.sys_role set " +
        "role_name = #{roleName}, enabled = #{enabled}, create_by = #{createBy}, create_time = #{createTime}" +
        "where id = #{id}")
int updateById(SysRole role);

@Delete("delete from mybatis_study.sys_role where id = #{id}")
int deleteById(Long id);
4.使用@Provider注解开发
使用@provider注解开发的好处是使mysql和接口的定义分开,使项目便于维护,但是修改sql语句时需要重新编译代码,个人觉得还是没有.xml文件好使
使用@provider注解开发步骤:
- 定义xxxMapper接口
- 定义xxxProvider对象,并根据xxxMapper接口写sql语句
- 在mapper上添加@xxxProvider注解
根据id查找privilege
xxxMapper
@SelectProvider(type = PrivilegeProvider.class,method = "selectById")
SysPrivilege selectById(Long id);
@Provider注解有两个属性type配置的是method方法所在的类(该类必须包含空的构造方法),method方法返回值必须是String
xxxProvider
public class PrivilegeProvider {
    public PrivilegeProvider() {
    }
    public String selectById(Long id){
        return new SQL(){
            {
                SELECT("id,privilege_name,privilege_url");
                FROM("sys_privilege");
                WHERE("id = #{id}");
            }
        }.toString();
    }
}
5.动态sql语句
Mybatis3之后的版本采用了功能强大的OGNL( Object-graph Navigation Language)表达式语言消除了许多其他标签,以下是 Mybatis的动态SQL在XML中支持的几种标签。
choose (when, oterwise)
trim( where、set)
foreach
bind
不仅学习标签的用法,还要学习OGNL
1.if
假设现在有一个新的需求:实现一个用户管理高级查询功能,根据输入的条件去检索用户信息。这个功能还需要支持以下三种情况:当只输入用户名时,需要根据用户名进行模糊查询当只输入邮箱时,根据邮箱进行完全匹配:当同时输入用户名和邮箱时,用这两个条件去查询匹配的用户。
//根据动态条件(用户名和邮箱)查询用户信息
List<SysUser> selectUserByNameAndEmail(@Param("username") String username,@Param("email") String userEmail);
<select resultType="SysUser">
    select * from mybatis_study.sys_user
    where 1 = 1
    <if test="username != null and username != ''">
        and user_name like concat('%',#{username},'%')
    </if>
    <if test="email != null and email != ''">
        and user_email = #{email}
    </if>
</select>
这里需要注意的是1 = 1 这个条件,如果username和email都为空又没有1 = 1 这个条件会报错,后面可以用<where>代替
现在要实现这样一个需求:只更新有变化的字段。需要注意,更新的时候不能将原来有值但没有发生变化的字段更新为空或null.通过if标签可以实现这种动态列更新。
//只更新有变化的字段。更新的时候不能将原来有值但没有发生变化的字段更新为空或null.
int updateUserByIdSelective(SysUser user);
<update>
    update mybatis_study.sys_user
    set
    <if test="userName != null and userName != ''">
        user_name = #{userName},
    </if>
    <if test="userPassword != null and userPassword != ''">
        user_password = #{userPassword},
    </if>
    <if test="userEmail != null and userEmail != ''">
        user_email = #{userEmail},
    </if>
    <if test="userInfo != null and userInfo != ''">
        user_info = #{userInfo},
    </if>
    <if test="headImg != null">
        head_img = #{headImg},
    </if>
    <if test="createTime != null">
        create_time = #{createTime},
    </if>
    id = #{id}
    where id = #{id}
</update>
这里需要注意id = #{id}这个条件,如果前面的都为空,或者有的不为空,这个条件都可以是sql语句不报错误
在数据库表中插入数据的时候,如果某一列的参数值不为空,就使用传入的值,如果传入参数为空,就使用数据库中的默认值(通常是空),而不使用传入的空值。
//在数据库表中插入数据的时候,如果某一列的参数值不为空,就使用传入的值,如果传入参数为空,就使用数据库中的默认值(通常是空),而不使用传入的空值。
//这里以email为例
int insertIfNullGetDefault(SysUser user);
<insert useGeneratedKeys="true" keyProperty="id">
    insert into mybatis_study.sys_user
        (user_name, user_password,
         <if test="userEmail != null and userEmail != ''">
             user_email,
         </if>
         user_info, head_img, create_time)
         value
         (#{userName},#{userPassword},
            <if test="userEmail != null and userEmail != ''">
                #{userEmail},
            </if>
          #{userInfo},#{headImg},#{createTime})
</insert>
这里注意userName在列部分加了if标签那么在value部分也要加
2. choose
实现if...else、if...else的逻辑,要想实现这样的逻辑,就需要用到 choose when otherwise标签。 choose元素中包含when和 otherwise两个标签,一个 choose中至少有一个when,有0个或者1个otherwise。
在已有的 sys_user表中,除了主键id外,我们认为 user name(用户名)也是唯一的,所有的用户名都不可以重复。现在进行如下查询:当参数id有值的时候优先使用id查询,当id没有值时就去判断用户名是否有值,如果有值就用用户名查询,如果用户名也没有值,就使SQL查询无结果。
SysUser selectByIdOrUserName(SysUser user);
<select resultType="SysUser">
    select * from mybatis_study.sys_user
    where 1 = 1
    <choose>
        <when test="id != null">
            and id = #{id}
        </when>
        <when test="userName != null">
            and user_name = #{userName}
        </when>
        <otherwise>
            and 1 = 2
        </otherwise>
    </choose>
</select>
要加otherwise这个条件否则条件不满足时会返回全部的user但是返回值只返回一个所以会报错
3.where set trim
1. where
where标签的用法:当where标签包含的元素有返回值时,加上where,如果后面的字符串是以and or 开头的就将他们剔除
之前的需求:实现一个用户管理高级查询功能,根据输入的条件去检索用户信息。这个功能还需要支持以下三种情况:当只输入用户名时,需要根据用户名进行模糊查询当只输入邮箱时,根据邮箱进行完全匹配:当同时输入用户名和邮箱时,用这两个条件去查询匹配的用户。
<select resultType="SysUser">
    select * from mybatis_study.sys_user
    <where>
        <if test="username != null and username != ''">
            and user_name like concat('%',#{username},'%')
        </if>
        <if test="email != null and email != ''">
            and user_email = #{email}
        </if>
    </where>
</select>
2. set
set标签的用法是:如果set标签包含的元素有返回值则插入set, 如果set里面的字符串是以,结尾的就去掉,
之前的需求:只更新有变化的字段。需要注意,更新的时候不能将原来有值但没有发生变化的字段更新为空或null.通过if标签可以实现这种动态列更新。
<update>
    update mybatis_study.sys_user
    <set>
        <if test="userName != null and userName != ''">
            user_name = #{userName},
        </if>
        <if test="userPassword != null and userPassword != ''">
            user_password = #{userPassword},
        </if>
        <if test="userEmail != null and userEmail != ''">
            user_email = #{userEmail},
        </if>
        <if test="userInfo != null and userInfo != ''">
            user_info = #{userInfo},
        </if>
        <if test="headImg != null">
            head_img = #{headImg},
        </if>
        <if test="createTime != null">
            create_time = #{createTime},
        </if>
        id = #{id},
    </set>
    where id = #{id}
</update>
id = #{id},这一表达式不能丢掉,也不能放进if标签,如果没有这条表达式SQL语句还是会出错,set标签并没有解决这个问题
3. trim
where,set其实是trim的两种具体的表现形式
trim标签有如下属性:
- prefix:当trim元素内包含内容时,会给内容增加 prefix指定的前缀。
- prefixOverrides:当trim元素内包含内容时,会把内容中匹配的前缓字符串去掉。
- suffix:当trim元素内包含内容时,会给内容增加 suffix指定的后缀。
- suffixOverrides:当trim元素内包含内容时,会把内容中匹配的后缀字符串去掉。
WHERE标签的实现
<trim prefix="where" prefixOverrides="and |or ">
	...
</trim>
and 和 or 后面的空格不能省略,以免碰到开头有 andes 或者 order 这样的单词 那就会变成 es 或者 der 这样SQL就报错了
SET标签的实现
<trim prefix="set" suffixOverrides=",">
	...
</trim>
4. foreach
SQL语句中有时会使用IN关键字,例如idin(1,2,3)。可以使用${ids}方式直接获取值,但这种写法不能防止SQL注入,想避免SQL注入就需要用#(}的方式,这时就要配合使用 foreach标签来满足需求。
foreach可以对数组、Map或实现了 Iterable接口(如ist、set)的对象进行遍历。数组在处理时会转换为List对象,因此 foreach遍历的对象可以分为两大类: Iterable类型和Map类型。这两种类型在遍历循环时情况不一样,这一节会通过3个例子来讲解foreach的用法。
1. foreach实现in集合
根据用户id集合查询
//根据用户id集合查询
List<SysUser> selectByIdList(List<Long> idList);
<select resultType="SysUser">
    select * from mybatis_study.sys_user
    where id in
    <foreach collection="list" separator="," open="(" close=")" index="i" item="id">
        #{id}
    </foreach>
</select>
foreach包含以下属性。
- collection:必填,值为要迭代循环的属性名。这个属性值的情况有很多。
- item:变量名,值为从迭代对象中取出的每一个值。
- index:索引的属性名,在集合数组情况下值为当前索引值,当迭代循环的对象是Map类型时,这个值为Map的key(键值)。
- open:整个循环内容开头的字符串。
- close:整个循环内容结尾的字符串。
- separator:每次循环的分隔符。
collection属性值怎么填写
在ParamNameResolver中有如下代码
public static Object wrapToMapIfCollection(Object object, String actualParamName) {
  if (object instanceof Collection) {
    ParamMap<Object> map = new ParamMap<>();
    ("collection", object);
    if (object instanceof List) {
      ("list", object);
    }
    (actualParamName).ifPresent(name -> (name, object));
    return map;
  } else if (object != null && ().isArray()) {
    ParamMap<Object> map = new ParamMap<>();
    ("array", object);
    (actualParamName).ifPresent(name -> (name, object));
    return map;
  }
  return object;
}
可见当集合是list是collection属性值是 list,当集合是map是collection属性值是 _parameter,当集合是array是collection属性值是 array
更推荐使用@param指定的值作为collection的属性值,这样意图更加清晰
实现批量插入数据
批量插入用户信息,并返回插入用户的主键值
//批量插入用户信息
int insertList(@Param("userList") List<SysUser> userList);
<insert useGeneratedKeys="true" keyProperty="id">
    insert into mybatis_study.sys_user(user_name, user_password, user_email, user_info, head_img, create_time) values
    <foreach collection="userList" item="user" separator=",">
        (#{},#{},#{},#{},#{user.headImg, jdbcType=BLOB},#{user.createTime, jdbcType=TIMESTAMP})
    </foreach>
</insert>
item指定循环变量名后要使用 属性.属性 的方式
批量返回用户的主键值不是所有的数据库都支持的(要求数据库支持主键自增且实现的JDBC提供的接口),JDBC虽然提供了接口,但是有些数据库厂商是没有实现的,MYSQL支持这种功能。
3. foreach实现动态Update
当集合是map时,index是map的key值,利用这一点我们可以实现动态Update
通过map更新列
//动态update
int updateByMap(Map<String,Object> map);
<update>
    update mybatis_study.sys_user set
    <foreach collection="_parameter" separator="," item="val" index="key">
        ${key} = #{val}
    </foreach>
    where id = #{id}
</update>
这里使用的是map的默认值 _parameter
5. bind
bind标签可以使用OGNL表达式创建一个变量并将其绑定到上下文中
之前实现需求的时候,在字符拼接的时候是这样使用的
<if test="username != null and username != ''">
     and user_name like concat('%',#{username},'%')
</if>
concat在mysql数据库中支持三个字符的拼接,但是orcle不支持,所以更换数据库还得重写SQL,使用bind可以解决这个问题,使用bind还能防止SQL注入
6. OGNL表达式
常用的OGNL表达式如下
e1 or e2
e1 and e2
e1 == e2 或 e1 eq e2
e1 != e2 或 e1 neq e2
e1 lt e2:小于
e1 lte e2:小于等于,其他表示为 gt(大于)、gte(大于等于)
e1+e2、e1*e2、e1/e2、e1 - e2、e1%e2
!e 或 not e:非,取反
(args):调用对象方法
:对象属性值
e1[e2]: 按索引取值(list、数组和Map)
@class@method(args): 调用类的静态方法
@class@field: 调用类的静态字段值
<if test="username != null and username != ''">
     ...
</if>
通过ONGL表达式可以写为
<if test="@(username)">
    ...
</if>
还可以打印映射XML中的参数
<update>
    <bind name="print" value="@(_parameter)"/>
    update mybatis_study.sys_user set
    <foreach collection="_parameter" separator="," item="val" index="key">
        ${key} = #{val}
    </foreach>
    where id = #{id}
</update>
其中StringUtil的代码如下
public class StringUtil {

   public static boolean isEmpty(String str){
      return str == null || str.length() == 0;
   }

   public static boolean isNotEmpty(String str){
      return !isEmpty(str);
   }

   public static void print(Object parameter){
      (parameter);
   }

}
7. 多数据库的实现
多数据的实现在这里留个坑,在需要使用的时候再来记笔记
代码生成器
由于自定义的内容太多。本章只讲springboot和Mybatis-Generator的一个入门案例
再POM文件中引入mybatis和mysql的依赖
<dependency>
    <groupId>org.mybatis.spring.boot</groupId>
    <artifactId>mybatis-spring-boot-starter</artifactId>
    <version>2.1.3</version>
</dependency>

<dependency>
    <groupId>mysql</groupId>
    <artifactId>mysql-connector-java</artifactId>
    <scope>runtime</scope>
</dependency>
引入Mybatis-Generator插件
<plugin>
    <groupId>org.mybatis.generator</groupId>
    <artifactId>mybatis-generator-maven-plugin</artifactId>
    <version>1.3.2</version>
    <executions>
        <execution>
            <id>mybatis-generator</id>
            <phase>deploy</phase>
            <goals>
                <goal>generate</goal>
            </goals>
        </execution>
    </executions>
    <configuration>
        <!-- Mybatis-Generator 工具配置文件的位置 -->
        <configurationFile>${basedir}/src/main/resources/generator/generatorConfig.xml</configurationFile>
        <verbose>true</verbose>
        <overwrite>true</overwrite>
    </configuration>
    <!--JDBC driver mybatis-generator -->
    <dependencies>
        <dependency>
            <groupId>mysql</groupId>
            <artifactId>mysql-connector-java</artifactId>
            <version>8.0.21</version>
        </dependency>
        <dependency>
            <groupId>org.mybatis.generator</groupId>
            <artifactId>mybatis-generator-core</artifactId>
            <version>1.3.2</version>
        </dependency>
    </dependencies>
</plugin>
在上面指定的配置文件目录下写generatorConfig.xml
<?xml version="" encoding="UTF-8"?> <!DOCTYPE generatorConfiguration PUBLIC "-//mybatis.org//DTD MyBatis Generator Configuration //EN" ""> <generatorConfiguration> <!-- targetRuntime="MyBatis3Simple" 生成简单的增删改查代码 如果指定为Mybatis3 MBG会生成和Example相关的对象和方法(可以使用该对象和其方法生成sql语句) defaultModelType="flat" 一张表生成一个实体类 --> <context targetRuntime="MyBatis3Simple" defaultModelType="flat"> <!-- 配置前后分隔符如表的名字为 user info 那么sql语句会加分隔符 `user info` 这样不会报错 --> <property name="beginningDelimiter" value="`"/> <property name="endingDelimiter" value="`"/> <property name="javaFileEncoding" value="UTF-8"/> <!-- name="suppressDate" 阻止生成包含时间戳的注释 name="addRemarkComments" 是否添加数据库表的备注信息 也可以自定义commentGenerator,官网上找 --> <commentGenerator> <property name="suppressDate" value="true"/> <property name="addRemarkComments" value="true"/> </commentGenerator> <!--jdbcConnection : 指定MBG要连接的数据库的信息 这个标签下如果包含property的标签,那么该标签的属性会添加到jdbc驱动的属性中 --> <jdbcConnection driverClass="" connectionURL="jdbc:mysql://localhost:3306/mybatis_study?useUnicode=true&characterEncoding=utf8&useSSL=true&useJDBCCompliantTimezoneShift=true&useLegacyDatetimeCode=false&serverTimezone=UTC&serverTimezone=GMT%2B8" userId="root" password="123456"> </jdbcConnection> <!-- targetPackage="" model生成包的路径 targetProject="src\main\java" 项目路径 --> <javaModelGenerator targetPackage="" targetProject="src\main\java"> <!-- name="trimStrings" 判断是否对数据库查询结果进行trim操作 默认false 改为true后 public void setCountryCode(String countryCode) { this.countryCode = countryCode == null ? null : countryCode.trim(); } --> <property name="trimStrings" value="true" /> </javaModelGenerator> <sqlMapGenerator targetPackage="mapper" targetProject="src\main\resources"/> <!-- 配置Java客户端生成器( Mapper接口)的属性 type="XMLMAPPER" mapper接口与文件完全分离,易于维护,推荐使用 --> <javaClientGenerator type="XMLMAPPER" targetPackage="" targetProject="src\main\java"/> <!-- table可以有多个,每个数据库中的表都可以写一个table,tableName表示要匹配的数据库表 ,也可以在tableName属性中通过使用%通配符来匹配所有数据库表,只有匹配的表才会自动生成文件 --> <table tableName="country" enableCountByExample="true" enableUpdateByExample="true" enableDeleteByExample="true" enableSelectByExample="true" selectByExampleQueryId="true"> <!--如果设置为true,那么MBG会使用从数据库元数据获取的列名作为生成的实体对象的属性 为false(默认)会将返回的名称转换为驼峰模式--> <property name="useActualColumnNames" value="false" /> <!-- generatedKey:指定自动生成主键的属性,指定这个标签,在生成的insert语句中就会添加selectKey标签,用于主键回写 --> <generatedKey column="id" sqlStatement="Mysql" identity="true" /> </table> </context> </generatorConfiguration>在中添加datasource以及基本的mybatis配置
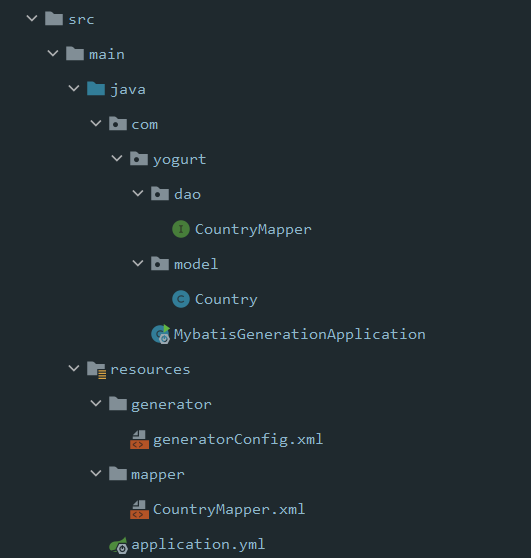
spring:
  datasource:
    driver-class-name:
    url: jdbc:mysql://localhost:3306/mybatis_study?useUnicode=true&characterEncoding=utf8&useSSL=true&&useJDBCCompliantTimezoneShift=true&useLegacyDatetimeCode=false&serverTimezone=UTC&serverTimezone=GMT%2B8
    username: root
    password: 123456

mybatis:
  mapper-locations: classpath:mapper/*.xml
  type-aliases-package:
  configuration:
    #mybtais配置
    map-underscore-to-camel-case: true
点击插件生成mapper接口、实体类和文件

成果
测试
@Autowired
CountryMapper countryMapper;
@Test
void contextLoads() {
    List<Country> countries = ();
    for (Country country : countries) {
        (());
    }
}
测试成功
还有很多自定义配置请看官网或者mybatis从入门到精通:


 1万+
1万+


 被折叠的 条评论
为什么被折叠?
被折叠的 条评论
为什么被折叠?
 到【灌水乐园】发言


