


CRT、xshell使用SSH公钥方式登录Linux服务器
ssh-keygen -t rsa
id_rsa 私钥id_rsa.pub 公钥
1、 crt使用ssh公钥方式登陆linux服务器
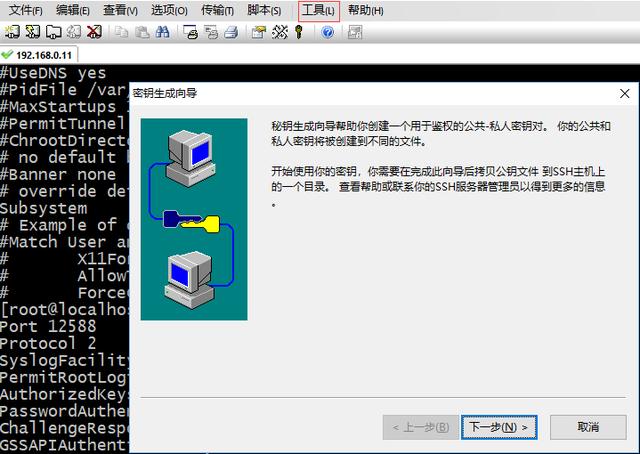
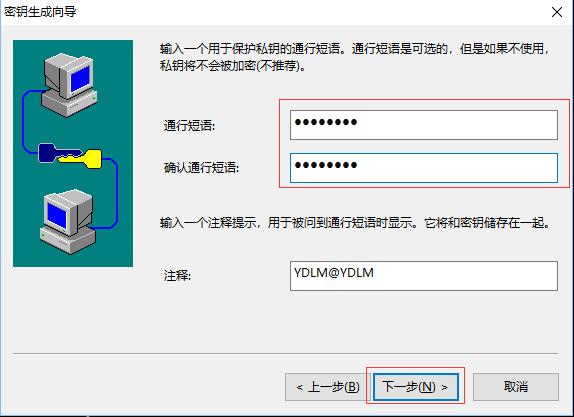
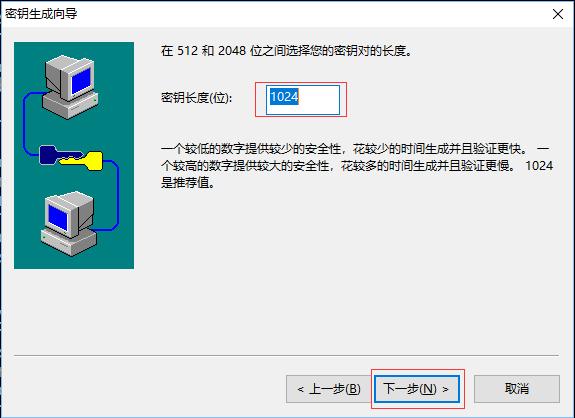
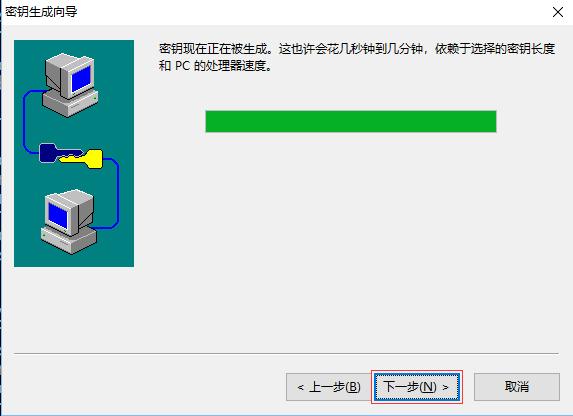
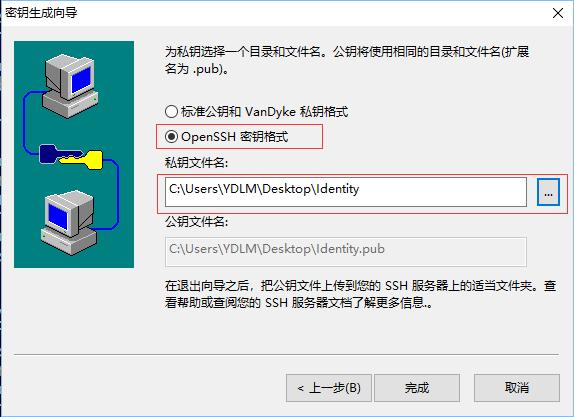
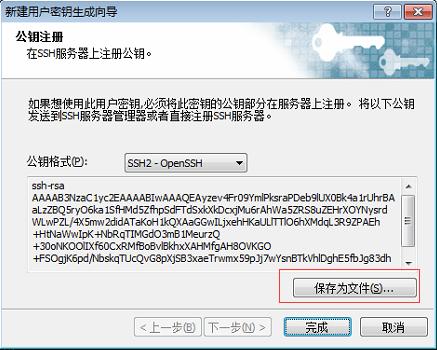
1.1 crt工具生成密钥
打开SecureCRT客户端,连接服务器,点击工具-->创建公钥

1.2上传密钥到服务器
cd /root/.ssh #上传生成的密钥
cat Identity.pub >authorized_keys
1.3更改ssh配置文件
cat /etc/ssh/sshd_config |grep -v ^$ |grep -v ^#
Port 12588 #ssh连接端口
Protocol 2
SyslogFacility AUTHPRIV
PermitRootLogin yes #root用户登陆
PubkeyAuthentication yes # 默认为注释,启用公钥认证
AuthorizedKeysFile /root/.ssh/authorized_keys # 验证公钥的存放路径
PasswordAuthentication no #密码认证
ChallengeResponseAuthentication no
GSSAPIAuthentication yes
GSSAPICleanupCredentials yes
UsePAM yes
AcceptEnv LANG LC_CTYPE LC_NUMERIC LC_TIME LC_COLLATE LC_MONETARY LC_MESSAGES
AcceptEnv LC_PAPER LC_NAME LC_ADDRESS LC_TELEPHONE LC_MEASUREMENT
AcceptEnv LC_IDENTIFICATION LC_ALL LANGUAGE
AcceptEnv XMODIFIERS
X11Forwarding yes
Subsystem sftp /usr/libexec/openssh/sftp-server
1.4 crt登陆服务器
service sshd restart
Iptables -F
第一次登陆服务器重启,输入通行短语
2、 xshell使用ssh公钥方式登陆linux服务器
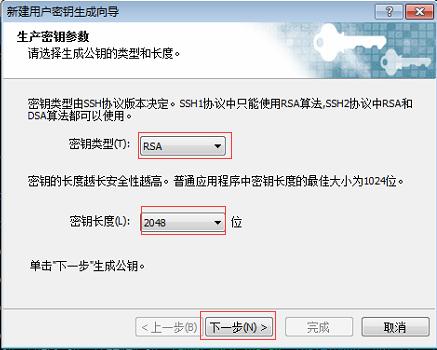
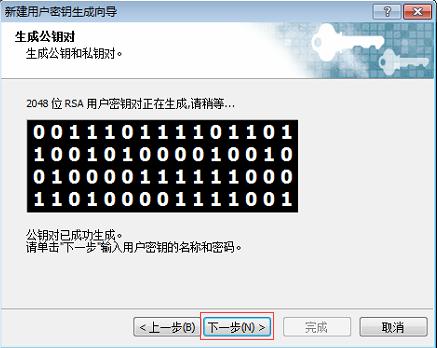
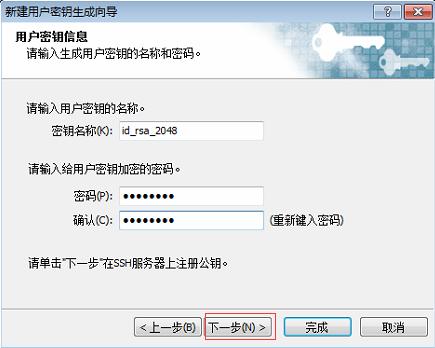
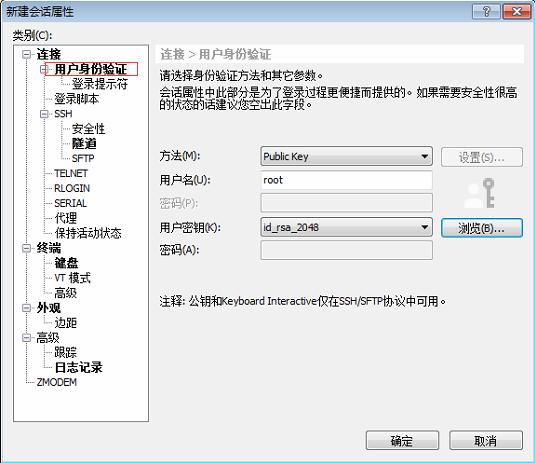
2.1 在xshell中配置公私钥

2.2上传密钥到服务器
cd /root/.ssh #上传生成的公钥
cat id_rsa_2048 >authorized_keys
2.3更改ssh配置文件
cat /etc/ssh/sshd_config |grep -v ^$ |grep -v ^#
Port 12588 #ssh连接端口
Protocol 2
SyslogFacility AUTHPRIV
PermitRootLogin yes #root用户登陆
PubkeyAuthentication yes # 默认为注释,启用公钥认证
AuthorizedKeysFile /root/.ssh/authorized_keys # 验证公钥的存放路径
PasswordAuthentication no #密码认证
ChallengeResponseAuthentication no
GSSAPIAuthentication yes
GSSAPICleanupCredentials yes
UsePAM yes
AcceptEnv LANG LC_CTYPE LC_NUMERIC LC_TIME LC_COLLATE LC_MONETARY LC_MESSAGES
AcceptEnv LC_PAPER LC_NAME LC_ADDRESS LC_TELEPHONE LC_MEASUREMENT
AcceptEnv LC_IDENTIFICATION LC_ALL LANGUAGE
AcceptEnv XMODIFIERS
X11Forwarding yes
Subsystem sftp /usr/libexec/openssh/sftp-server
2.4 xshell登陆服务器


 253
253


 被折叠的 条评论
为什么被折叠?
被折叠的 条评论
为什么被折叠?
 到【灌水乐园】发言


