


上一节已经教大家如何创建一个vue项目,这一节,我们就温故下vue项目的创建,顺便引入element,实现一个简答的登陆页面。
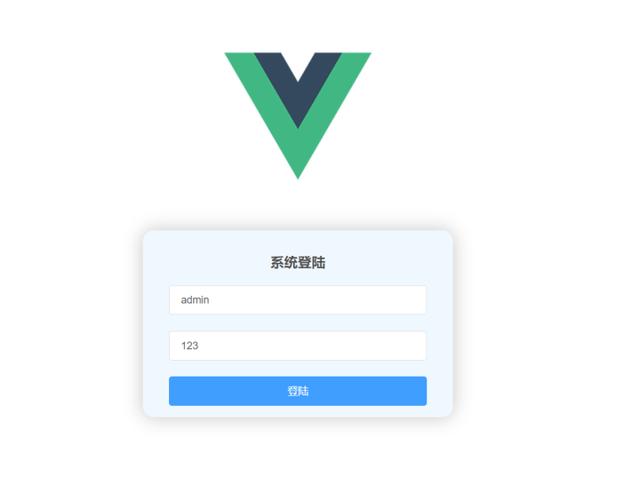
老规矩,先看效果图
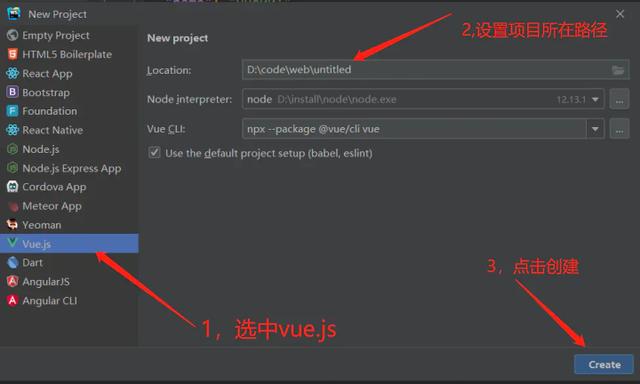
一,快速创建vue项目
二,引入element类库
首先我们进入element官网:https://element.eleme.cn/#/zh-CN/component/installation 简单熟悉下element。然后如下图所示引入element类库。
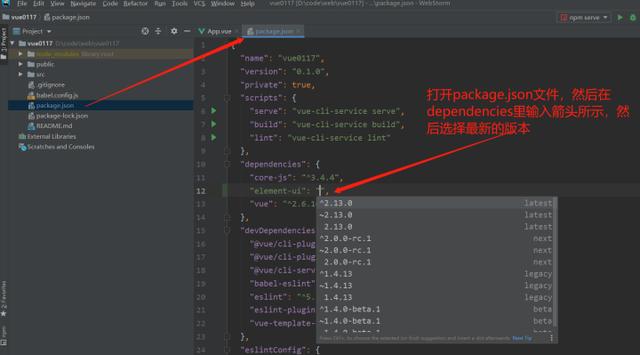
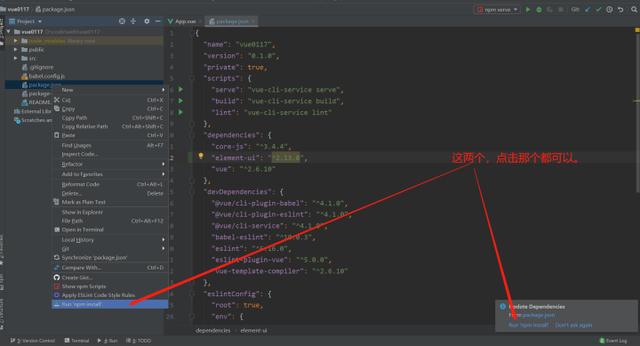
做完上面的操作后,不要忘记安装依赖。
三,在main.js里引入使用
如下图红色框里所示

四,改造HelloWorld组件如下图
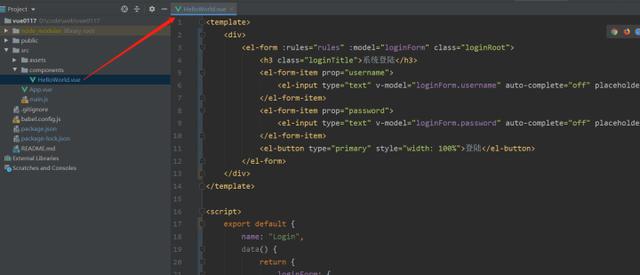
下面我把HelloWorld.Vue的完整代码贴出来给大家
系统登陆
登陆
五,运行项目查看效果

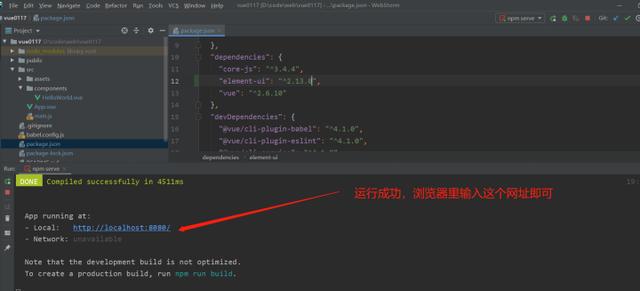
运行效果如下
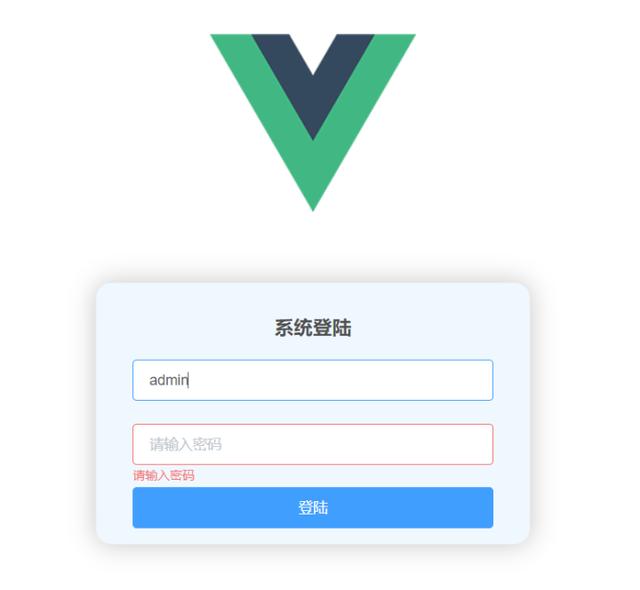
到这里就完整的使用vue+element实现了登陆页的ui样式了。 后面我还会系统的更新更多vue入门相关的文章,还会录制对应的视频出来,敬请关注。


 5899
5899


 被折叠的 条评论
为什么被折叠?
被折叠的 条评论
为什么被折叠?
 到【灌水乐园】发言


