


Docker 安装 Nginx
docker pull nginx 命令安装
查找 Docker Hub 上的 nginx 镜像
runoob@runoob:~/nginx$ docker search nginxNAME DESCRIPTION STARS OFFICIAL AUTOMATEDnginx Official build of Nginx. 3260 [OK] jwilder/nginx-proxy Automated Nginx reverse proxy for docker c... 674 [OK]richarvey/nginx-php-fpm Container running Nginx + PHP-FPM capable ... 207 [OK]million12/nginx-php Nginx + PHP-FPM 5.5, 5.6, 7.0 (NG), CentOS... 67 [OK]maxexcloo/nginx-php Docker framework container with Nginx and ... 57 [OK]...这里我们拉取官方的镜像
$ docker pull nginx等待下载完成后,我们就可以在本地镜像列表里查到 REPOSITORY 为 nginx 的镜像。
runoob@runoob:~/nginx$ docker images nginxREPOSITORY TAG IMAGE ID CREATED SIZEnginx latest 555bbd91e13c 3 days ago 182.8 MB以下命令使用 NGINX 默认的配置来启动一个 Nginx 容器实例:
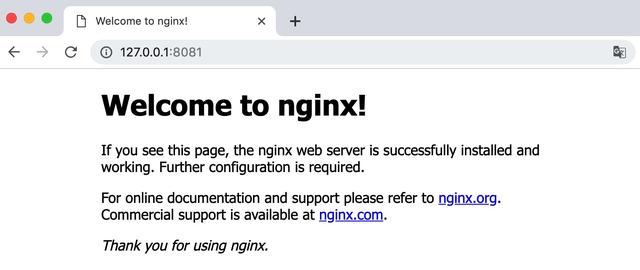
$ docker run --name runoob-nginx-test -p 8081:80 -d nginx- runoob-nginx-test 容器名称。
- the -d设置容器在在后台一直运行。
- the -p 端口进行映射,将本地 8081 端口映射到容器内部的 80 端口。
执行以上命令会生成一串字符串,类似 6dd4380ba70820bd2acc55ed2b326dd8c0ac7c93f68f0067daecad82aef5f938,这个表示容器的 ID,一般可作为日志的文件名。
我们可以使用 docker ps 命令查看容器是否有在运行:
$ docker psCONTAINER ID IMAGE ... PORTS NAMES6dd4380ba708 nginx ... 0.0.0.0:8081->80/tcp runoob-nginx-testPORTS 部分表示端口映射,本地的 8081 端口映射到容器内部的 80 端口。
在浏览器中打开 http://127.0.0.1:8081/,效果如下:
nginx 部署
首先,创建目录 nginx, 用于存放后面的相关东西。
$ mkdir -p ~/nginx/www ~/nginx/logs ~/nginx/conf拷贝容器内 Nginx 默认配置文件到本地当前目录下的 conf 目录,容器 ID 可以查看 docker ps 命令输入中的第一列:
docker cp 6dd4380ba708:/etc/nginx/nginx.conf ~/nginx/conf- www: 目录将映射为 nginx 容器配置的虚拟目录。
- logs: 目录将映射为 nginx 容器的日志目录。
- conf: 目录里的配置文件将映射为 nginx 容器的配置文件。
部署命令
$ docker run -d -p 8082:80 --name runoob-nginx-test-web -v ~/nginx/www:/usr/share/nginx/html -v ~/nginx/conf/nginx.conf:/etc/nginx/nginx.conf -v ~/nginx/logs:/var/log/nginx nginx命令说明:
- -p 8082:80: 将容器的 80 端口映射到主机的 8082 端口。
- --name runoob-nginx-test-web:将容器命名为 runoob-nginx-test-web。
- -v ~/nginx/www:/usr/share/nginx/html:将我们自己创建的 www 目录挂载到容器的 /usr/share/nginx/html。
- -v ~/nginx/conf/nginx.conf:/etc/nginx/nginx.conf:将我们自己创建的 nginx.conf 挂载到容器的 /etc/nginx/nginx.conf。
- -v ~/nginx/logs:/var/log/nginx:将我们自己创建的 logs 挂载到容器的 /var/log/nginx。
启动以上命令后进入 ~/nginx/www 目录:
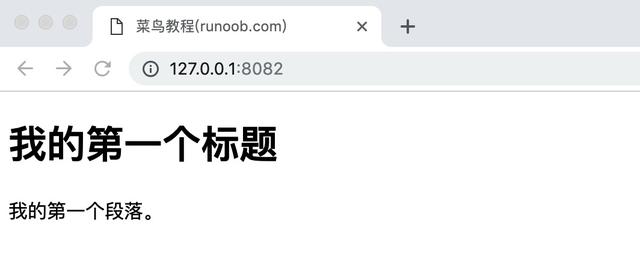
$ cd ~/nginx/www创建 index.html 文件,内容如下:
菜鸟教程(runoob.com)我的第一个标题
我的第一个段落。
输出结果为:
相关命令
如果要重新载入 NGINX 可以使用以下命令发送 HUP 信号到容器:
$ docker kill -s HUP container-name重启 NGINX 容器命令:
$ docker restart container-nameDocker 安装 PHP
安装 PHP 镜像
方法一、docker pull php
查找Docker Hub上的php镜像
runoob@runoob:~/php-fpm$ docker search phpNAME DESCRIPTION STARS OFFICIAL AUTOMATEDphp While designed for web development, the PH... 1232 [OK] richarvey/nginx-php-fpm Container running Nginx + PHP-FPM capable ... 207 [OK]phpmyadmin/phpmyadmin A web interface for MySQL and MariaDB. 123 [OK]eboraas/apache-php PHP5 on Apache (with SSL support), built o... 69 [OK]php-zendserver Zend Server - the integrated PHP applicati... 69 [OK] million12/nginx-php Nginx + PHP-FPM 5.5, 5.6, 7.0 (NG), CentOS... 67 [OK]webdevops/php-nginx Nginx with PHP-FPM 39 [OK]webdevops/php-apache Apache with PHP-FPM (based on webdevops/php) 14 [OK]phpunit/phpunit PHPUnit is a programmer-oriented testing f... 14 [OK]tetraweb/php PHP 5.3, 5.4, 5.5, 5.6, 7.0 for CI and run... 12 [OK]webdevops/php PHP (FPM and CLI) service container 10 [OK]...这里我们拉取官方的镜像,标签为5.6-fpm
runoob@runoob:~/php-fpm$ docker pull php:5.6-fpm等待下载完成后,我们就可以在本地镜像列表里查到REPOSITORY为php,标签为5.6-fpm的镜像。
runoob@runoob:~/php-fpm$ docker imagesREPOSITORY TAG IMAGE ID CREATED SIZEphp 5.6-fpm 025041cd3aa5 6 days ago 456.3 MBNginx + PHP 部署
Nginx 部署可以查看:Docker 安装 Nginx,一些 Nginx 的配置参考这篇文章。
启动 PHP:
$ docker run --name myphp-fpm -v ~/nginx/www:/www -d php:5.6-fpm命令说明:
- --name myphp-fpm : 将容器命名为 myphp-fpm。
- -v ~/nginx/www:/www : 将主机中项目的目录 www 挂载到容器的 /www
创建 ~/nginx/conf/conf.d 目录:
mkdir ~/nginx/conf/conf.d 在该目录下添加 ~/nginx/conf/conf.d/runoob-test-php.conf 文件,内容如下:
server { listen 80; server_name localhost; location / { root /usr/share/nginx/html; index index.html index.htm index.php; } error_page 500 502 503 504 /50x.html; location = /50x.html { root /usr/share/nginx/html; } location ~ .php$ { fastcgi_pass php:9000; fastcgi_index index.php; fastcgi_param SCRIPT_FILENAME /www/$fastcgi_script_name; include fastcgi_params; }}配置文件说明:
- php:9000: 表示 php-fpm 服务的 URL,下面我们会具体说明。
- /www/: 是 myphp-fpm 中 php 文件的存储路径,映射到本地的 ~/nginx/www 目录。
启动 nginx:
docker run --name runoob-php-nginx -p 8083:80 -d -v ~/nginx/www:/usr/share/nginx/html:ro -v ~/nginx/conf/conf.d:/etc/nginx/conf.d:ro --link myphp-fpm:php nginx- -p 8083:80: 端口映射,把 nginx 中的 80 映射到本地的 8083 端口。
- ~/nginx/www: 是本地 html 文件的存储目录,/usr/share/nginx/html 是容器内 html 文件的存储目录。
- ~/nginx/conf/conf.d: 是本地 nginx 配置文件的存储目录,/etc/nginx/conf.d 是容器内 nginx 配置文件的存储目录。
- --link myphp-fpm:php: 把 myphp-fpm 的网络并入 nginx,并通过修改 nginx 的 /etc/hosts,把域名 php 映射成 127.0.0.1,让 nginx 通过 php:9000 访问 php-fpm。
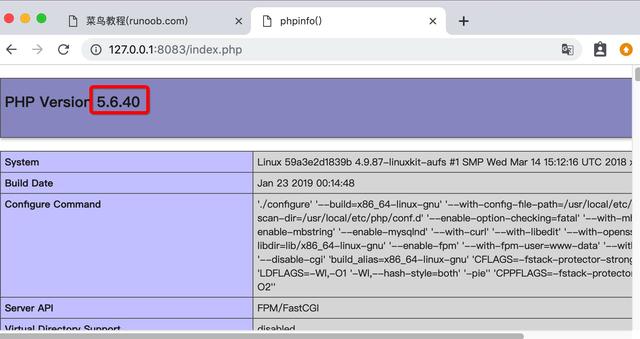
接下来我们在 ~/nginx/www 目录下创建 index.php,代码如下:
<?phpecho phpinfo();?>浏览器打开 http://127.0.0.1:8083/index.php,显示如下:
Docker 安装 MySQL
方法一、docker pull mysql
查找Docker Hub上的mysql镜像
runoob@runoob:/mysql$ docker search mysqlNAME DESCRIPTION STARS OFFICIAL AUTOMATEDmysql MySQL is a widely used, open-source relati... 2529 [OK] mysql/mysql-server Optimized MySQL Server Docker images. Crea... 161 [OK]centurylink/mysql Image containing mysql. Optimized to be li... 45 [OK]sameersbn/mysql 36 [OK]google/mysql MySQL server for Google Compute Engine 16 [OK]appcontainers/mysql Centos/Debian Based Customizable MySQL Con... 8 [OK]marvambass/mysql MySQL Server based on Ubuntu 14.04 6 [OK]drupaldocker/mysql MySQL for Drupal 2 [OK]azukiapp/mysql Docker image to run MySQL by Azuki - http:... 2 [OK]...这里我们拉取官方的镜像,标签为5.6
runoob@runoob:~/mysql$ docker pull mysql:5.6等待下载完成后,我们就可以在本地镜像列表里查到REPOSITORY为mysql,标签为5.6的镜像。
runoob@runoob:~/mysql$ docker images |grep mysqlmysql 5.6 2c0964ec182a 3 weeks ago 329 MB方法二、通过 Dockerfile构建
创建Dockerfile
首先,创建目录mysql,用于存放后面的相关东西。
runoob@runoob:~$ mkdir -p ~/mysql/data ~/mysql/logs ~/mysql/confdata目录将映射为mysql容器配置的数据文件存放路径
logs目录将映射为mysql容器的日志目录
conf目录里的配置文件将映射为mysql容器的配置文件
进入创建的mysql目录,创建Dockerfile
FROM debian:jessie# add our user and group first to make sure their IDs get assigned consistently, regardless of whatever dependencies get addedRUN groupadd -r mysql && useradd -r -g mysql mysql# add gosu for easy step-down from rootENV GOSU_VERSION 1.7RUN set -x && apt-get update && apt-get install -y --no-install-recommends ca-certificates wget && rm -rf /var/lib/apt/lists/* && wget -O /usr/local/bin/gosu "https://github.com/tianon/gosu/releases/download/$GOSU_VERSION/gosu-$(dpkg --print-architecture)" && wget -O /usr/local/bin/gosu.asc "https://github.com/tianon/gosu/releases/download/$GOSU_VERSION/gosu-$(dpkg --print-architecture).asc" && export GNUPGHOME="$(mktemp -d)" && gpg --keyserver ha.pool.sks-keyservers.net --recv-keys B42F6819007F00F88E364FD4036A9C25BF357DD4 && gpg --batch --verify /usr/local/bin/gosu.asc /usr/local/bin/gosu && rm -r "$GNUPGHOME" /usr/local/bin/gosu.asc && chmod +x /usr/local/bin/gosu && gosu nobody true && apt-get purge -y --auto-remove ca-certificates wgetRUN mkdir /docker-entrypoint-initdb.d# FATAL ERROR: please install the following Perl modules before executing /usr/local/mysql/scripts/mysql_install_db:# File::Basename# File::Copy# Sys::Hostname# Data::DumperRUN apt-get update && apt-get install -y perl pwgen --no-install-recommends && rm -rf /var/lib/apt/lists/*# gpg: key 5072E1F5: public key "MySQL Release Engineering " importedRUN apt-key adv --keyserver ha.pool.sks-keyservers.net --recv-keys A4A9406876FCBD3C456770C88C718D3B5072E1F5ENV MYSQL_MAJOR 5.6ENV MYSQL_VERSION 5.6.31-1debian8RUN echo "deb http://repo.mysql.com/apt/debian/ jessie mysql-${MYSQL_MAJOR}" > /etc/apt/sources.list.d/mysql.list# the "/var/lib/mysql" stuff here is because the mysql-server postinst doesn't have an explicit way to disable the mysql_install_db codepath besides having a database already "configured" (ie, stuff in /var/lib/mysql/mysql)# also, we set debconf keys to make APT a little quieterRUN { echo mysql-community-server mysql-community-server/data-dir select ''; echo mysql-community-server mysql-community-server/root-pass password ''; echo mysql-community-server mysql-community-server/re-root-pass password ''; echo mysql-community-server mysql-community-server/remove-test-db select false; } | debconf-set-selections && apt-get update && apt-get install -y mysql-server="${MYSQL_VERSION}" && rm -rf /var/lib/apt/lists/* && rm -rf /var/lib/mysql && mkdir -p /var/lib/mysql /var/run/mysqld && chown -R mysql:mysql /var/lib/mysql /var/run/mysqld # ensure that /var/run/mysqld (used for socket and lock files) is writable regardless of the UID our mysqld instance ends up having at runtime && chmod 777 /var/run/mysqld# comment out a few problematic configuration values# don't reverse lookup hostnames, they are usually another containerRUN sed -Ei 's/^(bind-address|log)/#&/' /etc/mysql/my.cnf && echo 'skip-host-cacheskip-name-resolve' | awk '{ print } $1 == "[mysqld]" && c == 0 { c = 1; system("cat") }' /etc/mysql/my.cnf > /tmp/my.cnf && mv /tmp/my.cnf /etc/mysql/my.cnfVOLUME /var/lib/mysqlCOPY docker-entrypoint.sh /usr/local/bin/RUN ln -s usr/local/bin/docker-entrypoint.sh /entrypoint.sh # backwards compatENTRYPOINT ["docker-entrypoint.sh"]EXPOSE 3306CMD ["mysqld"]通过Dockerfile创建一个镜像,替换成你自己的名字
runoob@runoob:~/mysql$ docker build -t mysql .创建完成后,我们可以在本地的镜像列表里查找到刚刚创建的镜像
runoob@runoob:~/mysql$ docker images |grep mysqlmysql 5.6 2c0964ec182a 3 weeks ago 329 MB使用mysql镜像
运行容器
runoob@runoob:~/mysql$ docker run -p 3306:3306 --name mymysql -v $PWD/conf:/etc/mysql/conf.d -v $PWD/logs:/logs -v $PWD/data:/var/lib/mysql -e MYSQL_ROOT_PASSWORD=123456 -d mysql:5.621cb89213c93d805c5bacf1028a0da7b5c5852761ba81327e6b99bb3ea89930erunoob@runoob:~/mysql$ 命令说明:
- -p 3306:3306:将容器的 3306 端口映射到主机的 3306 端口。
- -v $PWD/conf:/etc/mysql/conf.d:将主机当前目录下的 conf/my.cnf 挂载到容器的 /etc/mysql/my.cnf。
- -v $PWD/logs:/logs:将主机当前目录下的 logs 目录挂载到容器的 /logs。
- -v $PWD/data:/var/lib/mysql :将主机当前目录下的data目录挂载到容器的 /var/lib/mysql 。
- -e MYSQL_ROOT_PASSWORD=123456:初始化 root 用户的密码。
查看容器启动情况
runoob@runoob:~/mysql$ docker ps CONTAINER ID IMAGE COMMAND ... PORTS NAMES21cb89213c93 mysql:5.6 "docker-entrypoint.sh" ... 0.0.0.0:3306->3306/tcp mymysqlDocker 安装 Tomcat
方法一、docker pull tomcat
查找Docker Hub上的tomcat镜像
runoob@runoob:~/tomcat$ docker search tomcatNAME DESCRIPTION STARS OFFICIAL AUTOMATEDtomcat Apache Tomcat is an open source implementa... 744 [OK] dordoka/tomcat Ubuntu 14.04, Oracle JDK 8 and Tomcat 8 ba... 19 [OK]consol/tomcat-7.0 Tomcat 7.0.57, 8080, "admin/admin" 16 [OK]consol/tomcat-8.0 Tomcat 8.0.15, 8080, "admin/admin" 14 [OK]cloudesire/tomcat Tomcat server, 6/7/8 8 [OK]davidcaste/alpine-tomcat Apache Tomcat 7/8 using Oracle Java 7/8 wi... 6 [OK]andreptb/tomcat Debian Jessie based image with Apache Tomc... 4 [OK]kieker/tomcat 2 [OK]fbrx/tomcat Minimal Tomcat image based on Alpine Linux 2 [OK]jtech/tomcat Latest Tomcat production distribution on l... 1 [OK]这里我们拉取官方的镜像
runoob@runoob:~/tomcat$ docker pull tomcat等待下载完成后,我们就可以在本地镜像列表里查到REPOSITORY为tomcat的镜像。
runoob@runoob:~/tomcat$ docker images|grep tomcattomcat latest 70f819d3d2d9 7 days ago 335.8 MB方法二、通过 Dockerfile 构建
创建Dockerfile
首先,创建目录tomcat,用于存放后面的相关东西。
runoob@runoob:~$ mkdir -p ~/tomcat/webapps ~/tomcat/logs ~/tomcat/confwebapps目录将映射为tomcat容器配置的应用程序目录
logs目录将映射为tomcat容器的日志目录
conf目录里的配置文件将映射为tomcat容器的配置文件
进入创建的tomcat目录,创建Dockerfile
FROM openjdk:8-jreENV CATALINA_HOME /usr/local/tomcatENV PATH $CATALINA_HOME/bin:$PATHRUN mkdir -p "$CATALINA_HOME"WORKDIR $CATALINA_HOME# let "Tomcat Native" live somewhere isolatedENV TOMCAT_NATIVE_LIBDIR $CATALINA_HOME/native-jni-libENV LD_LIBRARY_PATH ${LD_LIBRARY_PATH:+$LD_LIBRARY_PATH:}$TOMCAT_NATIVE_LIBDIR# runtime dependencies for Tomcat Native Libraries# Tomcat Native 1.2+ requires a newer version of OpenSSL than debian:jessie has available# > checking OpenSSL library version >= 1.0.2...# > configure: error: Your version of OpenSSL is not compatible with this version of tcnative# see http://tomcat.10.x6.nabble.com/VOTE-Release-Apache-Tomcat-8-0-32-tp5046007p5046024.html (and following discussion)# and https://github.com/docker-library/tomcat/pull/31ENV OPENSSL_VERSION 1.1.0f-3+deb9u2RUN set -ex; currentVersion="$(dpkg-query --show --showformat '${Version}' openssl)"; if dpkg --compare-versions "$currentVersion" '< /etc/apt/sources.list.d/stretch.list; { # add a negative "Pin-Priority" so that we never ever get packages from stretch unless we explicitly request them echo 'Package: *'; echo 'Pin: release n=stretch*'; echo 'Pin-Priority: -10'; echo; # ... except OpenSSL, which is the reason we're here echo 'Package: openssl libssl*'; echo "Pin: version $OPENSSL_VERSION"; echo 'Pin-Priority: 990'; } > /etc/apt/preferences.d/stretch-openssl; fi; apt-get update; apt-get install -y --no-install-recommends openssl="$OPENSSL_VERSION"; rm -rf /var/lib/apt/lists/*; fiRUN apt-get update && apt-get install -y --no-install-recommends libapr1 && rm -rf /var/lib/apt/lists/*# see https://www.apache.org/dist/tomcat/tomcat-$TOMCAT_MAJOR/KEYS# see also "update.sh" (https://github.com/docker-library/tomcat/blob/master/update.sh)ENV GPG_KEYS 05AB33110949707C93A279E3D3EFE6B686867BA6 07E48665A34DCAFAE522E5E6266191C37C037D42 47309207D818FFD8DCD3F83F1931D684307A10A5 541FBE7D8F78B25E055DDEE13C370389288584E7 61B832AC2F1C5A90F0F9B00A1C506407564C17A3 713DA88BE50911535FE716F5208B0AB1D63011C7 79F7026C690BAA50B92CD8B66A3AD3F4F22C4FED 9BA44C2621385CB966EBA586F72C284D731FABEE A27677289986DB50844682F8ACB77FC2E86E29AC A9C5DF4D22E99998D9875A5110C01C5A2F6059E7 DCFD35E0BF8CA7344752DE8B6FB21E8933C60243 F3A04C595DB5B6A5F1ECA43E3B7BBB100D811BBE F7DA48BB64BCB84ECBA7EE6935CD23C10D498E23ENV TOMCAT_MAJOR 8ENV TOMCAT_VERSION 8.5.32ENV TOMCAT_SHA512 fc010f4643cb9996cad3812594190564d0a30be717f659110211414faf8063c61fad1f18134154084ad3ddfbbbdb352fa6686a28fbb6402d3207d4e0a88fa9ceENV TOMCAT_TGZ_URLS # https://issues.apache.org/jira/browse/INFRA-8753?focusedCommentId=14735394#comment-14735394 https://www.apache.org/dyn/closer.cgi?action=download&filename=tomcat/tomcat-$TOMCAT_MAJOR/v$TOMCAT_VERSION/bin/apache-tomcat-$TOMCAT_VERSION.tar.gz # if the version is outdated, we might have to pull from the dist/archive :/ https://www-us.apache.org/dist/tomcat/tomcat-$TOMCAT_MAJOR/v$TOMCAT_VERSION/bin/apache-tomcat-$TOMCAT_VERSION.tar.gz https://www.apache.org/dist/tomcat/tomcat-$TOMCAT_MAJOR/v$TOMCAT_VERSION/bin/apache-tomcat-$TOMCAT_VERSION.tar.gz https://archive.apache.org/dist/tomcat/tomcat-$TOMCAT_MAJOR/v$TOMCAT_VERSION/bin/apache-tomcat-$TOMCAT_VERSION.tar.gzENV TOMCAT_ASC_URLS https://www.apache.org/dyn/closer.cgi?action=download&filename=tomcat/tomcat-$TOMCAT_MAJOR/v$TOMCAT_VERSION/bin/apache-tomcat-$TOMCAT_VERSION.tar.gz.asc # not all the mirrors actually carry the .asc files :'( https://www-us.apache.org/dist/tomcat/tomcat-$TOMCAT_MAJOR/v$TOMCAT_VERSION/bin/apache-tomcat-$TOMCAT_VERSION.tar.gz.asc https://www.apache.org/dist/tomcat/tomcat-$TOMCAT_MAJOR/v$TOMCAT_VERSION/bin/apache-tomcat-$TOMCAT_VERSION.tar.gz.asc https://archive.apache.org/dist/tomcat/tomcat-$TOMCAT_MAJOR/v$TOMCAT_VERSION/bin/apache-tomcat-$TOMCAT_VERSION.tar.gz.ascRUN set -eux; savedAptMark="$(apt-mark showmanual)"; apt-get update; apt-get install -y --no-install-recommends gnupg dirmngr; export GNUPGHOME="$(mktemp -d)"; for key in $GPG_KEYS; do gpg --keyserver ha.pool.sks-keyservers.net --recv-keys "$key"; done; apt-get install -y --no-install-recommends wget ca-certificates; success=; for url in $TOMCAT_TGZ_URLS; do if wget -O tomcat.tar.gz "$url"; then success=1; break; fi; done; [ -n "$success" ]; echo "$TOMCAT_SHA512 *tomcat.tar.gz" | sha512sum -c -; success=; for url in $TOMCAT_ASC_URLS; do if wget -O tomcat.tar.gz.asc "$url"; then success=1; break; fi; done; [ -n "$success" ]; gpg --batch --verify tomcat.tar.gz.asc tomcat.tar.gz; tar -xvf tomcat.tar.gz --strip-components=1; rm bin/*.bat; rm tomcat.tar.gz*; rm -rf "$GNUPGHOME"; nativeBuildDir="$(mktemp -d)"; tar -xvf bin/tomcat-native.tar.gz -C "$nativeBuildDir" --strip-components=1; apt-get install -y --no-install-recommends dpkg-dev gcc libapr1-dev libssl-dev make "openjdk-${JAVA_VERSION%%[.~bu-]*}-jdk=$JAVA_DEBIAN_VERSION" ; ( export CATALINA_HOME="$PWD"; cd "$nativeBuildDir/native"; gnuArch="$(dpkg-architecture --query DEB_BUILD_GNU_TYPE)"; ./configure --build="$gnuArch" --libdir="$TOMCAT_NATIVE_LIBDIR" --prefix="$CATALINA_HOME" --with-apr="$(which apr-1-config)" --with-java-home="$(docker-java-home)" --with-ssl=yes; make -j "$(nproc)"; make install; ); rm -rf "$nativeBuildDir"; rm bin/tomcat-native.tar.gz; # reset apt-mark's "manual" list so that "purge --auto-remove" will remove all build dependencies apt-mark auto '.*' > /dev/null; [ -z "$savedAptMark" ] || apt-mark manual $savedAptMark; apt-get purge -y --auto-remove -o APT::AutoRemove::RecommendsImportant=false; rm -rf /var/lib/apt/lists/*; # sh removes env vars it doesn't support (ones with periods)# https://github.com/docker-library/tomcat/issues/77 find ./bin/ -name '*.sh' -exec sed -ri 's|^#!/bin/sh$|#!/usr/bin/env bash|' '{}' +# verify Tomcat Native is working properlyRUN set -e && nativeLines="$(catalina.sh configtest 2>&1)" && nativeLines="$(echo "$nativeLines" | grep 'Apache Tomcat Native')" && nativeLines="$(echo "$nativeLines" | sort -u)" && if ! echo "$nativeLines" | grep 'INFO: Loaded APR based Apache Tomcat Native library' >&2; then echo >&2 "$nativeLines"; exit 1; fiEXPOSE 8080CMD ["catalina.sh


 1349
1349

 被折叠的 条评论
为什么被折叠?
被折叠的 条评论
为什么被折叠?
 到【灌水乐园】发言


