


anaconda安装
下载地址:
清华镜像地址
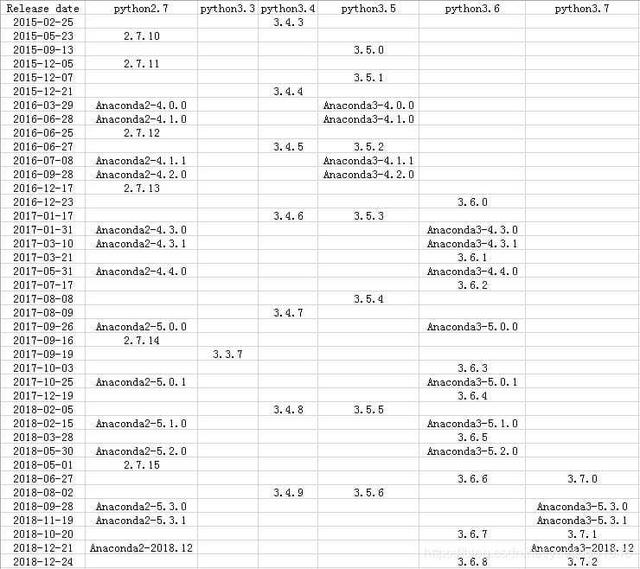
由于tensorflow2.0不支持python3.7版本,因此下载python3.6版本,anaconda和python版本对应关系如下图:
下载安装好对应版本anaconda后,通过命令安装tensorflow2.0(等正式版本上线后需要替换):
pip install tensorflow==2.0.0-beta1如果需要,还可以安装pandas等包:
pip install pandas etc...jupyter notebook安装
pip install jupyter notebook生成jupyter notebook配置文件:
jupyter notebook --generate-config生成密码:
jupyter notebook password拷贝~/jupyter/jupyter_notebook_config.json中的密码到jupyter_notebook_config.py:
c.NotebookApp.password = 'sha1:%s' # %s替换为自己生成的密码c.NotebookApp.ip = '*' #设置可访问的ip为任意。c.NotebookApp.open_browser = False #设置默认不打开浏览器c.NotebookApp.port = 6666 # 设置端口号c.NotebookApp.notebook_dir = '/your/file/saved/path/' # 设置默认访问的文件路径启动jupyter notebook:
jupyter notebook # 如需后台运行,则加nohuppython虚拟环境
创建一个新的虚拟环境:
conda create -n tensorflow python=3.6查看已有的虚拟环境:
conda env list切换虚拟环境(tensorflow为你自己创建时的名,在此为tensorflow):
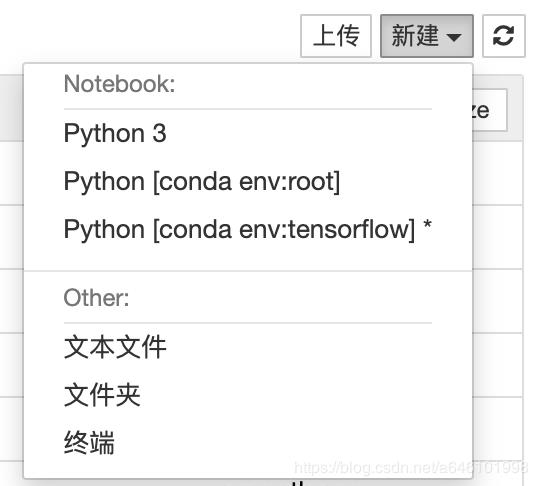
source activate tensorflow在此打开jupyter notebook
让我们看看有没有成功:

so easy?isn’t it?
关注公众号:【算法与推荐系统】


 1万+
1万+


 被折叠的 条评论
为什么被折叠?
被折叠的 条评论
为什么被折叠?
 到【灌水乐园】发言


