


阅读此文之前推荐阅读:Hadoop RPC调用实例分析
在Hadoop HA集群中,一般有两个NameNode(NN),一个是Active的ANN,另一个是Standby的SBNN。 只有ANN对外提供读写功能,那么当客户端想要对文件系统元数据进行修改操作时,比如创建文件,删除文件,重命名文件等,客户端是如何连接到ANN的呢。
经过查阅官网文档。参考连接
可以看到是由dfs.client.failover.proxy.provider.[nameservice ID] 这个配置项配置的。
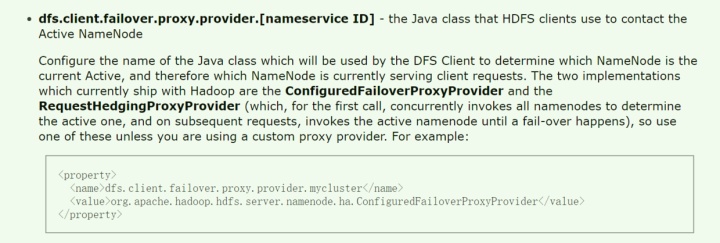
同时在hdfs-site.xml的相关配置项介绍中可以找到。

这个属性Hadoop提供了两种自带的实现:ConfiguredFailoverProxyProvider 和RequestHedgingProxyProvider
- ConfiguredFailoverProxyProvider :
顾名思义就是按照配置文件的方式去找ANN - RequestHedgingProxyProvider :
如果采用这种方式的话,首先会并发的向每个NN发送请求来判定哪个是ANN,然后接下来的请求就直接向ANN发送请求。
当然我们也可以实现一个自定义的ProxyProvider。比如直接去请求ZK,看哪个是ANN,这样直接就可以与这个ANN通信了。
ConfiguredFailoverProxyProvider
看下这个类的构造方法:
protected final List<AddressRpcProxyPair<T>> proxies =
new ArrayList<AddressRpcProxyPair<T>>();
*
*
*
*
*
ConfiguredFailoverProxyProvider(Configuration conf, URI uri,
Class<T> xface, ProxyFactory<T> factory) {
Preconditions.checkArgument(
xface.isAssignableFrom(NamenodeProtocols.class),
"Interface class %s is not a valid NameNode protocol!");
this.xface = xface;
this.conf = new Configuration(conf);
int maxRetries = this.conf.getInt(
DFSConfigKeys.DFS_CLIENT_FAILOVER_CONNECTION_RETRIES_KEY,
DFSConfigKeys.DFS_CLIENT_FAILOVER_CONNECTION_RETRIES_DEFAULT);
this.conf.setInt(
CommonConfigurationKeysPublic.IPC_CLIENT_CONNECT_MAX_RETRIES_KEY,
maxRetries);
int maxRetriesOnSocketTimeouts = this.conf.getInt(
DFSConfigKeys.DFS_CLIENT_FAILOVER_CONNECTION_RETRIES_ON_SOCKET_TIMEOUTS_KEY,
DFSConfigKeys.DFS_CLIENT_FAILOVER_CONNECTION_RETRIES_ON_SOCKET_TIMEOUTS_DEFAULT);
this.conf.setInt(
CommonConfigurationKeysPublic
.IPC_CLIENT_CONNECT_MAX_RETRIES_ON_SOCKET_TIMEOUTS_KEY,
maxRetriesOnSocketTimeouts);
try {
ugi = UserGroupInformation.getCurrentUser();
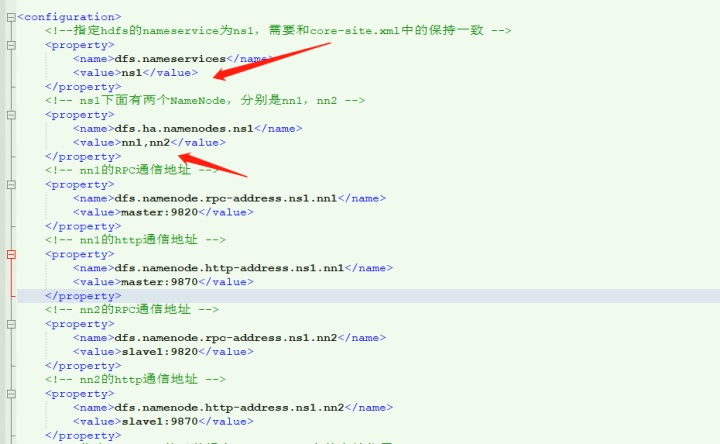
//得到我们配置的HA的多个NN的RPC通信地址。大Map的key是nameservice,里面map的key是我们配置文件中的namenode的名字。我下面放一个图。
Map<String, Map<String, InetSocketAddress>> map = DFSUtil.getHaNnRpcAddresses(
conf);
Map<String, InetSocketAddress> addressesInNN = map.get(uri.getHost());
if (addressesInNN == null || addressesInNN.size() == 0) {
throw new RuntimeException("Could not find any configured addresses " +
"for URI " + uri);
}
//这里就是把多个namenode的网络地址获得到。对Map用values方法,得到的集合不保证顺序。
Collection<InetSocketAddress> addressesOfNns = addressesInNN.values();
for (InetSocketAddress address : addressesOfNns) {
//加到proxies这个ArrayList里。这个对象我们上面也列出来了。这个对象在getProxy()方法中使用到。
proxies.add(new AddressRpcProxyPair<T>(address));
}
// The client may have a delegation token set for the logical
// URI of the cluster. Clone this token to apply to each of the
// underlying IPC addresses so that the IPC code can find it.
HAUtil.cloneDelegationTokenForLogicalUri(ugi, uri, addressesOfNns);
this.factory = factory;
} catch (IOException e) {
throw new RuntimeException(e);
}
}
经过上面的代码,我们知道proxies这个list就存储了我们配置的多个NN的通信地址。
那什么地方用到了proxies这个对象呢,通过追踪。是getProxy()方法:
/**
 * Lazily initialize the RPC proxy object.
 */
@Override
public synchronized ProxyInfo<T> getProxy() {
    //currentProxyIndex代表list的当前索引,当发生fail-over时会加一,从而对list中哪一个namenode创建代理。
  AddressRpcProxyPair<T> current = proxies.get(currentProxyIndex);
  if (current.namenode == null) {
    try {
        //创建namenode的代理对象
      current.namenode = factory.createProxy(conf,
          current.address, xface, ugi, false, fallbackToSimpleAuth);
    } catch (IOException e) {
      LOG.error("Failed to create RPC proxy to NameNode", e);
      throw new RuntimeException(e);
    }
  }
  return new ProxyInfo<T>(current.namenode, current.address.toString());
}
至此关于ConfiguredFailoverProxyProvider的实现和工作方式我们已经有了清楚的认识。
RequestHedgingProxyProvider
下面来看RequestHedgingProxyProvider这个类。
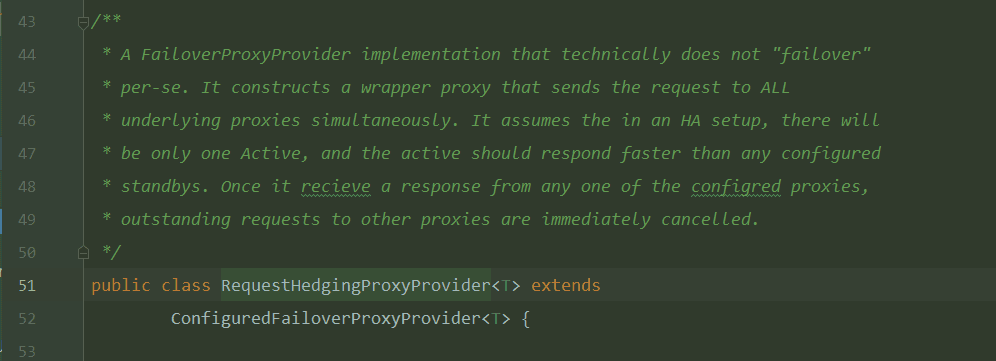
这个类是继承了ConfiguredFailoverProxyProvider类的。所以像proxies成员变量都是继承下来的。
老套路,我们还是看这个类的getProxy方法。
  @Override
  public synchronized ProxyInfo<T> getProxy() {
    if (currentUsedProxy != null) {
      return currentUsedProxy;
    }
    Map<String, ProxyInfo<T>> targetProxyInfos = new HashMap<>();
    StringBuilder combinedInfo = new StringBuilder("[");
    //这里proxies已经在父类的构造函数里获得了值,就是配置文件中配置的。
    for (int i = 0; i < proxies.size(); i++) {
      ProxyInfo<T> pInfo = super.getProxy();
      incrementProxyIndex();
      //
      targetProxyInfos.put(pInfo.proxyInfo, pInfo);
      //拼接代理对象相关信息(例如IP地址)
      combinedInfo.append(pInfo.proxyInfo).append(',');
    }
    combinedInfo.append(']');
    //通过JDK动态代理生成一个包装代理对象。InvocationHandler是内部类。
    T wrappedProxy = (T) Proxy.newProxyInstance(
            RequestHedgingInvocationHandler.class.getClassLoader(),
            new Class<?>[]{xface},
            new RequestHedgingInvocationHandler(targetProxyInfos));
    return new ProxyInfo<T>(wrappedProxy, combinedInfo.toString());
  }
所以下一步我们自然就要看RequestHedgingInvocationHandler中的invoke方法了,看看它的逻辑是什么。
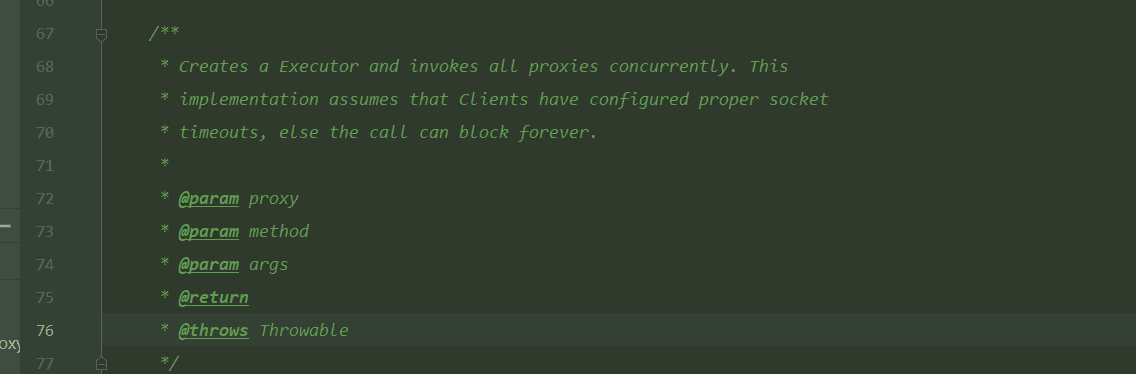
首先看JavaDoc中的说明,它说:invoke方法会创建一个Executor,并且并发的去调用所有proxies。这个实现假定client端配置了合理的socket timeouts,否则请求可能永远阻塞。接下来看代码。这个方法很长,我先给给出一个整体的处理逻辑。
1.首先判断currentUsedProxy 是不是null,如果不是null的话,说明我们之前已经找到过ANN了,就可以直接复用这个proxy了。于是在currentUsedProxy对象上应用method。如果currentUsedProxy 等于null的话,说明之前还没找到过ANN,那么进入下一步。
2.判断targetProxies.size()是不是等于1。如果等于1的话,说明我们就配置了一项,那直接就去向这个namenode的所在的地址发请求即可。顺便把currentUsedProxy给赋值。如果不等于1的话,进入第三步。
3.走到这一步说明currentUsedProxy==null,而且targetProxies.size()>1。所以就创建了一个线程数为proxies.size()的线程池。然后对所有targetProxy构造Callable对象,以便并发的去向每一个Namenode进行请求,然后就是submit这些Callable对象。接着就是调用take方法阻塞地获取Future对象,获得到第一个Future之后就直接返回了,因为这个类的JavaDoc就说了, 他认为在一个HA集群中,Active NN的响应肯定要比SBNN的相应快。所以我们得到第一个相应结果,赋值给currentUsedProxy之后就可以返回了。
4.关闭线程池等一些收尾操作。
 class RequestHedgingInvocationHandler implements InvocationHandler {

    final Map<String, ProxyInfo<T>> targetProxies;

    public RequestHedgingInvocationHandler(
            Map<String, ProxyInfo<T>> targetProxies) {
      this.targetProxies = new HashMap<>(targetProxies);
    }

    /**
     * Creates a Executor and invokes all proxies concurrently. This
     * implementation assumes that Clients have configured proper socket
     * timeouts, else the call can block forever.
     *
     * @param proxy
     * @param method
     * @param args
     * @return
     * @throws Throwable
     */
    @Override
    public Object
    invoke(Object proxy, final Method method, final Object[] args)
            throws Throwable {
        //判断之前是否已经连接到ANN了
      if (currentUsedProxy != null) {
        try {
          Object retVal = method.invoke(currentUsedProxy.proxy, args);
          LOG.debug("Invocation successful on [{}]",
              currentUsedProxy.proxyInfo);
          return retVal;
        } catch (InvocationTargetException ex) {
          Exception unwrappedException = unwrapInvocationTargetException(ex);
          logProxyException(unwrappedException, currentUsedProxy.proxyInfo);
          LOG.trace("Unsuccessful invocation on [{}]",
              currentUsedProxy.proxyInfo);
          throw unwrappedException;
        }
      }
      Map<Future<Object>, ProxyInfo<T>> proxyMap = new HashMap<>();
      int numAttempts = 0;

      ExecutorService executor = null;
      CompletionService<Object> completionService;
      try {
        // Optimization : if only 2 proxies are configured and one had failed
        // over, then we dont need to create a threadpool etc.
        targetProxies.remove(toIgnore);
        if (targetProxies.size() == 0) {
          LOG.trace("No valid proxies left");
          throw new RemoteException(IOException.class.getName(),
              "No valid proxies left. All NameNode proxies have failed over.");
        }
        //之前没有连接到ANN并且配置项里只有1个NN,那直接连接这个NN就好了
        if (targetProxies.size() == 1) {
          ProxyInfo<T> proxyInfo = targetProxies.values().iterator().next();
          try {
            currentUsedProxy = proxyInfo;
            Object retVal = method.invoke(proxyInfo.proxy, args);
            LOG.debug("Invocation successful on [{}]",
                currentUsedProxy.proxyInfo);
            return retVal;
          } catch (InvocationTargetException ex) {
            Exception unwrappedException = unwrapInvocationTargetException(ex);
            logProxyException(unwrappedException, currentUsedProxy.proxyInfo);
            LOG.trace("Unsuccessful invocation on [{}]",
                currentUsedProxy.proxyInfo);
            throw unwrappedException;
          }
        }
        //配置里的NN项超过1,就并发的去向每个NN发送请求。
        executor = Executors.newFixedThreadPool(proxies.size());
        completionService = new ExecutorCompletionService<>(executor);
        for (final Map.Entry<String, ProxyInfo<T>> pEntry :
                targetProxies.entrySet()) {
          Callable<Object> c = new Callable<Object>() {
            @Override
            public Object call() throws Exception {
              LOG.trace("Invoking method {} on proxy {}", method,
                  pEntry.getValue().proxyInfo);
              return method.invoke(pEntry.getValue().proxy, args);
            }
          };
          proxyMap.put(completionService.submit(c), pEntry.getValue());
          numAttempts++;
        }

        Map<String, Exception> badResults = new HashMap<>();
        while (numAttempts > 0) {
            //阻塞获取请求结果
          Future<Object> callResultFuture = completionService.take();
          Object retVal;
          try {
            //ANN相应要比SBNN快,所以我们只要获取第一个响应的结果就可以返回了。
            currentUsedProxy = proxyMap.get(callResultFuture);
            retVal = callResultFuture.get();
            LOG.debug("Invocation successful on [{}]",
                currentUsedProxy.proxyInfo);
            return retVal;
          } catch (ExecutionException ex) {
            Exception unwrappedException = unwrapExecutionException(ex);
            ProxyInfo<T> tProxyInfo = proxyMap.get(callResultFuture);
            logProxyException(unwrappedException, tProxyInfo.proxyInfo);
            badResults.put(tProxyInfo.proxyInfo, unwrappedException);
            LOG.trace("Unsuccessful invocation on [{}]", tProxyInfo.proxyInfo);
            numAttempts--;
          }
        }

        // At this point we should have All bad results (Exceptions)
        // Or should have returned with successful result.
        if (badResults.size() == 1) {
          throw badResults.values().iterator().next();
        } else {
          throw new MultiException(badResults);
        }
      } finally {
        if (executor != null) {
          LOG.trace("Shutting down threadpool executor");
          executor.shutdownNow();
        }
      }
    }
  }
至此关于ConfiguedFailoverProxyProvider和RequestHedgingProxyProvider类的分析就已经完成了。


 2980
2980


 被折叠的 条评论
为什么被折叠?
被折叠的 条评论
为什么被折叠?
 到【灌水乐园】发言


