


本文只是从 Java 的角度出发,并不涉及 Android 的类加载方式。
从上一篇解析类加载机制的文章:
我们已经知道了 ClassLoader 的委托机制。
本篇文章我们来详细分析下 ClassLoader 是如何加载 Java 类的。
一、ClassLoader 使用
流程简单说是这样的:
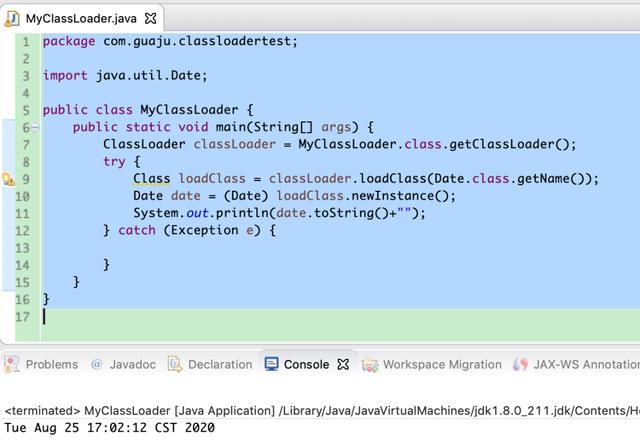
- 我们用 ClassLoader 的 loadClass() 方法获取到了对应类的 class 文件;
- 随后通过 class 文件调用 newInstance() 方法创建了对应类的实例;
- 然后调用实例的方法;
那么其实 loadClass() 就是我们加载类的关键一步。
二、loadClass() 源码解析
从上例中,点击 loadClass() 方法,进入 ClassLoader 源码
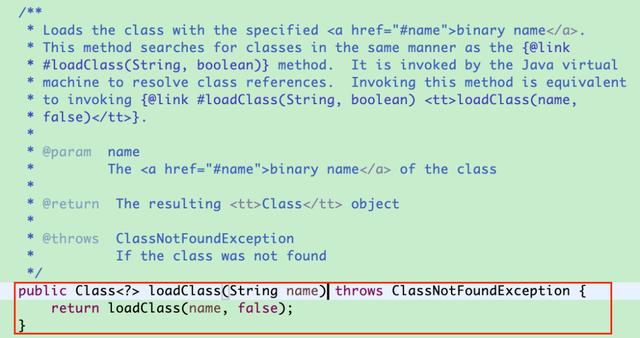
发现实际起作用的还是 loadClass(name,false) 这个方法,我们点进去看看
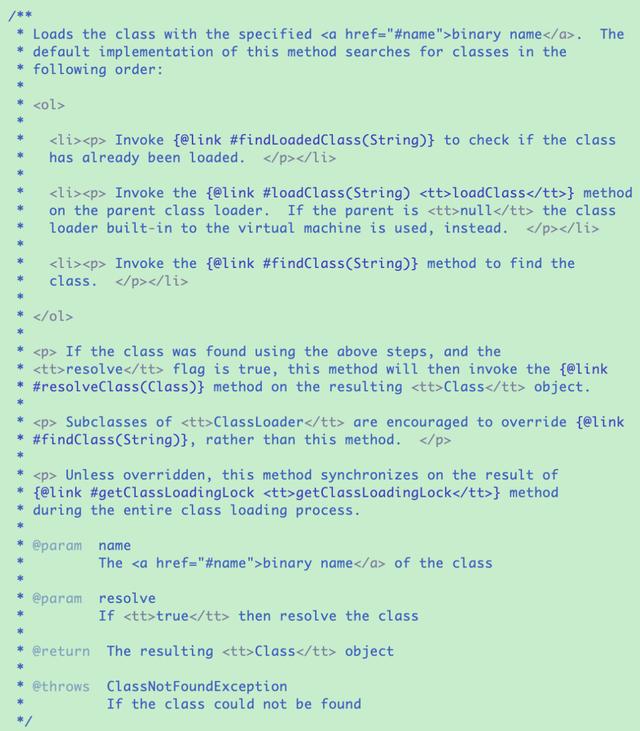
源码的解释已经很清楚了,我们再来看下实际代码

用流程图可以这样概括一下

我们逐个步骤看下吧
① 保证线程安全
synchronized (getClassLoadingLock(name))给整个 loadClass 的过程加了一把同步锁,避免了多线程共同加载相同名字的 class 的类加载问题。
② 查看是否已加载
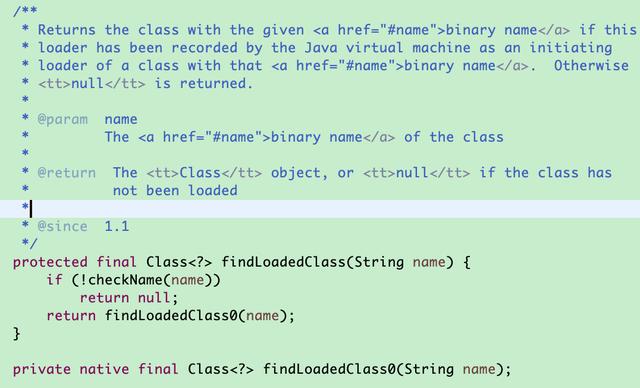
findLoadedClass(name)看了源码,发现查看对应名字的 class 是否已被加载是调用的 native 方法:
findLoadedClass0(name)如果 class 已经被加载,那么就直接返回加载的 Class 文件;
如果 class 并未被加载,那么继续进行下面的步骤。
③ 查找「父'类加载器」
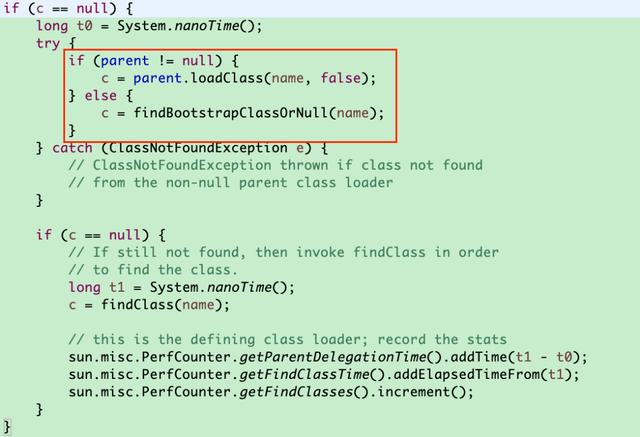
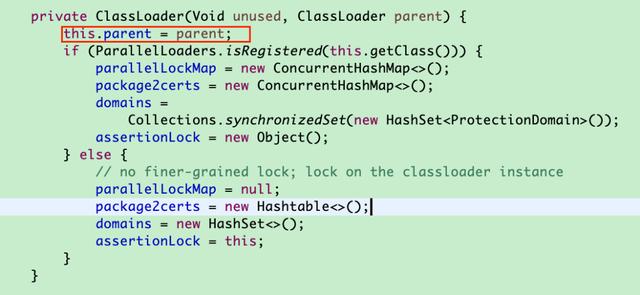
我们再看下全局变量 parent 的声明

所以,在加载类时,起初 parent 不为 null,所以会调用
parent.loadClass(name,false)依次往父级上推,直到 parent 为 null,即追溯到的「父'类加载器」是
BootStrap,则会调用
findBootstrapClassOrNull(name)方法,我们来看下这个方法的定义
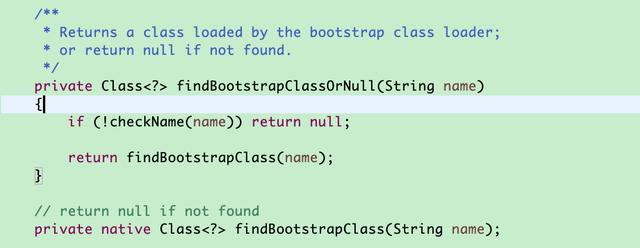
这个方法会返回一个“被 bootstrap 加载过的类,如果没有找到,则会返回 null ”
而真正的逻辑处理也是一个 native 方法:
findBootstrapClass(name)如果这个方法返回值不为 null ,loadClass 流程会进入:
parent.loadClass(name, false)阶段,依次往父级上推,直到出现下方情况之一
- 加载成功,返回加载好的类
- 加载失败,返回 null
- 加载异常,抛出 ClassNotFoundException 异常
则结束此过程。
④ 如果加载失败,返回为 null,则会调用:
findClass(name)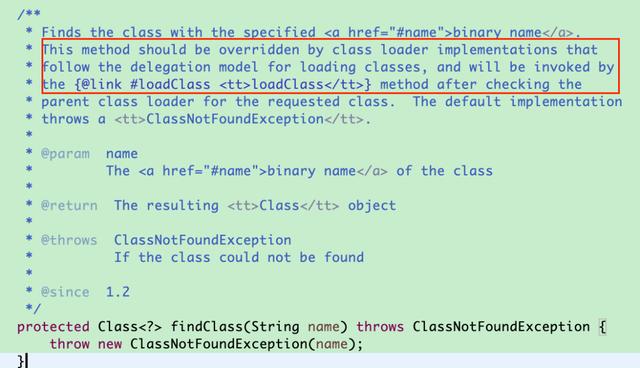
即如果我们没有自定义类加载器,默认则会抛出
ClassNotFoundException 异常。
ok ,这样整个过程就结束了。
我们可以看到,整个 loadClass() 的方法会有两种情况:
- 加载成功,返回加载好的类
- 加载异常,抛出 ClassNotFoundException 异常
三、单纯了解了 ClassLoader 中的 loadClass() 不够,我们来自定义一个类加载器吧
我的例子的思路大致是:
① 创建一个需要被自定义的 ClassLoader 加载的 java 文件,并编译成为 class 文件
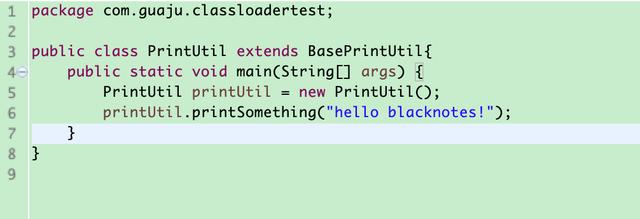
很简单,就是打印一句话,但此例是我们要创建 java 文件的基类。
下面是我们的需要加载的 java 文件,即上面基类的子类。

运行,得到 class 文件
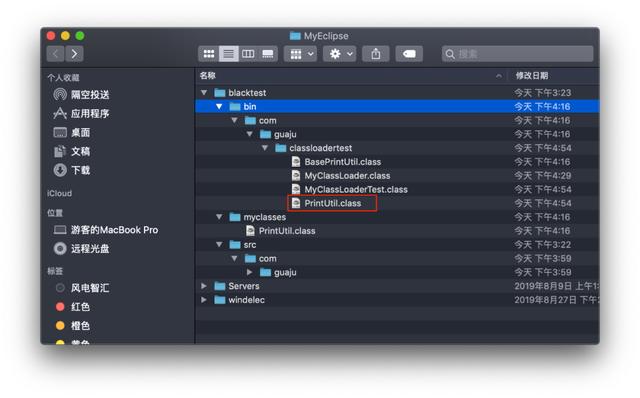
红框内即我们得到的class 文件
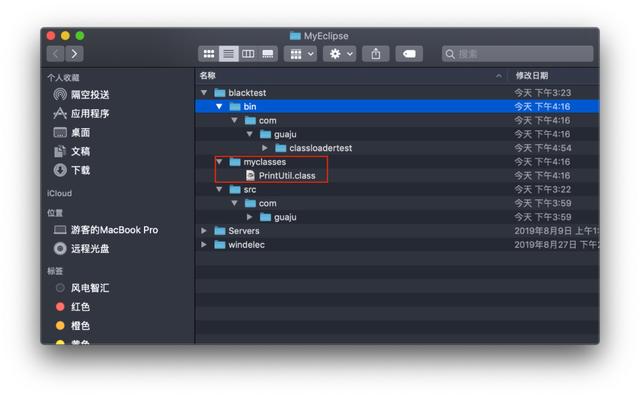
② 在我们工程目录下创建一个新的目录,用来存放我们创建好的 class 文件
③ 编写我们的自定义 ClassLoader 文件
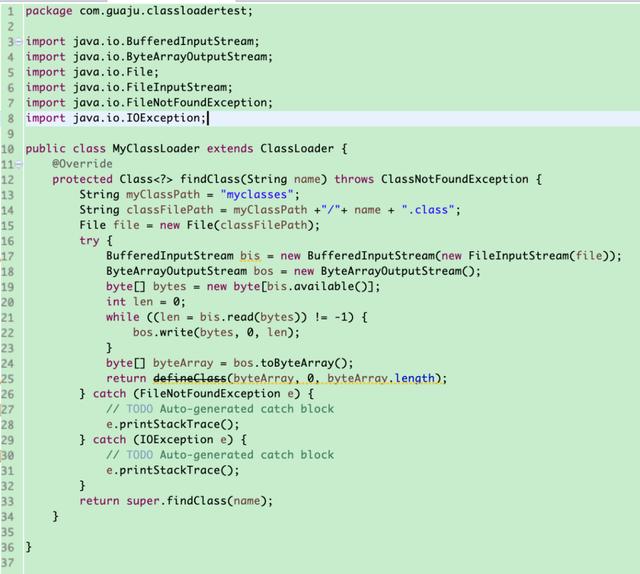
对,没有可扩展性,路径都是定的。
因为上文中我们解析 loadClass() 方法的源码时,得知我们需要重写
findClass
方法,所以这里就重写了下,主要功能就是找到我们放到 myclasses 文件夹下的 class 文件,并且调用 defineClass 方法去解析出来。
④ 创建运行类,查看类加载器的加载规则
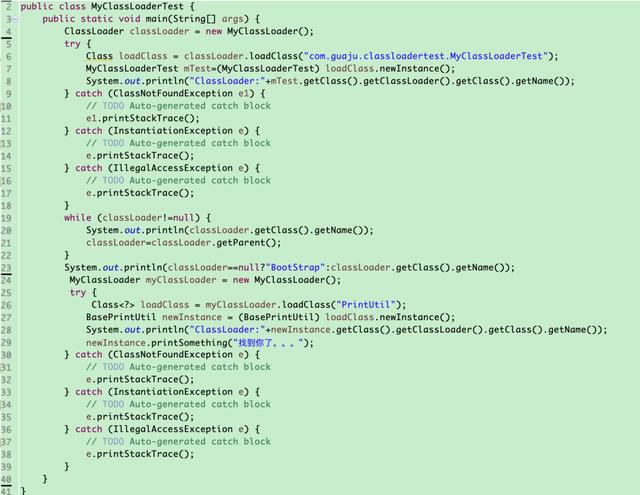
打印结果是
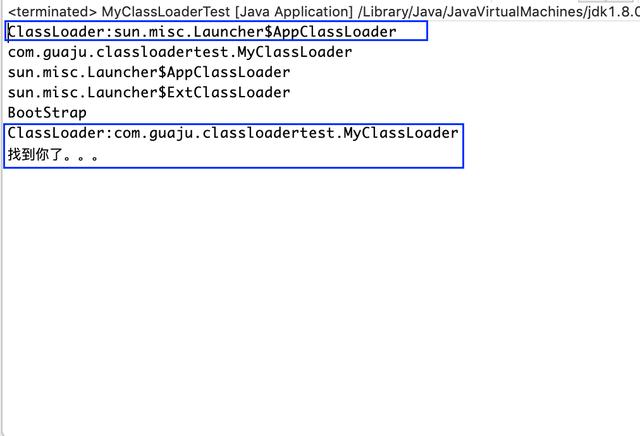
我们发现,同样是通过 myClassLoader 的实例加载的类,但是当我们加载
MyClassLoaderTest 时:
Class loadClass = classLoader.loadClass("com.guaju.classloadertest.MyClassLoaderTest");真正的类加载器是 AppClassLoader
而当我们加载 PrintUtil 时:
Class> loadClass = myClassLoader.loadClass("PrintUtil");真正的类加载器是 MyClassLoader。
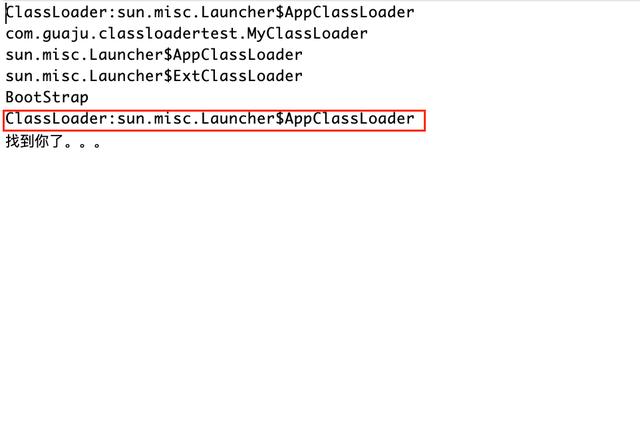
当我们修改 PrintUtils 的加载方式时
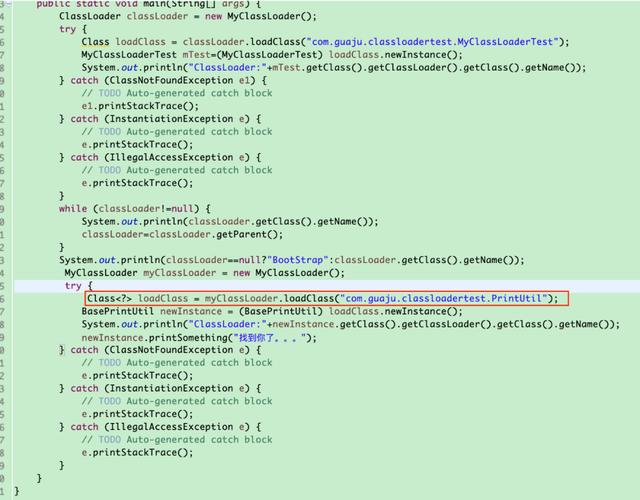
真正的类加载器也是 AppClassLoader
总结得到这两点:
- 自定义类加载器时,如果传入完整类名,会优先使用系统类加载器去加载类,如果系统类加载器找不到该类,则会调用自定义的类加载器。
- 自定义类加载器时,需要使用 findClass 去定位需要加载的类,读取并调用 defineClass 方法去解析类
好了,本篇完~~~
后续会继续针对 Android 项目的类加载进行解析,如果有兴趣想继续看,点个关注吧~


 873
873


 被折叠的 条评论
为什么被折叠?
被折叠的 条评论
为什么被折叠?
 到【灌水乐园】发言


