


教程源码:
nofacer/vue3-electrongithub.com
之前写过一篇文章Vue结合Electron构建跨平台应用(TDD)。当时的方法后来发现了一个问题,就是打包后的应用拿到其他机子上没法用,原因在于index.html的地址是个绝对路径,在打包的时候就被固定下来了。

在查阅了许多资料后发现之前将二者结合的方法不是很有效(开发和生产环境不一致等),正好Vue3也进入beta阶段了,因此想借着这个机会重新梳理一下这个话题。打算不借助各种快捷生成项目的cli从零将二者有机结合起来,这样可以加深对各种构建工具的了解。
涉及内容:
- Vue
- Electron
- Webpack
- Scss
安装Webpack
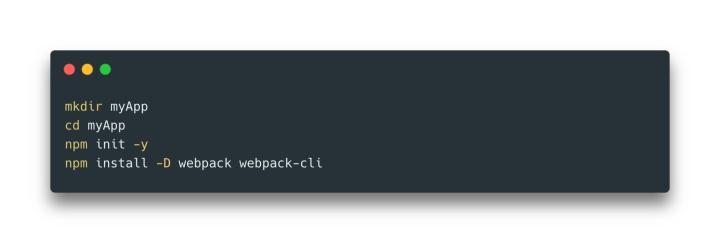
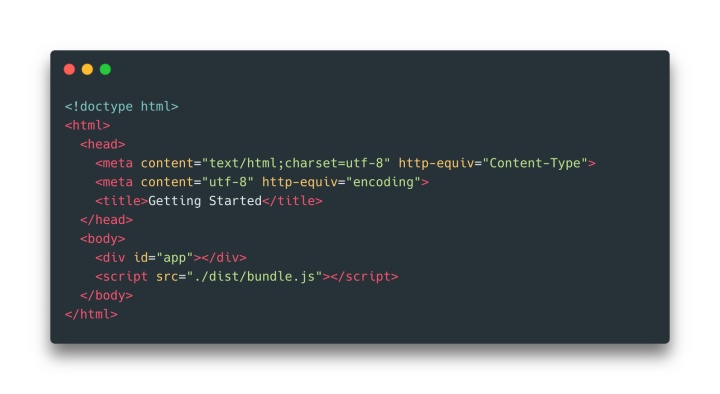
新建./index.html
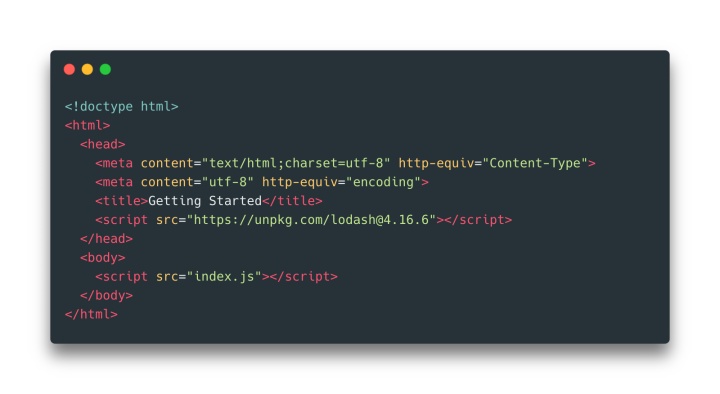
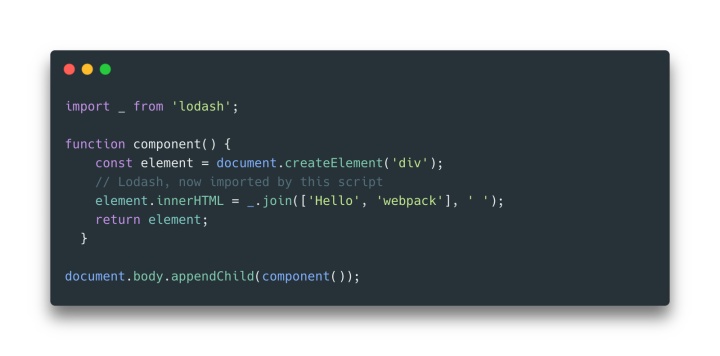
这里通过script src的方式导入了lodash,为了后面测试webpack能否正常工作。 新建./index.js
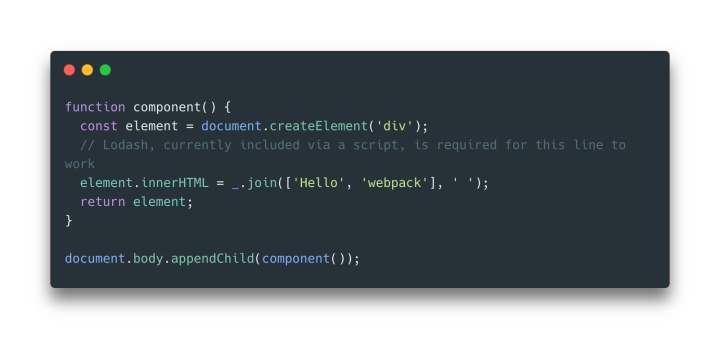
用浏览器打开index.html,不出意外应该能看到Hello webpack页面。 运行npm install -D lodash在本地安装lodash。修改./index.js,通过包引入lodash。
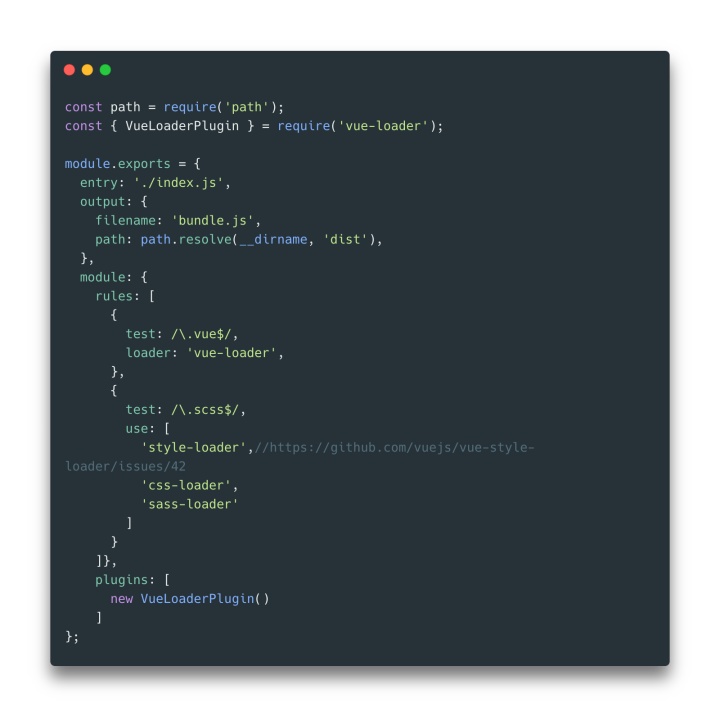
新建./webpack.config.js来配置webpack的行为。
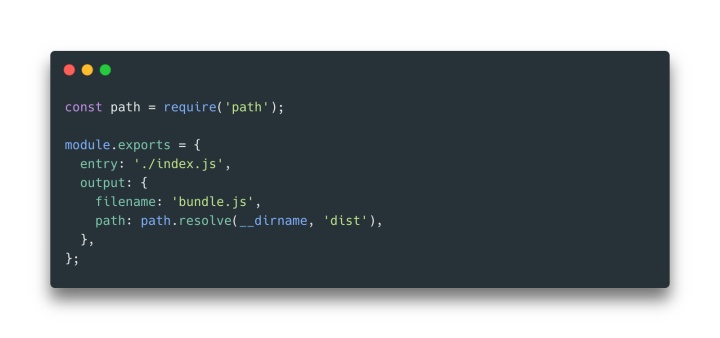
运行npx webpack,正常情况应该在./dist/bundle.js中有我们所有的js内容。 将./index.html的内容修改为
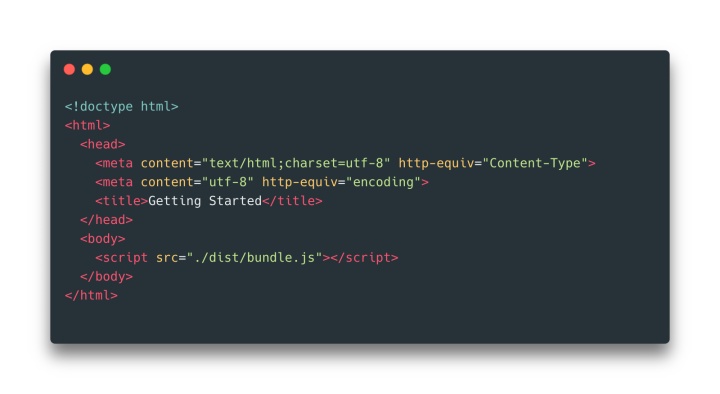
在浏览器中打开看到的应该是和之前一样的界面。说明webpack正常工作了。
安装Vue3

vue-loader is a loader for webpack that allows you to author Vue components in a format called Single-File Components (SFCs)
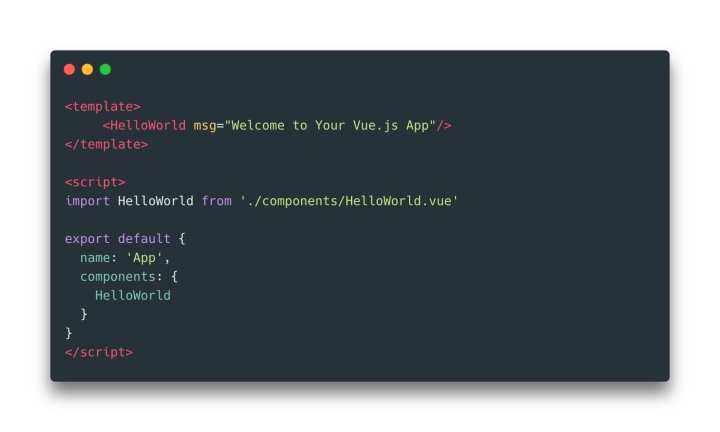
修改./index.js,新建一个vue应用。

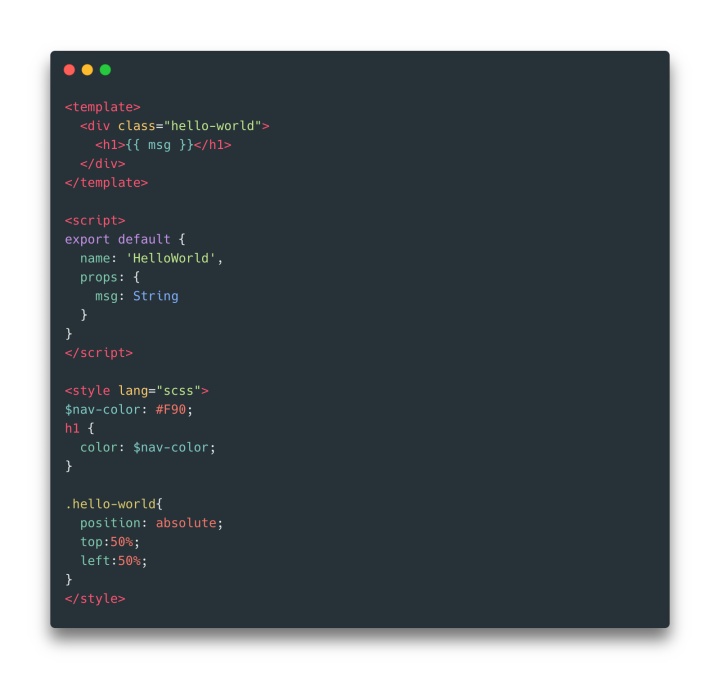
新建./App.vue
再新建个src/components/HelloWorld.vue

最后再在./index.html的<body>中加一个<div id="app"></div>
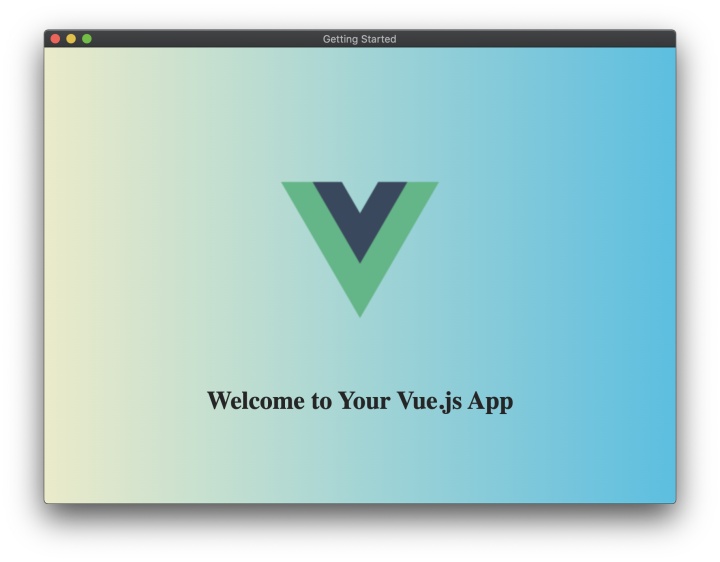
./node_modules/.bin/webpack --config webpack.config.js后在浏览器中打开index.html,应该可以看到“Welcome to Your Vue.js App”几个大字。
引入样式(Scss)
到目前为止,我们的应用还没有设定什么样式,接下来我们看看样式怎么被一起打包。
https:// vue-loader.vuejs.org/gu ide/pre-processors.html
在src/components/HelloWorld.vue的末尾加上一点样式
这时候build是会报错的
You may need an additional loader to handle the result of these loaders.
|
> $nav-color: #F90;
| h1{
| color: $nav-color;我们需要安装一点东西npm install -D style-loader sass-loader node-sass css-loader。之后修改./webpack.config.js
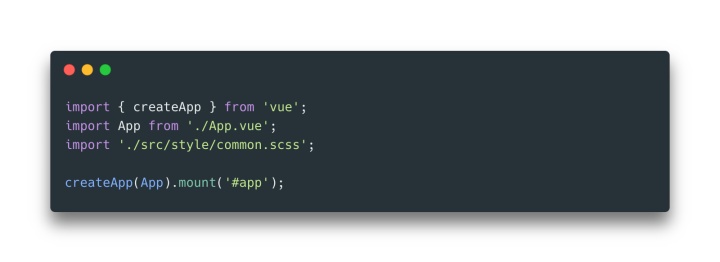
build后打开网页,文字应该变成了橙色。这种方式是通过single-file component的形式添加的样式,接下来我们再通过import external scss文件的形式添加样式。新建./src/style/common.scss
在./index.js里加入scss文件
到目前为止,最终的网页看起来应该像这样:

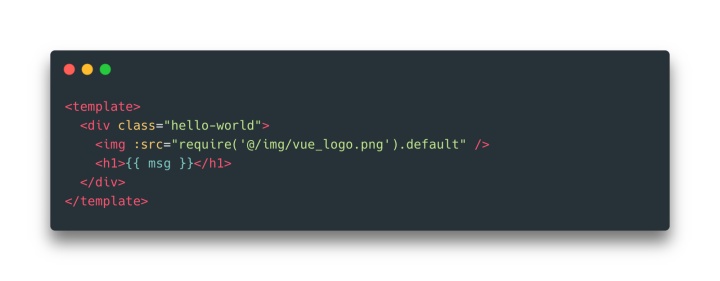
引入图片资源
图片也可以被当成模块利用webpack打包,后期管理资源路径比较方便。修改HelloWorld.vue的template
在webpack.config的rules中加上

Babel
因为我们用的都是最新的Electron,浏览器内核都比较新,新的JS特性也都支持,就不安装Babel了。
安装Electron
重头戏终于来了。npm i -D electron@latest安装最新的electron。新建./main.js作为electron的入口文件。

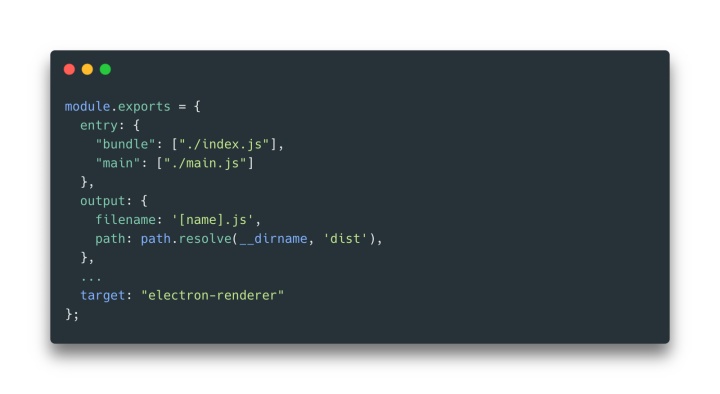
由于增加了main文件作为Electron的入口,再加上index文件作为Vue的入口,现在一共两个入口,需要修改entry配置。同时,我们需要在配置中指定打包应用类型,将target设置为electron-renderer。修改后如下:
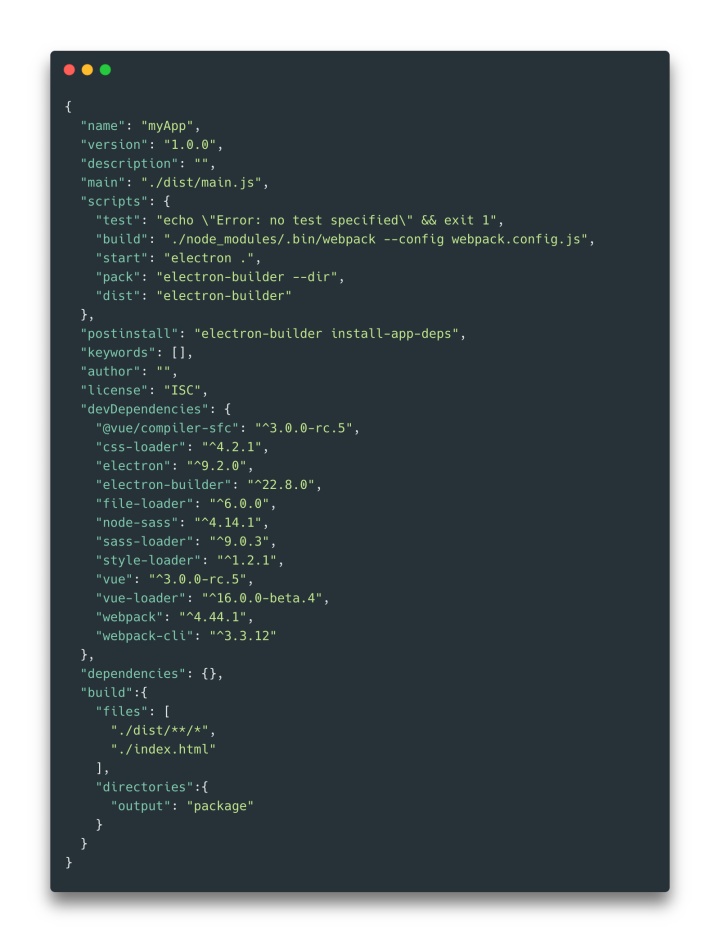
修改package.json中的"main": "./dist/main.js"。scripts中加一个"start": "electron ."。npm run build后npm run start应该可以看到electron app成功启动。
Publish配置
如果要打包应用还有些东西要调整。安装npm i -D electron-builder。 在package.json中加入
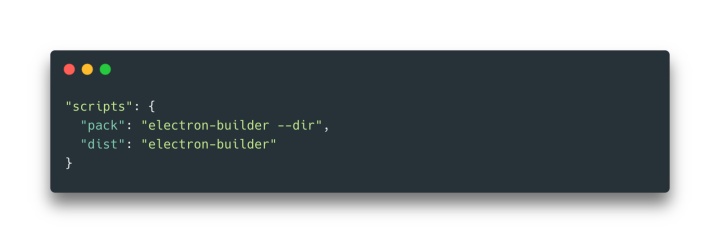
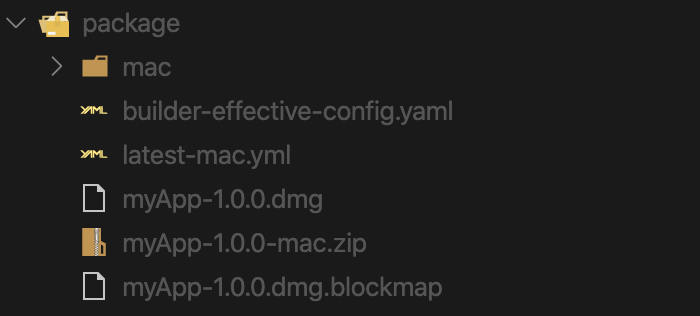
Then you can run yarn dist (to package in a distributable format (e.g. dmg, windows installer, deb package)) or yarn pack (only generates the package directory without really packaging it. This is useful for testing purposes).
为了确保所有依赖都匹配electron的版本,再在package.json中加入"postinstall": "electron-builder install-app-deps" 增加build的配置,将dist文件夹和index.html包含进去,打包输出路径为package。最终的package.json应该长这样
运行npm run dist看看能不能打包成功。
微调下样式,最终的效果应该是这样
后话
目前的配置只适合作为Demo,更详细的配置请移步Github。顺便记得点个 哦~
nofacer/vue3-electrongithub.com


 7164
7164


 被折叠的 条评论
为什么被折叠?
被折叠的 条评论
为什么被折叠?
 到【灌水乐园】发言


