


TensorRT是NVIDIA开发的一款高性能神经网络推理引擎(Inference engine),用于在生产环境中部署深度学习应用程序,应用有图像分类、分割和目标检测等,可提供最大的推理吞吐量和效率。为了方便tensorflow用户使用tensorRT在GPU上进行推理加速,NVIDIA和Tensorflow的开发者将TensorRT的API库直接集成到Tensorflow的contrib模块中(集成TensorRT的Tensorflow的英文缩写为TFTRT)。 tensorflow用户通过几行简单tf代码就可以实现推理加速。
本文介绍相关TF-TRT使用环境搭建和代码编写。
1 服务器上直接搭建环境
以下是Nvidia推荐的的软件环境,本文档推基于TensorRT5.0RC的配置,建议环境配置如图3.1所示。值得注意的是nvidia driver最好升级到410.0以上。CUDA10.0对TensorRT5RC的支持较好,而CUDA10.0需要nvidia driver 410.0+版本。
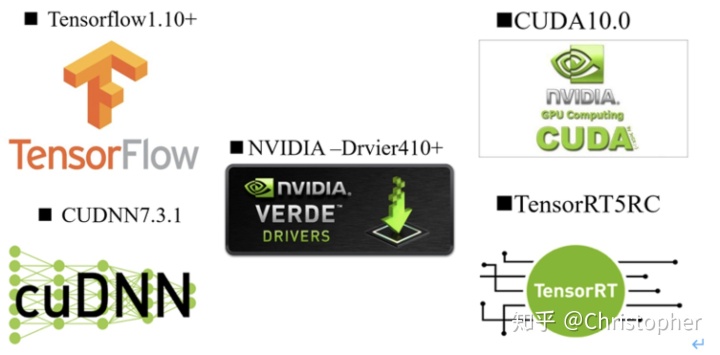
图 1推荐环境配置图
CUDA,CUDNN,NVIDIA Driverh和TensorRT可以通过NVIDIA官方教程安装。本机的tensorflow采用源码安装tf1.12版本,安装配置步骤如下:
(1).在GitHub上下载Tensorflow的release版本;https://github.com/Tensorflow/Tensorflow(2).本文档选择在anaconda中安装,方便用户管理。创建并激活虚拟环境 Source activate my_tftrt;
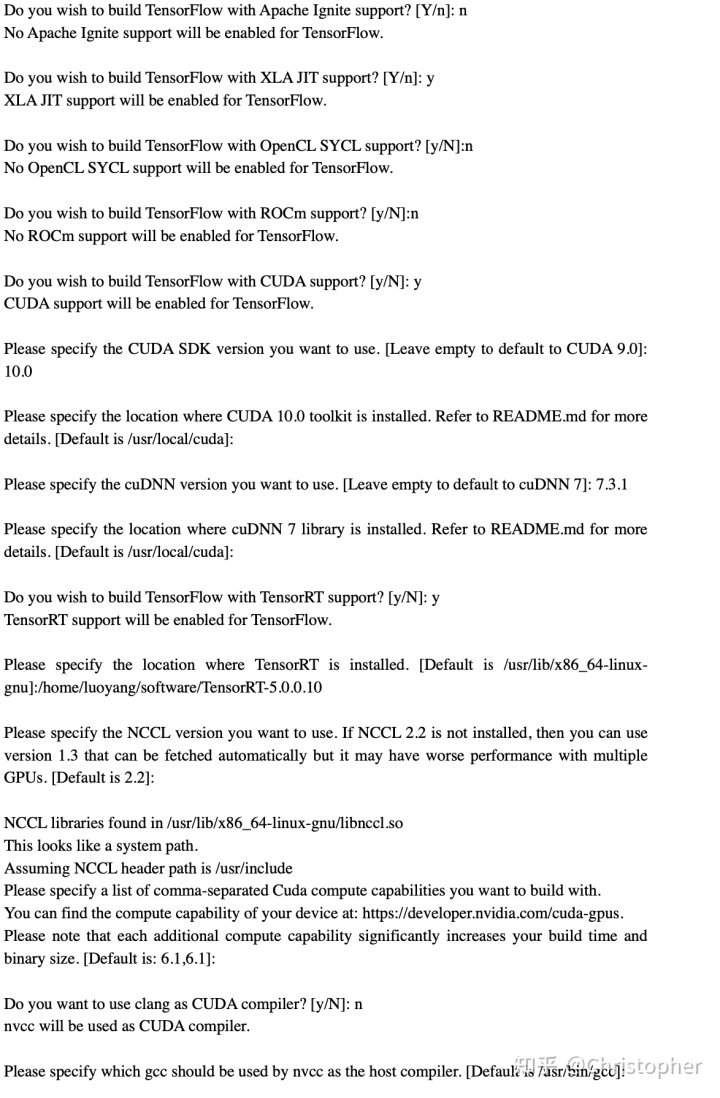
(3)在虚拟环境中运行tensorflow-r1.12/tensorflow文件夹下的configure 文件,进行相关配置, ./configure对于本机进行如下相关配置,可根据自己的软硬件填写。本机的显卡为Tesla P4,配置情况如下所示;
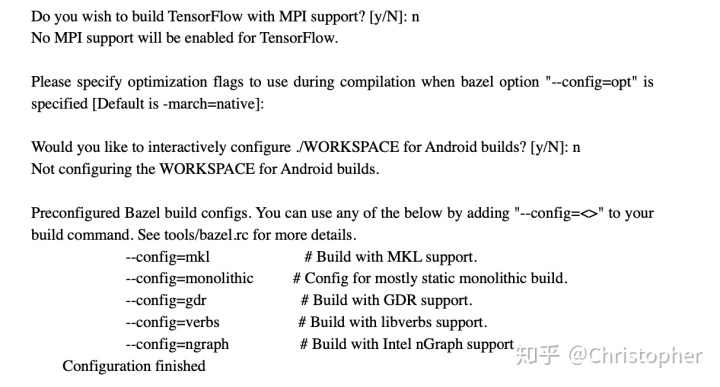
(4)利用bazel build生成:build_pip_package,因为本机使用的为GCC 5 ,为了使得编译与老版的ABI 兼容,所以在此基础上加入--cxxopt="-D_GLIBCXX_USE_CXX11_ABI=0";
bazel build --config=opt --cxxopt="-D_GLIBCXX_USE_CXX11_ABI=0" //tensorflow/tools/pip_package:build_pip_package (5)运行工具(tools)生成*.whl文件;
sudo bazel-bin/tensorflow/tools/pip_package/build_pip_package ./tmp/tensorflow_pkg
(6)运行工具(tools)生成*.whl文件;
(7)cd /tmp/tensorflow_pkg href="http://www.baidu.com/link?url=mM_ZlInV4APjv1atYuEMVzUzKIz0yP-ClVqEgctRA0Wylk5f5b2LedlYtpaKR10fFuRWNIO5VYeNQIlyu-a4knJeWzBj2OUrYufmA5WVI3q">pip install --upgrade pip
(8)通过*.whl文件pip安装tensorflow
安装需要注意以下点:
(1) 关于clang和nvcc编译的选用,推荐用nvcc编译,ubuntu系统自带的clang可能因版本较低,导致编译无法完成;
(2) cudnn的版本建议选用cudnn7.3以上版本,因为最新的Tensorflow1.12和Tensorflow master的源码是基于cudnn7.3.1开发的;
(3) 本机的GCC版本为GCC 5.0, 按安装包的要求用GCCC4.0编译,可能引入ABI 兼容问题,所以在编译时加入--cxxopt="-D_GLIBCXX_USE_CXX11_ABI=0";
(4) NCLL选用NCLL2.2或以上的版本,而不是选用默认的NCLL1.3版本。
最后可以用以下代码测试以下Tensorflow1.12版本是否安装成功.
import os
os.environ['TF_CPP_MIN_LOG_LEVEL'] = '0'
import tensorflow as tf
import tensorflow.contrib.TensorRT as trt
hello = tf.constant('Hello, Tensorflow!')
sess=tf.Session()
print(sess.run(hello))
或者直接运行Tensorflow安装包中tensorflow-r1.12/tensorflow/contrib/TensorRT/test/ test_tftrt.py文件。
2 基于docker配置tensorflow container
除了直接在服务器上配置环境之外,可以选择第二种方式。Tensorflow container 18.09需要nvidia driver到410+版本,docker以及nvidia-docker。docker建议安装docker CE版本,参照docker 官网https://docs.docker.com/install/linux/docker-ce/ubuntu/#install-using-the-repository。Docker CE版本安装步骤如下:
(1) 更新package的index
$ sudo apt-get update
(2) 安装权限包使得apt可以通过HTTPS使用repository.
$ sudo apt-get install  apt-transport-https ca-certificates  curl  software-properties-common
(3) 添加docker的官方GPG 密钥
$ curl -fsSL https://download.docker.com/linux/ubuntu/gpg | sudo apt-key add -
Verify that you now have the key with the fingerprint 9DC8 5822 9FC7 DD38 854A E2D8 8D81 803C 0EBF CD88, by searching for the last 8 characters of the fingerprint.
$ sudo apt-key fingerprint 0EBFCD88
pub 4096R/0EBFCD88 2017-02-22
 Key fingerprint = 9DC8 5822 9FC7 DD38 854A E2D8 8D81 803C 0EBF CD88
uid Docker Release (CE deb) <docker@docker.com>
sub 4096R/F273FCD8 2017-02-22
(4) 更新apt package索引
$ sudo apt-get update
(5) 安装最新的docker-ce版本,并测试docker ce或者查看docker ce版本
$ sudo apt-get install docker-ce
$ sudo docker run hello-world
$ docker --version

Hello from Docker!
This message shows that your installation appears to be working correctly.

To generate this message, Docker took the following steps:
 1. The Docker client contacted the Docker daemon.
 2. The Docker daemon pulled the "hello-world" image from the Docker Hub.
 (amd64)
 3. The Docker daemon created a new container from that image which runs the
 executable that produces the output you are currently reading.
 4. The Docker daemon streamed that output to the Docker client, which sent it
 to your terminal.

To try something more ambitious, you can run an Ubuntu container with:
 $ docker run -it ubuntu bash

Share images, automate workflows, and more with a free Docker ID:
 https://hub.docker.com/

For more examples and ideas, visit:
 https://docs.docker.com/get-started/
docker的版本查看
Docker version 18.06.1-ce, build e68fc7a
Docker CE版本安装完成后,需要再安装nvidia-docker,本文档参考了https://github.com/NVIDIA/nvidia-docker,安装步骤如下:
(1) 如果你自带nvidia-docker1.0,首先需要移除它以及其中安装的所有GPU container;
$ docker volume ls -q -f driver=nvidia-docker | xargs -r -I{} -n1 docker ps -q -a -f volume={} | xargs -r docker rm -f
sudo apt-get purge -y nvidia-docker
(2) 添加package repositories;
$curl -s -L https://nvidia.github.io/nvidia-docker/gpgkey |
sudo apt-key add -
distribution=$(. /etc/os-release;echo $ID$VERSION_ID)
curl -s -L https://nvidia.github.io/nvidia-docker/$distribution/nvidia-docker.list |
sudo tee /etc/apt/sources.list.d/nvidia-docker.list
sudo apt-get update
(3)安装安装nvidia-docker2,重新加载docker daemon 配置;
$sudo apt-get install -y nvidia-docker2
$sudo pkill -SIGHUP dockerd
(4)使用nvidia-smi测试一个官方CUDA image
$ docker run --runtime=nvidia --rm nvidia/cuda:9.0-base nvidia-smi
上述准备工作完成后,接下来需要拉取(pull) tensorflow container 18.09。首先介绍tensorflow container。tensorflow container 18.09 (就是一个docker景象)相当于一个环境配置完备的虚拟机,可大大方便用户开发。
对于Tensorflow container 18.09来说,container的软件环境如下
Ubuntu 16.04
Note: Container image 18.09-py2 contains Python 2.7; 18.09-py3 contains Python 3.5.
·NVIDIA CUDA 10.0 including CUDA® Basic Linear Algebra Subroutines library™ (cuBLAS) 10.0
·NVIDIA CUDA® Deep Neural Network library™ (cuDNN) 7.3.0
·NCCL 2.3.4 (optimized for NVLink™ )
·Horovod™ 0.13.10
·OpenMPI 3.0.0
·TensorBoard 1.10.0
·MLNX_OFED 3.4
·OpenSeq2Seq v18.09 at commit 694a230
·TensorRT 5.0.0 RC
·DALI 0.2 Beta
由于18.09版本是基于cuda 10.0的,所以nvidia driver 需要410.xx版本,但是在Tesla V100, Tesla P4, Tesla P40,Tesla P100可以使用驱动384(建议还是安装410.xx驱动)。
在pull nvidia-docker之前,需要有NGC container registry密钥。可以直接上nvidia GPU cloud上去申请,申请步骤如下:
- 打开GPU cloud网址 https://www.nvidia.com/en-us/gpu-cloud/,用邮箱注册账户;
相继进入如图2和图3的页面后,在Tensorflow栏目中点击Get API Key;
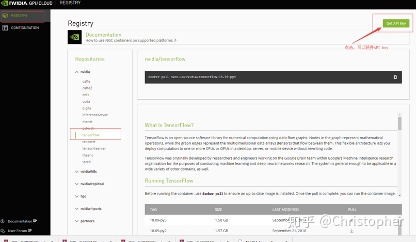
图2 Nvidia的GPU cloud中获取API密钥界面
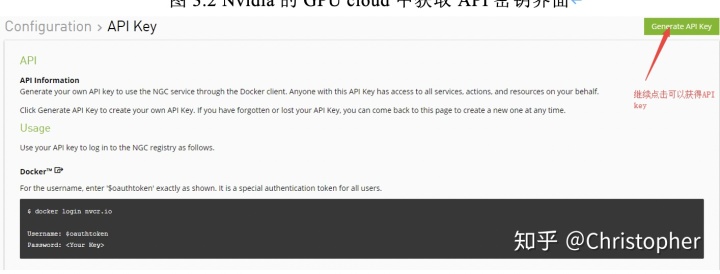
图3 Nvidia的GPU cloud中获取API密钥界面
生成密钥的形式是:OG5wYDY5dWkwY2s4ZHAyYzV1YzPxdnM5cHM6ZWU1NjM0YjItOUE2ZS00YWE5LTg1ZTYtYzM2ZWQ5YWFiMDQ1(已失效)
然后利用NGC密钥需要登陆http://nvcr.io
$sudo docker login nvcr.io
Username($oauthtoken):$oauthtoken
Password:
输入密钥后就可以成功,显示信息如下
$ sudo docker login nvcr.io
Authenticating with existing credentials...
WARNING! Your password will be stored unencrypted in /home/luoyang/.docker/config.json.
Configure a credential helper to remove this warning. See
https://docs.docker.com/engine/reference/commandline/login/#credentials-store
Login Succeeded
然后拉取(pull)一下Tensorflow:18.09-py3 (py3表示配置python3)
$sudo docker pull nvcr.io/nvidia/Tensorflow:18.09-py3等待十几分钟可以获得Tensorflow:18.09-py3镜像,使用Tensorflow安装包中Tensorflow master/Tensorflow/contrib/TensorRT/test/ test_tftrt.py文件测试TensorRT和Tensorflow
最后运行Tensorflow:18.09-py3
$sudo nvidia-docker run -it --rm nvcr.io/nvidia/Tensorflow:18.09-py3可以进入Tensorflow:18.09-py3的环境中。
将用户的文件传输到container中和将container中的文件传送到用户命令分别为
$sudo docker cp testfile d4cda790c312:/workspace
$ docker cp ba5396ddd343:/workspace/work/yolov3_frozen_graph_19_tf10.pb /home/luoyang/work tensorflow-gpu 1.10.0+nv
此外,如果有需求可以container中安装需要软件,然后保存为自己的container,以供下次使用。


 5048
5048


 被折叠的 条评论
为什么被折叠?
被折叠的 条评论
为什么被折叠?
 到【灌水乐园】发言


