


欢迎关注专栏:里面定期分享Android和Flutter架构技术知识点及解析,还会不断更新的BATJ面试专题,欢迎大家前来探讨交流,如有好的文章也欢迎投稿。
Android架构解析zhuanlan.zhihu.com
项目目录
一、项目概述二、开发环境三、详细设计1、头像设计2、账号输入框3、密码输入框4、登录按钮5、按钮点击事件四、项目效果五、项目总结
一、项目概述
QQ是我们日常生活使用最多的软件之一,包含登录界面和进入后的聊天界面、好友列表界面和空间动态界面等。登录界面的制作比较简单,主要考验布局的使用,是实现QQ项目的第一步。现在APP开发的首要工作都是实现登录页面,所以学会了QQ登录界面对以后的软件开发有着很重要的作用。
二、开发环境
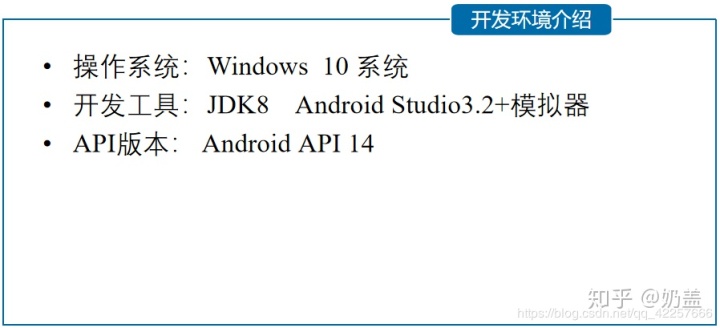
三、详细设计
1、头像设计
首先在layout文件里面选择了RelativeLayout(相对布局)作为整个页面的布局。
在顶端放置了一个ImageView控件,宽度和高度设置的都是70dp,水平居中设置为true。
然后使头像在整个页面下调一点,不要紧贴着顶端,所以layout_marginTop设置为40dp。
最后选择drawable文件夹中的head文件作为头像。代码如下:
<ImageView
        android:id='@+id/iv'
        android:layout_width="70dp"
        android:layout_height="70dp"
        android:layout_centerHorizontal="true"
        android:layout_marginTop="40dp"
        android:background="@drawable/head"/>
2、账号输入框
利用LinearLayout(线性布局)作为账号输入框的外层布局,orientation设置的为水平排列。
放置了一个TextView控件,宽度和高度设置的wrap_content,即适应内容大小,显示文本“账号”。
紧接着放置一个EditText控件,用于输入账号内容,使用layout_toRightOf属性定位于账号的右侧。
<LinearLayout
        android:id="@+id/number_11"
        android:layout_width="match_parent"
        android:layout_height="wrap_content"
        android:layout_below="@id/iv"
        android:layout_centerVertical="true"
        android:layout_marginBottom="5dp"
        android:layout_marginLeft="10dp"
        android:layout_marginRight="10dp"
        android:layout_marginTop="15dp"
        android:background="#ffffff"
        android:orientation="horizontal">

        <TextView
            android:id="@+id/tv_number"
            android:layout_width="wrap_content"
            android:layout_height="wrap_content"
            android:padding="10dp"
            android:text="账号:"
            android:textColor="#000"
            android:textSize="20sp" />

        <EditText
            android:id="@+id/et_number"
            android:layout_width="match_parent"
            android:layout_height="wrap_content"
            android:layout_toRightOf="@id/tv_number"
            android:layout_marginLeft="5dp"
            android:background="@null"
            android:inputType="text"
            android:padding="10dp" />
    </LinearLayout>
3、密码输入框
最外层依旧是LinearLayout(线性布局),整体放置在上一个LinearLayout的下面,控件排列依然为horizontal(水平)。
放置一个TextView文本显示框,文本内容是“密码”,文本颜色为黑色,文本大小为20sp。
再放置一个EditText文本输入框,inputType设置为textPassword,输入时候会隐藏输入内容,使用*** 代替。
<LinearLayout
        android:id="@+id/password_11"
        android:layout_width="match_parent"
        android:layout_height="wrap_content"
        android:layout_below="@+id/number_11"
        android:layout_centerVertical="true"
        android:layout_marginLeft="10dp"
        android:layout_marginRight="10dp"
        android:background="#ffffff"
        android:orientation="horizontal">

        <TextView
            android:id="@+id/tv_password"
            android:layout_width="wrap_content"
            android:layout_height="wrap_content"
            android:padding="10dp"
            android:text="密码:"
            android:textColor="#000"
            android:textSize="20sp" />
        <EditText
            android:id="@+id/et_password"
            android:layout_width="match_parent"
            android:layout_height="wrap_content"
            android:layout_marginLeft="5dp"
            android:layout_toRightOf="@id/tv_password"
            android:background="@null"
            android:inputType="textPassword"
            android:padding="10dp"/>
    </LinearLayout>
4、登录按钮
在账号密码框下方放置一个Button控件,文本内容为“登录”,文本颜色为蓝色。
<Button
        android:id="@+id/btn_login"
        android:layout_width="match_parent"
        android:layout_height="wrap_content"
        android:layout_marginTop="38dp"
        android:background="#3C8DC4"
        android:text="登录"
        android:textColor="#ffffff"
        android:textSize="20sp"
        android:layout_below="@+id/password_11"
        android:layout_alignParentLeft="true"
        android:layout_alignParentStart="true"/>
5、按钮点击事件
在MainActivity里面先声明了btn这个变量,并与刚刚设置的登录按钮进行绑定。
然后使用了setOnClickListener按钮点击事件监听器,在监听器里面声明了onClick方法,在里面声明了dialog变量,即显示对话框。
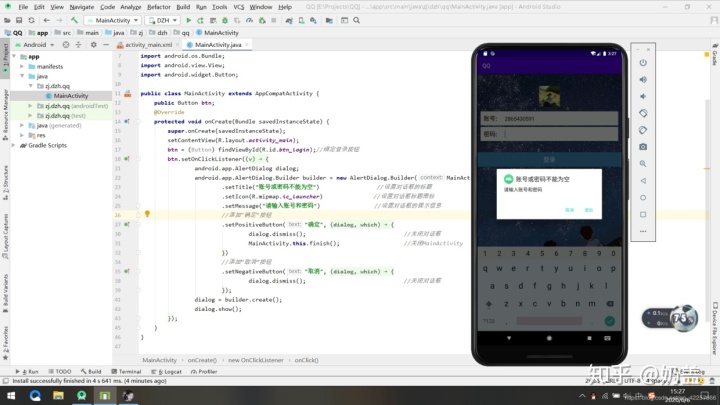
setTitle( )设置了对话框的标题为“账号或密码不能为空”,setIcon( )设置了对话框标题图标,setMessage( )设置对话框的提示信息为"请输入账号和密码" 。
最后添加了"确定"按钮和“取消”按钮,点击按钮都会调用dialog.dismiss()方法关闭对话框。
public class MainActivity extends AppCompatActivity {
    public Button btn;
    @Override
    protected void onCreate(Bundle savedInstanceState) {
        super.onCreate(savedInstanceState);
        setContentView(R.layout.activity_main);
        btn = (Button) findViewById(R.id.btn_login);//绑定登录按钮
        btn.setOnClickListener(new View.OnClickListener() {
            @Override
            public void onClick(View v) {
                android.app.AlertDialog dialog;
                android.app.AlertDialog.Builder builder = new AlertDialog.Builder(MainActivity.this)
                        .setTitle("账号或密码不能为空")                 //设置对话框的标题
                        .setIcon(R.mipmap.ic_launcher)               //设置对话框标题图标
                        .setMessage("请输入账号和密码")                //设置对话框的提示信息
                        //添加"确定"按钮
                        .setPositiveButton("确定", new DialogInterface.OnClickListener() {
                            @Override
                            public void onClick(DialogInterface dialog, int which) {
                                dialog.dismiss();                             //关闭对话框
                                MainActivity.this.finish();                   //关闭MainActivity
                            }
                        })
                        //添加“取消”按钮
                        .setNegativeButton("取消", new DialogInterface.OnClickListener() {
                            @Override
                            public void onClick(DialogInterface dialog, int which) {
                                dialog.dismiss();                             //关闭对话框
                            }
                        });
                dialog = builder.create();
                dialog.show();
            }
        });
    }
}
四、项目效果
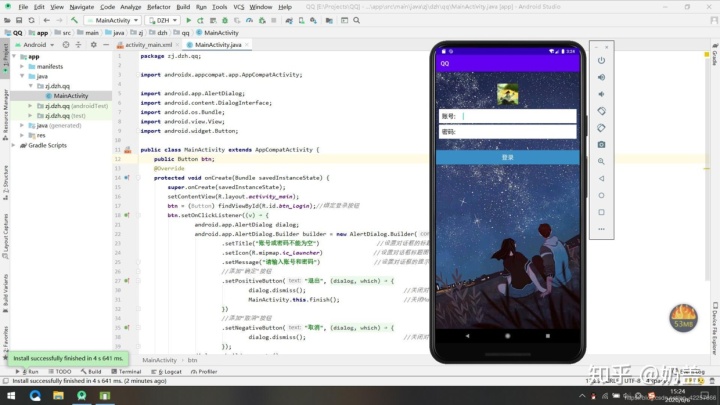
1、用模拟器运行。
2、输入账号不输入密码,点击登录按钮会显示提醒对话框。
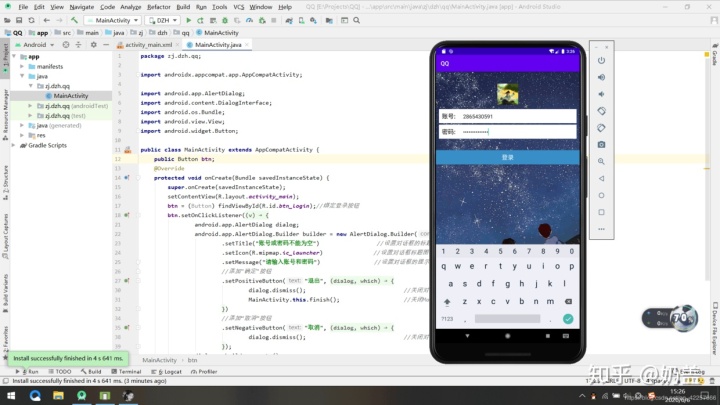
3、输入账号和密码。
五、项目总结
本次项目属于比较基础的内容,希望初学者通过这次项目熟练掌握界面布局和控件的使用,为以后的项目开发打下坚实的基础。本次项目文件的百度网盘链接如下:百度网盘链接 提取码:x3mp
原文作者:振华OPPO
原文链接:https://blog.csdn.net/qq_42257666/java/article/details/1065875
原文出处:CSDN


 2万+
2万+


 被折叠的 条评论
为什么被折叠?
被折叠的 条评论
为什么被折叠?
 到【灌水乐园】发言


