


本文将介绍使用DevStack工具安装OpenStack环境。DevStack配置简单,并且只需要一台机器,不需要复杂的网络配置。适合新人安装体验。下面将从官方安装翻译,问题处理几个方面指引完成DevStak的安装,有问题可以评论或私信。
官方安装指示(随手翻译)
1.If you are not using a cloud image, you can create a separate stack user to run DevStack with/如果你没有使用云镜像,你可以创建一个stack用户来运行DevStack环境
If you are not using a cloud image, you can create a separate stack user to run DevStack with$ sudo useradd -s /bin/bash -d /opt/stack -m stackSince this user will be making many changes to your system, it should have sudo privileges:$ echo "stack ALL=(ALL) NOPASSWD: ALL" | sudo tee /etc/sudoers.d/stack$ sudo su - stackDownload DevStack¶$ git clone https://opendev.org/openstack/devstack$ cd devstackThe devstack repo contains a script that installs OpenStack and templates for configuration files.Create a local.conf¶Create a local.conf file with four passwords preset at the root of the devstack git repo.[[local|localrc]]ADMIN_PASSWORD=secretDATABASE_PASSWORD=$ADMIN_PASSWORDRABBIT_PASSWORD=$ADMIN_PASSWORDSERVICE_PASSWORD=$ADMIN_PASSWORDThis is the minimum required config to get started with DevStack. NoteThere is a sample local.conf file under the samples directory in the devstack repository.Start the install¶$ ./stack.shThis will take a 15 - 20 minutes, largely depending on the speed of your internet connection. Many git trees and packages will be installed during this process.2.Since this user will be making many changes to your system, it should have sudo privileges:/由于这个用户需要改变你的系统,它需要有sudo权限
$ echo "stack ALL=(ALL) NOPASSWD: ALL" | sudo tee /etc/sudoers.d/stack$ sudo su - stack3.Download DevStack /下载DevStack
$ git clone https://opendev.org/openstack/devstack$ cd devstackThe devstack repo contains a script that installs OpenStack and templates for configuration files./这个devstak仓库包含了一个安装OpenStack的脚本和一些配置模板文件
4.Create a local.conf /创建一个local.conf的配置文件
Create a local.conf file with four passwords preset at the root of the devstack git repo./在你下载的devstack git仓库的同级目录下,创建一个包含4个密码的 local.conf 配置文件,其内容如下:
[[local|localrc]]ADMIN_PASSWORD=qwerttDATABASE_PASSWORD=$ADMIN_PASSWORDRABBIT_PASSWORD=$ADMIN_PASSWORDSERVICE_PASSWORD=$ADMIN_PASSWORDThis is the minimum required config to get started with DevStack./这是DevStack环境的最小配置。
5.Start the install/执行安装脚本
$ ./stack.shThis will take a 15 - 20 minutes, largely depending on the speed of your internet connection. Many git trees and packages will be installed during this process./这个将花费15-20分钟,但具体时间依赖你的网速,很多git仓库和包在安装阶段会先被下载。
上面的指引非常简单,但是对国内用户而言,却需要花费更多的时间在文件下载上,有时还因为网络问题导致安装失败,下面针对上述指引进行优化
安装过程
Ubuntu 18.04 操作系统安装后按指引操作,并git 克隆devstak 代码仓库到到sever上,如果开始执行安装脚本,等来的是漫长的安装过程,主要花费在下载依赖和软件上,包括系统组件、python的库、OpenStack软件。建议先做网络优化如下:
(1)、系统组件需要快速下载,需要更改系统的软件源地址,指向国内的源,比如阿里云、清华源等等
#cp /etc/apt/sources.list /etc/apt/sources.list.bak#vi /etc/apt/sources.list清空sources.list文件,写入下面源地址
deb http://mirrors.aliyun.com/ubuntu/ bionic main restricted universe multiversedeb http://mirrors.aliyun.com/ubuntu/ bionic-security main restricted universe multiversedeb http://mirrors.aliyun.com/ubuntu/ bionic-updates main restricted universe multiversedeb http://mirrors.aliyun.com/ubuntu/ bionic-proposed main restricted universe multiversedeb http://mirrors.aliyun.com/ubuntu/ bionic-backports main restricted universe multiversedeb-src http://mirrors.aliyun.com/ubuntu/ bionic main restricted universe multiversedeb-src http://mirrors.aliyun.com/ubuntu/ bionic-security main restricted universe multiversedeb-src http://mirrors.aliyun.com/ubuntu/ bionic-updates main restricted universe multiversedeb-src http://mirrors.aliyun.com/ubuntu/ bionic-proposed main restricted universe multiversedeb-src http://mirrors.aliyun.com/ubuntu/ bionic-backports main restricted universe multiverse(2)、python库的安装,指向豆瓣
在stack用户下创建如下文件并写入如下内容:
stack@s1804:~$ more .pip/pip.conf [global]index-url = https://pypi.douban.com/simple/python库的安装主要是devstack和OpenStack的组件需要的依赖,一般可以从requirement.txt文件看到。比如keystone的依赖:
stack@s1804:~/keystone$ pwd/opt/stack/keystonestack@s1804:~/keystone$ more requirements.txt # The order of packages is significant, because pip processes them in the order# of appearance. Changing the order has an impact on the overall integration# process, which may cause wedges in the gate later.pbr!=2.1.0,>=2.0.0 # Apache-2.0WebOb>=1.7.1 # MITFlask!=0.11,>=1.0.2 # BSDFlask-RESTful>=0.3.5 # BSDcryptography>=2.1 # BSD/Apache-2.0SQLAlchemy>=1.1.0 # MITsqlalchemy-migrate>=0.11.0 # Apache-2.0stevedore>=1.20.0 # Apache-2.0。。。。。。(3)、OpenStack软件主要从git上克隆,更改opendev为GitHub,可能更快一些,如下是我改动后和备份的内容对比
修改stackrc脚本中的GIT地址为GitHub的地址(第22行)
stack@s1804:~/devstack$ vi stackrc227:GIT_BASE=${GIT_BASE:-https://github.com}完成上述修改后。可以执行stack.sh安装。
问题处理和手动下载组件指引
(1)、stack.sh安装脚本出问题怎么办?
因为国内网络的问题,安装脚本因下载超时等会中断下载并退出,这个时候会出现各种莫名其妙的报错,不需要理会,重新执行。
如果你觉得脚本每次重头开始,太慢了,建议手动下载OpenStack的git组件仓库
(2)、手动下载OpenStack的配套软件,下面是安装命令,后面加“&”是后台执行
git clone https://github.com/openstack/glance.git /opt/stack/glance --branch master &git clone https://github.com/openstack/horizon.git /opt/stack/horizon --branch master &git clone https://github.com/openstack/keystone.git /opt/stack/keystone --branch master &git clone https://github.com/openstack/neutron.git /opt/stack/neutron --branch master &git clone https://github.com/openstack/nova.git /opt/stack/nova --branch master &git clone https://github.com/openstack/swift.git /opt/stack/swift --branch master &git clone https://github.com/openstack/placement.git /opt/stack/placement --branch master &git clone https://github.com/openstack/requirements.git /opt/stack/requirements --branch master &git clone https://github.com/openstack/tempest.git /opt/stack/tempest --branch master &git clone https://github.com/openstack/nova.git /opt/stack/nova --branch master &git clone https://github.com/openstack/keystone.git /opt/stack/keystone --branch master &因为是后台下载,可以用“ps -ef|grep git”命令检查是否还在下载。
最后检查/opt/stack目录是否有相关的目录,这是我下载完成后的内容
stack@s1804:~$ ls -rlttotal 68drwxr-xr-x 6 stack stack 4096 Jul 15 13:34 bindep-venvdrwxr-xr-x 2 root root 4096 Jul 15 13:47 bindrwxrwxr-x 17 stack stack 4096 Jul 16 14:30 keystonedrwxr-xr-x 12 stack stack 4096 Jul 16 14:35 glancedrwxrwxr-x 14 stack stack 4096 Jul 16 15:04 swiftdrwxrwxr-x 13 stack stack 4096 Jul 16 15:04 cinderdrwxrwxr-x 16 stack stack 4096 Jul 17 00:38 neutrondrwxr-xr-x 11 stack stack 4096 Jul 17 00:42 noVNCdrwxrwxr-x 15 stack stack 4096 Jul 17 00:42 novadrwxrwxr-x 13 stack stack 4096 Jul 17 00:43 placementdrwxr-xr-x 2 stack stack 4096 Jul 17 00:45 logsdrwxrwxr-x 15 stack stack 4096 Jul 17 00:49 horizondrwxrwxr-x 16 stack stack 4096 Jul 17 00:59 devstackdrwxr-xr-x 10 stack stack 4096 Jul 17 00:59 requirementsdrwxr-xr-x 8 stack root 4096 Jul 17 01:00 datadrwxrwxr-x 12 stack stack 4096 Jul 17 01:04 tempest-rw-r--r-- 1 stack stack 440 Jul 17 01:04 devstack.subunitstack@s1804:~$ pwd另外,如果能挂上国外加速器,也许情况会好一点。建议是手动下载OpenStack的软件
安装后
(1)安装完毕后,会提示如下内容:
This is your host IP address: 192.168.10.131This is your host IPv6 address: ::1Horizon is now available at http://192.168.10.131/dashboardKeystone is serving at http://192.168.10.131/identity/The default users are: admin and demoThe password: qwertt.......2020-07-17 01:04:29.905 | stack.sh completed in 1742 seconds.注意:上述的密码和IP都是根据你的操作系统和配置文件生成的。注意保留好你的密码。
(2)、登录dashboard
输入账号密码即可登录,账号密码关注安装的打印:
The default users are: admin and demo
The password: qwertt
OpenStack管理登录界面
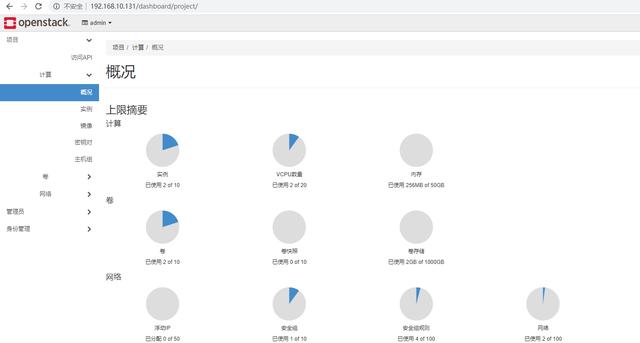
OpenStack项目界面
后续将做一个OpenStack体验和讲解的系列文章,期待关注


 1176
1176

 被折叠的 条评论
为什么被折叠?
被折叠的 条评论
为什么被折叠?
 到【灌水乐园】发言


