


图像毛玻璃特效
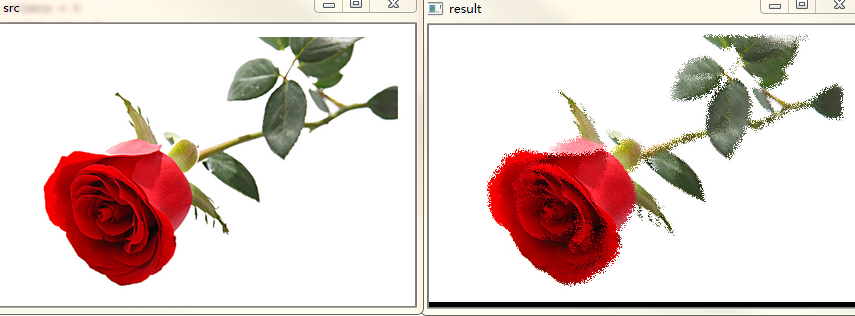
图像毛玻璃特效是用图像邻域内随机一个像素点的颜色来代替当前像素点颜色的过程,从而为图像增加一个毛玻璃模糊的特效。
src = cv2.imread("rose.jpg")
dst=np.zeros_like(src)
rows, cols= src.shape[:2]#定义偏移量和随机数
offsets = 5random_num=0#毛玻璃效果: 像素点邻域内随机像素点的颜色替代当前像素点的颜色
for y in range(rows -offsets):for x in range(cols -offsets):
random_num=np.random.randint(0, offsets)
dst[y, x]= src[y + random_num, x +random_num]
cv2.imshow("src", src)
cv2.imshow("result", dst)if cv2.waitKey() == 27:
cv2.destroyAllWindows()
效果如下:
图像浮雕特效
将要呈现的图像突起于石头表面,根据凹凸程度不同形成三维的立体效果。Python绘制浮雕图像是通过勾画图像的轮廓,并降低周围的像素值,从而产生一张具有立体感的浮雕效果图。设置卷积核,再调用filter2D()实现浮雕特效。
src = cv2.imread("rose.jpg")
dst=np.zeros_like(src)
rows, cols= src.shape[:2]
gray=cv2.cvtColor(src, cv2.COLOR_BGR2GRAY)#目标图像
dst = np.zeros((rows, cols, 1), np.uint8)for i inrange(0, rows):for j in range(0, cols - 1):
grayCurrentPixel=int(gray[i, j])
grayNextPixel= int(gray[i, j + 1])
nextPixel= grayCurrentPixel - grayNextPixel + 120
if nextPixel > 255:
nextPixel= 255
if nextPixel <0:
nextPixel=0
dst[i, j]=nextPixel
cv2.imshow("src", gray)
cv2.imshow("result", dst)if cv2.waitKey() == 27:
cv2.destroyAllWindows()
效果如下:

图像油漆特效
它主要采用自定义卷积核和cv2.filter2D(),卷积核公式

src = cv2.imread("rose.jpg")
gray=cv2.cvtColor(src, cv2.COLOR_BGR2GRAY)#自定义卷积核
kerbnel = np.array([[-1, -1, -1],[-1, 10, -1],[-1, -1, -1]])#图像浮雕效果
dst = cv2.filter2D(gray, -1, kerbnel)
cv2.imshow("src", gray)
cv2.imshow("result", dst)if cv2.waitKey() == 27:
cv2.destroyAllWindows()
效果如下:

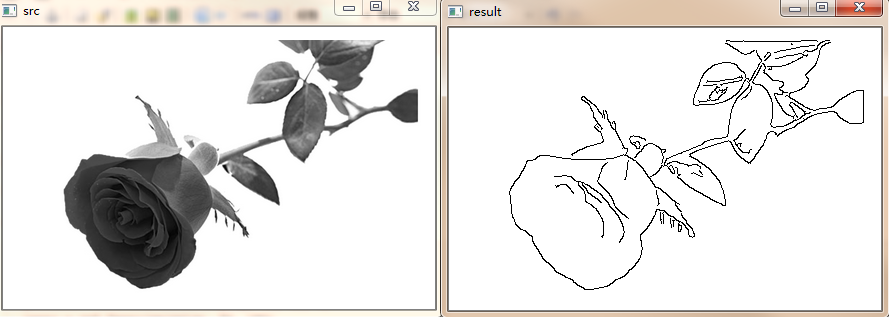
图像素描特效
主要通过以下步骤:
1:调用cv2.cvtColor()函数将彩色图像灰度化处理
2:通过cv2.GaussianBlur()函数实现高斯滤波降噪
3:边缘检测采用Canny算子实现
4:最后通过cv2.threshold()反二进制阈值化处理实现素描特效
src = cv2.imread("rose.jpg")
gray=cv2.cvtColor(src, cv2.COLOR_BGR2GRAY)
gaussian= cv2.GaussianBlur(gray, (5, 5), 0)
canny= cv2.Canny(gaussian, 50, 150)
ret, result= cv2.threshold(canny, 100, 255, cv2.THRESH_BINARY_INV)
cv2.imshow("src", gray)
cv2.imshow("result", result)if cv2.waitKey() == 27:
cv2.destroyAllWindows()
效果如下:
图像怀旧特效
怀旧特效是将图像的RGB三个分量分别按照一定比例进行处理的结果,其怀旧公式如下:

主要通过双层循环遍历图像的各像素点,再结合公式计算各颜色通道的像素值。
img = cv2.imread("rose.jpg", 1)
rows, cols= img.shape[:2]
dst= np.zeros((rows, cols, 3), dtype=np.uint8)for i inrange(rows):for j inrange(cols):
B= 0.272 * img[i, j][2] + 0.534 * img[i, j][1] + 0.131 *img[i, j][0]
G= 0.349 * img[i, j][2] + 0.686 * img[i, j][1] + 0.168 *img[i, j][0]
R= 0.393 * img[i, j][2] + 0.769 * img[i, j][1] + 0.189 *img[i, j][0]if B > 255:
B= 255
if G > 255:
G= 255
if R < 255:
R= 255dst[i, j]=np.uint8((B, G, R))
cv2.imshow("src", img)
cv2.imshow("result", dst)if cv2.waitKey() == 27:
cv2.destroyAllWindows()
效果如下:
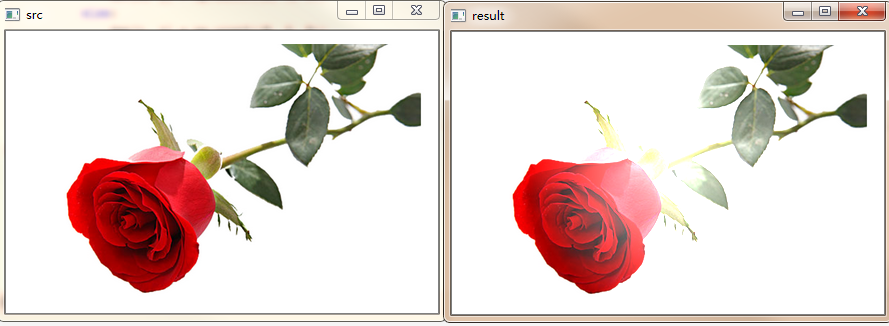
图像光照特效
主要是通过双层循环遍历图像的各像素点,寻找图像的中心点,再通过计算当前点到光照中心的距离(平面坐标系中两点之间的距离),判断该距离与图像中点圆半径的大小关系,中心圆范围内的图像灰度值增强,范围外的图像灰度值保留,并结合边界范围判断生成最终的光照效果。
importmath
img= cv2.imread("rose.jpg", 1)
rows, cols= img.shape[:2]
centerX= int(rows / 2)
centerY= int(cols / 2)
radius=min(centerX, centerY)
strength= 200dst= np.zeros((rows, cols, 3), dtype=np.uint8)for i inrange(rows):for j inrange(cols):#计算当前点到光照中心距离
distance = math.pow((centerY - j ), 2) + math.pow((centerX - i), 2)
B=img[i, j][0]
G= img[i, j][1]
R= img[i, j][2]if distance < (radius *radius):
result= int(strength * (1.0 - math.sqrt(distance) /radius))
B= img[i, j][0] +result
G= img[i, j][1] +result
R= img[i, j][2] +result#判断边界,防止越界
B = min(255, max(0, B))
G= min(255, max(0, G))
R= min(255, max(0, R))
dst[i, j]=np.uint8((B, G, R))else:
dst[i, j]=np.uint8((B, G, R))
cv2.imshow("src", img)
cv2.imshow("result", dst)if cv2.waitKey() == 27:
cv2.destroyAllWindows()
效果如下:
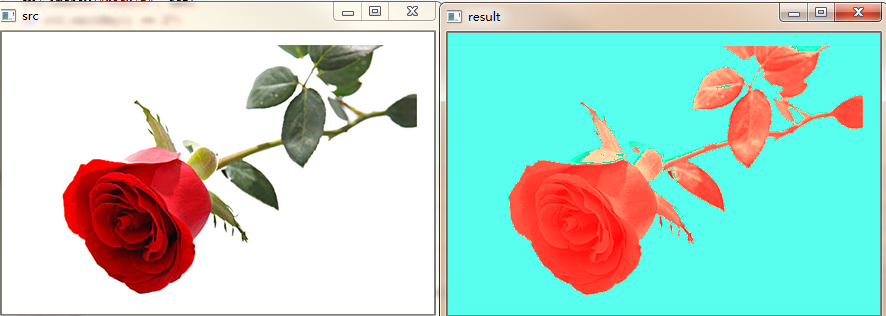
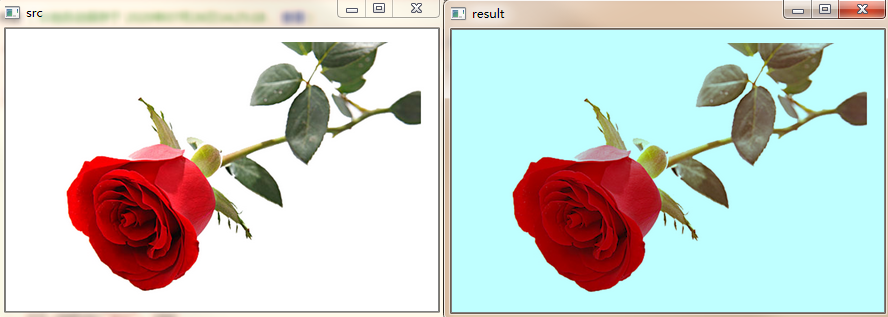
图像流年特效
将原始图像的任一种元素(B/G/R)通道的像素开根号,再乘以一个权重参数,产生流年效果。
importmath
img= cv2.imread("rose.jpg", 1)
rows, cols= img.shape[:2]
dst= np.zeros((rows, cols, 3), dtype=np.uint8)for i inrange(rows):for j inrange(cols):#R通道的数值开平方再乘以12
B =img[i, j][0]
G= img[i, j][1]
R= math.sqrt(img[i, j][2]) * 12R= min(255, max(0, R))
dst[i, j]=np.uint8((B, G, R))
cv2.imshow("src", img)
cv2.imshow("result", dst)if cv2.waitKey() == 27:
cv2.destroyAllWindows()
效果如下:
图像滤镜特效
#获取滤镜颜色
defgetBGR(img, table, i, j):#获取图像颜色
b, g, r =img[i][j]#计算标准颜色表中颜色的位置坐标
x = min(255, int(g / 4 + int(b / 32) * 64))
y= min(255, int(r / 4 + int((b % 32) / 4) * 64))#返回滤镜颜色表中对应的颜色
returntable[x][y]#读取原始图像
img = cv2.imread('rose.jpg')
lj_map= cv2.imread('table.png')#获取图像行和列
rows, cols = img.shape[:2]#新建目标图像
dst = np.zeros((rows, cols, 3), dtype=np.uint8)#循环设置滤镜颜色
for i inrange(rows):for j inrange(cols):
dst[i][j]=getBGR(img, lj_map, i, j)#显示图像
cv2.imshow('src', img)
cv2.imshow('dst', dst)if cv2.waitKey() == 27:
cv2.destroyAllWindows()
效果如下:

转自: https://blog.csdn.net/Eastmount/article/details/99566969


 92
92


 被折叠的 条评论
为什么被折叠?
被折叠的 条评论
为什么被折叠?
 到【灌水乐园】发言


