步骤1:目的步骤2:eclipse 版本步骤3:使用git方式导入项目步骤4:选择Clone URI步骤5:输入git参数步骤6:是否提供密码提示步骤7:选择分支步骤8:本地存放位置步骤9:导入此项目到Eclipse中步骤10:确定位置步骤11:运行HelloGit
步骤 1 : 目的
本知识点讲解如何拉一个现成的java 项目到eclipse中,并跑起来步骤 2 : eclipse 版本
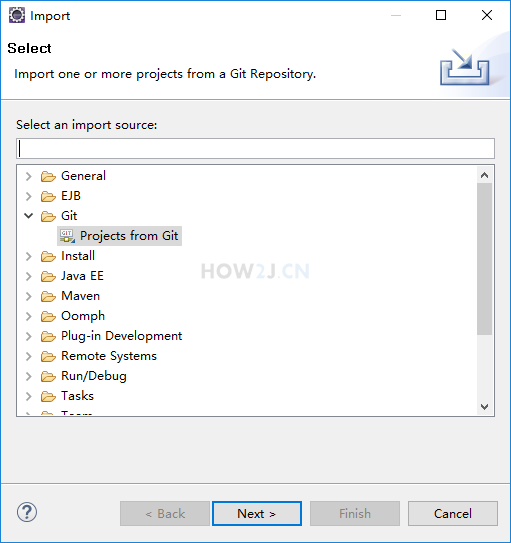
目前使用的是eclipse ee mar 3.1 版本,内置了对git的支持, 学习本课程请保持IDE版本一致,否则操作会有区别,影响学习:下载 Eclipse步骤 3 : 使用git方式导入项目
菜单-File->import->Git->Projects from Git
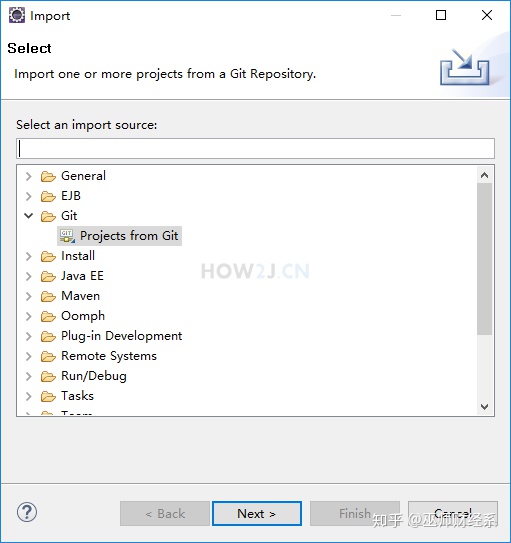
![b918e3a927db461fe2c1b1d61c1ba963.png](https://img-blog.csdnimg.cn/img_convert/b918e3a927db461fe2c1b1d61c1ba963.png)
步骤 4 : 选择Clone URI
这表示使用某个服务器上的git资源
![64a0a83763ba9adf5ce0d7ae6e9dcdfc.png](https://img-blog.csdnimg.cn/img_convert/64a0a83763ba9adf5ce0d7ae6e9dcdfc.png)
步骤 5 : 输入git参数
URI: https://github.com/how2j/hellogit.git
Host: http://github.com
Respository path: /how2j/hellogit.git
按理说只要URI输入了地址,后面两个参数就会自动生成
然后输入账号密码
最后Store in Secure Store勾上,表示Eclipse会保持你的账号密码。
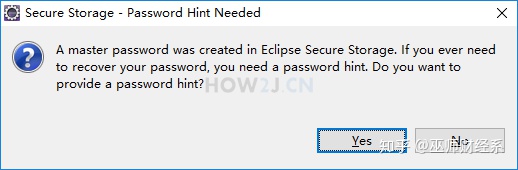
![ddb56fc8d55412a3ed35f53144492e17.png](https://img-blog.csdnimg.cn/img_convert/ddb56fc8d55412a3ed35f53144492e17.png)
步骤 6 : 是否提供密码提示
询问是否需要提供密码提示信息,一般都选择NO
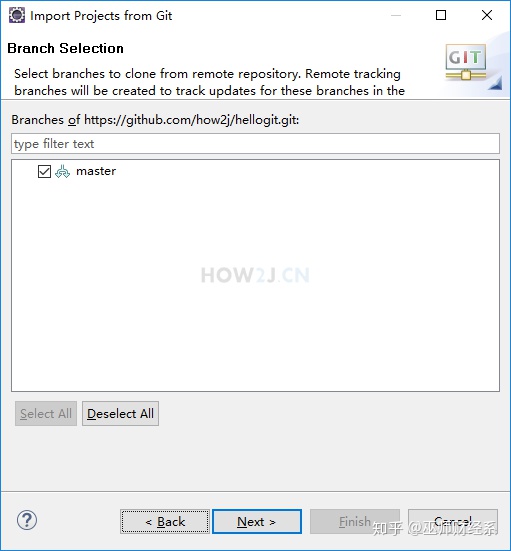
![908454763f2b8a10e211da791a621de6.png](https://img-blog.csdnimg.cn/img_convert/908454763f2b8a10e211da791a621de6.png)
步骤 7 : 选择分支
这是一个简单项目,只有一个分支,选master
![03fd77a291370330e0fbc0689eefb3c8.png](https://img-blog.csdnimg.cn/img_convert/03fd77a291370330e0fbc0689eefb3c8.png)
步骤 8 : 本地存放位置
把项目放在e:projecthellogit 这个地方
![c411d7fa1358bc5d122bcfb4f1cd6e1f.png](https://img-blog.csdnimg.cn/img_convert/c411d7fa1358bc5d122bcfb4f1cd6e1f.png)
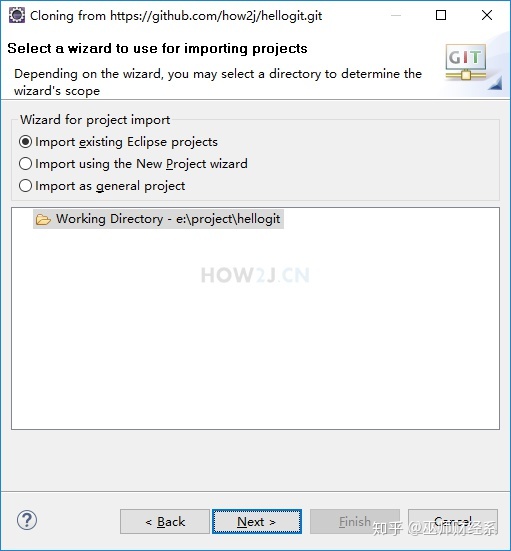
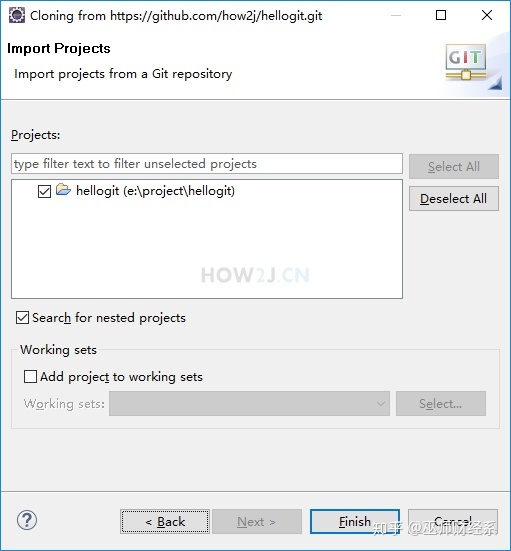
步骤 9 : 导入此项目到Eclipse中
选择import existing Eclipse projects
![c3fa0e134bb2a0216b0009e4811988f5.png](https://img-blog.csdnimg.cn/img_convert/c3fa0e134bb2a0216b0009e4811988f5.png)
步骤 10 : 确定位置
![b940db2ab91bd9eed532f3eb4e10fcbf.png](https://img-blog.csdnimg.cn/img_convert/b940db2ab91bd9eed532f3eb4e10fcbf.png)
步骤 11 : 运行HelloGit
这样hellogit这个项目就到了Eclipse里了,接下来打开hellogit这个包,运行HelloGit
![10bbf95692d31b3ba9d3fec789884e84.png](https://img-blog.csdnimg.cn/img_convert/10bbf95692d31b3ba9d3fec789884e84.png)
以上内容均可在
![818069f7c0b4ff13586eb45e95544a77.png](https://img-blog.csdnimg.cn/img_convert/818069f7c0b4ff13586eb45e95544a77.png)
免费学习。