


在日常的测试过程中,我们为了更好的捕获异常信息,不仅仅是查看日志信息,更重要的事界面截图,最终可以达到有图有真相的效果。
截图方法:
方法1:
save_screenshot()该方法直接报错当前屏幕截图到当前脚本的文件位置。代码如下:
driver.save_screenshot('logout.jpg')方法2:
get_screenshot_as_file(self,filename)该方法直接将截图保存在指定位置,代码如下:
driver.get_screenshot_as_file('./images/logout.png')测试场景:
网易云APP登录授权界面截图
相关代码实现,我们使用第二种方法:
# -*- coding: utf-8 -*-
from appium import webdriver
from time import sleep
desired_caps={}
desired_caps['platformName'] = 'Android'
desired_caps['deviceName'] = 'emulator-5554'
desired_caps['platformVersion'] = '7.1.2'
desired_caps['app'] = r"C:UsersPCDesktopwyy.apk"
desired_caps['appPackage'] = 'com.netease.cloudmusic'
desired_caps['appActivity'] = 'com.netease.cloudmusic.activity.LoadingActivity'
desired_caps['no_Reset'] = 'true'
desired_caps['resetKeyboard'] = 'true'
desired_caps['unicodeKeyboard'] = 'true'
desired_caps['automationName']= 'uiautomator2'
driver = webdriver.Remote('http://localhost:4723/wd/hub',desired_caps)
driver.implicitly_wait(5)  #隐式等待
# # driver.quit()
driver.find_element_by_id('com.netease.cloudmusic:id/as6').click()
driver.find_element_by_id('com.netease.cloudmusic:id/c0o').click()
#保存截图
driver.get_screenshot_as_file('./picture/agree.png')
driver.find_element_by_id('com.android.packageinstaller:id/permission_allow_button').click()
driver.get_screenshot_as_file('./picture/agree1.png')
driver.find_element_by_id('com.android.packageinstaller:id/permission_allow_button').click()
driver.implicitly_wait(10)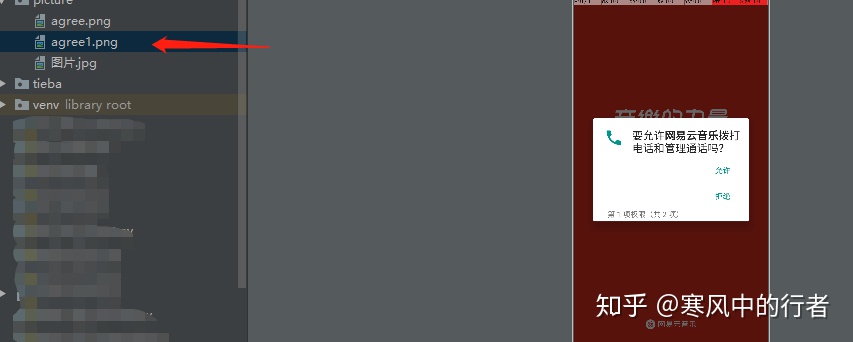
图片生产指定文件夹,运行成功。
滑动操作
测试中不免遇到需要滑动界面的操作,向上,向下,向左,向右一类的操作,appium自动化如何实现这些操作呢?
Appium官方给的swipe方法如下:
    def swipe(self, start_x, start_y, end_x, end_y, duration=None):
        """Swipe from one point to another point, for an optional duration.

        :Args:
         - start_x - x-coordinate at which to start
         - start_y - y-coordinate at which to start
         - end_x - x-coordinate at which to stop
         - end_y - y-coordinate at which to stop
         - duration - (optional) time to take the swipe, in ms.

        :Usage:
            driver.swipe(100, 100, 100, 400)
下面主要的滑动操作如下:
1.水平滑动
2.垂直滑动
3.任意方向滑动
执行相关操作前我们需要先获取当前屏幕尺寸:
def get_size():
    x=driver.get_window_size()['width']
    y=driver.get_window_size()['height']
    return x,y
垂直滑动代码封装如下:
def swipeUp():
    l = get_size()
    x1 = int(l[0] * 0.5)
    y1 = int(l[1] * 0.95)
    y2 = int(l[1] * 0.35)
    driver.swipe(x1, y1, x1, y2, 1000)
水平滑动操作代码如下:
def swipeLeft():
    l=get_size()
    x1=int(l[0]*0.9)
    y1=int(l[1]*0.5)
    x2=int(l[0]*0.1)
    driver.swipe(x1,y1,x2,y1,1000)
当然遇到一些指定界面的滑动我们就需要自定义相关滑动操作
driver.swipe(start_x, start_y, end_x, end_y)


 1729
1729


 被折叠的 条评论
为什么被折叠?
被折叠的 条评论
为什么被折叠?
 到【灌水乐园】发言


