


ASP即Active Server Pages,是Microsoft开发的服务器端脚本环境,可用来创建动态交互式网页。ASP简单、直观,易于理解。在计算机专业和物联网专业的小学期课程中,我们就将使用HTML+JS+ASP+Access的组合,创建一个小型网站程序。

我们执行ASP脚本需要服务端的运行环境。而本文就将以我们使用最广泛的Windows 10为例,带领大家一同安装所需的运行环境。
安装IIS


右击开始按钮,选择应用与功能。

向下翻页,找到“相关设置”,
点击“程序与功能”。
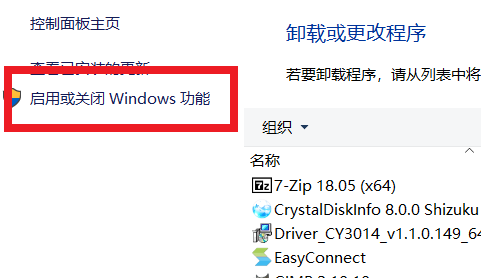
点击“启用或关闭Windows功能”。
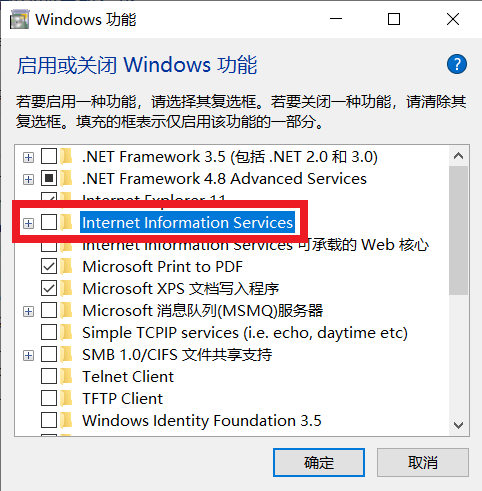
找到Internet Information Services,在其前面的框里点击,此时框变成填充状态(黑方块)。
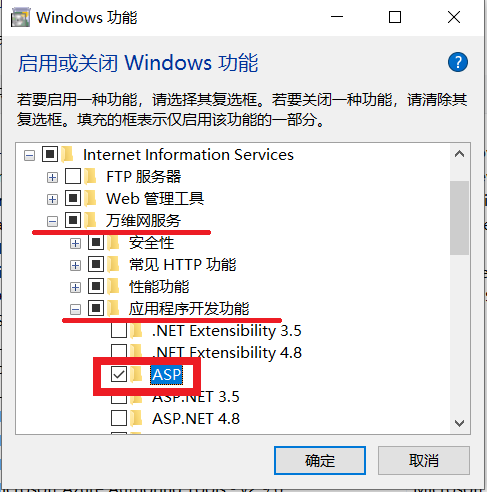
依次点开"IIS"、“万维网”、“应用程序开发功能”前的加号,找到"ASP",将其打勾。
点击确定,开始安装。

安装完成后,可在开始菜单的Windows管理工具中找到IIS管理器。

IIS的默认网站根目录地址位于C:\inetpub\wwwroot。

笔者编写了"Hello, World"代码,放到了网站根目录里。

在浏览器中访问这个页面( http://localhost/hello.asp ),成功打印出"Hello, World" 。

下面简单介绍一下ASP的配置。

打开IIS管理器,在左侧选择Default Web Site,点击右侧的"ASP",就可以进入配置页面了。
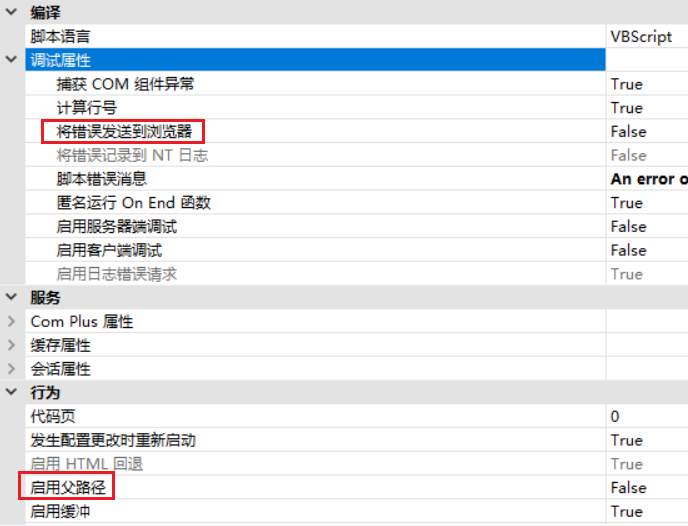
★这里主要说两个配置★
①将错误发送到浏览器
打开这个选项,就可以把ASP执行的错误信息打印到浏览器中,方便调试。不过生产环境可千万别打开哦~
②启用父路径
如果在ASP代码中使用了这个ASP文件的父目录的文件,那么就需要打开这个选项才能正常运行。
安装Access Database Engine

浏览器打开下载地址
https://www.microsoft.com/en-us/download/details.aspx?id=54920
点击Download,下载Access Database Engine 2016。

在弹出的选框中选择64位,点击Next下载并安装。
安装成功后即可在ASP中使用Access数据库(accdb格式)。
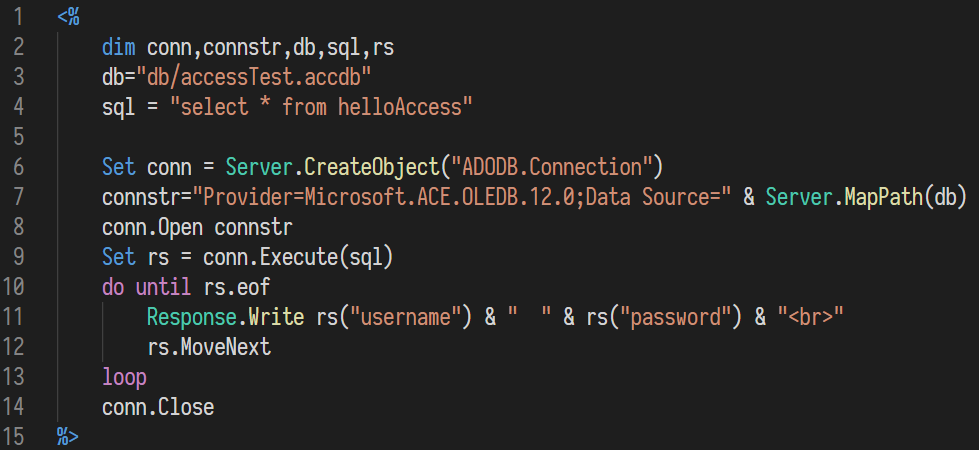
这里,笔者创建了一个数据库的访问例子。

访问这个页面,可以看到,页面成功打印出来了保存在数据库中的信息。
然而,我们刚才这样做有一个问题,那就是我们没有给数据库文件的写权限,也就是说我们只能读取,却不能写入。
写入这个数据库要求对数据库文件本身和数据库所在文件夹都有写权限。为了简单,我们直接建立一个新文件夹放置数据库,并加上写权限。
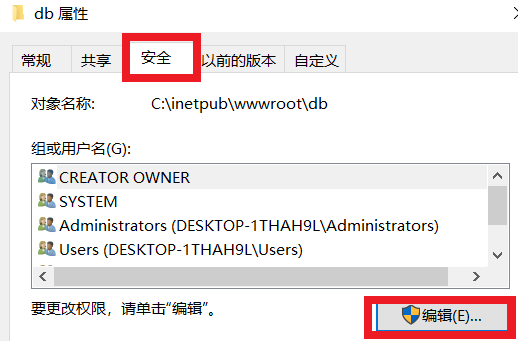
右键新文件夹,属性,选择安全选项卡。

这里我们粗暴的给了任何用户(Everyone)的权限。
点击添加,输入everyone,确定。

在everyone的权限框中的"完全控制"的"允许"处打勾,设置权限设置,确定。
此时把数据库文件放到这个文件夹里面,就可以在ASP正常读写这个数据库了。
到了这里,基本的环境配置就已经结束了,这也意味着,大家Web开发的旅途马上就要启程了。
那么,祝大家代码一遍通过,没有BUG!
本文作者所用的示例数据库和脚本可以在这里下载哦。
https://everything411.top/files/HelloASP.zip
THE
END
排版 | everything411

编写 | everything411

审核 | 养生阿皮


 99
99


 被折叠的 条评论
为什么被折叠?
被折叠的 条评论
为什么被折叠?
 到【灌水乐园】发言


