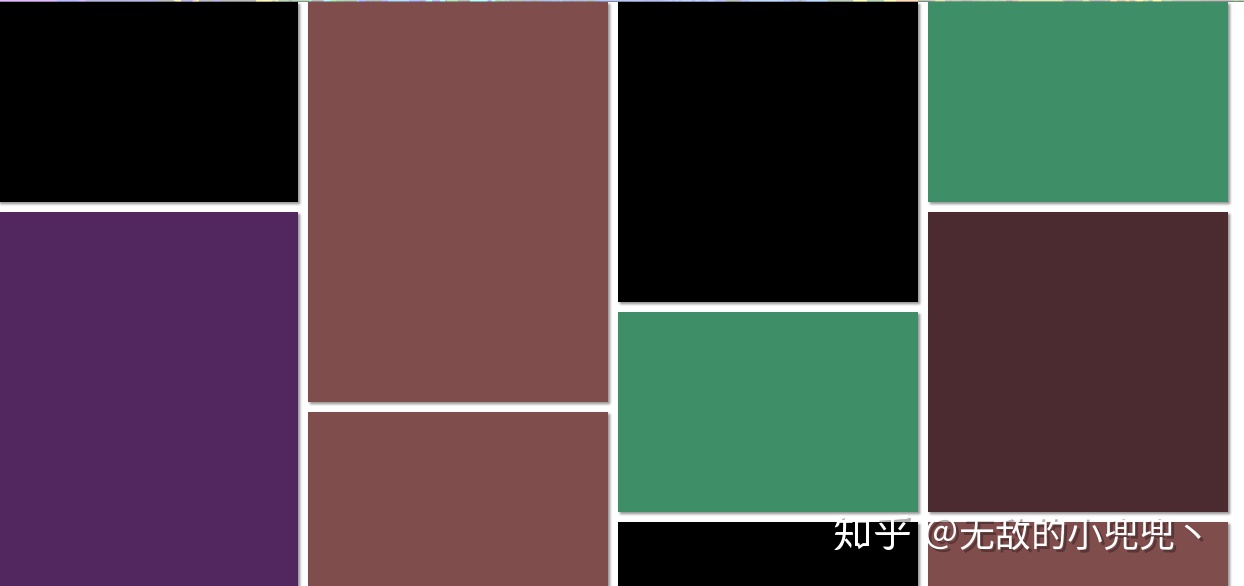
瀑布流布局现在是很多网站用来展示页面的主要方式,今天就来记录一下怎样用原生js来实现。
先来看一下具体效果,这里就用不同颜色,不同大小的颜色快来表示图片了

实现思路:
根据浏览器宽度和每张照片的宽度来得到页面应该分为几列,然后是第一列显示在同一高度,从第二列开始,每多一张照片就在上一列高度最低的照片下面来显示,以此来实现最后的瀑布流效果,当然照片的位置应该采取绝对定位,这样才能更好的控制他出现的位置。
具体实现代码:
css:
* {
 margin: 0;
 padding: 0;
 position: relative;
 }

 .item {
 box-shadow: 2px 2px 2px #999;
 position: absolute;           //此处用div块代表图片,采取绝对定位的方式
 }
HTML:
<div class="box" id="box">
        <div class="item" style="width:300px;height:200px;background-color: black"></div>
        <div class="item" style="width:300px;height:400px;background-color: rgb(128, 77, 77)"></div>
        <div class="item" style="width:300px;height:300px;background-color: black"></div>
        <div class="item" style="width:300px;height:200px;background-color: rgb(62, 143, 103)"></div>
        <div class="item" style="width:300px;height:500px;background-color: rgb(82, 39, 95)"></div>
        <div class="item" style="width:300px;height:300px;background-color: rgb(75, 43, 47)"></div>
        <div class="item" style="width:300px;height:200px;background-color: rgb(62, 143, 103)"></div>
        <div class="item" style="width:300px;height:400px;background-color: rgb(128, 77, 77)"></div>
        <div class="item" style="width:300px;height:200px;background-color: black"></div>
        <div class="item" style="width:300px;height:400px;background-color: rgb(128, 77, 77)"></div>
        <div class="item" style="width:300px;height:200px;background-color: rgb(62, 143, 103)"></div>
        <div class="item" style="width:300px;height:200px;background-color: rgb(62, 143, 103)"></div>
    </div>
JS:
var box = document.getElementById('box');
        var items = box.children; //获取所有照片
        var gap = 10; //设置照片之间的间隔
        window.onload = function() {
            waterFall();
            function waterFall() {
                var pageWidth = window.innerWidth; //获取网页宽度
                var itemWidth = items[0].offsetWidth; //获取单张照片的宽度
                var columns = parseInt(pageWidth / (itemWidth + gap)); //获取列数
                var arr = []; //设置一个空数组,用来放置第一列每张照片的高度
                for (var i = 0; i < items.length; i++) {
                    //设置第一行的布局方式
                    if (i < columns) {
                        items[i].style.top = 0;
                        items[i].style.left = (itemWidth + gap) * i + 'px';
                        arr.push(items[i].offsetHeight);
                    } else { //设置第二行开始每张照片的位置
                        var minHeight = arr[0];
                        var index = 0;
                        //找到上一行高度最低的照片
                        for (var j = 0; j < arr.length; j++) {
                            if (minHeight > arr[j]) {
                                minHeight = arr[j];
                                index = j;
                            }
                        }
                        //将该照片放置到上一张照片下面
                        items[i].style.top = arr[index] + gap + 'px';
                        items[i].style.left = items[index].offsetLeft + 'px';
                        //重新设置数组中高度
                        arr[index] = arr[index] + items[i].offsetHeight + gap;
                    }
                }
            }
            //当页面size改变时,重新渲染页面
            window.onresize = function() {
                waterFall();
            }
        }
这样,一个简单的瀑布流就实现了!


 111
111

 被折叠的 条评论
为什么被折叠?


