


vue接入腾讯地图
最近在使用vue接入腾讯地图也是饱受折磨,因为本身对vue就不是很会,借此机会能好好学学vue。
里面代码可能有的地方会有不妥之处,后面会改进的
一、接入腾讯地图
首先在
马上开始接入 - 入门指南 | 腾讯位置服务lbs.qq.com,这里面申请一个key
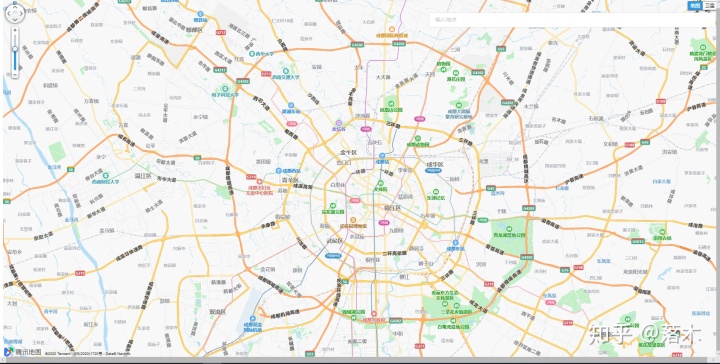
效果图如下
1、在vue里面的index.html中引用地图
<script charset="utf-8" src="http://map.qq.com/api/js?v=2.exp&key=你申请的key"></script>
<!--定位-->
<script src="https://3gimg.qq.com/lightmap/components/geolocation/geolocation.min.js"></script>2、在vue页面中写如下代码
里面代码包含了,当前定位信息
<template>
<div class="index">
<div id="container"></div>
</div>
</template>
<script>
let map, marker, polygon, drawingManager, lngLat,ap;
export default {
name: 'Index',
data() {
return {
position:[
{
longitude: 0,//经度
latitude:0,//纬度
city:''
}
]
};
},
methods:{
/**
* /定位获得当前位置信息
*/
getMyLocation() {
var geolocation = new qq.maps.Geolocation("你申请的key", "名字");
geolocation.getLocation(this.showPosition, this.showErr);
},
showPosition(position) {
console.log(position);
this.position.latitude = position.lat;
this.position.longitude = position.lng;
this.position.city = position.city;
this.setMapData();
},
//定位失败再请求定位,测试使用
showErr() {
console.log("定位失败,请重试!");
this.getMyLocation();
},
/**
* 位置信息在地图上展示
*/
setMapData() {
var myLatlng = new qq.maps.LatLng(this.position.latitude, this.position.longitude);
var myOptions = {
zoom: 16,
center: myLatlng,
mapTypeId: qq.maps.MapTypeId.ROADMAP
}
//获取dom元素添加地图信息
map = new qq.maps.Map(document.getElementById("container"), myOptions)
//给定位的位置添加图片标注
marker = new qq.maps.Marker({
position: myLatlng,
map: map,
draggable: true //允许鼠标拖动
})
},
},
mounted() {
this.getMyLocation();
}
}
</script>
<style>
#container{
width: 100%;
height: 100%;
position: absolute;
}
</style>
二、鼠标点击地图,获得相应位置信息
在vue的methods中写入此方法,再在setMapData()方法中调用此方法即可,具体情况可根据自己需求你来写,我这里是需要用这个点击鼠标获取位置信息借此跳转页面来测试其他功能
 methods:{
    /**
         * 鼠标点击获取标记位置事件
         */
        mouseClick () {
            const _this = this
            qq.maps.event.addListener(map, 'click', function (event) {
                if(!marker) {
                    marker=new qq.maps.Marker({
                        position: event.latLng,
                        map:map
                    })
                    return
                }
                marker.setPosition(event.latLng)
                _this.position.latitude = event.latLng.getLat();
                _this.position.longitude = event.latLng.getLng();
            })
        },
},
三、在地图上搜索地点
如图
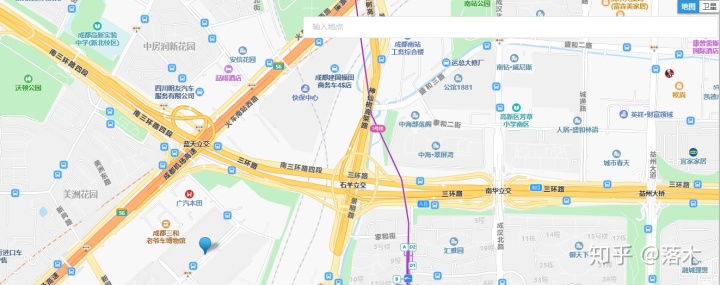
在vue中的index.html中加入
<script charset="utf-8" src="https://map.qq.com/api/js?v=2.exp&key=你的key&libraries=place"></script> 这一步很关键,因为之前我看是加入了这个cdn,但是没注意到后面还拼了个libraries=place这个,导致一直搜索不出来
然后在vue的method加入如下代码,再在setMapData()方法中调用此方法即可
template中加入如下代码
<el-input v-model="input" type="text" id="place" placeholder="请输入地点"></el-input>
/**搜索地点 */
search(){
ap = new window.qq.maps.place.Autocomplete(document.getElementById('place'));
var keyword = "";
//调用Poi检索类。用于进行本地检索、周边检索等服务。
var searchService = new window.qq.maps.SearchService({
complete : function(results){
if(results.type === "CITY_LIST") {
searchService.setLocation(results.detail.cities[0].cityName);
searchService.search(keyword);
return;
}
var pois = results.detail.pois;
var latlngBounds = new window.qq.maps.LatLngBounds();
for(var i = 0,l = pois.length;i < l; i++){
var poi = pois[i];
latlngBounds.extend(poi.latLng);
var marker = new window.qq.maps.Marker({
map:map,
position: poi.latLng
});
marker.setTitle(poi.name);
}
map.fitBounds(latlngBounds);
}
});
//添加监听事件
window.qq.maps.event.addListener(ap, "confirm", function(res){
keyword = res.value;
searchService.search(keyword);
});
}四、绘制围栏
这部分借鉴了
在vue中使用腾讯地图绘制围栏功能_soberbloke的博客-CSDN博客blog.csdn.net
在vue中的index.html中加入
<script charset="utf-8" src="https://map.qq.com/api/js?v=2.exp&key=你的key&libraries=drawing"></script>注意:到后面还拼了个libraries=drawing
目前此功能正在完善,但是具体的思路有了。代码部分有个问题,就是在drawingManager.setMap(map)这里说我传入的map值或者类型不对,但是我传入的map其实是没有为题的。所有正在完善。提供代码,提供个思路
这部分在vue中所有代码如下:
<template>
<div class="addpolygon">
<div id="container">
<!-- <div class="mapBtn">
<el-button size="small" type="danger" @click="clearOverlays()">清除</el-button>
<el-button size="small" type="primary" @click="sendLngLat">确认</el-button>
<el-button size="small" type="primary" @click="sendMsg">返回</el-button>
</div> -->
</div>
</div>
</template>
<script>
import { Notification } from 'element-ui';
let marker, polygon, drawingManager, lngLat,ap, map;
let path = [];// 设置回显数据参数
let overlaysArray = []
import axios from 'axios'
export default {
name: 'addpolygon',
data() {
return {
position:[
{
longitude: 0,//经度
latitude:0,//纬度
city:''
}
],
polygonPath: [
{
provider: '',
polygonsVOS: [
{
lat: '',
lng: '',
q: '',
p: ''
}
]
}
],
lngLatData: [],
notify:'',
input:''
};
},
methods:{
// 子组件给父组件传值(确认按钮)
sendLngLat() {
if (lngLat == undefined) {
lngLat = path;
}
const h = this.$createElement;
},
/**
* 定位获得当前位置信息
*/
getMyLocation() {
var geolocation = new window.qq.maps.Geolocation("你的key", "名字");
geolocation.getLocation(this.showPosition, this.showErr);
},
showPosition(position) {
console.log(position);
this.position.latitude = position.lat;
this.position.longitude = position.lng;
this.position.city = position.city;
this.setMapData();
},
//定位失败再请求定位,测试使用
showErr() {
console.log("定位失败,请重试!");
this.getMyLocation();
},
/**
* 位置信息在地图上展示
*/
setMapData() {
var myLatlng = new window.qq.maps.LatLng(this.position.latitude, this.position.longitude);
console.log("当前位置:"+this.position.latitude, this.position.longitude)
var myOptions = {
zoom: 16,
center: myLatlng,
mapTypeId: window.qq.maps.MapTypeId.ROADMAP
}
//获取dom元素添加地图信息
map = new window.qq.maps.Map(document.getElementById("container"), myOptions)
console.log("初始定义map:" + map)
//给定位的位置添加图片标注
marker = new window.qq.maps.Marker({
position: myLatlng,
map: map
})
/**绘制围栏 */
this.addpolygon();
},
/**
* 绘制地图围栏
*/
addpolygon() {
const _this = this
drawingManager = new window.qq.maps.drawing.DrawingManager({
drawingMode: window.qq.maps.drawing.OverlayType.null, // 默认选中绘制方式
drawingControl: true,
drawingControlOptions: {
position: window.qq.maps.ControlPosition.TOP_CENTER,
// 表头显示区域
drawingModes: [
window.qq.maps.drawing.OverlayType.MARKER,
window.qq.maps.drawing.OverlayType.CIRCLE,
window.qq.maps.drawing.OverlayType.POLYGON,
window.qq.maps.drawing.OverlayType.POLYLINE,
window.qq.maps.drawing.OverlayType.RECTANGLE
]
},
markerOptions: {
visible: false
},
// 多边形样式
polygonOptions: {
editable: true,
strokeColor: new window.qq.maps.Color(202, 67, 58, 0.8),
fillColor: new window.qq.maps.Color(202, 67, 58, 0.1),
clickable: false
},
// 圆形样式
circleOptions: {
fillColor: new window.qq.maps.Color(255, 208, 70, 0.3),
strokeColor: new window.qq.maps.Color(88, 88, 88, 1),
strokeWeight: 3,
clickable: false
}
});
drawingManager.setMap(map);
window.qq.maps.event.addListener(drawingManager, 'overlaycomplete', function(event) {
// clearOverlays(overlaysArray)
lngLat = [];
overlaysArray.push(event.overlay);
for (const item of event.overlay.getPath().elems) {
const lng = item.getLng();
const lat = item.getLat();
lngLat.push({
lat: lat,
lng: lng
});
}
console.log("绘图后获得的:"+lngLat); // 获得相应的经纬度值
});
},
},
mounted() {
this.getMyLocation()
}
}
</script>
<style>
#container{
width: 84%;
height: 87%;
position: absolute;
}
.mapBtn {
position: absolute;
top: 20px;
right: 500px;
z-index: 999;
}
#place{
position: absolute;
top: 20px;
width: 40%;
right:10px;
z-index:999
}
</style>
后面绘制地图的代码部分如果我处理这个部分,应该是可以将绘制好的围栏信息传入后台
五、显示后台数据库中的所有地图围栏信息
在显示围栏这部分,出了个失误一直没发现,知道最后整合的时候才发现的问题。就是一开始是在mounted中调用的查询全部围栏的方法getAllPolygons() 第一次加载的时候没有问题,但是我从这个页面出去然后回到这个页面的时候,加载的围栏就会消失。这个问题是vue中加载顺序导致的。
后来我直接在加载模板的时候就调用这个方法最后成功解决这个办法。
如图所示

这部分显示围栏,并不是显示单一围栏。而是显示数据库中存入的所有围栏
request.js 部分代码如下
const url = 'http://127.0.0.1:8081'; // 开发
export default {url}
在显示地图围栏这部分,前提是你的后台提供了这部分的功能接口
<template>
<div class="showpolygon">
<div id="container"></div>
</div>
</template>
<script>
import { Notification } from 'element-ui';
let map, marker, polygon, drawingManager, lngLat,ap;
let path = [];// 设置回显数据参数
import url from '@/request';
import axios from 'axios'
export default {
name: "showpolygon",
data() {
return {
position:[
{
longitude: 0,//经度
latitude:0,//纬度
city:''
}
],
polygonPath: [
{
provider: '',
polygonsVOS: [
{
lat: '',
lng: '',
q: '',
p: ''
}
]
}
],
markersArray: [],
notify:'',
input:''
};
},
methods:{
/**
*定位获得当前位置信息
*/
getMyLocation() {
var geolocation = new window.qq.maps.Geolocation("你的key", "名字");
geolocation.getLocation(this.showPosition, this.showErr);
},
showPosition(position) {
console.log(position);
this.position.latitude = position.lat;
this.position.longitude = position.lng;
this.position.city = position.city;
this.setMapData();
},
//定位失败再请求定位,测试使用
showErr() {
console.log("定位失败,请重试!");
this.getMyLocation();
},
/**
* 位置信息在地图上展示
*/
setMapData() {
var myLatlng = new qq.maps.LatLng(this.position.latitude, this.position.longitude);
console.log("当前位置:"+this.position.latitude, this.position.longitude)
var myOptions = {
zoom: 16,
center: myLatlng,
mapTypeId: qq.maps.MapTypeId.ROADMAP
}
//获取dom元素添加地图信息
map = new qq.maps.Map(document.getElementById("container"), myOptions)
//给定位的位置添加图片标注
marker = new qq.maps.Marker({
position: myLatlng,
map: map,
})
//查询所有后台围栏
this.getAllPolygons()
},
/**
* 获取所有围栏
*/
getAllPolygons(){
const _this = this;
axios.get(url.url + "/v1/polygons/findAll").then(function (response) {
_this.polygonPath = response.data
_this.showArrayPolygon()
})
.catch(function (error) {
console.error(error);
});
},
/**循环调用显示围栏方法 */
showArrayPolygon(){
const _this = this
for (const polygonpath of _this.polygonPath) {
path = []
for (const polygonsvos of polygonpath.polygonsVOS) {
path.push(new qq.maps.LatLng(polygonsvos.lat, polygonsvos.lng))
}
_this.showpolygons(path)
}
},
/**
* 显示围栏
*/
showpolygons(path) {
const _this = this
polygon = new qq.maps.Polygon({
map: map,
strokeColor: new qq.maps.Color(202, 67, 58, 0.8),
fillColor: new qq.maps.Color(202, 67, 58, 0.1)
});
polygon.setPath(path);
},
},
mounted() {
this.getMyLocation();
}
}
</script>
<style>
#container{
width: 100%;
height: 100%;
position: absolute;
}
#place{
position: absolute;
top: 20px;
width: 40%;
right:10px;
z-index:999
}
</style>
六、判断当前位置在不在围栏中
如图所示

这部分的功能主要是,获取当前位置并判断当前位置在不在地图中的围栏中,如果在则跳转页面。不在则显示不在围栏中的信息
request.js 部分代码如下
const url = 'http://127.0.0.1:8081'; // 开发
export default {url}
在显示地图围栏这部分,前提是你的后台提供了这部分的功能接口
<template>
<div class="index">
<div id="container"></div>
</div>
</template>
<script>
import { Notification } from 'element-ui';
let map, marker, polygon, drawingManager, lngLat,ap;
let path = [];// 设置回显数据参数
import url from '@/request';
import axios from 'axios'
export default {
name: 'Index',
data() {
return {
position:[
{
longitude: 0,//经度
latitude:0,//纬度
city:''
}
],
polygonPath: [
{
provider: '',
polygonsVOS: [
{
lat: '',
lng: '',
q: '',
p: ''
}
]
}
],
lngLatData: [],
notify:'',
input:''
};
},
methods:{
/**
* //定位获得当前位置信息
*/
getMyLocation() {
var geolocation = new qq.maps.Geolocation("你的key", "名字");
geolocation.getLocation(this.showPosition, this.showErr);
},
showPosition(position) {
console.log(position);
this.position.latitude = position.lat;
this.position.longitude = position.lng;
this.position.city = position.city;
this.setMapData();
},
//定位失败再请求定位,测试使用
showErr() {
console.log("定位失败,请重试!");
this.getMyLocation();
},
/**
* 位置信息在地图上展示
*/
setMapData() {
var myLatlng = new qq.maps.LatLng(this.position.latitude, this.position.longitude);
console.log("当前位置:"+this.position.latitude, this.position.longitude)
var myOptions = {
zoom: 16,
center: myLatlng,
mapTypeId: qq.maps.MapTypeId.ROADMAP
}
//获取dom元素添加地图信息
map = new qq.maps.Map(document.getElementById("container"), myOptions)
console.log("初始定义map:" + map)
//给定位的位置添加图片标注
marker = new qq.maps.Marker({
position: myLatlng,
map: map,
draggable: true
})
this.mouseClick()
//获取围栏信息
this.getAllPolygons()
this.existsPolygon();
},
/**
* 鼠标点击获取标记位置事件
*/
mouseClick () {
const _this = this
qq.maps.event.addListener(map, 'click', function (event) {
if(!marker) {
marker=new qq.maps.Marker({
position: event.latLng,
map:map
})
return
}
marker.setPosition(event.latLng)
console.log("鼠标点击位置:"+event.latLng)
_this.position.latitude = event.latLng.getLat();
_this.position.longitude = event.latLng.getLng();
_this.existsPolygon();
})
},
/**
* 获取所有围栏
*/
getAllPolygons(){
const _this = this;
axios.get(url.url + "/v1/polygons/findAll").then(function (response) {
_this.polygonPath = response.data
console.log("获取所有围栏信息:"+_this.polygonPath)
_this.showArrayPolygon()
})
.catch(function (error) {
console.error(error);
});
},
/**循环调用显示围栏方法 */
showArrayPolygon(){
const _this = this
for (const polygonpath of _this.polygonPath) {
path = []
for (const polygonsvos of polygonpath.polygonsVOS) {
path.push(new qq.maps.LatLng(polygonsvos.lat, polygonsvos.lng))
}
_this.showpolygons(path)
}
},
/**
* 显示围栏
*/
showpolygons(path) {
const _this = this
polygon = new qq.maps.Polygon({
map: map,
strokeColor: new qq.maps.Color(202, 67, 58, 0.8),
fillColor: new qq.maps.Color(202, 67, 58, 0.1)
});
polygon.setPath(path);
},
/**
* 当前位置是否在围栏中
*/
existsPolygon(){
const _this = this;
// console.log("当前位置:"+ _this.position.latitude,_this.position.longitude)
axios.post(url.url + "/v1/polygons/existPolygons", {
lng: _this.position.longitude, //如果改为在getMyLocation中调用该方法,该位置应该变为 obj.longitude和obj.latitude
lat: _this.position.latitude,
})
.then(function (response) {
// response.data以http or https开头,打开支付页面
if(response.data.indexOf("http") == 0){
window.location.href = response.data;
}else{
_this.$notify({
title: '定位失败',
message: '经度: '+ _this.position.longitude + ", 纬度:" + _this.position.latitude + "," + "信息:" + response.data,
type: 'success'
})
}
})
.catch(function (error) {
console.error(error);
});
},
},
mounted() {
this.getMyLocation();
}
}
</script>
<style>
#container{
width: 100%;
height: 100%;
position: absolute;
}
</style>
结语
整个接入完成之后是将这个地图功能全部整合到另一个vue写的后台管理系统中。整合过程踩了很多坑。
整个功能部分是在vue2.x的环境中写好的,但是后台管理是vue3.x所以出了一些问题
一开始接入的时候new qq.maps. 这个位置所有new 的qq.maps都出错了,然后网上百度了一番,找到了个解决办法,就是 new window.qq.maps 在qq的前面加上window就没问题了。
项目代码部分有问题 ,可以联系我。


 718
718


 被折叠的 条评论
为什么被折叠?
被折叠的 条评论
为什么被折叠?
 到【灌水乐园】发言


