


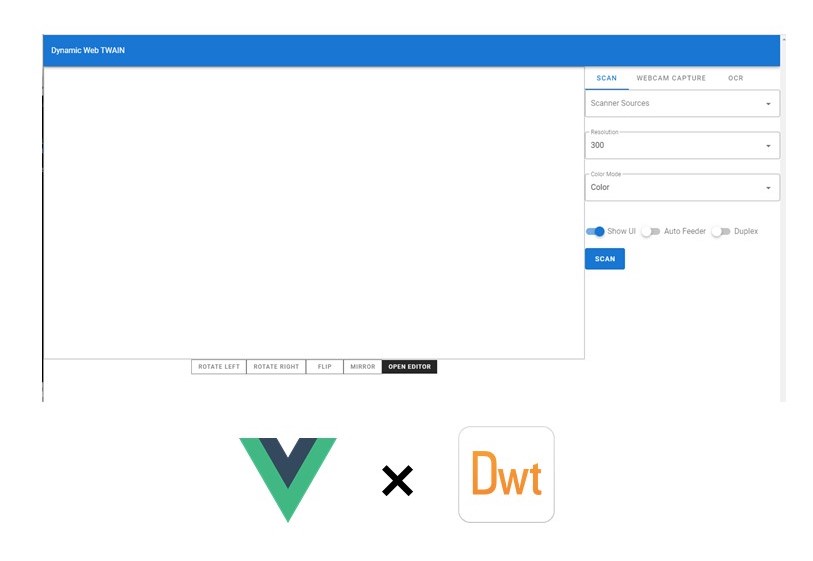
前端组件化是最近前端开发的趋势,组件化的应用可以快速地将组件装载与卸载以灵活地应对需求变更。在这篇文章里,我将用Vue.js与Dynamic Web TWAIN构建一个组件化的文档扫描Web应用。为了让应用更加的美观,我使用了Vuetify作为界面库。
准备工作
如果你还没有安装Dynamic Web TWAIN,那么可以去WebTwain Download - Dynamsoft下载安装以及申请一个密钥。现代化的前端应用需要Node.js提供本地运行环境以及包管理工具。如果你是初次接触现代前端应用的开发,可以前往 Run JavaScript Everywhere下载。当上述工具都安装完成后,我们需要安装vue-cli来帮助我们创建与管理项目。在终端命令行输入以下代码完成vue-cli的安装。
npm install -g @vue/cli创建项目
通过vue-cli,我们可以快速地基于模板创建一个vue项目。在终端内输入vue create dwt-vue,创建一个名为dwt-vue的项目。vue-cli会在创建项目前提供一些选项,因为我们暂时只有一个页面,也没有利用全局状态管理工具,因此其他项目常见的依赖,如vuex与vue-router,在这里不是必须的。 当dwt-vue被成功创建之后,在终端内将工作目录切换到dwt-vue文件夹下,然后在终端内输入以下命令,安装vuetify与Dynamic Web TWAIN。
vue add vuetify
npm install dwt
将Dynamic Web TWAIN与项目集成
我们在前一步已经安装了Dynamic Web TWAIN (dwt)。但对于开发而言还需要进行额外的配置。 首先,我们需要额外借助ncp帮我们在项目调试与打包前后复制文件。如果你的环境中没有安装ncp,可以通过npm install ncp进行安装。安装完成后,我们打开package.json对命令进行一些修改。
"scripts": {
    "serve": "ncp node_modules/dwt/dist public/resources/dwt && vue-cli-service serve",
    "build": "vue-cli-service build && ncp node_modules/dwt/dist public/resources/dwt",
    "lint": "vue-cli-service lint"
  }
我们将ncp node_modules/dwt/dist public/resources/dwt分别添加在serve命令之前、build命令之后,以保证我们的dwt依赖独立的被打包到发布文件夹中。因为dwt在初始化的时候需要从指定位置加载额外的文件进行配置,因此保证整个dwt库的相对独立非常的重要。 最后,我们在public文件夹下创建我们刚才指定的目录。
cd public
mkdir resources
cd resources
mkdir dwt
功能实现
加载Dynamic Web TWAIN
完成配置任务后,我们可以开始写代码实现需要的功能了。首先,我们在src/components下先创建一个DWT.vue文件,当然,你也可以选择直接修改模板创建的HelloWorld.vue。
<template>
  <div id="dwt-container">
  </div>
</template>

<script>
import dwt from 'dwt'

export default {
  name: 'dwt',
  data () {
    return {
      dwt: {
        obj: null,
        id: 'dwtObject',
        licenseKey: ''
      }
    }
  },
  mounted () {
    this.mountDWT()
  },
  methods: {
    mountDWT () {
      return new Promise((res, rej) => {
        this.unmountDWT()
          .then(() => {
            dwt.WebTwainEnv.UseLocalService = true;
            dwt.WebTwainEnv.ResourcesPath = "resources/dwt";
            dwt.WebTwainEnv.ProductKey = this.dwt.licenseKey
            dwt.WebTwainEnv.AutoLoad = false;
            dwt.WebTwainEnv.Containers = [];
            dwt.WebTwainEnv.IfAddMD5InUploadHeader = false;
            dwt.WebTwainEnv.IfConfineMaskWithinTheViewer = false;
            let dwtConfig = { WebTwainId: this.dwt.id }
            // By default, use local service is true
            dwt.WebTwainEnv.CreateDWTObjectEx(
                  dwtConfig,
                  (dwtObject) => { this.dwt.obj = dwtObject; res(true);},
                  (errStr) => { console.log(`failed to initialize dwt, message: ${errStr}`); rej(false);}
            )
          })
      })
    },
    /**
     * Delete dwt instance
     */
    unmountDWT () {
      return new Promise((res, rej) => {
        if (dwt.WebTwainEnv.DeleteDWTObject(this.dwt.id)) {
          res(true)
        } else {
          rej(false)
        }
      })
    }
  }
}
</script>

<style scoped>

</style>
然后,我们回到App.vue文件,引入DWT。 首先修改<script>部分,通过import引入组件,然后注册。
<script>
import HelloWorld from './components/HelloWorld';
import DWT from './components/DWT';

export default {
  name: 'App',
  components: {
    HelloWorld,
    DWT
  },
  data: () => ({
    //
  }),
};
</script>
接着,我们将<DWT />添加到模板中
<v-main>
<HelloWorld/>
<DWT />
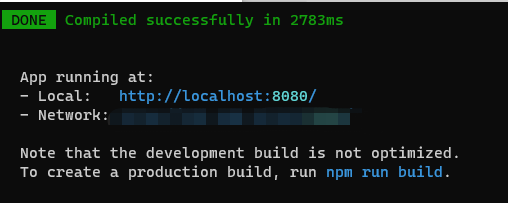
</v-main>对我们修改过的文件进行保存,随后在终端中敲下npm run serve,启动我们的项目。如果一切顺利,你将看到编译成功的提示,并通过给出的地址访问app。
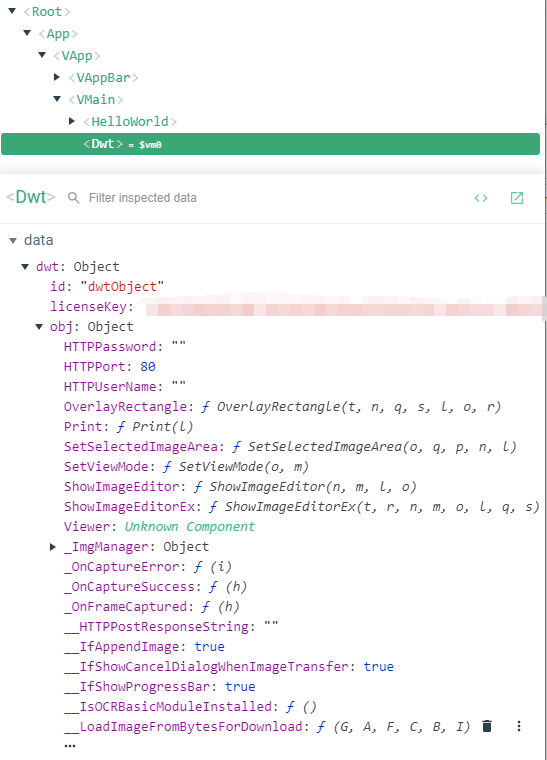
登录页面后,如果你看到开发者工具中的console面板没有报错,或者你通过Vue开发者工具看到Dwt下已经有了dwt instance的信息,证明我们成功的引入了Dynamic Web TWAIN。
实现扫描功能
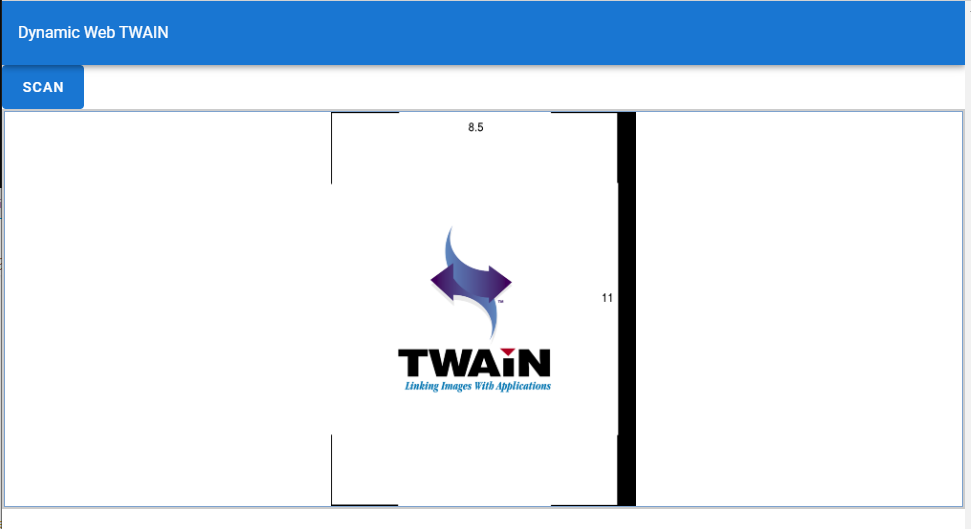
现在,我们来实现app的第一个功能,也是最基本的功能。我们通过调用DWT的接口,从扫描仪获取图像。 首先,我们把HelloWorld从App.vue内移除,然后回到DWT.vue中,添加一个按钮。然后在<script>部分调用相关的接口完成功能。按钮通过设置click事件调用方法完成扫描任务。 <template>部分:
<div id="dwt-control">
  <v-btn color="primary" large depressed @click="acquireImage">
    Scan
  </v-btn>
</div>
在<script>部分,向methods添加以下方法:
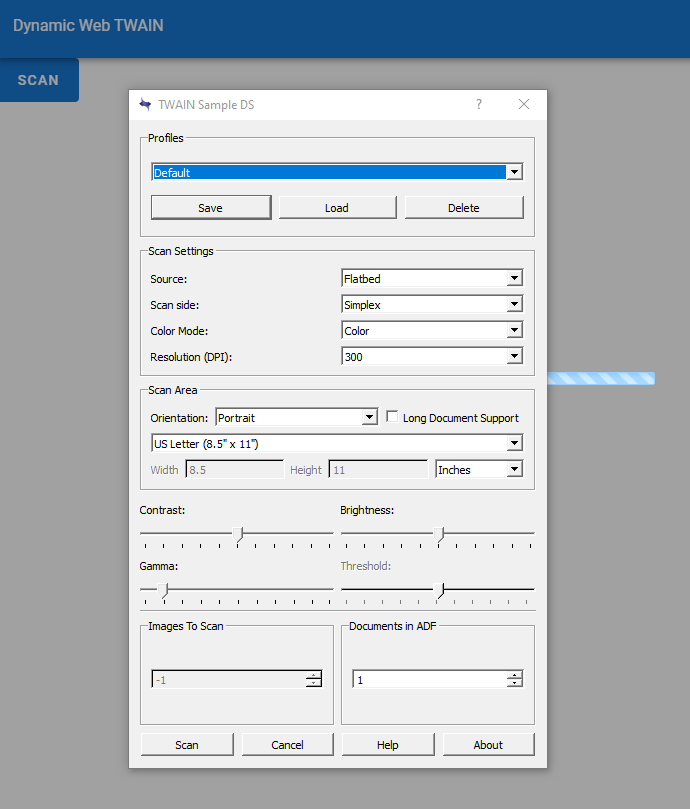
acquireImage () {
      const dwtObj = this.dwt.obj
      if (dwtObj) {
        if (dwtObj.UseLocalService) {
          let configure = {
            IfShowUI: true, // Show the setting UI of scanner
            PixelType: dwt.EnumDWT_PixelType.TWPT_SRGB, // Color type, can be black & white, grayscale, color
            Resolution: 300,  // Resolution of scanning
            IfFeederEnabled: false,
            IfDuplexEnabled: false,
            IfDisableSourceAfterAcquire: true
          }
          dwtObj.SelectSource(
            function () {
              var onAcquireSuccess = function () { dwtObj.CloseSource() }
              var onAcquireFailure = function () { dwtObj.CloseSource() }
              dwtObj.OpenSource()
              dwtObj.AcquireImage(configure, onAcquireSuccess, onAcquireFailure)
            }
          )
        } else {
          // Load externally
          dwtObj.LoadImageEx('', -1)
        }
      }
    }
保存修改,如果你关闭了服务,现在可以通过npm run serve重新启动,如果你未关闭服务,那么可以刷新页面尝试我们刚刚添加的功能。

绑定预览窗口
我们完成了扫描功能,但是扫描上来的图像还无法查看,我们需要一个预览窗口用来展示。在DWT.vue中,我们添加一个<div>用于存放预览窗口。
<div
    :id="this.viewer.id"
    :style="{ width: this.viewer.width, height: this.viewer.height }"
>
    <!-- DWT viewer -->
</div>
在<script>部分,我们对data添加一些字段用于保存我们的预览窗口配置参数。
viewer: {
    id: 'dwtViewer',
    obj: null,
    width: '100%',
    height: '400px'
}
然后,我们在methods部分添加初始化代码
bindViewer () {
      if (!this.dwt.obj) {
        alert('WebTwain Object has not been initialized yet.')
      } else {
        const dwtObj = this.dwt.obj
        let viewOptions = {
          width: this.viewer.width,
          height: this.viewer.height,
          view: {
            bShow: true,
            Width: '100%',
          }
        }
        if (dwtObj.BindViewer(this.viewer.id, viewOptions)) {
          this.viewer.obj = this.dwt.obj.Viewer
        }
      }
最后,我们在mounted钩子函数内,在挂在mountDWT后加一个then,然后在里面bindViewer。
组件化改造
到目前为止,我们所有的代码都糅合在DWT.vue一个文件里,随着功能的增加,可能会导致代码行数急剧增多,并且导致工作量无法有效地切割分配的情况。我们现在就来将它们分别做成组件,并实现更多功能。 我们打算在扫描的基础上,实现摄像头捕获、文字识别两个功能。摄像头捕获需要额外的选项进行设置,文字识别需要额外的空间展示结果。我们利用Tab在不同的功能之间切换。整体的组件结构图如下。

在开始实现组件之前,我们需要先在components文件夹下创建一个panel文件夹。
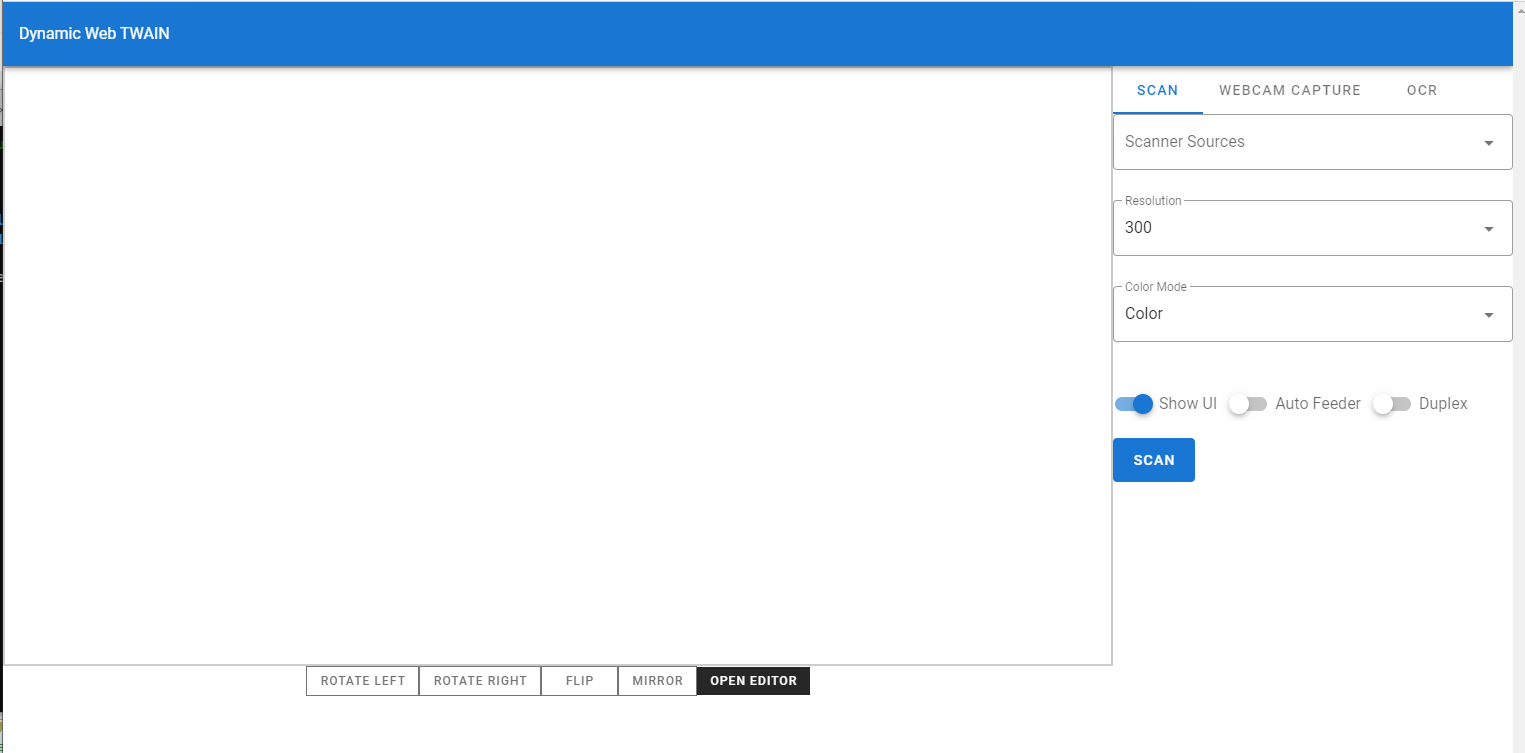
扫描面板
借此机会,我们将扫描功能的代码从DWT剥离出来的同时,还要实现一些额外的功能。现在,用户使用一个弹出式的扫描仪选择器。但是,我们希望能集成一个选择器在页面中,以提供无缝的体验。除此之外,我们希望能控制扫描仪的扫描参数。因此,我们除了扫描按钮之外,还需要若干个select组件。 我们在panel文件夹下创建Scan.vue文件,然后向其中添加以下代码:
<template>
  <div id="scan-panel">
    <!-- Source selection -->
    <v-select
      v-model="selectScanner"
      :items="scanners"
      item-value="id"
      item-text="text"
      label="Scanner Sources"
      outlined
    ></v-select>
    <!-- Resolution setting -->
    <v-select
      v-model="resolution"
      :items="resolutionOptions"
      item-text="text"
      item-value="val"
      label="Resolution"
      outlined
      return-object
    ></v-select>
    <!-- Color Mode -->
    <v-select
      v-model="colorMode"
      :items="colorModeOptions"
      item-text="text"
      item-value="val"
      label="Color Mode"
      outlined
      return-object
    ></v-select>
    <div class="flex">
      <!-- Show UI Control -->
      <v-switch
        v-model="showUI"
        label="Show UI"
      ></v-switch>
      <!-- Auto Feeder Control -->
      <v-switch
        v-model="autoFeeder"
        label="Auto Feeder"
      ></v-switch>
      <!-- Duplex Control -->
      <v-switch
        v-model="duplex"
        label="Duplex"
      ></v-switch>
    </div>
    <!-- Scan button -->
    <v-btn color="primary" depressed large @click="acquireImage">Scan</v-btn>
  </div>
</template>

<script>
export default {
  name: 'scan-panel',
  props: [''],
  data () {
    return {
      dwtObj: null,
      selectScanner: null,
      scanners: [],
      colorMode: { val: 2, text: 'Color' },
      colorModeOptions: [
        { val: 0, text: 'Black & White' },
        { val: 1, text: 'Grayscale' },
        { val: 2, text: 'Color' }
      ],
      resolution: { val: 300, text: '300' },
      resolutionOptions: [
        { val: 100, text: '100' },
        { val: 150, text:'150' },
        { val: 300, text: '300' }
      ],
      showUI: true,
      autoFeeder: false,
      duplex: false
    }
  },
  methods: {
    acquireImage () {
      const DWObject = this.dwtObj;
      if (DWObject) {
        if (DWObject.UseLocalService) {
          let configure = {
            IfShowUI: this.showUI,
            PixelType: this.colorMode,
            Resolution: this.resolution,
            IfFeederEnabled: this.autoFeeder,
            IfDuplexEnabled: this.duplex,
            IfDisableSourceAfterAcquire: true,
            // Advance settings
            IfGetImageInfo: true,
            IfGetExtImageInfo: true,
            extendedImageInfoQueryLevel: 0
          }
          DWObject.SelectSourceByIndex(this.selectScanner)
          DWObject.AcquireImage(
            configure,
            () => { DWObject.CloseSource() },
            () => { DWObject.CloseSource() }
          )
        }
      }
    },
    setupScan (dwtObj) {
      this.dwtObj = dwtObj
      this.scanners = dwtObj.GetSourceNames().map((scanner, idx) => { return { id: idx, text: scanner } })
    }
  }
}
</script>

<style scoped>
.flex {
  display: flex;
  justify-content: left;
}
.flex > * {
  margin-right: 12px;;
}
</style>
预览面板
在完成扫描面板之后,我们着手对预览窗口进行组件化封装。同样地,创建一个Viewer.vue,然后将下列代码贴入文件中。
<template>
  <div id="viewer-container" :style="{ width:width, height: height }">
    <div :id="id" style="height: inherit;"></div>
    <div id="edit-button-group">
      <v-btn outlined tile color="grey darken-1" small @click="rotate(-1)">Rotate Left</v-btn>
      <v-btn outlined tile color="grey darken-1" small @click="rotate(1)">Rotate Right</v-btn>
      <v-btn outlined tile color="grey darken-1" small @click="flip()">Flip</v-btn>
      <v-btn outlined tile color="grey darken-1" small @click="mirror()">Mirror</v-btn>
      <v-btn tile dark depressed small @click="openEditor">Open Editor</v-btn>
    </div>
  </div>
</template>

<script>
export default {
  name:'dwt-viewer',
  props: ['id', 'width', 'height', 'dwtRef'],
  data () {
    return {
      dwtObj: null,
      viewerObj: null,  // reference of viewer instance
      currIdx: 0,  // indicator of selected image
    }
  },
  methods: {
    mountViewer (dwtObj) {
      if (!dwtObj) {
        alert('WebTwain Object has not been initialized yet.')
      } else {
        let viewOptions = {
          width: this.width,
          height: this.height,
          view: {
            bShow: true,
            Width: this.width,
            Height: this.height
          }
        }
        if (dwtObj.BindViewer(Home | This.ID, viewOptions)) {
          this.dwtObj = dwtObj
          this.viewerObj = this.dwtRef.Viewer
          dwtObj.RegisterEvent('OnMouseClick', (idx) => { this.currIdx = idx })
        }
      }
    },
    rotate (direction) {
      switch (direction) {
        case -1:
        case '-1': {
          this.dwtObj.Rotate(this.currIdx, -90, true);
          break;
        }
        case 1:
        case '1': {
          this.dwtObj.Rotate(this.currIdx, 90, true);
          break;
        }
      }
    },
    flip: function() {
      this.dwtObj.Flip(this.currIdx);
    },
    mirror: function() {
      this.dwtObj.Mirror(this.currIdx);
    },
    openEditor: function () {
      if (this.dwtObj) {
        this.dwtObj.ShowImageEditor()
      }
    }
  }
}
</script>

<style scoped>
#viewer-container {
  box-sizing: content-box;
  text-align: center;
  /* width: 100%;
  height: inherit; */
}
#edit-button-group {
  display: inline-block;
}
.inherit-width {
  width: inherit;
}
.inherit-height {
  height: inherit;
}
</style>
我们在封装预览窗口的同时,给它加了五个按钮,分别实现顺/逆时针旋转90°、镜像、翻转、打开编辑器功能。
组装视图
两个面板都实现完成后,我们可以将它们在DWT内组装起来。因为我们还有后续功能面板要添加,在这里,我们使用了tabs来承载功能面板。预览视图将独立于tabs显示在页面左侧。
<template>
  <div id="dwt-container">
    <Viewer
      :id="this.viewer.id"
      :ref="this.viewer.id"
      :dwtRef="this.dwt.obj"
      :width="this.viewer.width"
      :height="this.viewer.height"
    >
      <!-- DWT viewer -->
    </Viewer>
    <v-tabs id="dwt-control">
      <v-tab :key="0">Scan</v-tab>
      <v-tab :key="1">Camera Capture</v-tab>
      <v-tab :key="2">OCR</v-tab>
      <v-tab-item :key="0">
        <Scan :ref="'scan-panel'"></Scan>
      </v-tab-item>
    </v-tabs>
  </div>
</template>

<script>
import dwt from 'dwt'
import Viewer from '@/components/panel/Viewer'
import Scan from '@/components/panel/Scan'

export default {
  name: 'dwt',
  components: {
    Viewer,
    Scan
  },
  data () {
    return {
      dwt: {
        obj: null,
        id: 'dwtObject',
        licenseKey: ''	// Your licenseKey
      },
      viewer: {
        id: 'dwtViewer',
        width: '100%',
        height: '600px'
      }
    }
  },
  mounted () {
    this.mountDWT()
      .then(() => {
        this.initPanels()
        this.bindViewer()
      })
  },
  methods: {
    bindViewer () {
      this.$refs[this.viewer.id].mountViewer(this.dwt.obj)
    },
    mountDWT () {
      return new Promise((res, rej) => {
        this.unmountDWT()
          .then(() => {
            dwt.WebTwainEnv.UseLocalService = true;
            dwt.WebTwainEnv.ResourcesPath = "resources/dwt";
            dwt.WebTwainEnv.ProductKey = this.dwt.licenseKey
            dwt.WebTwainEnv.AutoLoad = false;
            dwt.WebTwainEnv.Containers = [];
            dwt.WebTwainEnv.IfAddMD5InUploadHeader = false;
            dwt.WebTwainEnv.IfConfineMaskWithinTheViewer = false;
            let dwtConfig = { WebTwainId: this.dwt.id }
            // By default, use local service is true
            dwt.WebTwainEnv.CreateDWTObjectEx(
                  dwtConfig,
                  (dwtObject) => { this.dwt.obj = dwtObject; res(true);},
                  (errStr) => { console.log(`failed to initialize dwt, message: ${errStr}`); rej(false);}
            )
          })
      })
    },
    /**
     * Delete dwt instance
     */
    unmountDWT () {
      return new Promise((res, rej) => {
        if (dwt.WebTwainEnv.DeleteDWTObject(this.dwt.id)) {
          res(true)
        } else {
          rej(false)
        }
      })
    },
    initPanels () {
      this.$refs['scan-panel'].setupScan(this.dwt.obj)
    }
  },
}
</script>

<style scoped>
#dwt-container {
  display: flex;
  height: inherit;
  width: inherit;
}
#dwt-control {
  max-width: 400px;
}
</style>
实现更多功能
摄像头捕获
摄像头捕获也需要自己的源选择器、分辨率、帧率、色彩模式等选项设置。我们在完成它的布局后,着手进行逻辑实现。需要注意的是,摄像头捕获相关的API封装在Addon.Webcam下,同时捕获等功能又依赖DWT实例,因此,我们需要将它们作为参数从外部传入初始化函数中。这里,我们利用refs实现父组件对子组件的方法调用。
<template>
  <div id="webcam-panel">
    <!-- Source selection -->
    <v-select
      v-model="selectedWebcam"
      :items="webcamSources"
      item-value="val"
      item-text="text"
      label="Webcam Sources"
      outlined
    ></v-select>
    <!-- Resolution setting -->
    <v-select
      v-model="resolution"
      :items="resolutionOptions"
      item-text="text"
      item-value="val"
      label="Resolution"
      outlined
    ></v-select>
    <!-- Framerates -->
    <v-select
      v-model="framerate"
      :items="framerateOptions"
      item-text="text"
      item-value="val"
      label="Frame Rate"
      outlined
    ></v-select>
    <!-- Color Mode -->
    <v-select
      v-model="mediaType"
      :items="mediaTypeOptions"
      item-text="text"
      item-value="val"
      label="Media Type"
      outlined
    ></v-select>
    <!-- Rotation -->
    <v-select
      v-model="rotate"
      :items="rotationOptions"
      item-text="text"
      item-value="val"
      label="Rotation"
      outlined
    ></v-select>
    <!-- Operation button group -->
    <v-btn color="primary" depressed large @click="capture">Capture</v-btn>
    <v-btn depressed large @click="toggleLiveView">Live Viewing {{ liveViewing ? 'OFF':'ON' }}</v-btn>
  </div>
</template>

<script>
export default {
  name: 'webcam-panel',
  props: ['ssl', 'rotateMode'],
  data () {
    return {
      dwtObj: null,
      webcamObj: null,
      selectedWebcam: null,
      webcamSources: [],
      resolution: null,
      resolutionOptions: [],
      mediaType: null,
      mediaTypeOptions: [],
      framerate: null,
      framerateOptions: [],
      rotate: 0,
      rotationOptions: [],
      liveViewing: false
    }
  },
  watch: {
    selectedWebcam () {
        this.updateWebcamOptions()
    }
  },
  methods: {
    setupWebcam (ssl, rotateMode, dwtObj) {
      this.dwtObj = dwtObj
      this.webcamObj = dwtObj.Addon.Webcam
      // Set rotate mode
      const rotation = [
        { text: 'OFF', val: rotateMode.VRM_NONE },
        { text: 'CLOCKWISE 90°', val: rotateMode.VRM_90_DEGREES_CLOCKWISE },
        { text: 'CLOCKWISE 180°', val: rotateMode.VRM_180_DEGREES_CLOCKWISE },
        { text: 'CLOCKWISE 270°', val: rotateMode.VRM_270_DEGREES_CLOCKWISE },
        { text: 'FLIP VERTICAL', val: rotateMode.VRM_FLIP_VERTICAL },
        { text: 'FLIP HORIZONTAL', val: rotateMode.VRM_FLIP_HORIZONTAL }
      ]
      this.rotationOptions = rotation
      // Set Default Webcam
      if (ssl) {
        dwtObj.IfSSL = true
        dwtObj.HTTPPort = 443
      }
      this.webcamSources = this.webcamObj.GetSourceList().map(e => { return { text: e, val: e } })
    },
    updateWebcamOptions () {
      this.webcamObj.StopVideo()
      this.webcamObj.SelectSource(this.selectedWebcam)
      function ObjToArr(obj) {
        let count = obj.GetCount()
        let arr = []
        for (let i = 0; i < count; i++) {
          arr.push({ text: obj.Get(i), val: obj.Get(i) })
        }
        return arr
      }

      new Promise((res) => {
        this.framerateOptions = ObjToArr(this.webcamObj.GetFrameRate())
        this.resolutionOptions = ObjToArr(this.webcamObj.GetResolution())
        this.mediaTypeOptions = ObjToArr(this.webcamObj.GetMediaType())
        res()
      })
      .then(() => {
        this.resolution = this.resolutionOptions[0]
        this.mediaType = this.mediaTypeOptions[0]
        this.framerate = this.framerateOptions[0]
      })
    },
    updateWebcamSetting () {
      if (this.liveViewing) { this.webcamObj.StopVideo() }
      this.webcamObj.SetFrameRate(this.framerate)
      this.webcamObj.SetMediaType(this.mediaType)
      this.webcamObj.SetResolution(this.resolution)
      this.webcamObj.SetVideoRotateMode(this.rotate)
      if (this.liveViewing) { this.webcamObj.PlayVideo() }
    },
    capture () {
      if (this.liveViewing) { this.toggleLiveView(false) }
      this.webcamObj.CaptureImage(()=>{}, (errCode, errStr) => { console.error(`${errCode} - ${errStr}`) })
    },
    toggleLiveView () {
      if (this.liveViewing) { this.setVideoPlayback(false) }
      else { this.setVideoPlayback(true) }
    },
    setVideoPlayback (show) {
      if (show) {
        this.webcamObj.StopVideo()
        setTimeout(
          () => {
            this.webcamObj.PlayVideo(this.dwtObj, 80, () => {})
            this.liveViewing = true
          },
          30
        )
      } else {
        this.webcamObj.StopVideo()
        this.liveViewing = false
      }
    }
  },
}
</script>
完成后,不要忘记将Webcam面板导入DWT的Tab中。
文字识别(OCR)
类似的,OCR功能也是通过Addon提供的。但是,OCR的加载会相对复杂一些,它需要先将自身载入、再将语言包载入。因此,它的初始化函数需要的参数比摄像头面板要更多。我们将初始化过程放在setupOcr中,它将接收OCR资源路径、是否需要加载动态链接库、dwt实例、dwt库四个参数。
<template>
  <div id="ocr-panel">
    <v-btn depressed color="primary" @click="doOCR">Recognize</v-btn>
    <div class="outlined-box">
      <p v-for="(text, idx) in result" :key="idx">{{ text }}</p>
    </div>
  </div>
</template>

<script>
export default {
  name: 'ocr-panel',
  data () {
    return {
      ocrObj: null,
      dwtLib: null,
      result: ''
    }
  },
  methods: {
    setupOcr (resPath, downloadDLL, dwtObj, dwtLib) {
      new Promise((res, rej) => {
        const ocrObj = dwtObj.Addon.OCR
        let corePath = resPath + '/addon/OCR.zip'
        let langPath = resPath + '/addon/OCRBasicLanguages/English.zip'

        if (downloadDLL) {
          ocrObj.Download(
            corePath,
            this.setupOcr(resPath, false, dwtObj, dwtLib),
            (errCode, errStr) => {
              rej({errCode: errCode, errStr: errStr})
            }
          )
        } else {
          ocrObj.DownloadLangData(
            langPath,
            () => { res([ocrObj, dwtLib]); },
            (errCode, errStr) => {
              rej({errCode: errCode, errStr: errStr})
            }
          )
        }
      })
      .then((ocr) => {
        this.ocrObj = ocr[0]
        this.dwtLib = ocr[1]
      })
    },
    doOCR () {
      this.ocrObj.SetLanguage('eng')
      this.ocrObj.SetOutputFormat(0)
      this.ocrObj.RecognizeSelectedImages(
        (result) => {
          let _textResult = this.dwtLib.base64.decode(result.Get()).split(/r?n/g)
          let res = []
           for (let i = 0; i < _textResult.length; i++) {
            if (!_textResult[i].trim()) { continue }
            res.push(_textResult[i].trim() + 'n')
          }
          this.result = res
        },
        (errCode, errStr) => {
          console.error(`${errCode} - ${errStr}`)
        }
      )
    }
  }
}
</script>

<style scoped>
.outlined-box {
  border: 1px solid black;
}
</style>
同样的,最后需要将OCR面板挂载到DWT的tab下。
源代码
Github: dwt-vue


 被折叠的 条评论
为什么被折叠?
被折叠的 条评论
为什么被折叠?
 到【灌水乐园】发言


