


小白的springboot之路(八)、继承Redis以及@Cacheable注解实现Redis缓存,
0、前言
在项目中,缓存作为一种高效的提升性能的手段,几乎必不可少,Redis作为其中的佼佼者被广泛应用;
一、spring boot集成Redis
1、添加依赖
org.springframework.boot
spring-boot-starter-data-redis
2、配置文件增加Redis配置
####### Redis ################
#第几个数据库,由于redis中数据库不止一个(默认会开启15个)
spring.redis.database=1# 也可指定为127.0.0.1spring.redis.host=localhost
spring.redis.port=6379spring.redis.password=88888888# springboot2.x以上如此配置,由于2.x的客户端是lettuce
# 单位要带上
spring.redis.lettuce.pool.max-active=8spring.redis.lettuce.pool.min-idle=0spring.redis.lettuce.pool.max-idle=8spring.redis.lettuce.pool.max-wait=10000ms
spring.redis.lettuce.shutdown-timeout=100ms
# springboot1.x如此配置,由于1.x的客户端是jedis
#spring.redis.jedis.pool.max-active=8#spring.redis.jedis.pool.min-idle=0#spring.redis.jedis.pool.max-idle=8#spring.redis.jedis.pool.max-wait=-1#spring.redis.timeout=500
3、使用
这样就集成进来了,就可以使用了,有两种template可以直接使用,RedisTemplate和StringRedisTemplate,有opsForValue、opsForList、opsForSet、opsForZset、opsForHash几种访问方法,简单示例如下:
@ResourceprivateRedisTemplate redisTemplate;//写入缓存
redisTemplate.opsForValue().set("111","anson");//读取缓存
String str = redisTemplate.opsForValue().get("111").toString();
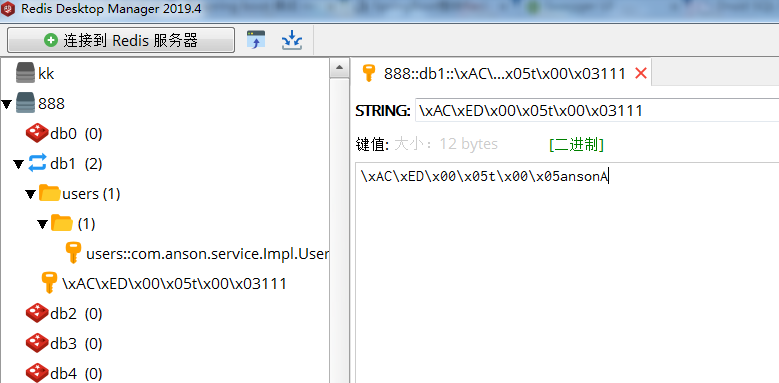
运行后可以查看到缓存中已经写入,读取也正常读取出来
4、总结:
可以看到,写入Redis的是经过转码的,不方便查看,一般我们在使用的时候,会替换掉它默认的解析器,并且将相关操作封装成工具类方便使用;通常Redis我们是作为缓存服务器来使用,实际项目中,缓存有两种方式,一种是手动的方式:就是像上面的方式,将Redis的解析器替换,然后封装工具类;在使用的地方,先判断缓存中时候有需要的数据,没有的换就从数据库中去取,然后写入Redis缓存,有的话就直接从Redis缓存取;手动的方式虽然有时候更灵活,但是每个方法都需要写一堆代码,很累赘,基本上我们是不会用这种方式的,所以上面的方式只是简单介绍,什么封装工具类啊那些都没贴代码出来,想用这种方式的自己去百度,一大堆;
缓存的第二种方式就是配合注解实现缓存,方便,只需要在需要缓存的方法上加上注解即可,实际项目中,基本都是使用这种方式,下面介绍
二、@Cacheable注解实现Redis缓存
1、添加依赖
org.apache.commons
commons-pool2
2.4.2
org.springframework.boot
spring-boot-starter-data-redis
org.springframework.boot
spring-boot-starter-cache
2、配置文件中增加配置
####### Redis ################
#第几个数据库,由于redis中数据库不止一个
spring.redis.database=1# 也可指定为127.0.0.1spring.redis.host=localhost
spring.redis.port=6379spring.redis.password=88888888# springboot2.x以上如此配置,由于2.x的客户端是lettuce
# 单位要带上
spring.redis.lettuce.pool.max-active=8spring.redis.lettuce.pool.min-idle=0spring.redis.lettuce.pool.max-idle=8spring.redis.lettuce.pool.max-wait=10000ms
spring.redis.lettuce.shutdown-timeout=100ms
# springboot1.x如此配置,由于1.x的客户端是jedis
#spring.redis.jedis.pool.max-active=8#spring.redis.jedis.pool.min-idle=0#spring.redis.jedis.pool.max-idle=8#spring.redis.jedis.pool.max-wait=-1#spring.redis.timeout=500
3、实现自定义缓存管理器
packagecom.anson.config;importorg.slf4j.Logger;importorg.slf4j.LoggerFactory;importorg.springframework.cache.annotation.CachingConfigurerSupport;importorg.springframework.cache.annotation.EnableCaching;importorg.springframework.cache.interceptor.KeyGenerator;importorg.springframework.context.annotation.Bean;importorg.springframework.context.annotation.Configuration;importorg.springframework.data.redis.cache.RedisCacheConfiguration;importorg.springframework.data.redis.cache.RedisCacheManager;importorg.springframework.data.redis.connection.RedisConnectionFactory;import org.springframework.data.redis.serializer.*;importjava.time.Duration;/*** @description: redis缓存配置类
*@author: anson
* @Date: 2019/12/8 21:34*/@Configuration
@EnableCachingpublic class RedisCacheConfig extendsCachingConfigurerSupport {private static final Logger logger = LoggerFactory.getLogger(RedisCacheConfig.class);//自定义key生成器
@BeanpublicKeyGenerator keyGenerator(){return (o, method, params) ->{
StringBuilder sb= newStringBuilder();
sb.append(o.getClass().getName());//类目
sb.append(method.getName()); //方法名
for(Object param: params){
sb.append(param.toString());//参数名
}returnsb.toString();
};
}//配置缓存管理器
@BeanpublicRedisCacheManager cacheManager(RedisConnectionFactory connectionFactory) {
RedisCacheConfiguration config=RedisCacheConfiguration.defaultCacheConfig()
.entryTtl(Duration.ofSeconds(60000000)) //60s缓存失效//设置key的序列化方式
.serializeKeysWith(RedisSerializationContext.SerializationPair.fromSerializer(keySerializer()))//设置value的序列化方式
.serializeValuesWith(RedisSerializationContext.SerializationPair.fromSerializer(valueSerializer()))//不缓存null值
.disableCachingNullValues();
RedisCacheManager redisCacheManager=RedisCacheManager.builder(connectionFactory)
.cacheDefaults(config)
.transactionAware()
.build();
logger.info("自定义RedisCacheManager加载完成");returnredisCacheManager;
}//key键序列化方式
private RedisSerializerkeySerializer() {return newStringRedisSerializer();
}//value值序列化方式
privateGenericJackson2JsonRedisSerializer valueSerializer(){return newGenericJackson2JsonRedisSerializer();//return new GenericFastJsonRedisSerializer();
}
}
4、使用:可以直接使用了,在UserServiceImpl中
@Override
@Cacheable(cacheNames= "user" ,key="#id")publicUser selectByPrimaryKey(Integer id)
{returnusermapper.selectByPrimaryKey(id);
}
@Override
@Cacheable(cacheNames= "users")public ListgetAll()
{returnusermapper.getAll();
}
其中,key如果不设置,会根据我们设置的生成器生成KEY,如果自己设置的话,有几种方式,下面介绍一下:
A、基本形式
@Cacheable(value="cacheName", key"#id")
public User method(int id);
B、组合形式
@Cacheable(value="cacheName", key"T(String).valueOf(#name).concat('-').concat(#password))
public User method(int name, String password);
C、对象形式
@Cacheable(value="cacheName", key"#user.id)
public User method(User user);
D、自定义Key生成器
@Cacheable(value="gomeo2oCache", keyGenerator = "keyGenerator")
public User method(User user);
5、测试
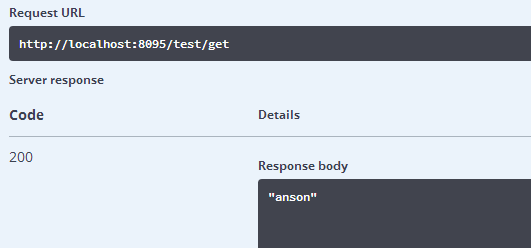
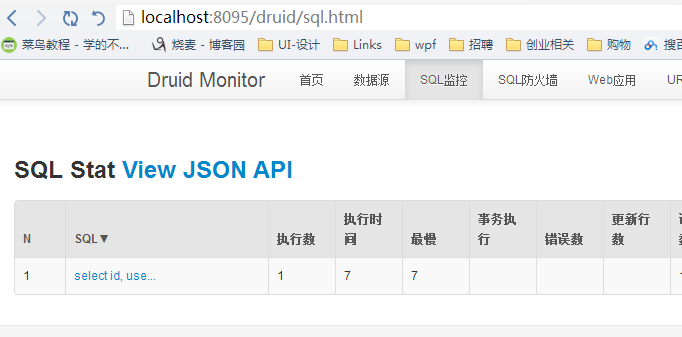
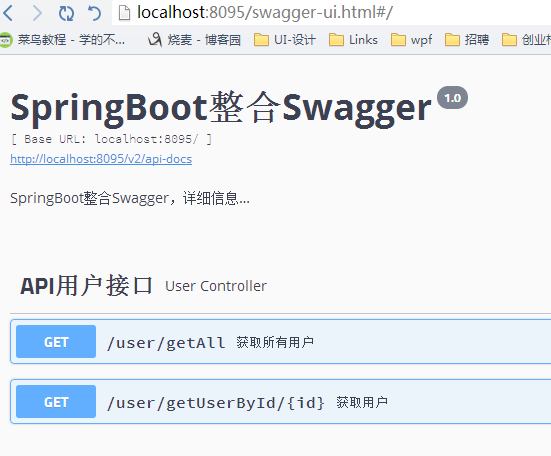
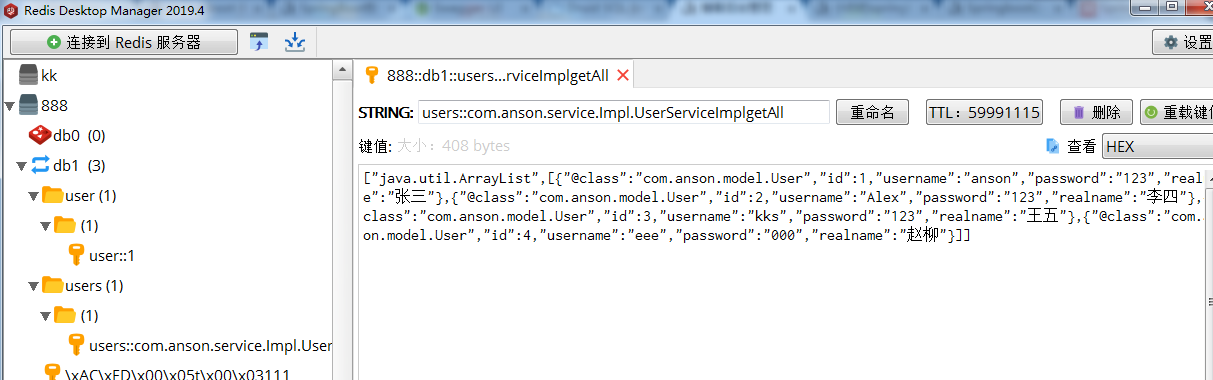
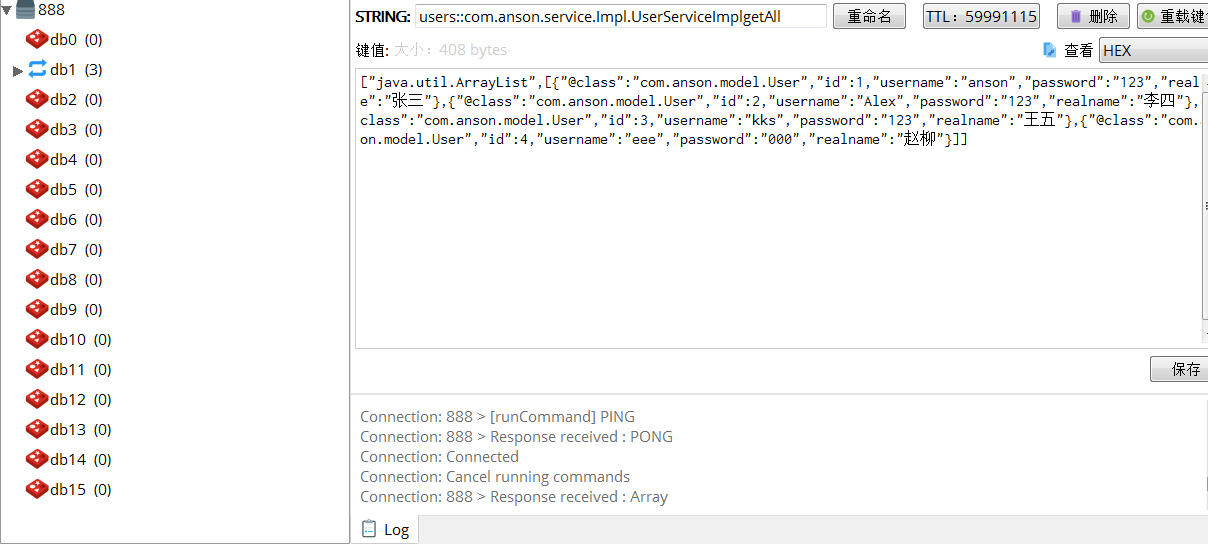
我们 打开druid的SQL监控,然后在swagger中进行操作,在Redis desktop manager中查看Redis,就可以看到第一次查询执行了数据库查询,并把结果存进了Redis中,以后执行同样的查询,在缓存没过期之前,都直接从Redis获取,不再执行数据库查询,可见Redis缓存成功运行和释放了数据库的压力了;
附:Redis Windows下简单实用以及Redis GUI工具Redis desktop manager的使用,也简单介绍下:
1、Redis Windows版的简单使用:
下载Redis Windows版,解压后看到
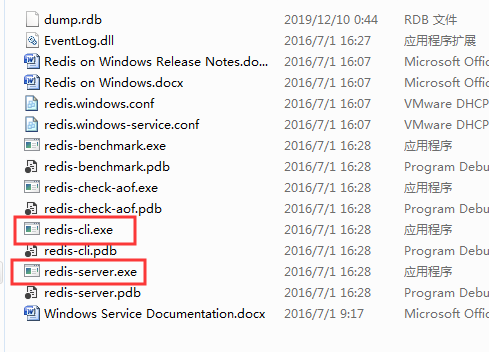
先点击打开Redis-server.exe,再打开Redis-cli.exe,Redis已经以默认的方式启动起来了,其中Redis-server.exe就是Redis服务,Redis-cli.exe是客户端工具,用来以命令操作Redis的;
这时候就可以使用Redis,默认密码是空的,端口是6379;我们设置一下密码:
config set requirepass “你的密码” //设置密码
auth “你的密码” //验证密码是否成功设置
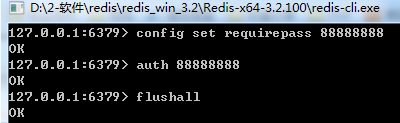
flushall ,是清除所有缓存的命令,用来清除重新测试的,
其他命令就不多介绍了,需要用到自行百度
2、Redis desktop manager的使用
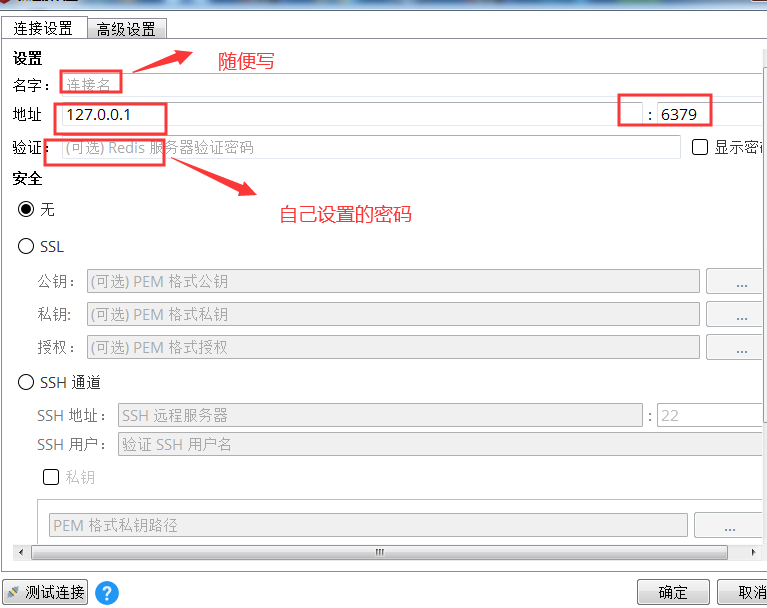
下载安装包,安装,然后填入密码连接即可
三、后续
第二种方式中注解实现Redis缓存的方式有个缺点,就是失效时间都统一配置了,更多时候,我们希望失效时间可以每个方法单独配置,所以二的方法还需要改造,实现失效时间单独配置的功能;还有Redis一般我们都会搭建集群实现高可用,关于Linux、docker搭建Redis集群的方式,这些项目实战干货我们以后再来详细聊;
附demoGIT地址:https://github.com/anson-yang/cloverDemo.git
相关文章暂无相关文章


 1155
1155


 被折叠的 条评论
为什么被折叠?
被折叠的 条评论
为什么被折叠?
 到【灌水乐园】发言


