


业务需求
后台为一个采集系统,需要将采集过程中产生的日志实时发送到前台页面展示,以便了解采集过程。
技能点
SpringBoot 2.x
websocket
logback
thymeleaf
RabbitMQ
之所以使用到RabbitMQ是因为实际环境中采集服务为多个,为了统一处理日志信息,将日志都先灌入mq中,再统一从mq中进行消费
引入关键pom
<dependency> <groupId>org.springframework.bootgroupId> <artifactId>spring-boot-starter-webartifactId>dependency><dependency> <groupId>org.springframework.bootgroupId> <artifactId>spring-boot-starter-websocketartifactId>dependency><dependency> <groupId>org.springframework.bootgroupId> <artifactId>spring-boot-starter-amqpartifactId>dependency>logback配置文件引入AmqpAppender
<springProperty scope="context" name="rabbitmq-address" source="spring.rabbitmq.addresses" defaultValue="127.0.0.1:5672" /><springProperty scope="context" name="rabbitmq-username" source="spring.rabbitmq.username" defaultValue="guest" /><springProperty scope="context" name="rabbitmq-password" source="spring.rabbitmq.password" defaultValue="guest" /><springProperty scope="context" name="rabbitmq-virtual-host" source="spring.rabbitmq.virtual-host" defaultValue="/" /><springProperty scope="context" name="exhcange-name" source="platform.parameter.exhcangeName" defaultValue="default-exchange" /><springProperty scope="context" name="binding-key" source="platform.parameter.bindingKey" defaultValue="default-routing" /><appender name="RabbitMq" class="org.springframework.amqp.rabbit.logback.AmqpAppender"> <layout> <pattern>[%X{traceId}] - %d{HH:mm:ss.SSS} %-5level %logger{36} - %msg%npattern> layout> <addresses>${rabbitmq-address}addresses> <username>${rabbitmq-username}username> <password>${rabbitmq-password}password> <virtualHost>${rabbitmq-username}virtualHost> <declareExchange>falsedeclareExchange> <exchangeType>directexchangeType> <exchangeName>${exhcange-name}exchangeName> <routingKeyPattern>${binding-key}routingKeyPattern> <generateId>truegenerateId> <charset>UTF-8charset> <durable>truedurable> <deliveryMode>NON_PERSISTENTdeliveryMode> <filter class="com.log.websocket.stomp.LogFilter"> <level>INFOlevel> filter>appender><springProfile name="dev"> <root level="debug"> <appender-ref ref="RabbitMq" /> root>springProfile>日志过滤器
logback配置文件中添加的AmqpAppender使用了filter,具体的filter如下所示:
public class LogFilter extends AbstractMatcherFilter<ILoggingEvent> { Level level; @Override public FilterReply decide(ILoggingEvent event) { if (!isStarted()) { return FilterReply.NEUTRAL; } //过滤指定级别的日志 if(event.getLevel().equals(level)){ Map mdcMap = event.getMDCPropertyMap(); String tracId = mdcMap.get("traceId"); //过滤日志中带有traceId的日志,其他的不需要,traceId使用aop添加 if(StringUtils.isNotBlank(tracId)){ return FilterReply.ACCEPT; } } return FilterReply.DENY; } public void setLevel(Level level) { this.level = level; } @Override public void start() { if (this.level != null) { super.start(); } }}说明:
AmqpAppender中的filter设置了过滤级别,因此只过滤指定级别的日志;
过滤日志中带有traceId的日志,traceId通过aop添加,具体参考后面的aop设置;
aop方式添加traceId
编写LogAspect如下所示:
@Order(1)@Aspect@Componentpublic class LogAspect { /** * 所有的业务类的类名都是xxSpiderxxImpl,统一入口都是gatherData方法 */ @Pointcut("execution(* com.log..*.service..*Spider*Impl.gatherData(..))") public void pointCut() {} @Before("pointCut()") public void before(JoinPoint joinPoint){ //切点已经确定是com.log..*.service..*Spider*Impl.gatherData(..),该方法的参数只有一个,且为GatherTaskVO GatherTaskVO vo = (GatherTaskVO)joinPoint.getArgs()[0]; //将任务id作为traceId MDC.put("traceId", vo.getId()); } @After("pointCut()") public void after(JoinPoint joinPoint){ //方法执行完成以后,删除traceId MDC.remove("traceId"); }}解释一下MDC:
对于多个线程同时执行的系统或者分布式系统中,各个线程的日志穿插执行,导致我们无法直观的直接定位整个操作流程,因此,我们需要对一个线程的操作流程进行归类标记,比如使用线程+时间戳或者用户id等,从而使我们能够从混乱的日志中梳理处整个线程的操作流程,因此Slf4j的MDC应运而生,logback和log4j支持MDC。
MDC中提供的方法如下所示:
package org.jboss.logging;import java.util.Collections;import java.util.Map;/** * Mapped diagnostic context. Each log provider implementation may behave different. */public final class MDC { //uts the value onto the context. public static Object put(String key, Object val); //Returns the value for the key or {@code null} if no value was found. public static Object get(String key); //Removes the value from the context. public static void remove(String key); //Clears the message diagnostics context. public static void clear();}MDC提供的方法比较简单,使用也很简单,只需要将指定的值put到线程上下文中,在对应的地方调用get方法获取到值即可。
注意看上述AmqpAppender配置中标记<1>中的traceId即为我们此处添加到线程上下文中的值,如下所示:
[%X{traceId}] - %d{HH:mm:ss.SSS} %-5level %logger{36} - %msg%n</pattern></layout>开启websocket支持
Springboot环境下注入ServerEndpointExporter以开启websocket支持
@Configurationpublic class WebSocketConfig { @Bean public ServerEndpointExporter serverEndpointExporter() { return new ServerEndpointExporter(); }}websocketServer
websocketServer用来开启连接,关闭连接以及接收消息等
@Slf4j@ServerEndpoint("/socketserver/{taskId}")@Componentpublic class WebSocketServer { /**concurrent包的线程安全Set,用来存放每个客户端对应的MyWebSocket对象。*/ private static ConcurrentHashMap<String,WebSocketServer> webSocketMap = new ConcurrentHashMap<>(); /**与某个客户端的连接会话,需要通过它来给客户端发送数据*/ private Session session; /**接收taskId*/ private String taskId=""; /** * 连接建立成功调用的方法*/ @OnOpen public void onOpen(Session session,@PathParam("taskId") String taskId) { this.session = session; this.taskId=taskId; if(webSocketMap.containsKey(taskId)){ webSocketMap.remove(taskId); webSocketMap.put(taskId,this); }else{ webSocketMap.put(taskId,this); } try { sendMessage("socket连接成功"); } catch (IOException e) { log.error("socket>>"+taskId+",网络异常!!!!!!"); } } /** * 连接关闭调用的方法 */ @OnClose public void onClose() { if(webSocketMap.containsKey(taskId)){ webSocketMap.remove(taskId); } } /** * 收到客户端消息后调用的方法 * TODO 客户端交互使用,暂无用到 * @param message 客户端发送过来的消息*/ @OnMessage public void onMessage(String message, Session session) { log.info("socket>>>:"+taskId+",报文:"+message); } /** * * @param session * @param error */ @OnError public void onError(Session session, Throwable error) { log.error("用户错误:"+this.taskId+",原因:"+error.getMessage()); error.printStackTrace(); } /** * 实现服务器主动推送 */ public void sendMessage(String message) throws IOException { //加锁,否则会出现java.lang.IllegalStateException: The remote endpoint was in state [TEXT_FULL_WRITING] which is an invalid state for called method异常,并发使用session发送消息导致的 synchronized (this.session){ this.session.getBasicRemote().sendText(message); } } public ConcurrentHashMap<String,WebSocketServer> getWebSocketMap(){ return webSocketMap; }}前台页面
前台页面使用js来调用websocket,请求websocketserver打开socket连接,并且开始和后台交互发送消息
<html xmlns:th="http://www.thymeleaf.org" ><head> <meta charset="utf-8"> <title>任务日志展示title>head><body><script th:src="@{/js/jquery.min.js}">script><input type="hidden" id="gather_task_id" th:value="${taskId}" /><script> var socket; function openSocket() { var detailDiv = $("#log_detail"); var taskId = $("#gather_task_id").val(); //实现化WebSocket对象,指定要连接的服务器地址与端口 建立连接 var socketUrl="http://localhost:8888/socketserver/"+taskId; socketUrl=socketUrl.replace("https","ws").replace("http","ws"); if(socket!=null){ socket.close(); socket=null; } socket = new WebSocket(socketUrl); //打开事件 socket.onopen = function() { console.log("websocket已打开"); }; //获得消息事件 socket.onmessage = function(msg) { console.log(msg.data); //发现消息进入 开始处理前端触发逻辑 detailDiv.append(""
+msg.data+"") }; //关闭事件 socket.onclose = function() { console.log("websocket已关闭"); }; //发生了错误事件 socket.onerror = function() { console.log("websocket发生了错误"); } } function sendMessage() { if(typeof(WebSocket) == "undefined") { console.log("您的浏览器不支持WebSocket"); }else { console.log("您的浏览器支持WebSocket"); console.log('{"toUserId":"'+$("#toUserId").val()+'","contentText":"'+$("#contentText").val()+'"}'); socket.send('{"toUserId":"'+$("#toUserId").val()+'","contentText":"'+$("#contentText").val()+'"}'); } } function printLog(){ if(typeof(WebSocket) == "undefined") { console.log("您的浏览器不支持WebSocket"); alert("您的浏览器不支持WebSocket"); }else { openSocket(); } } function quit(){ if(socket!=null){ socket.close(); socket=null; var detailDiv = $("#log_detail"); detailDiv.append("
客户端已退出
") } }script><a href="javascript:void(0);" onclick="printLog()" >打印日志a><a href="javascript:void(0);" onclick="quit()">退出a><div id="log_detail">div>body>html>
消费mq中的日志消息
service中产生的日志是添加到mq队列中的,因此需要一个消费者消费队列中的数据,并且使用websocketserver将消息发送到对应的页面上,从而在页面上进行展示
@Component@Slf4jpublic class LogConsumer { @Resource private WebSocketService webSocketService; @RabbitHandler @RabbitListener( bindings = @QueueBinding( value = @Queue(name = "${platform.parameter.queueName}",durable = "true"), exchange = @Exchange(name = "${platform.parameter.exhcangeName}",ignoreDeclarationExceptions="true",durable = "true"), key = "${platform.parameter.bindingKey}" ), concurrency = "2" ) public void listennerPush(String msg, Channel channel, Message message) throws IOException { try { log.debug("consumer>>>接收到的消息>>>{}",msg); //[1] - 13:15:17.484 - TwitterSpiderMobileService实现类方法<<< msg.split(" - ")[0].trim().replace("[","").replace("]",""); String tracId = msg.substring(0,msg.indexOf(" - ")).trim().replace("[","").replace("]",""); msg = msg.substring(msg.indexOf(" - ")+2); //调用websocket发送日志信息到页面上 webSocketService.sendMessage(tracId,msg); } catch (Exception e) { log.error("获取消息失败,异常原因:{}",e.getMessage(),e); } finally { channel.basicAck(message.getMessageProperties().getDeliveryTag(), false); } }}sendMessage方法如下所示:
@Overridepublic void sendMessage(String taskId, String logMessage) { try { ConcurrentHashMapmap = webSocketServer.getWebSocketMap(); WebSocketServer server = map.get(taskId); if(server!=null){ server.sendMessage(logMessage); }else{ log.warn("客户端已退出"); } } catch (IOException e) { log.error("向客户端发送消息时出现异常,异常原因:{}",e.getMessage(),e); }}最终效果图
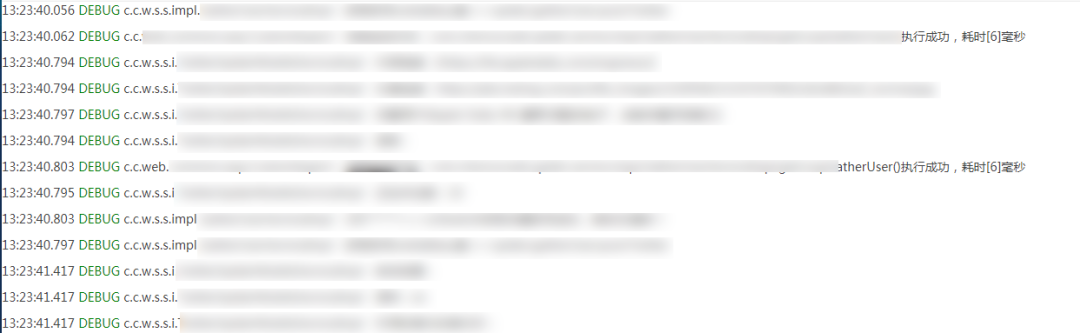
经过以上步骤即可将service中生成的日志接近实时的显示在前台页面上,最后的显示效果如下所示:
参考资料
1.SpringBoot2.0集成WebSocket,实现后台向前端推送信息(https://blog.csdn.net/moshowgame/article/details/80275084)
本文所对应的代码已上传gitee(https://gitee.com/liaidai/log-websocket),有需要的可以自行下载。


 5969
5969


 被折叠的 条评论
为什么被折叠?
被折叠的 条评论
为什么被折叠?
 到【灌水乐园】发言


