


MoviePy
MoviePy (full documentation) is a Python library for video editing: cutting, concatenations, title insertions, video compositing (a.k.a. non-linear editing), video processing, and creation of custom effects. See the gallery for some examples of use.
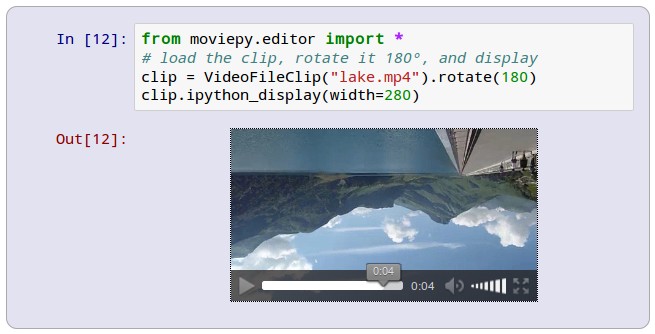
MoviePy can read and write all the most common audio and video formats, including GIF, and runs on Windows/Mac/Linux, with Python 3.6+. Here it is in action in an IPython notebook:
Example
In this example we open a video file, select the subclip between t=50s and t=60s, add a title at the center of the screen, and write the result to a new file:
from moviepy.editor import *
video = VideoFileClip("myHolidays.mp4").subclip(50,60)
# Make the text. Many more options are available.
txt_clip = ( TextClip("My Holidays 2013",fontsize=70,color='white')
.set_position('center')
.set_duration(10) )
result = CompositeVideoClip([video, txt_clip]) # Overlay text on video
result.write_videofile("myHolidays_edited.webm",fps=25) # Many options...
Maintainers wanted!
As there are more and more people seeking support (320 open issues as of Sept. 2019!) and all the MoviePy maintainers seem busy, we'd love to hear about developers interested in giving a hand and solving some of the issues (especially the ones that affect you) or reviewing pull requests. Open an issue or contact us directly if you are interested. Thanks!
Installation
MoviePy depends on the Python modules NumPy, Imageio, Decorator, and Proglog, which will be automatically installed during MoviePy's installation. The software FFMPEG should be automatically downloaded/installed (by imageio) during your first use of MoviePy (installation will take a few seconds). If you want to use a specific version of FFMPEG, follow the instructions in config_defaults.py. In case of trouble, provide feedback.
Installation by hand: download the sources, either from PyPI or, if you want the development version, from GitHub, unzip everything into one folder, open a terminal and type:
$ (sudo) python setup.py install
Installation with pip: if you have pip installed, just type this in a terminal:
$ (sudo) pip install moviepy
If you have neither setuptools nor ez_setup installed, the command above will fail. In this case type this before installing:
$ (sudo) pip install setuptools
Optional but useful dependencies
You can install moviepy with all dependencies via:
$ (sudo) pip install moviepy[optional]
ImageMagick is not strictly required, but needed if you want to incorporate texts. It can also be used as a backend for GIFs, though you can also create GIFs with MoviePy without ImageMagick.
Once you have installed ImageMagick, MoviePy will try to autodetect the path to its executable. If it fails, you can still configure it by setting environment variables (see the documentation).
PyGame is needed for video and sound previews (not relevant if you intend to work with MoviePy on a server but essential for advanced video editing by hand).
For advanced image processing, you will need one or several of the following packages:
The Python Imaging Library (PIL) or, even better, its branch Pillow.
Scipy (for tracking, segmenting, etc.) can be used to resize video clips if PIL and OpenCV are not installed.
Scikit Image may be needed for some advanced image manipulation.
OpenCV 2.4.6 or a more recent version (one that provides the package cv2) may be needed for some advanced image manipulation.
For instance, using the method clip.resize requires that at least one of Scipy, PIL, Pillow or OpenCV is installed.
Documentation
Running build_docs has additional dependencies that require installation.
$ (sudo) pip install moviepy[doc]
The documentation can be generated and viewed via:
$ python setup.py build_docs
You can pass additional arguments to the documentation build, such as clean build:
$ python setup.py build_docs -E
More information is available from the Sphinx documentation.
New in 1.0.0: Progress bars and messages with Proglog
Non-backwards-compatible changes were introduced in 1.0.0 to manage progress bars and messages using Proglog, which enables to display nice progress bars in the console as well as in a Jupyter notebook or any user interface, like a website.
To display notebook friendly progress bars, first install IPyWidgets:
sudo pip install ipywidgets
sudo jupyter nbextension enable --py --sys-prefix widgetsnbextension
Then at the beginning of your notebook enter:
import proglog
proglog.notebook()
Have a look at the Proglog project page for more options.
Running Tests
In order to run the test suite locally, first install the dependencies by navigating to the project directory and running:
$ (sudo) pip install moviepy[test]
The test suite can then be executed via:
$ pytest
Contribute
MoviePy is open-source software originally written by Zulko and released under the MIT licence. The project is hosted on GitHub, where everyone is welcome to contribute, ask for help or simply give feedback. Please read our Contributing Guidelines for more information about how to contribute!
You can also discuss the project on Reddit or Gitter. These are preferred over GitHub issues for usage questions and examples.
Maintainers


 299
299

 被折叠的 条评论
为什么被折叠?
被折叠的 条评论
为什么被折叠?
 到【灌水乐园】发言


