


上一篇文章已经将图标文字绘制完成。
在一般软件开发中,常用按钮一般不止,一个靠左图标和靠左文字。
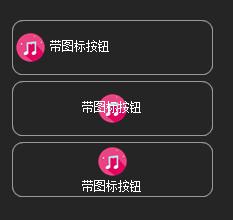
常用的一般三种按钮。文字靠下图标居上居中,文字浮现在图标上方。如上图。
公有属性
[Category("Wen")] [DefaultValue(TextImageRelation.ImageBeforeText)] public TextImageRelation TextImageRelation { get; set; } = TextImageRelation.ImageBeforeText;上一篇文章已经提到如何绘制一个图标,也详细解释了如何使得图标垂直居中。本文不做详细解释。
贴关键代码
第一个:绘制按钮居中,按钮居中
//图标绘制靠上居中 recimage = new Rectangle((this.Width - ImageSize.Width) / 2, (this.Height - ImageSize.Height) / 2, ImageSize.Width, ImageSize.Height); recString = new Rectangle(0, 3 + ImageSize.Height, this.Width, this.Height - 3 - ImageSize.Height); if (Image != null) g.DrawImage(Image, recimage); g.DrawString(this.Text, Font, brush, rec, ControlHelper.StringContersCenter);贴上一个比较常用的属性,可以做一个常用静态帮助类
/// /// 绘制文字,垂直居中,水平靠左 /// public static StringFormat StringConters { get; set; } = new StringFormat(StringFormatFlags.NoClip | StringFormatFlags.NoWrap) { LineAlignment = StringAlignment.Center, Trimming = StringTrimming.EllipsisCharacter }; /// /// 绘制文字,垂直居中,水平居中 /// public static StringFormat StringContersCenter { get; set; } = new StringFormat(StringFormatFlags.NoClip | StringFormatFlags.NoWrap) { LineAlignment = StringAlignment.Center, Alignment = StringAlignment.Center, Trimming = StringTrimming.EllipsisCharacter };以后绘制文字时候就不用每次都写很长一段代码。
第二个:绘制图标考上居中,文字靠下居中
//图标绘制靠上居中 recimage = new Rectangle((this.Width - ImageSize.Width) / 2, 3, ImageSize.Width, ImageSize.Height); recString = new Rectangle(0, 3 + ImageSize.Height, this.Width, this.Height - 3 - ImageSize.Height); if (Image != null) g.DrawImage(Image, recimage); g.DrawString(this.Text, Font, brush, recString, ControlHelper.StringContersCenter);到目前位置一个完整的按钮绘制完成
贴上完整代码块。小伙伴可以直接诶复制粘贴开箱即用。
protected override void OnPaint(PaintEventArgs e) { base.OnPaint(e); Graphics g = e.Graphics; Rectangle rec = this.ClientRectangle; Rectangle recimage = Rectangle.Empty; Rectangle recString = Rectangle.Empty; Brush brush = new SolidBrush(this.ForeColor); if (TextImageRelation == TextImageRelation.ImageAboveText) { //图标绘制靠上居中 recimage = new Rectangle((this.Width - ImageSize.Width) / 2, 3, ImageSize.Width, ImageSize.Height); recString = new Rectangle(0, 3 + ImageSize.Height, this.Width, this.Height - 3 - ImageSize.Height); if (Image != null) g.DrawImage(Image, recimage); g.DrawString(this.Text, Font, brush, recString, ControlHelper.StringContersCenter); } else if (TextImageRelation == TextImageRelation.Overlay || Image == null) { //图标绘制靠上居中 recimage = new Rectangle((this.Width - ImageSize.Width) / 2, (this.Height - ImageSize.Height) / 2, ImageSize.Width, ImageSize.Height); recString = new Rectangle(0, 3 + ImageSize.Height, this.Width, this.Height - 3 - ImageSize.Height); if (Image != null) g.DrawImage(Image, recimage); g.DrawString(this.Text, Font, brush, rec, ControlHelper.StringContersCenter); } else { //其他都是图标坐标文字靠图标 recimage = new Rectangle(2, (this.Height - ImageSize.Height) / 2, ImageSize.Width, ImageSize.Height); recString = new Rectangle(2 + ImageSize.Width + 2, 0, this.Width - ImageSize.Width - 6, this.Height); if (Image != null) g.DrawImage(Image, recimage); g.DrawString(this.Text, Font, brush, recString, ControlHelper.StringConters); } if (this.BorderStyle == BorderStyle.FixedSingle) { System.Drawing.Drawing2D.GraphicsPath path = ControlHelper.CreateRoundedRectanglePath(new Rectangle(0, 0, Width - 1, Height - 1), 10); using (Pen pen = new Pen(Color.FromArgb(153, 153, 153))) { g.DrawPath(pen, path); } } }感兴趣的小伙伴,欢迎在下方留言。关注我,带你重绘美化C#控件


 被折叠的 条评论
为什么被折叠?
被折叠的 条评论
为什么被折叠?
 到【灌水乐园】发言


