


在本系列的文章中,我将介绍如何在Spring Boot Application中使用CKEditor编辑器。介绍的内容包括基本环境的搭建,文件上传,SpringData JPA数据持久化,CKEditor5的安装,CKEditor图片上传,CKEditor插入视频,获取/设置CKEditor内容等。

在本章节中,主要介绍的内容是在SpringBoot中实现图片上传功能,其中包括上传路径的设置,图片路径映射和上传业务代码的编写。
文件上传
所谓的文件上传就是将客户端的资源通过网络传输到服务端,其本质就是IO流操作。服务端通过IO流读取客户端数据,然后对数据进行解析,获取目标文件数据后,将数据存储到服务端磁盘中。
引入依赖
要实现文件上传,首先需要将所需要的依赖包导入到项目中。这里我们仅导入commons-fileupload和commons-io依赖包。通常,commons-fileupload依赖需要和commons-io一起搭配使用,其中封装了大量的用于操作文件上传的功能,可以帮助我们简化文件上传代码的编写。打开pom.xml配置文件,并加入如下的配置:
commons-fileupload commons-fileupload 1.3.3commons-io commons-io 2.6存储路径
上面我们提到,文件上传的本质就是通过IO流将客户端数据存储到服务端的磁盘上。因此,我们需要在服务端的磁盘上规划一个存储空间,用于存储客户端上传的文件。这里我将客户端上传的文件存储到当前项目的类路径下的images文件夹中。
首先,在com.ramostear.ckeditor.common包中创建一个Consts类,然后通过ClassPathResource类获得当前项目的类路径。代码如下:
package com.ramostear.ckeditor.common;import org.springframework.core.io.ClassPathResource;import org.springframework.core.io.Resource;import java.io.IOException;public class Consts { public static String FILE_STORAGE_ROOT = getRootPath(); private static String getRootPath(){ try { Resource resource = new ClassPathResource(""); return resource.getFile().getAbsolutePath(); } catch (IOException e) { e.printStackTrace(); } return null; }}在代码中,获取到的类路径赋值给了公有静态常量 FILE_STORAGE_ROOT,该常量将在图片路径映射和文件上传业务代码中被使用。
上传配置
一般情况下,客户端的数据可以通过Form表单传递到服务端,但如果是图片等大文件数据,服务端将无法直接解析这些数据(如果是图片文件,也可以将图片通过Base64转码后,将获得的二进制文本传递到服务端),因此,我们需要配置一个专门用于解析客户端上传文件的解析器,另外,如果上传的是图片文件,通常需要在上传成功后显示这些图片,在SpringBoot中,客户端是无法直接去加载这些文件的,这就要求我们还得手动去映射图片地址。
下面,将介绍如何在SpringBoot中配置文件上传的相关参数。最简单的配置方式是配置类继承 WebMvcConfigurationSupport类,然后重写其中对应的方法。首先是文件解析器,这里我们实例化一个CommonsMultipartResolver来作为上传文件的解析器,然后设置其允许上传文件的大小和文件的字符编码,代码如下:
@Beanpublic CommonsMultipartResolver multipartResolver(){ CommonsMultipartResolver resolver = new CommonsMultipartResolver(); resolver.setMaxUploadSize(600000000); resolver.setDefaultEncoding("UTF-8"); return resolver;}提示:
在代码中,setMaxUploadSize()方法用于限制上传文件大小的最大值,单位为字节,如果你不想对上传文件做大小限制,可将值设置为-1,默认值也是-1。
最后,为例能够在客户端浏览器中显示上传的图片,我们还需要覆盖WebMvcConfigurationSupport类中的addResourceHandlers()方法,然后对我们定义的图片上传路径做映射。代码如下:
@Overrideprotected void addResourceHandlers(ResourceHandlerRegistry registry) { registry.addResourceHandler("/**") .addResourceLocations("classpath:/static/") .addResourceLocations("file:"+ Consts.FILE_STORAGE_ROOT+"/images"); super.addResourceHandlers(registry);}在上述代码中,将”classpath:/static/“和文件上传路径下的图片地址映射为”/**”,例如,上传到服务器的图片存储路径为”C:/ckeditor5-springboot/images/demo.png”,那么该图片的在客户端浏览器中的请求地址为:”http://localhost:8080/demo.png"。完整的配置类如下:
package com.ramostear.ckeditor.config;import com.ramostear.ckeditor.common.Consts;import org.springframework.context.annotation.Bean;import org.springframework.context.annotation.Configuration;import org.springframework.web.multipart.commons.CommonsMultipartResolver;import org.springframework.web.servlet.config.annotation.ResourceHandlerRegistry;import org.springframework.web.servlet.config.annotation.WebMvcConfigurationSupport;@Configurationpublic class MvcConfiguration extends WebMvcConfigurationSupport { @Bean public CommonsMultipartResolver multipartResolver(){ CommonsMultipartResolver resolver = new CommonsMultipartResolver(); resolver.setMaxUploadSize(600000000); resolver.setDefaultEncoding("UTF-8"); return resolver; } @Override protected void addResourceHandlers(ResourceHandlerRegistry registry) { registry.addResourceHandler("/**") .addResourceLocations("classpath:/static/") .addResourceLocations("file:"+ Consts.FILE_STORAGE_ROOT+"/images/"); super.addResourceHandlers(registry); }}提示:
别忘记添加配置类的@Configuration注解以及配置方法上的@Bean注解。
实现文件上传
以上环节都准备好后,我们将要实现服务端获取客户端上传文件,并保存到磁盘中的功能。首先,定义一个FileManager接口类,并提供文件上传和删除文件方法,代码如下:
package com.ramostear.ckeditor.service;import org.springframework.web.multipart.commons.CommonsMultipartFile;import java.util.Collection;public interface FileManager { String upload(CommonsMultipartFile multipartFile); boolean remove(String url); void remove(Collection urls);}upload()方法用于将客户端上传的文件写入到指定的上传目录中,remove()方法在删除内容时被调用。接下来,在FileManagerImpl.java类中实现上述三个方法。
upload
对于文件上传,首先得获取文件存储的路径,然后将上传文件重命名,最后将上传文件数据写入到目标文件中,文件的读写我们将使用CommonsMultipartFile提供的transferTo()方法来实现,代码如下:
@Overridepublic String upload(CommonsMultipartFile multipartFile) { String storageRoot = Consts.FILE_STORAGE_ROOT+ File.separator+"images"; String path = ""; String suffix = Objects.requireNonNull(multipartFile.getOriginalFilename()) .substring(multipartFile.getOriginalFilename().lastIndexOf(".")); String fileName = SIMPLE_DATE_FORMAT.format(new Date())+"-" + UUID.randomUUID().toString().replaceAll("-","").toLowerCase() + suffix; File file = new File(storageRoot+File.separator+fileName); if(!file.getParentFile().exists()){ file.getParentFile().mkdirs(); } try { multipartFile.transferTo(file); path = "/"+fileName; }catch (IOException e){ e.printStackTrace(); } return path;}文件上传成功后,我们需要将文件的相对地址返回到上一层。
remove
删除文件的方法比较简单,在上传目录中查找传入的文件,如果找到,则删除该文件,反之则不做任何操作。代码如下:
@Overridepublic boolean remove(String url) { String path = Consts.FILE_STORAGE_ROOT+ File.separator+"images"+url; File file = new File(path); if(file.exists() && file.isFile()){ return file.delete(); } return false;}FileManagerImpl.java类的完整代码如下:
package com.ramostear.ckeditor.service.impl;import com.ramostear.ckeditor.common.Consts;import com.ramostear.ckeditor.service.FileManager;import org.springframework.stereotype.Service;import org.springframework.util.CollectionUtils;import org.springframework.web.multipart.commons.CommonsMultipartFile;import java.io.File;import java.io.IOException;import java.text.SimpleDateFormat;import java.util.Collection;import java.util.Date;import java.util.Objects;import java.util.UUID;@Service(value = "fileManager")public class FileManagerImpl implements FileManager { private static final SimpleDateFormat SIMPLE_DATE_FORMAT = new SimpleDateFormat("yyyyMMdd"); @Override public String upload(CommonsMultipartFile multipartFile) { String storageRoot = Consts.FILE_STORAGE_ROOT+ File.separator+"images"; String path = ""; String suffix = Objects.requireNonNull(multipartFile.getOriginalFilename()) .substring(multipartFile.getOriginalFilename().lastIndexOf(".")); String fileName = SIMPLE_DATE_FORMAT.format(new Date())+"-" + UUID.randomUUID().toString().replaceAll("-","").toLowerCase() + suffix; File file = new File(storageRoot+File.separator+fileName); if(!file.getParentFile().exists()){ file.getParentFile().mkdirs(); } try { multipartFile.transferTo(file); path = "/"+fileName; }catch (IOException e){ e.printStackTrace(); } return path; } @Override public boolean remove(String url) { String path = Consts.FILE_STORAGE_ROOT+ File.separator+"images"+url; File file = new File(path); if(file.exists() && file.isFile()){ return file.delete(); } return false; } @Override public void remove(Collection urls) { if(!CollectionUtils.isEmpty(urls)){ urls.stream().allMatch(this::remove); } }}提示:
别忘记在实现类上添加@Service注解。
上传控制器
最后,我们通过Spring MVC来实现图片上传控制器。根据查阅官网相关API可知,CKEditor是通过POST请求的方式将名为“upload”的文件提交到后台,后台将数据处理完成后,需要返回如下格式的数据:
{ "uploaded":true, "filename":"filename", "url":'url'}当图片上传成功后,uploaded的值为true,反之为false。
下面是上传图片控制器的详细代码:
package com.ramostear.ckeditor.controller;import com.alibaba.fastjson.JSONObject;import com.ramostear.ckeditor.service.FileManager;import org.apache.commons.lang3.StringUtils;import org.springframework.web.bind.annotation.PostMapping;import org.springframework.web.bind.annotation.RequestMapping;import org.springframework.web.bind.annotation.RequestParam;import org.springframework.web.bind.annotation.RestController;import org.springframework.web.multipart.commons.CommonsMultipartFile;import java.util.Arrays;import java.util.List;import java.util.stream.Collectors;@RestController@RequestMapping("/upload")public class FileUploadController { private final FileManager fileManager; FileUploadController(FileManager fileManager){ this.fileManager = fileManager; } @PostMapping("/image") public JSONObject image(@RequestParam(name = "upload")CommonsMultipartFile file){ JSONObject json = new JSONObject(); if(file == null || file.isEmpty()){ json.put("uploaded",false); json.put("url",""); return json; } if(StringUtils.isBlank(file.getOriginalFilename()) || !isAllow(file.getOriginalFilename())){ json.put("uploaded",false); json.put("url",""); return json; } String url = fileManager.upload(file); if(StringUtils.isBlank(url)){ json.put("uploaded",false); json.put("url",""); return json; }else{ json.put("uploaded",true); json.put("url",url); return json; } } private boolean isAllow(String fileName){ String[] allowFiles = {".gif",".png",".jpg",".jpeg",".bpm",".svg"}; String suffix = fileName.substring(fileName.lastIndexOf(".")); List suffixList = Arrays.stream(allowFiles).collect(Collectors.toList()); return suffixList.contains(suffix); }}其中,isAllow()方法用于限定上传的文件只能是图片类型,在FileUploadController类中,使用基于构造方法注入的方式将FileManager实例化对象注入到其中,并完成图片上传操作。另外,在该类中使用到了StringUtils工具类和Alibaba FastJson类,因此,你还需要向pom.xml文件中添加如下的依赖:
com.alibaba fastjson 1.2.57org.apache.commons commons-lang3上传测试
由于目前还未搭建前端页面,因此使用浏览器来测试文件上传功能,但我们可以借助Postman来测试文件上传功能。打开Postman软件,然后新建一个请求,请求方式为POST,接着在地址栏输入“http://localhost:8080/upload/image ” ;最后,在Body选项栏下,数据提交格式为form-data,KEY的值为“upload”,类型为”file”,VALUE为待上传的图片。配置完成后点击”Send”按钮进行测试。测试流程如下图:
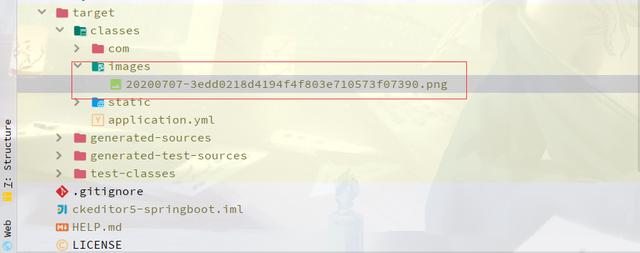
图片上传成功后,我们可以在项目的target/classes/images/目录下查看到刚刚上传的图片“20200707-3edd0218d4194f4f803e710573f07390.png”,如下图:
除此之外,我们开可以在浏览器中输入“ http://localhost:8080/20200707-3edd0218d4194f4f803e710573f07390.png ”来访问刚才上传的图片,如下图:
本章小结
在本章内容中,详细介绍了使用SpringBoot实现文件上传的详细过程,并使用Postman工具对文件上传功能做了测试。在下一章中,将介绍SpringBoot和Freemaker模板引擎的整合。
未经作者允许,请勿擅自转载,转载请注明文章作者和出处。


 5810
5810

 被折叠的 条评论
为什么被折叠?
被折叠的 条评论
为什么被折叠?
 到【灌水乐园】发言


