


原理
接着我们来了解一下iCarousel的基本原理
iCarousel支持如下几种内置显示类型(没用过的同学请务必使用pod try iCarousel来运行一下demo)
iCarouselTypeLinear
iCarouselTypeRotary
iCarouselTypeInvertedRotary
iCarouselTypeCylinder
iCarouselTypeInvertedCylinder
iCarouselTypeWheel
iCarouselTypeInvertedWheel
iCarouselTypeCoverFlow
iCarouselTypeCoverFlow2
iCarouselTypeTimeMachine
iCarouselTypeInvertedTimeMachine
具体效果图可以在官方Github主页上看到 不过这几种类型虽然好 但是也无法满足我们现在的需求 没关系 iCarousel还支持自定义类型
iCarouselTypeCustom
这就是我们今天的主角
还是代码说话 我们先配置一个简单的iCarousel示例 并使用iCarouselTypeCustom作为其类型
@interfaceViewController ()
<
iCarouselDelegate,
iCarouselDataSource
>
@property(nonatomic, strong) iCarousel *carousel;
@property(nonatomic, assign) CGSize cardSize;
@end
@implementationViewController
- (void)viewDidLoad {
[superviewDidLoad];
CGFloat cardWidth = [UIScreen mainScreen].bounds.size.width*5.0f/7.0f;
self.cardSize = CGSizeMake(cardWidth, cardWidth*16.0f/9.0f);
self.view.backgroundColor = [UIColor blackColor];
self.carousel = [[iCarousel alloc] initWithFrame:[UIScreen mainScreen].bounds];
[self.view addSubview:self.carousel];
self.carousel.delegate = self;
self.carousel.dataSource = self;
self.carousel.type = iCarouselTypeCustom;
self.carousel.bounceDistance = 0.2f;
}
- (NSInteger)numberOfItemsInCarousel:(iCarousel *)carousel
{
return15;
}
- (CGFloat)carouselItemWidth:(iCarousel *)carousel
{
returnself.cardSize.width;
}
- (UIView *)carousel:(iCarousel *)carousel viewForItemAtIndex:(NSInteger)index reusingView:(UIView *)view
{
UIView *cardView = view;
if( !cardView )
{
cardView = [[UIView alloc] initWithFrame:CGRectMake(0,0, self.cardSize.width, self.cardSize.height)];
UIImageView *imageView = [[UIImageView alloc] initWithFrame:cardView.bounds];
[cardView addSubview:imageView];
imageView.contentMode = UIViewContentModeScaleAspectFill;
imageView.backgroundColor = [UIColor whiteColor];
cardView.layer.shadowPath = [UIBezierPath bezierPathWithRoundedRect:imageView.frame cornerRadius:5.0f].CGPath;
cardView.layer.shadowRadius = 3.0f;
cardView.layer.shadowColor = [UIColor blackColor].CGColor;
cardView.layer.shadowOpacity = 0.5f;
cardView.layer.shadowOffset = CGSizeMake(0,0);
CAShapeLayer *layer = [CAShapeLayer layer];
layer.frame = imageView.bounds;
layer.path = [UIBezierPath bezierPathWithRoundedRect:imageView.bounds cornerRadius:5.0f].CGPath;
imageView.layer.mask = layer;
}
returncardView;
}
当你运行这段代码的时候哦 你会发现显示出来是下面这个样子的 并且划也划不动(掀桌:这是什么鬼~(/‵Д′)/~ ╧╧)
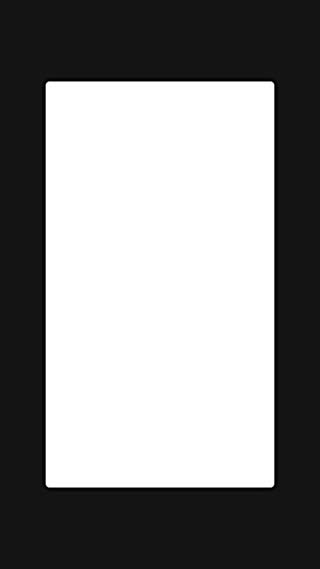
这是因为我们有个最重要的delegate方法没有实现
- (CATransform3D)carousel:(iCarousel *)carousel itemTransformForOffset:(CGFloat)offset
这个函数也是整个iCarouselTypeCustom的灵魂所在
接下来我们要简单的说一下iCarousel的原理
iCarousel并不是一个UIScrollView 也并没有包含任何UIScrollView作为subView
iCarousel通过UIPanGestureRecognizer来计算和维护scrollOffset这个变量
iCarousel通过scrollOffset来驱动整个动画过程
iCarousel本身并不会改变itemView的位置 而是靠修改itemView的layer.transform来实现位移和形变
可能文字说得不太清楚 我们还是通过代码来看一下
- (UIView *)carousel:(iCarousel *)carousel viewForItemAtIndex:(NSInteger)index reusingView:(UIView *)view
{
UIView *cardView = view;
if( !cardView )
{
cardView = [[UIView alloc] initWithFrame:CGRectMake(0,0, self.cardSize.width, self.cardSize.height)];
...
...
//添加一个lbl
UILabel *lbl = [[UILabel alloc] initWithFrame:cardView.bounds];
lbl.text = [@(index) stringValue];
[cardView addSubview:lbl];
lbl.font = [UIFont boldSystemFontOfSize:200];
lbl.textAlignment = NSTextAlignmentCenter;
}
returncardView;
}
- (CATransform3D)carousel:(iCarousel *)carousel itemTransformForOffset:(CGFloat)offset baseTransform:(CATransform3D)transform
{
NSLog(@"%f",offset);
returntransform;
}
然后滑动的时候打出的日志是类似这样的
2015-07-2816:53:22.330DemoTaskTray[1834:485052] -2.999739
2015-07-2816:53:22.331DemoTaskTray[1834:485052]2.000261
2015-07-2816:53:22.331DemoTaskTray[1834:485052] -1.999739
2015-07-2816:53:22.331DemoTaskTray[1834:485052]3.000261
2015-07-2816:53:22.331DemoTaskTray[1834:485052] -0.999739
2015-07-2816:53:22.332DemoTaskTray[1834:485052]0.000261
2015-07-2816:53:22.332DemoTaskTray[1834:485052]1.000261
2015-07-2816:53:22.346DemoTaskTray[1834:485052] -3.000000
2015-07-2816:53:22.347DemoTaskTray[1834:485052]2.000000
2015-07-2816:53:22.347DemoTaskTray[1834:485052] -2.000000
2015-07-2816:53:22.348DemoTaskTray[1834:485052]3.000000
2015-07-2816:53:22.348DemoTaskTray[1834:485052] -1.000000
2015-07-2816:53:22.348DemoTaskTray[1834:485052]0.000000
2015-07-2816:53:22.348DemoTaskTray[1834:485052]1.000000
2015-07-2816:53:22.363DemoTaskTray[1834:485052] -3.000000
2015-07-2816:53:22.363DemoTaskTray[1834:485052]2.000000
2015-07-2816:53:22.363DemoTaskTray[1834:485052] -2.000000
2015-07-2816:53:22.363DemoTaskTray[1834:485052]3.000000
2015-07-2816:53:22.364DemoTaskTray[1834:485052] -1.000000
2015-07-2816:53:22.364DemoTaskTray[1834:485052]0.000000
2015-07-2816:53:22.364DemoTaskTray[1834:485052]1.000000
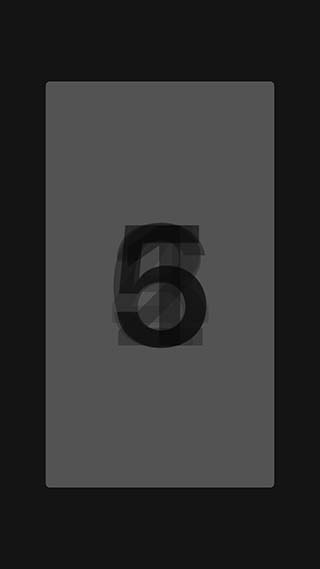
可以看到 所有的itemView都是居中并且重叠在一起的 我们滑动的时候并不会改变itemView的位置 但是这个offset是会改变的 而且可以看到 所有的offset的相邻差值都为1.0
这就是iCarousel的一个重要的设计理念 iCarousel虽然跟UIScrollView一样都各自会维护自己的scrollOffset 但是UIScrollView在滑动的时候改变的是自己的ViewPort 就是说 UIScrollView上的itemView是真正被放置到了他被设置的位置上 只是UIScrollView通过移动显示的窗口 造成了滑动的感觉(如果不理解 请看这篇文章)
但是iCarousel并不是这样 iCarousel会把所有的itemView都居中重叠放置在一起 当scrollOffset变化时 iCarousel会计算每个itemView的offset 并通过- (CATransform3D)carousel:(iCarousel *)carousel itemTransformForOffset:(CGFloat)offset baseTransform:(CATransform3D)transform这个函数来对每个itemView进行形变 通过形变来造成滑动的效果
这个非常大胆和另类的想法着实很奇妙! 可能我解释得不够好(尽力了~~) 还是通过代码来解释比较好


 416
416


 被折叠的 条评论
为什么被折叠?
被折叠的 条评论
为什么被折叠?
 到【灌水乐园】发言


