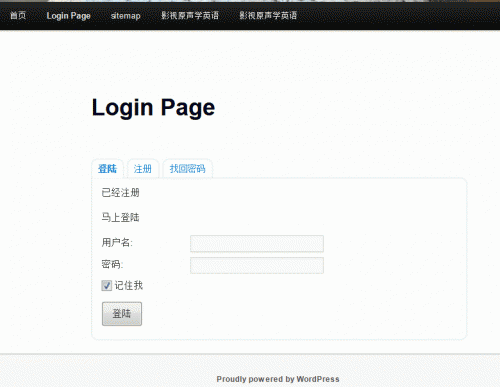
上次说到不用插件也可以修改WordPress登陆注册界面,不过只是简单的修改了CSS,缺少很多元素,例如header、导航、footer等,为了增加这些元素,我们可以采取另一种方式,将WordPress登陆注册界面做成page模板,用page来展示登陆/注册/找回密码。进一步,我们可以将登注册、找回密码放在一个页面,用选项卡切换,效果如下(Based on twentyeleven)
显示wp登陆表单的函数
如果只需要显示wp的登陆表单,有一个现成的函数可以用
这里我们要把登陆、注册和找回密码放到一个模板里,所以需要手动写这三个表单的代码。
实现方法
下述文件均放置在主题根目录下
1. 建立一个新的page模板,命名为page-login.php,内容如下:<?php
/*
Template Name:Login Template
*/
wp_enqueue_style('custom-login.css', get_stylesheet_directory_uri() . '/custom-login.css');
get_header();
?>
>
<?php the_title(); ?>
get_currentuserinfo();
if (!$user_ID) { ?>
$reset = $_GET['reset'];
if ($register == true) { ?>
<?php _e('Username'); ?>:
<?php _e('Password'); ?>:
if ($register == true) {
echo ' 密码已发送至您的邮箱,请查看 ';
}
?>
if ($reset == true) {
echo '信息将会发送至您的注册邮箱 ';
}
?>
<?php _e('欢迎'); ?>, <?php echo $user_identity; ?>
get_currentuserinfo();
echo get_avatar($userdata->ID, 60); ?>
2. 在文件开头引入了custom-login.css,建立该文件,并将下面的样式表拷贝进去/* tabbed list */
ul.tabs_login {
padding: 0; margin: 20px 0 0 0;
position: relative;
list-style: none;
font-size: 14px;
z-index: 1000;
float: left;
}
ul.tabs_login li {
border: 1px solid #E7E9F6;
-webkit-border-top-right-radius: 10px;
-khtml-border-radius-topright: 10px;
-moz-border-radius-topright: 10px;
border-top-right-radius: 10px;
-webkit-border-top-left-radius: 10px;
-khtml-border-radius-topleft: 10px;
-moz-border-radius-topleft: 10px;
border-top-left-radius: 10px;
line-height: 28px; /* = */ height: 28px;
padding: 0; margin: 0 5px 0 0;
position: relative;
background: #fff;
overflow: hidden;
float: left;
}
ul.tabs_login li a {
text-decoration: none;
padding: 0 10px;
display: block;
outline: none;
}
html ul.tabs_login li.active_login {
border-left: 1px solid #E7E9F6;
border-bottom: 1px solid #fff;
-webkit-border-top-right-radius: 10px;
-khtml-border-radius-topright: 10px;
-moz-border-radius-topright: 10px;
border-top-right-radius: 10px;
-webkit-border-top-left-radius: 10px;
-khtml-border-radius-topleft: 10px;
-moz-border-radius-topleft: 10px;
border-top-left-radius: 10px;
background: #fff;
color: #333;
}
html body ul.tabs_login li.active_login a { font-weight: bold; }
.tab_container_login {
background: #fff;
position: relative;
margin: 0 0 20px 0;
border: 1px solid #E7E9F6;
-webkit-border-bottom-left-radius: 10px;
-khtml-border-radius-bottomleft: 10px;
-moz-border-radius-bottomleft: 10px;
border-bottom-left-radius: 10px;
-webkit-border-bottom-right-radius: 10px;
-khtml-border-radius-bottomright: 10px;
-moz-border-radius-bottomright: 10px;
border-bottom-right-radius: 10px;
-webkit-border-top-right-radius: 10px;
-khtml-border-radius-topright: 10px;
-moz-border-radius-topright: 10px;
border-top-right-radius: 10px;
z-index: 999;
float: left;
width: 100%;
top: -1px;
}
.tab_content_login {
padding: 7px 15px 15px 15px;
padding-top: 10px;
}
.tab_content_login ul {
padding: 0; margin: 0 0 0 15px;
}
.tab_content_login li { margin: 5px 0; }
/* global styles */
#login-register-password {}
#login-register-password h3 {
border: 0 none;
margin: 10px 0;
padding: 0;
}
#login-register-password p {
margin: 0 0 15px 0;
padding: 0;
}
/* form elements */
.wp-user-form {}
.username, .password, .login_fields {
margin: 7px 0 0 0;
overflow: hidden;
width: 100%;
}
.username label, .password label { float: left; clear: none; width: 25%; }
.username input, .password input {
font: 12px/1.5 "Lucida Grande", "Lucida Sans Unicode", Verdana, sans-serif;
float: left; clear: none; width: 200px; padding: 2px 3px; color: #777;
}
.rememberme { overflow: hidden; width: 100%; margin-bottom: 7px; }
#rememberme { float: left; clear: none; margin: 4px 4px -4px 0; }
.user-submit { padding: 5px 10px; margin: 5px 0; cursor:pointer; }
.userinfo { float: left; clear: none; width: 75%; margin-bottom: 10px; }
.userinfo p {
margin-left: 10px;
}
.usericon { float: left; clear: none; width: 15%; margin: 0 0 10px 22px; }
.usericon img.avatar {
border: 1px solid #F4950E;
padding: 1px;
}
3. 选项卡切换效果通过jQuery实现,建立一个js文件叫custom-login.js,拷贝下面的代码jQuery(document).ready(function() {
jQuery(".tab_content_login").hide();
jQuery("ul.tabs_login li:first").addClass("active_login").show();
jQuery(".tab_content_login:first").show();
jQuery("ul.tabs_login li").click(function() {
jQuery("ul.tabs_login li").removeClass("active_login");
jQuery(this).addClass("active_login");
jQuery(".tab_content_login").hide();
var activeTab = jQuery(this).find("a").attr("href");
if (jQuery.browser.msie) {
jQuery(activeTab).show();
}
else {
jQuery(activeTab).show();
}
return false;
});
});
4. 到后台建立一个新的页面,模板选择Login Template,保存发布后就可以看到效果。不同的主题效果不同,需要根据具体情况修改css样式。
集成到主题
如果不想为css和js建立单独的文件,可以将custom-login.css中的内容拷贝到主题的style.css中,将custom-login.js的内容拷贝到footer.php


 1万+
1万+


 被折叠的 条评论
为什么被折叠?
被折叠的 条评论
为什么被折叠?
 到【灌水乐园】发言


