


前几个星期老师在课堂上教了我们Spring和SpringMVC以及Hibernate,但自己一直没有实践过,所以今天就用Spring+SpringMVC+Hibernate整合做了一个用户登陆的模块,好让自己以后搞项目有一个可以参考的流程,期间主要参考的是下面这个博客
第一步:构建一个Maven Web项目,至于怎么构建可以看我下面这篇博客
https://blog.csdn.net/weixin_41641941/article/details/90490133
第二步:添加Maven依赖(spring和hibernate版本均为4.0以上)
<project xmlns="http://maven.apache.org/POM/4.0.0"
	xmlns:xsi="http://www.w3.org/2001/XMLSchema-instance"
	xsi:schemaLocation="http://maven.apache.org/POM/4.0.0 http://maven.apache.org/xsd/maven-4.0.0.xsd">
	<modelVersion>4.0.0</modelVersion>

	<groupId>com.ringo</groupId>
	<artifactId>ssh</artifactId>
	<version>0.0.1-SNAPSHOT</version>
	<packaging>jar</packaging>

	<name>ssh</name>
	<url>http://maven.apache.org</url>

	<properties>
		<project.build.sourceEncoding>UTF-8</project.build.sourceEncoding>
		<spring.version>4.2.6.RELEASE</spring.version>
		<junit.version>4.12</junit.version>
	</properties>

	<!-- spring+junit单元测试 begin -->
	<dependencies>
		<dependency>
			<groupId>junit</groupId>
			<artifactId>junit</artifactId>
			<version>${junit.version}</version>
		</dependency>
		<dependency>
			<groupId>org.springframework</groupId>
			<artifactId>spring-test</artifactId>
			<version>4.1.2.RELEASE</version>
			<scope>test</scope>
		</dependency>
		<!-- spring+junit单元测试 end -->

		<!-- springframework 4 dependencies begin -->
		<dependency>
			<groupId>org.springframework</groupId>
			<artifactId>spring-core</artifactId>
			<version>${spring.version}</version>
		</dependency>
		<dependency>
			<groupId>org.springframework</groupId>
			<artifactId>spring-context</artifactId>
			<version>${spring.version}</version>
		</dependency>
		<dependency>
			<groupId>org.springframework</groupId>
			<artifactId>spring-web</artifactId>
			<version>${spring.version}</version>
		</dependency>
		<dependency>
			<groupId>org.springframework</groupId>
			<artifactId>spring-webmvc</artifactId>
			<version>${spring.version}</version>
		</dependency>
		<dependency>
			<groupId>org.springframework</groupId>
			<artifactId>spring-orm</artifactId>
			<version>${spring.version}</version>
		</dependency>
		<!-- springframework 4 dependencies end -->

		<!-- hibernate 配置 begin -->
		<dependency>
			<groupId>org.hibernate</groupId>
			<artifactId>hibernate-core</artifactId>
			<version>4.2.3.Final</version>
		</dependency>
		<!-- https://mvnrepository.com/artifact/net.sf.ehcache/ehcache-core -->
		<dependency>
			<groupId>net.sf.ehcache</groupId>
			<artifactId>ehcache-core</artifactId>
			<version>2.4.3</version>
		</dependency>
		<dependency>
			<groupId>org.hibernate</groupId>
			<artifactId>hibernate-ehcache</artifactId>
			<version>4.2.11.Final</version>
		</dependency>
		<dependency>
			<groupId>org.slf4j</groupId>
			<artifactId>slf4j-api</artifactId>
			<version>1.6.1</version>
		</dependency>
		<!-- hibernate 配置 end -->

		<!-- mysql数据库的驱动包 start -->
		<dependency>
			<groupId>mysql</groupId>
			<artifactId>mysql-connector-java</artifactId>
			<version>5.1.6</version>
		</dependency>

		<!-- 引入jstl包 -->
		<dependency>
			<groupId>javax.servlet.jsp.jstl</groupId>
			<artifactId>jstl-api</artifactId>
			<version>1.2</version>
		</dependency>

		<!-- 引入servlet -->
		<dependency>
			<groupId>javax.servlet</groupId>
			<artifactId>javax.servlet-api</artifactId>
			<version>3.1.0</version>
		</dependency>

		<!-- 引入数据库连接池 -->
		<!--c3p0 start -->
		<dependency>
			<groupId>c3p0</groupId>
			<artifactId>c3p0</artifactId>
			<version>0.9.1.2</version>
		</dependency>
		<!-- c3p0 end -->
		<dependency>
			<groupId>javax.annotation</groupId>
			<artifactId>javax.annotation-api</artifactId>
			<version>1.3.2</version>
		</dependency>
	</dependencies>
</project>
第三步:创建配置文件目录src/main/resourse
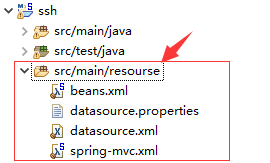
配置文件主要分为四个:web.xm , beans.xml ,,spring-mvc.xml ,,datasource.xml ,除了web.xml之外都放在src/main/resources文件夹中,我搭框架的做法是从底层一步步往最上层来搭,并且每一层都独立测试完毕才去搭下一层,以确保整合的时候错误好排查
第四步:配置好datasourse.properties和datasourse.xml以及beans.xml
datasourse.properties对应的是hibernate调用JDBC连接数据库所需要的全局变量配置,先新建一个datasourse.properties文件

写入配置:
#database connection config
  jdbc.driver = com.mysql.jdbc.Driver
  jdbc.url = jdbc:mysql://localhost:3306/ssh?useUnicode=true&characterEncoding=utf-8
  jdbc.username = root
  jdbc.password =

  #hibernate config
  hibernate.dialect = org.hibernate.dialect.MySQLDialect
  hibernate.show_sql = true
 hibernate.format_sql = true
 hibernate.hbm2ddl.auto = update
你直接用的话要记得改一下你的数据库名称和密码
datasourse.xml对应的是Hibernate的连接池、sessionFactory、事务的配置:
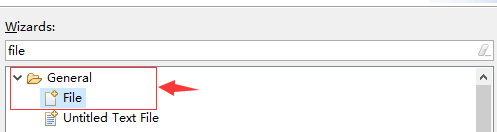
1、新建一个Spring Bean Definition file,并且命名为beans.xml(如果没有Spring Bean Definition file也可以新建xml文件,然后直接负责配置上去就好了)
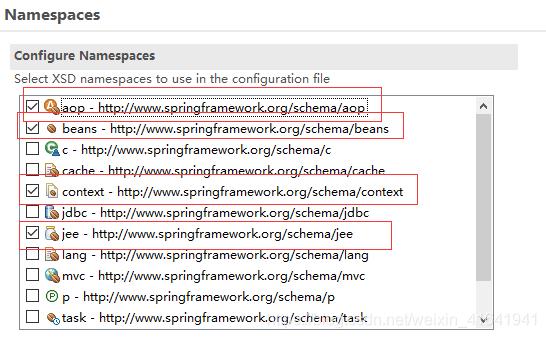
在这里插入图片描述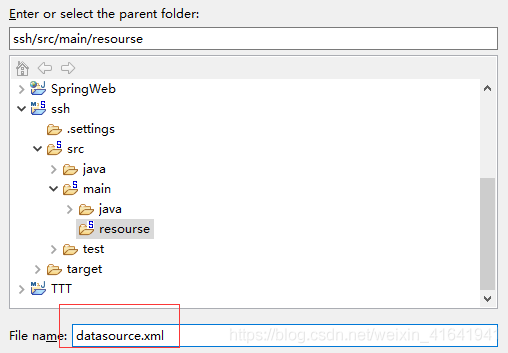
点击下面的四个命名空间,可以直接在bean头生成命名空
写入配置信息:
<?xml version="1.0" encoding="UTF-8"?>
<beans xmlns="http://www.springframework.org/schema/beans"
	xmlns:xsi="http://www.w3.org/2001/XMLSchema-instance"
	xmlns:jee="http://www.springframework.org/schema/jee"
	xmlns:tx="http://www.springframework.org/schema/tx"
	xmlns:context="http://www.springframework.org/schema/context"
	xmlns:aop="http://www.springframework.org/schema/aop"
	xsi:schemaLocation="
      http://www.springframework.org/schema/aop
     http://www.springframework.org/schema/aop/spring-aop-3.2.xsd
     http://www.springframework.org/schema/beans
     http://www.springframework.org/schema/beans/spring-beans-3.2.xsd
     http://www.springframework.org/schema/tx
     http://www.springframework.org/schema/tx/spring-tx-3.2.xsd
     http://www.springframework.org/schema/jee
     http://www.springframework.org/schema/jee/spring-jee-3.2.xsd
     http://www.springframework.org/schema/context
     http://www.springframework.org/schema/context/spring-context-3.2.xsd">
	<!--配置数据源 这里是使用的是c3p0连接池 -->
	<bean id="dataSource"
		class="com.mchange.v2.c3p0.ComboPooledDataSource"
		destroy-method="close">
		<property name="driverClass" value="${jdbc.driver}" />  <!--数据库连接驱动 -->
		<property name="jdbcUrl" value="${jdbc.url}" />     <!--数据库地址 -->
		<property name="user" value="${jdbc.username}" />   <!--用户名 -->
		<property name="password" value="${jdbc.password}" />   <!--密码 -->
		<property name="maxPoolSize" value="40" />      <!--最大连接数 -->
		<property name="minPoolSize" value="1" />       <!--最小连接数 -->
		<property name="initialPoolSize" value="10" />      <!--初始化连接池内的数据库连接 -->
		<property name="maxIdleTime" value="20" />  <!--最大空闲时间 -->
	</bean>

	<!--配置session工厂 -->
	<bean id="sessionFactory"
		class="org.springframework.orm.hibernate4.LocalSessionFactoryBean">
		<property name="dataSource" ref="dataSource" />
		<property name="packagesToScan" value="com.ringo.ssh.entity" />
		<property name="hibernateProperties">
			<props>
				<prop key="hibernate.hbm2ddl.auto">${hibernate.hbm2ddl.auto}</prop> <!--hibernate根据实体自动生成数据库表 -->
				<prop key="hibernate.dialect">${hibernate.dialect}</prop>   <!--指定数据库方言 -->
				<prop key="hibernate.show_sql">${hibernate.show_sql}</prop>     <!--在控制台显示执行的数据库操作语句 -->
				<prop key="hibernate.format_sql">${hibernate.format_sql}</prop>     <!--在控制台显示执行的数据哭操作语句(格式) -->
			</props>
		</property>
	</bean>

	<!-- 事务配置 声明式事务 -->
	<bean id="transactionManager"
		class="org.springframework.orm.hibernate4.HibernateTransactionManager">
		<property name="sessionFactory" ref="sessionFactory" />
	</bean>
	<!-- 使用annotation定义事务 -->
	<tx:annotation-driven
		transaction-manager="transactionManager" />
</beans>
beans.xml对应的是spring框架的配置:
建立文件的方式和datasource.xml一样,只是bean头有点不同,配置信息:
<?xml version="1.0" encoding="UTF-8"?>
<beans xmlns="http://www.springframework.org/schema/beans"
	xmlns:xsi="http://www.w3.org/2001/XMLSchema-instance"
	xmlns:context="http://www.springframework.org/schema/context"
	xmlns:p="http://www.springframework.org/schema/p"
	xmlns:cache="http://www.springframework.org/schema/cache"
	xsi:schemaLocation="
          http://www.springframework.org/schema/beans
          http://www.springframework.org/schema/beans/spring-beans-3.0.xsd
          http://www.springframework.org/schema/context
          http://www.springframework.org/schema/context/spring-context-3.0.xsd
         http://www.springframework.org/schema/cache
         http://www.springframework.org/schema/cache/spring-cache-3.1.xsd">

	<!-- 注解 -->
	<context:annotation-config />
	<!--扫描 -->
	<context:component-scan
		base-package="com">
		<context:exclude-filter type="annotation"
			expression="org.springframework.stereotype.Controller" />

	</context:component-scan>
	<!-- 导入多个Properties配置文件 -->
	<bean id="propertyConfigurer"
		class="org.springframework.beans.factory.config.PropertyPlaceholderConfigurer">
		<property name="locations">
			<list>
				<!--要是有多个配置文件,只需在这里继续添加即可 -->
				<value>classpath:datasource.properties</value>
			</list>
		</property>
	</bean>

	<!-- 加载数据源组件 -->
	<import resource="classpath:datasource.xml" />
</beans>
其中有几个点值得注意一下:
-
<context:exclude-filter type="annotation" expression="org.springframework.stereotype.Controller" />这段配置的作用是让Spring不要去扫描带@Controller注解的类,因为SpringMVC是Spring的子容器,如果重复扫描的话两个容器会冲突; -
<bean id="propertyConfigurer" class="org.springframework.beans.factory.config.PropertyPlaceholderConfigurer"> <property name="locations"> <list> <!--要是有多个配置文件,只需在这里继续添加即可 --> <value>classpath:datasource.properties</value> </list> </property> </bean>
这段配置是用于添加配置文件,这一步就相当于把datasource.properties和datasource.xml关联起来,让datasource.xml可以用到datasource.properties里面配置的变量 -
<import resource="classpath:datasource.xml" />则是将datasource.xml里面的bean组件加进到了beans.xml,也就是让整个Spring容器可以使用datasource.xml配置的SessionFactory
第四步:编写Entity层
先创建Entity层的包并创建Person类

编写代码:
package com.ringo.ssh.entity;

import javax.persistence.Column;
import javax.persistence.Entity;
import javax.persistence.GeneratedValue;
import javax.persistence.Id;
import javax.persistence.Table;
@Entity
@Table(name = "person")
public class Person {

	@Id
	@Column(name = "id")
	@GeneratedValue()
	private int id;

	@Column(name = "userName")
	private String userName;

	@Column(name = "password")
	private String password;

	@Column(name = "sex")
	private String sex;

	public int getId() {
		return id;
	}

	public void setId(int id) {
		this.id = id;
	}

	public String getUserName() {
		return userName;
	}

	public void setUserName(String userName) {
		this.userName = userName;
	}

	public String getPassword() {
		return password;
	}

	public void setPassword(String password) {
		this.password = password;
	}

	public String getSex() {
		return sex;
	}

	public void setSex(String sex) {
		this.sex = sex;
	}
}
第五步:创建名字为ssh的数据库
怎么创建就不说了吧。。。。。。
第六步:编写测试类来使用Hibernate来自动生成表结构
- 编写父类测试类BaseTestCaseJunit44,代码如下:
package com.ringo.ssh.dao;


import org.junit.runner.RunWith;
import org.springframework.transaction.annotation.Transactional;
import org.springframework.test.context.ContextConfiguration;
import org.springframework.test.context.junit4.SpringJUnit4ClassRunner;
import org.springframework.test.context.transaction.TransactionConfiguration;

@RunWith(SpringJUnit4ClassRunner.class)
@ContextConfiguration(locations = { "classpath:/beans.xml" ,"classpath:/datasource.xml"})
@TransactionConfiguration(transactionManager = "transactionManager", defaultRollback = true)
@Transactional
public class BaseTestCaseJunit44 {
	// 本类作为基类,所有要用到的东西都在annotation里配置了,所以什么内容都不用写了。
}
这里的注解有几个点要注意一下:
@RunWith(SpringJUnit4ClassRunner.class)这里面填写的是你对应的Junit版本的运行类,如果你用的是Junit3却用了写了SpringJUnit4ClassRunner.class,那么就会报错,版本的话在New Junit Test Case的时候可以设置

@ContextConfiguration(locations = { "classpath:/beans.xml" ,"classpath:/datasource.xml"}),这段作用是在测试环境里面关联配置文件,这里建议把所有配置文件都加进去
第七步:编写测试子类
- 新建一个测试子类PersonDaoTest并继承BaseTestCaseJunit44
测试代码:
package com.ringo.ssh.dao;

import org.hibernate.cfg.Configuration;
import org.hibernate.tool.hbm2ddl.SchemaExport;
import org.junit.Test;
import org.springframework.beans.factory.annotation.Autowired;

import com.ringo.ssh.entity.Person;

public class PersonDaoTest extends BaseTestCaseJunit44{
@Test
	public void testInit() {
		//不用写东西,启动hibernate时会自动检查数据库,如果缺少表,则自动建表;如果表里缺少列,则自动添加列
		}
第八步:暂时修改datasource.properties
打开datasource.properties,将hibernate.hbm2ddl.auto = update修改成hibernate.hbm2ddl.auto = create,这一步的作用是表示自动根据model对象来更新表结构,启动hibernate时会自动检查数据库,如果缺少表,则自动建表;如果表里缺少列,则自动添加列,当你把表都构建完之后就把它改回来就好了
详细的可以参考这篇文章
第九步:运行testInit(),自动在数据库中生成表
这一步记得打开数据库。。。。。
第十步:编写Dao层
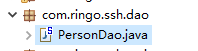
代码:
package com.ringo.ssh.dao;
import org.hibernate.SessionFactory;
import org.springframework.beans.factory.annotation.Autowired;
import org.springframework.stereotype.Repository;
import com.ringo.ssh.entity.Person;
@Repository("PersonDao")
public class PersonDao {
@Autowired
private SessionFactory sessionFactory;
/**
* 保存对象
*
* @param p
* @return
*/
public void save(Person p) {
sessionFactory.getCurrentSession().save(p);
}
/**
* 根据UserName来查找用户
*
* @param String userName
* @return Person
*/
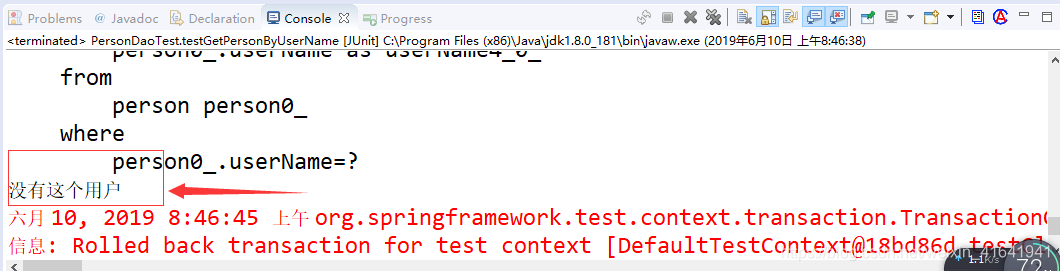
public Person getPersonByUserName(String userName) {
return (Person)sessionFactory.getCurrentSession().createQuery("from Person where userName =?")
.setParameter(0, userName).uniqueResult();
}
}
这里我创建了两个方法,一个用来储存用户,一个用来根据用户名查询用户,这里有一点要注意的是createQuery("from Person where userName =?")括号里面写的是HQL语言,所以from后面的不是写对应的表名而是写对应实体类的类名,不然会报“users is not mapped的错误”,这个是HQL比较特别的一个地方
第十一步:测试Dao层
在PersonDaoTest里面写入下面的测试代码
@Autowired
private PersonDao personDao;
@Test
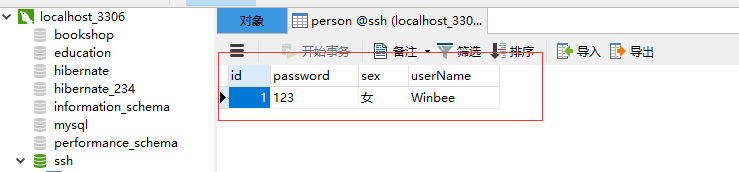
public void testSave() {
Person p = new Person();
p.setUserName("Winbee");
p.setSex("女");
p.setPassword("123");
personDao.save(p);
}
@Test
public void testGetPersonByUserName() {
Person p=personDao.getPersonByUserName("Ring");
if(p==null)
System.out.println("没有这个用户");
}
首先先执行testSave(),再执行testGetPersonByUserName()
测试用例可以自行设计,主要保证测试没有问题就好
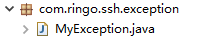
第十二步:编写异常类
因为后面要用到,所以先编写一个异常类MyException
异常类代码:
package com.ringo.ssh.exception;

public class MyException extends Exception{

	private static final long serialVersionUID = 1L;

	  // 提供无参数的构造方法
	  public MyException() {
	  }

	  // 提供一个有参数的构造方法,可自动生成
	  public MyException(String message) {
	    super(message);// 把参数传递给Throwable的带String参数的构造方法
	  }
}
第十三步:编写Service层
代码片段:
package com.ringo.ssh.service;
import javax.annotation.Resource;
import org.springframework.stereotype.Service;
import org.springframework.transaction.annotation.Transactional;
import com.ringo.ssh.dao.PersonDao;
import com.ringo.ssh.entity.Person;
import com.ringo.ssh.exception.MyException;
@Service("personService")
public class PersonService {
@Resource(name = "PersonDao")
private PersonDao personDao;
@Transactional
public void save(Person p) {
personDao.save(p);
}
@Transactional
public int checkSignIn(String userName,String password) throws MyException {
Person p1=personDao.getPersonByUserName(userName);
if(p1==null)
throw new MyException("该用户名不存在!");// new一个自己的异常类
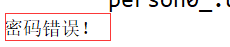
else if(!password.equals(p1.getPassword()))
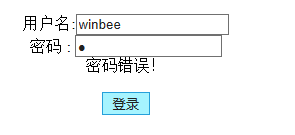
throw new MyException("密码错误!");// new一个自己的异常类
else
return 1;
}
}
这里使用异常的原因的为了把错误信息更方便的传送到前端给用户看
@Transactional注解是启动事务的意思,具体可以看下面这篇博客
https://blog.csdn.net/baidu_33403616/article/details/75284529
第十四步:编写Service层测试类
测试代码:
package com.ringo.ssh.service;

import javax.annotation.Resource;
import org.junit.Test;
import com.ringo.ssh.dao.BaseTestCaseJunit44;
import com.ringo.ssh.exception.MyException;
public class PersonServiceTest extends BaseTestCaseJunit44{

	@Resource
	PersonService personService;
	@Test
	public void testcheckSignIn() {
		try {
			if(personService.checkSignIn("Winbee", "123")==1)
				System.out.println("账户存在且密码正确");
		} catch (MyException e) {
			// TODO Auto-generated catch block
			System.out.println(e.getMessage());
		}
	}
}

第十五步:配置spring-mvc.xml配置文件
spring-mvc.xml对应的是springMVCD的配置文件:
<?xml version="1.0" encoding="UTF-8"?>
<beans xmlns="http://www.springframework.org/schema/beans"
xmlns:xsi="http://www.w3.org/2001/XMLSchema-instance"
xmlns:context="http://www.springframework.org/schema/context"
xmlns:mvc="http://www.springframework.org/schema/mvc"
xsi:schemaLocation="http://www.springframework.org/schema/beans
http://www.springframework.org/schema/beans/spring-beans-4.1.xsd
http://www.springframework.org/schema/context
http://www.springframework.org/schema/context/spring-context-4.1.xsd
http://www.springframework.org/schema/mvc
http://www.springframework.org/schema/mvc/spring-mvc-4.1.xsd">
<!-- 配置扫描的包 -->
<context:component-scan
base-package="com.ringo.ssh.controller">
<context:include-filter type="annotation"
expression="org.springframework.stereotype.Controller" />
</context:component-scan>
<!-- 注册HandlerMapper、HandlerAdapter两个映射类 -->
<mvc:annotation-driven />
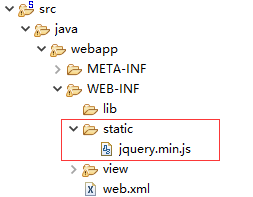
<!-- 访问静态资源 -->
<mvc:resources mapping="/static/**" location="/WEB-INF/static/"/>
<!-- 视图解析器 -->
<bean
class="org.springframework.web.servlet.view.InternalResourceViewResolver">
<property name="prefix" value="/WEB-INF/view/"></property>
<property name="suffix" value=".jsp"></property>
</bean>
</beans>
这里有几个地方要注意一下:
<property name="prefix" value="/WEB-INF/view/"></property>的value是你存放jsp文件的路径<mvc:resources mapping="/static/**" location="/WEB-INF/static/"/>这里写的则是你js和css以及图片的存放路径
第十六步:编写Controller层来测试SpringMVC
代码片段:
package com.ringo.ssh.controller;

import org.springframework.stereotype.Controller;
import org.springframework.web.bind.annotation.RequestMapping;

@Controller
public class DemoController{

	@RequestMapping("/test")
	public String demo() {
		return "test";
	}
}
然后去/ssh/src/java/webapp/WEB-INF/view目录下创建test.jsp
<%@ page language="java" contentType="text/html; charset=UTF-8"
pageEncoding="UTF-8"%>
<!DOCTYPE html>
<html>
<head>
<meta charset="UTF-8">
<title>Insert title here</title>
</head>
<body>
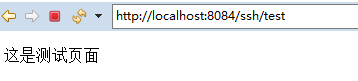
<p>这是测试页面</p>
</body>
</html>
然后将项目放到Tomcat里面,在浏览器端输入http://localhost:8084/ssh/test看看是否会跳转到测试页面
第十七步:编写Controller层
编写PersonController

代码片段:
package com.ringo.ssh.controller;
import java.io.IOException;
import java.io.PrintWriter;
import javax.servlet.http.HttpServletRequest;
import javax.servlet.http.HttpServletResponse;
import org.springframework.beans.factory.annotation.Autowired;
import org.springframework.stereotype.Controller;
import org.springframework.web.bind.annotation.RequestMapping;
import org.springframework.web.bind.annotation.RequestMethod;
import org.springframework.web.bind.annotation.ResponseBody;
import com.ringo.ssh.exception.MyException;
import com.ringo.ssh.service.PersonService;
@Controller
@RequestMapping(value="/person")
public class PersonController {
@Resource
private PersonService personService;
/**
* ajax请求不需要返回页面,只需要得到response中的数据即可,所以方法签名为void即可
*
* @param request
* @param response
*/
@RequestMapping(value="/personSignIn",method = RequestMethod.POST)
@ResponseBody//@ResponseBody的作用其实是将java对象转为json格式的数据
public void personSignIn(HttpServletRequest request, HttpServletResponse response) throws IOException {
String userName=request.getParameter("userName");
String password=request.getParameter("password");
try {
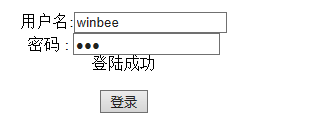
if(personService.checkSignIn(userName, password)==1) {
renderData(response,"登陆成功");
}
} catch (MyException e) {
// 如果有异常说明是账户不存在或者密码错误,就向前端发送错误信息
renderData(response,e.getMessage());
}
}
/**
* 通过PrintWriter将响应数据写入response,ajax可以接受到这个数据
*
* @param response
* @param data
* @throws IOException
*/
private void renderData(HttpServletResponse response, String data) throws IOException {
PrintWriter printWriter = null;
printWriter = response.getWriter();
printWriter.print(data);
if (null != printWriter) {
printWriter.flush();
printWriter.close();
}
}
/**
* 用于跳转到PersonLogin.jsp页面
*
* @param
* @param
*/
@RequestMapping(value="/personSignInPage")
public String personSignInPage() {
return "personLogin";
}
}
第十八步:用Postman来测试Controller层
Postman是一款用来测试Controller的软件,方便我们不用编写jsp页面来直接模拟报文发送到服务器并获得服务器的响应信息
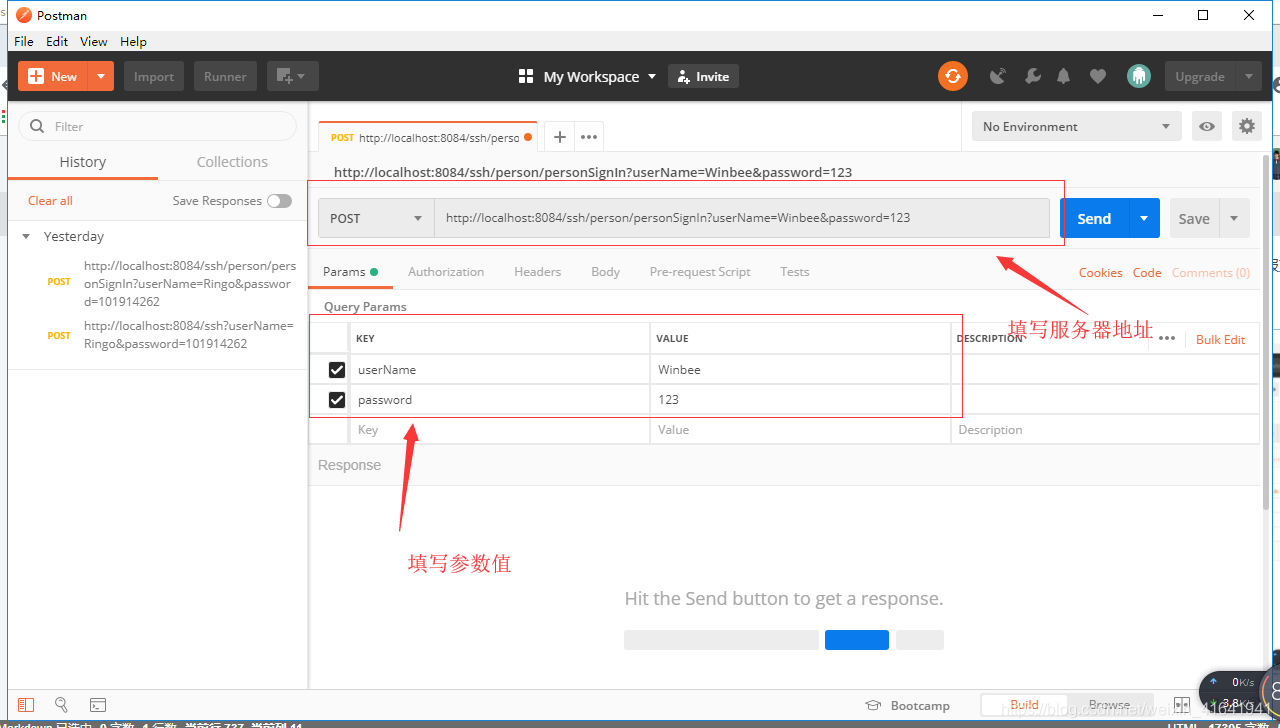
点击Send之后就可以看到服务器返回的信息

第十九步:编写登陆界面personLogin.jsp
代码片段:
<!DOCTYPE html PUBLIC "-//W3C//DTD HTML 4.01 Transitional//EN" "http://www.w3.org/TR/html4/loose.dtd">
<%@ page language="java" contentType="text/html; charset=UTF-8"
    pageEncoding="UTF-8"%>
<html>
<head>
<meta charset="UTF-8">
<title>用户登陆界面</title>
<script type="text/javascript" src="http://localhost:8084/ssh/static/jquery.min.js"></script>
 <script type="text/javascript">
      function login() {
        $.ajax({
          url: "http://localhost:8084/ssh/person/personSignIn",
          type: "POST",
          //后台返回的dataType类型和前台写的不一致会跳入error
          dataType: "text",
          data: {
            "userName": $("#userName").val(),
            "password": $("#password").val()
          },
          async: false,
          success: function(data) {
        	  $("#result").html(data);
          },
          //如果有错误抛出则向页面显示错误信息
          error: function(XMLHttpRequest, textStatus, errorThrown) {
              alert(XMLHttpRequest.status);
              alert(XMLHttpRequest.readyState);
              alert(textStatus);
          },
        });
      }
    </script>
</head>
<body>
		<center>
				<p>
					用户名:<input type="text" id="userName"><br>
					密码   : <input type="password" id="password"><br>
					<span id="result"></span><br>
				</p>
				<input type="button" value="登录" onclick="login()" >
		</center>

</body>
</html>
第二十步:测试登陆功能
浏览器输入http://localhost:8084/ssh/person/personSignInPage打开登陆界面


----------------------------------------------分割线-----------------------------------------------------------
以上就是整合的全部流程
在这个过程中我卡在的地方主要是Hibernate配置的时候我的SessionFactory用的是Hibernate4的驱动,结果我maven里导的Hibernate导的是Hibernate3,导致提示一直报错找不到包


 4131
4131


 被折叠的 条评论
为什么被折叠?
被折叠的 条评论
为什么被折叠?
 到【灌水乐园】发言


