


实现评论功能
数据库的构建
- 创建评论数据表
create table tbl_comment
(
	id bigint auto_increment,
	parent_id bigint not null comment '父类id,父类可能是question,也可以同样是comment',
	type int not null comment '父类的类型,是问题或者评论',
	commentator bigint null comment '评论人id',
	time_create bigint not null,
	time_modified bigint not null,
	like_count bigint default 0 null,
	content varchar(1024) null,
	constraint tbl_comment_pk
		primary key (id)
);
- 将其他表的主键类型都修改为Long所对应的BIGINT。并修改引起的数据类型相关的错误
alter table tbl_question modify id bigint auto_increment;
alter table tbl_user modify id bigint auto_increment;
alter table tbl_question modify creator bigint null comment '问题创建人id';
- mybatis generator生成mapper相关文件
<table tableName="tbl_comment" domainObjectName="Comment"></table>
异常的处理
- 定义一个请求返回信息类
package com.july.community.dto;

/**
 * 自定义的post请求返回信息的类
 */
@Data
public class ResultDTO {
    private Integer code;
    private String message;


    public static ResultDTO errorOf(Integer code,String message){
        ResultDTO resultDTO = new ResultDTO();
        resultDTO.setCode(code);
        resultDTO.setMessage(message);
        return resultDTO;
    }

    public static ResultDTO errorOf(CustomizeErrorCode customizeErrorCode) {
        return errorOf(customizeErrorCode.getCode(),customizeErrorCode.getMessage());
    }

    public static ResultDTO successOf(){
        ResultDTO resultDTO = new ResultDTO();
        resultDTO.setCode(200);
        resultDTO.setMessage("请求成功");
        return resultDTO;
    }

    public static ResultDTO errorOf(CustomizeException e) {
        return errorOf(e.getCode(),e.getMessage());
    }
}
- 修改之前定义的一些异常处理相关的类。添加code相关
package com.july.community.exception;

public interface ICustomizeErrorCode {
      Integer getCode();
      String getMessage() ;
}
- 修改,并添加与评论相关的异常信息定义
package com.july.community.exception;

public enum CustomizeErrorCode implements ICustomizeErrorCode {
    NO_LOGIN(3001,"未登录,请先登录再进行操作"),
    UNKNOWN_EXCEPTION(3002,"出现未知异常,联系一下开发人员吧"),
    QUESTION_NOT_FOUND(2001,"该问题不存在,请检查问题id是否正确"),
    UPDATE_FAIL_QUESTION_NUT_FOUND(2002,"更新问题失败。数据库中可能已不存在该问题..."),
    TARGET_PARAM_NOT_FOUND(2003,"未选中任何问题或评论进行回复"),
    TYPE_PARAM_WRONG(2004,"评论类型错误或不存在"),
    COMMENT_NOT_FOUND(2005,"你回复的评论不存在" );

    private Integer code;
    private String message;

    CustomizeErrorCode(Integer code, String message) {
        this.code = code;
        this.message = message;
    }

    @Override
    public Integer getCode() {
        return code;
    }

    @Override
    public String getMessage() {
        return message;
    }
}
- 修改自定义的异常类。添加code
package com.july.community.exception;

public class CustomizeException extends RuntimeException {
    private Integer code;
    private String message;

    public CustomizeException(ICustomizeErrorCode errorCode) {
        this.code=errorCode.getCode();
        this.message=errorCode.getMessage();
    }

    public Integer getCode() {
        return code;
    }

    @Override
    public String getMessage() {
        return message;
    }
}
- 修改异常处理的逻辑。
常规异常跳转到error页面,特定contentType类型的异常返回JSON
package com.july.community.advice;

@ControllerAdvice
public class CustomizeExceptionHandler {
    @ExceptionHandler(Exception.class)
    Object handle(Throwable e, Model model,
                  HttpServletRequest request, HttpServletResponse response){
        String contentType = request.getContentType();
        if ("application/json".equals(contentType)){
            ResultDTO resultDTO ;
            //返回JSON
            if(e instanceof CustomizeException){
                 resultDTO = ResultDTO.errorOf((CustomizeException) e);
            }else{
                //未知/未自己定义的异常时
                resultDTO = ResultDTO.errorOf(CustomizeErrorCode.UNKNOWN_EXCEPTION);
            }
            try {
                //手写要返回的json
                response.setContentType("application/json");
                response.setStatus(200);
                response.setCharacterEncoding("utf-8");
                PrintWriter writer = response.getWriter();
                writer.write(JSON.toJSONString(resultDTO));
                writer.close();
            } catch (IOException ioExeption) {
                ioExeption.printStackTrace();
            }
            return null;
        }else {
            //错误页面跳转
            if(e instanceof CustomizeException){
               model.addAttribute("message",e.getMessage());
            }else{
                //未知/未自己定义的异常时
                model.addAttribute("message",CustomizeErrorCode.UNKNOWN_EXCEPTION.getMessage());
            }

            return new ModelAndView("error");
        }
    }
}
评论数增加的功能
- 修改自己扩展的question mapper
package com.july.community.mapper;

import com.july.community.model.Comment;
import com.july.community.model.Question;

public interface QuestionExtMapper {
    int incView(Question record);

    void incComment(Question record);
}
<update id="incComment" parameterType="com.july.community.model.Question">
        update tbl_question set
        comment_count = comment_count + #{commentCount,jdbcType=INTEGER}
        where id = #{id}
    </update>
实现评论功能的逻辑
- 创建关于评论type的枚举
package com.july.community.enums;

public enum CommentTypeEnum {
    QUESTION(1),
    COMMENT(2);
    private Integer type;

    public static boolean isExist(Integer type) {
        for (CommentTypeEnum commentTypeEnum : CommentTypeEnum.values()) {
            if (commentTypeEnum.getType() == type){
                return true;
            }
        }
        return false;
    }

    public Integer getType() {
        return type;
    }

    CommentTypeEnum(Integer type) {
        this.type = type;
    }
}
- 编写controller
package com.july.community.controller;

import com.july.community.dto.CommentDTO;
import com.july.community.dto.ResultDTO;
import com.july.community.exception.CustomizeErrorCode;
import com.july.community.model.Comment;
import com.july.community.model.User;
import com.july.community.service.CommentService;
import org.springframework.beans.factory.annotation.Autowired;
import org.springframework.stereotype.Controller;
import org.springframework.web.bind.annotation.RequestBody;
import org.springframework.web.bind.annotation.RequestMapping;
import org.springframework.web.bind.annotation.RequestMethod;
import org.springframework.web.bind.annotation.ResponseBody;

import javax.servlet.http.HttpServletRequest;


@Controller
public class CommentController {

    @Autowired
    private CommentService commentService;

    @ResponseBody
    @RequestMapping(value = "/comment",method = RequestMethod.POST)
    public Object post(@RequestBody CommentDTO commentDTO,
                       HttpServletRequest request){
        //获取登录的用户信息
        User user = (User)request.getSession().getAttribute("user");
        if (user == null){
            return ResultDTO.errorOf(CustomizeErrorCode.NO_LOGIN);
        }
        Comment comment = new Comment();
        comment.setParentId(commentDTO.getParentId());
        comment.setContent(commentDTO.getContent());
        comment.setType(commentDTO.getType());
        comment.setTimeCreate(System.currentTimeMillis());
        comment.setTimeModified(System.currentTimeMillis());
        comment.setCommentator(user.getId());
        commentService.insert(comment);
        return ResultDTO.successOf();
    }
}
- 编写service
package com.july.community.service;

import com.july.community.enums.CommentTypeEnum;
import com.july.community.exception.CustomizeErrorCode;
import com.july.community.exception.CustomizeException;
import com.july.community.mapper.CommentMapper;
import com.july.community.mapper.QuestionExtMapper;
import com.july.community.mapper.QuestionMapper;
import com.july.community.model.Comment;
import com.july.community.model.Question;
import org.springframework.beans.factory.annotation.Autowired;
import org.springframework.stereotype.Service;

@Service
public class CommentService {
    @Autowired
    private CommentMapper commentMapper;

    @Autowired
    private QuestionMapper questionMapper;

    @Autowired
    private QuestionExtMapper questionExtMapper;

    public void insert(Comment comment) {
        //判断该评论的父存在
        if(comment.getParentId() == null || comment.getParentId() == 0){
            throw new CustomizeException(CustomizeErrorCode.TARGET_PARAM_NOT_FOUND);
        }
        //判断评论的类型是否存在
        if (comment.getType() == null || !CommentTypeEnum.isExist(comment.getType())){
            throw new CustomizeException(CustomizeErrorCode.TYPE_PARAM_WRONG);
        }


        if (comment.getType() == CommentTypeEnum.COMMENT.getType()){
            //评论的回复
            //查询该评论是否存在
            Comment parentComment = commentMapper.selectByPrimaryKey(comment.getParentId());
            if (parentComment == null){
                throw new CustomizeException(CustomizeErrorCode.COMMENT_NOT_FOUND);
            }
        }else{
            //问题的回复
            //查询该问题是否存在
            Question parentQuestion = questionMapper.selectByPrimaryKey(comment.getParentId());
            if (parentQuestion == null){
                throw new CustomizeException(CustomizeErrorCode.QUESTION_NOT_FOUND);
            }
            //给问题添加评论
            parentQuestion.setCommentCount(1);
            questionExtMapper.incComment(parentQuestion);
        }
        commentMapper.insert(comment);

    }
}
事务-实现评论数增加
事务:一系列操作的全体组成事务。
在本例子中,回复问题+回复数增加两个操作希望成功的时候两者都成功,若其中一项操作失败,另外的操作也是失败的。于是把这两个操作组成一个事务来进行。
- 添加事务注解
@Transactional
public class CommentService {
......
}
ajax实现页面值的传递
- 新建js文件:community.js
function postComment() {
    //获取评论的questionId
    var questionId = $("#question_id").val();
    //获取评论内容
    var content = $("#comment_content").val();
    //发出POST请求
    $.ajax({
        type:"POST",
        url:"/comment",
        contentType:"application/json",
        dataType:"json",
        data:JSON.stringify({
            "parentId":questionId,
            "content":content,
            "type":1
        }),
        success:function (response,data) {
            if (response.code == 200){
                $("#comment_section").hide();
            }else {
                alert(response.message);
            }
            console.log(response);
        }

    });
}
- question.html页面编写
<script src="/js/community.js" type="application/javascript"></script>
......
<hr class="col-lg-12 col-md-12 col-sm-12 col-xs-12">
            <!--评论部分-->
            <div class="col-lg-12 col-md-12 col-sm-12 col-xs-12" id="comment_section">
                <!-- 评论人 -->
                <div class="media-body">
                    <div class="media">
                        <!-- 头像部分 -->
                        <div class="media-left">
                            <a href="#">
                                <img class="media-object img-rounded" th:src="${question.user.avatarUrl}">
                            </a>
                        </div>
                        <!--用户名部分-->
                        <div class="media-body">
                            <h5 class="media-heading">
                                <span th:text="${question.user.name}"></span>
                            </h5>
                        </div>
                    </div>
                </div>
                <!--输入框-->
                <input type="hidden" id="question_id" th:value="${question.id}">
                <textarea id="comment_content" class="form-control comment" rows="6"></textarea>
                <button type="button" class="btn btn-success btn-comment" onclick="postComment(this)">回复</button>
            </div>
实现不刷新页面登录
当回复时遇到没有登录的问题,我们希望引导用户去进行登录,且登录后仍在回复的页面。此时可以使用localStorage来实现不刷新页面登录。
- 修改js中请求成功后的代码
success:function (response) {
            if (response.code == 200){
                $("#comment_section").hide();
            }else {
                if(response.code == 3001){
                    //登录异常
                    var isAccepted = confirm(response.message);
                    if (isAccepted){
                        window.open("https://github.com/login/oauth/authorize?client_id=728bc9dfda3dc246ba09&redirect_uri=http://localhost:8887/callback&scope=user&state=1");
                        //实现不刷新页面的登录
                        window.localStorage.setItem("closable","true");
                    }

                }else {
                    alert(response.message);
                }
            }
        }
- 修改index.html
<script type="application/javascript">
    //实现不刷新页面的登录
    window.onload = function () {
        var closable = window.localStorage.getItem("closable");
        if (closable=="true"){
            window.close();
            window.localStorage.removeItem("closable");
        }
    }
</script>
工具使用
在开发过程中,使用POSTMAN工具客户端或插件来测试post接口。因为插件下载一直超时,我使用的是客户端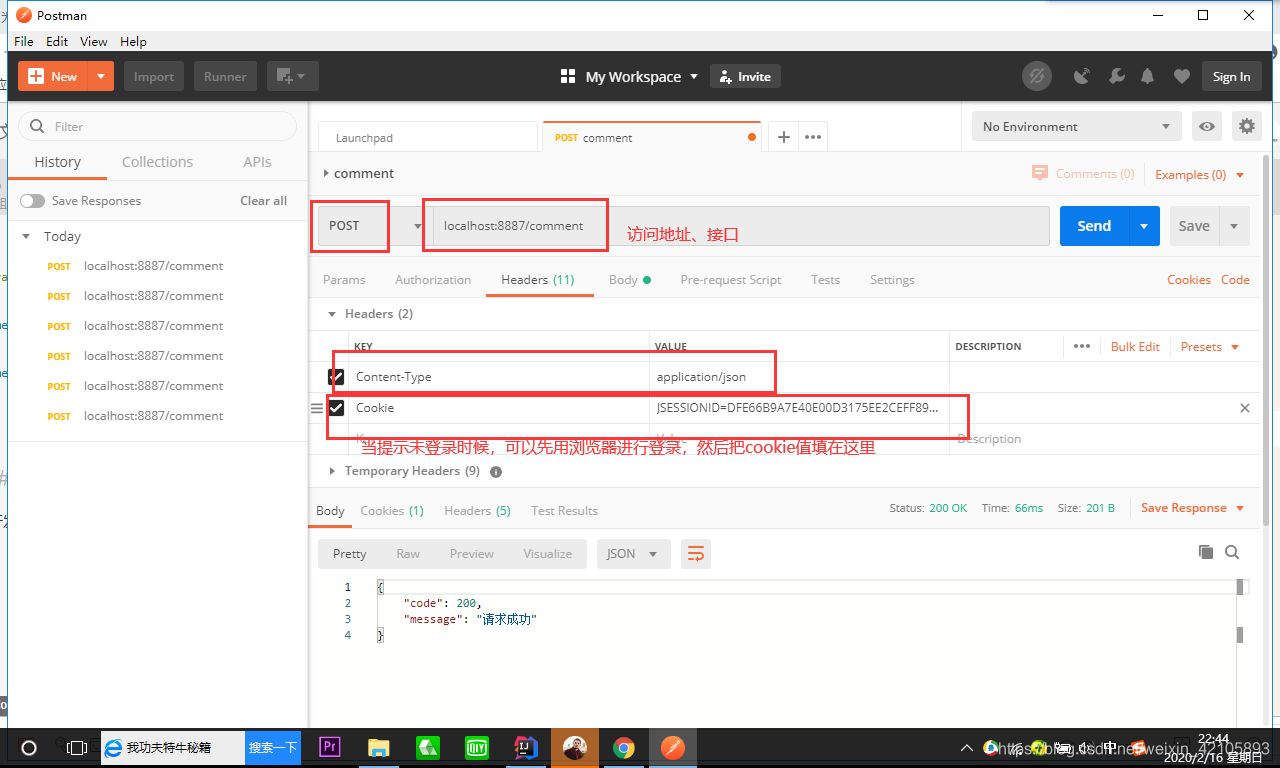
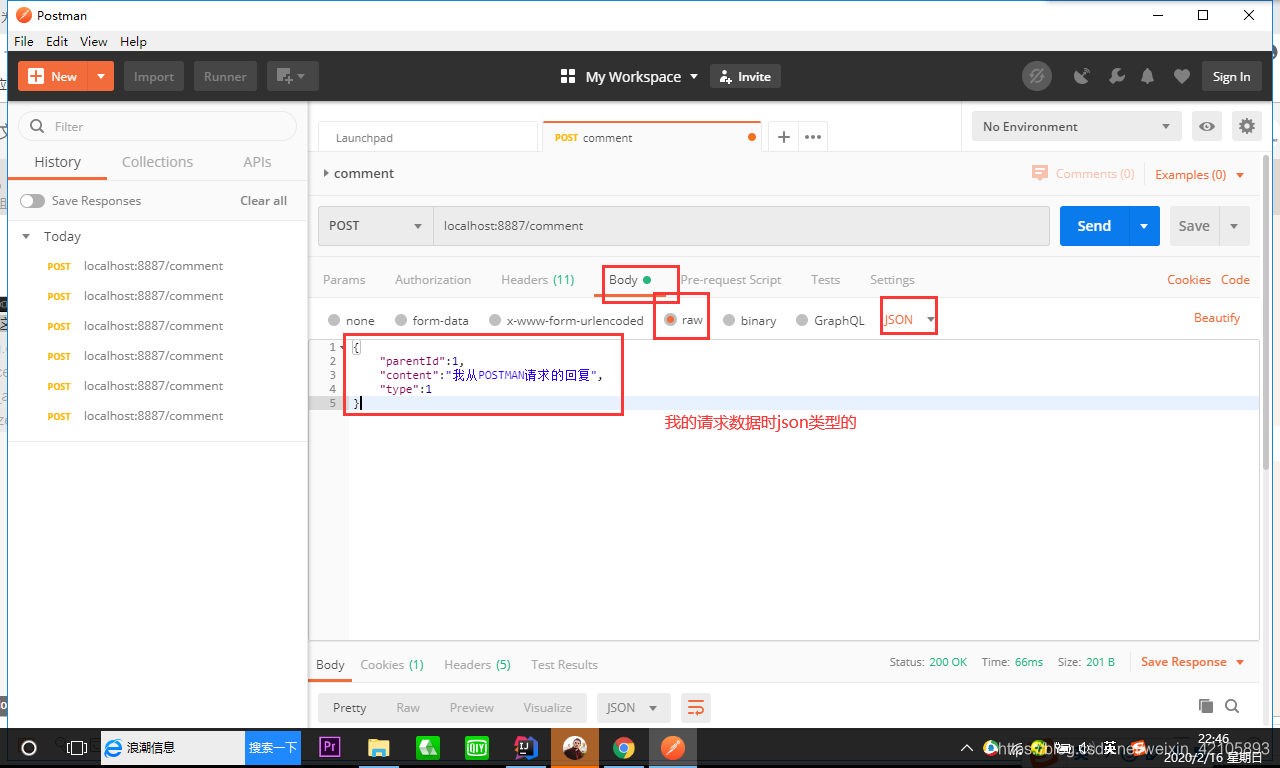
运行测试
搞定


 7854
7854


 被折叠的 条评论
为什么被折叠?
被折叠的 条评论
为什么被折叠?
 到【灌水乐园】发言


