


1.首先什么是jni呢?
jni——(java native interface),他是java平台的特性,不是安卓系统提供的。他定义了一些jni函数,来让开发者可以通过调用这些函数来实现java代码调用c/c++代码。
2.如何使用jni呢?
我们先将写好的c/c++代码编译成对应平台的动态库(windows是.dll文件,linux是.so文件)。
下面我们来举个栗子:使用androidstudio来实现jni
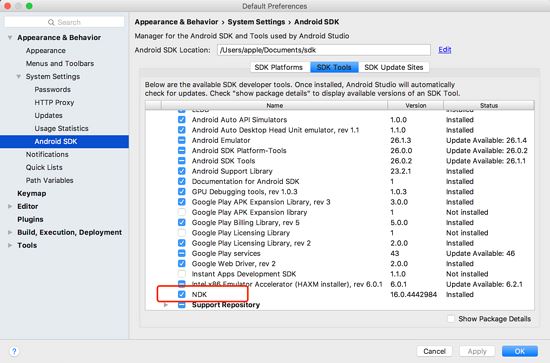
3.要实现jni先下载ndk,那么ndk又是什么呢?(面试宝典来了,赶紧掏出小本本)
ndk是一系列工具的集合
ndk提供了一份稳定、功能有限的api头文件声明
ndk的发布,使“java+c”的开发方式终于转正,成为官方支持的开发方式
ndk将使android平台支持c开发的开端
好,那接下来我们来下载ndk,有俩种方式:
google官方下载ndk:
通过sdkmanager来下载ndk:
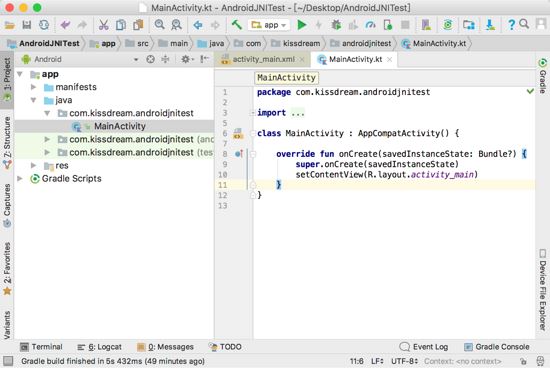
4.下来我们new一个新工程:这个工程只包含一个mainactivity
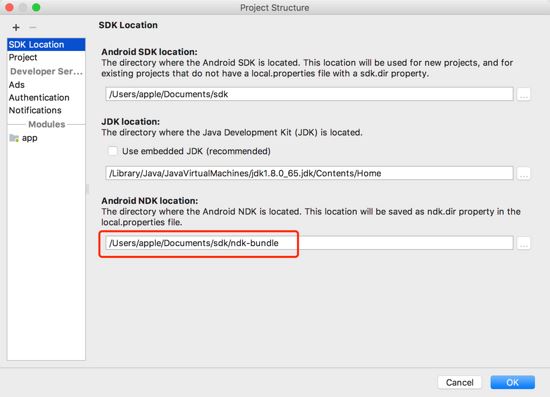
5.我们来检查一下ndk下载好了没有,怎么检查呢?如下:
检查sdk location里面的ndk路径:
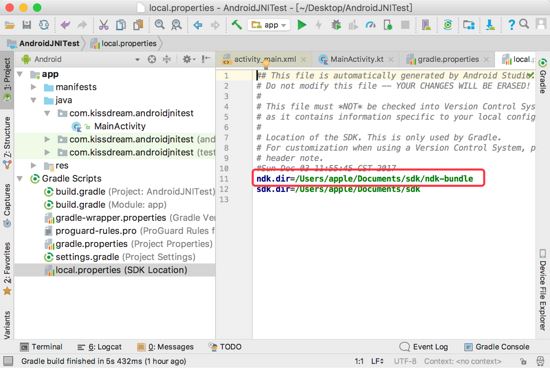
检查local.properties文件里面有没有ndk路径:
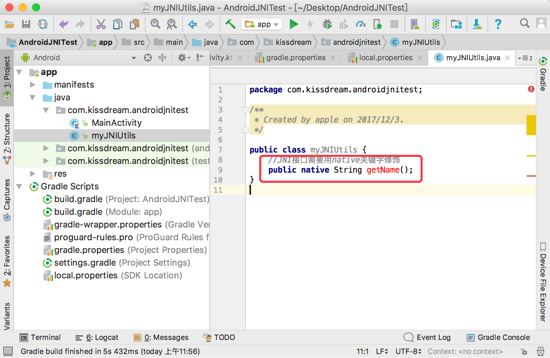
6.下来我们要编写jni接口啦,如下:
jni接口需要用native关键字修饰,我们会看到方法名报红,没关系,我们继续
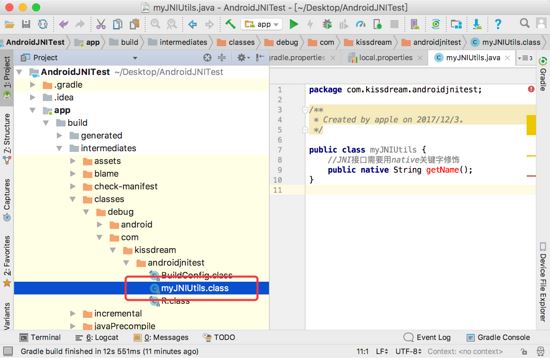
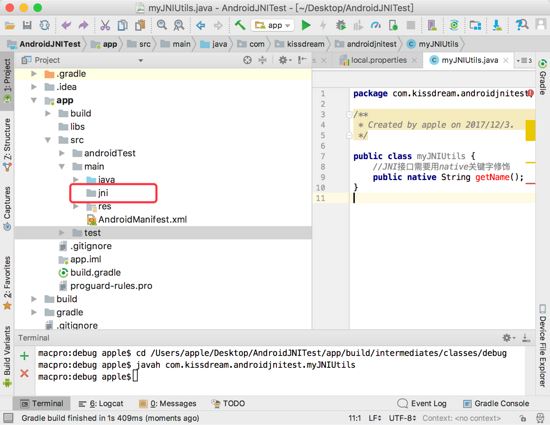
7.我们先build一下工程,检查myjniutils.java编译后有没有生成class文件,在这个位置下:
androidjnitest/app/build/intermediates/classes/debug/com/kissdream/androidjnitest/myjniutils.class
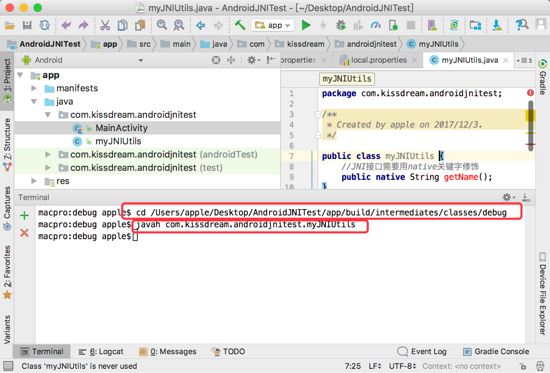
8.使用javah生成.h头文件,具体如下:
打开terminal,输入命令进入到debug目录下,命令如下:
cd/users/apple/desktop/androidjnitest/app/build/intermediates/classes/debug
然后使用javah+包名+文件路径来生成头文件,命令如下:
javah com.kissdream.androidjnitest.myjniutils
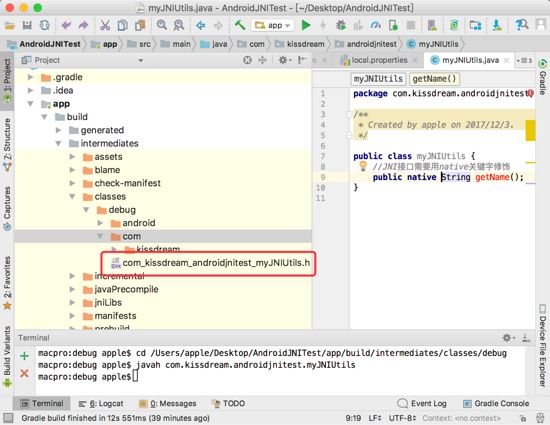
检查头文件有没有生成:
我们发现这个路径下多了个.h文件androidjnitest/app/build/intermediates/classes/debug/com/kissdream
哈哈,没错这个就是我们要生成的头文件
9.生成了.h文件还不行,只是声明了方法,我们还需要去实现它,那么如何去实现他呢,如下:
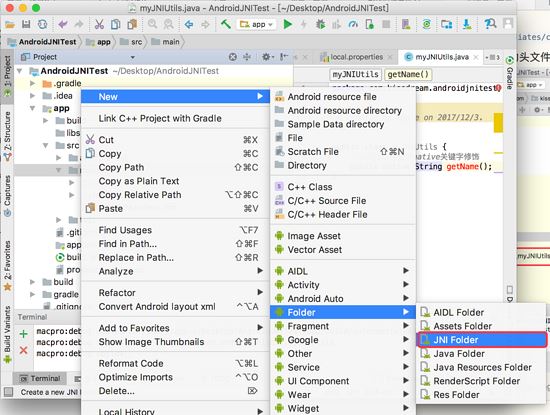
-我们在main下新建一个jni文件夹,如图:
.h文件内容如下:
/* do not edit this file - it is machine generated */
#include
/* header for class com_kissdream_androidjnitest_myjniutils */
#ifndef _included_com_kissdream_androidjnitest_myjniutils
#define _included_com_kissdream_androidjnitest_myjniutils
#ifdef __cplusplus
extern "c" {
#endif
/*
* class: com_kissdream_androidjnitest_myjniutils
* method: getname
* signature: ()ljava/lang/string;
*/
jniexport jstring jnicall java_com_kissdream_androidjnitest_myjniutils_getname
(jnienv *, jobject);
#ifdef __cplusplus
}
#endif
#endif
把生成的.h文件拷贝到jni文件夹下
在jni文件夹下,新建一个.c(c语言)或者.cpp(c++)的文件,来实现.h文件里声明的方法:
把.h文件里面声明的方法拷贝到新建的c++文件里面,然后在文件里面引入.h文件:
引入.h文件#include "com_kissdream_androidjnitest_myjniutils.h"
#include "com_kissdream_androidjnitest_myjniutils.h"
jniexport jstring jnicall java_com_kissdream_androidjnitest_myjniutils_getname
(jnienv * env, jobject obj){
//如果是用c语言格式就用这种方式
// return (*env)->newstringutf(env,"kiss dream");
//如果是用c语言格式就用这种方式
return env->newstringutf((char *)"kiss dream");
}

到这里我们的方法就实现完毕了
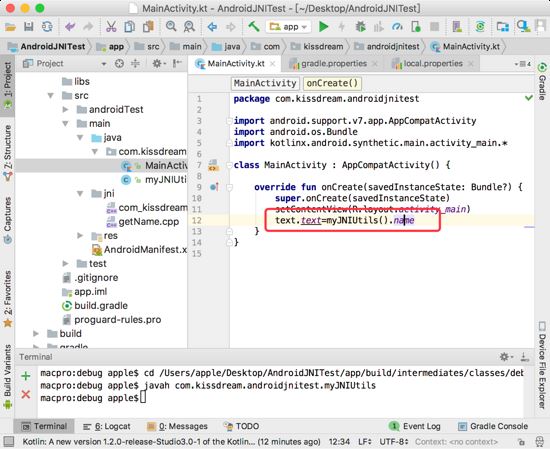
10.方法我们实现了,但是我们如何调用呢,不要着急,follow me:
首先引入动态库:
public class myjniutils {
static {
//名字注意,需要跟你的build.gradle ndk节点下面的名字一样
system.loadlibrary("nameprovider");
}
//jni接口需要用native关键字修饰
public native string getname();
}
nameprovider就是你要生成d的.so文件的文件名
下面我们来调用它
11.最重要的一步来了,生成so文件:
这个小编也不会,于是就去百度了下,得到结果:
在根目录gradle.properties下面加上:
android.usedeprecatedndk=true意思就是允许使用低版本的ndk
在module下面的build.gradle下面加上ndk节点如下图:
ndk {
modulename "nameprovider"
}
nameprovider注意这个名字要跟你引入动态库的名字一样
需要这俩步就可以运行生成so文件了
然儿,并没有想象的那么顺利,报错了,我顿时心中飞过一万只草泥玛,上log:
error:execution failed for task ':app:compiledebugndk'.
> error: flag android.usedeprecatedndk is no longer supported and will be removed in the next version of android studio. please switch to a supported build system.
consider using cmake or ndk-build integration. for more information, go to:
https://d.android.com/r/studio-ui/add-native-code.html#ndkcompile
to get started, you can use the sample ndk-build script the android
plugin generated for you at:
/users/apple/desktop/androidjnitest/app/build/intermediates/ndk/debug/android.mk
alternatively, you can use the experimental plugin:
https://developer.android.com/r/tools/experimental-plugin.html
to continue using the deprecated ndk compile for another 60 days, set
android.deprecatedndkcompilelease=1512283120054 in gradle.properties
百思不得其姐啊,百度的答案大家都是这样做啊,为什么人家可以我的就不行呢,我的代码和他的一模一样啊
为什么人家可以我的就不行呢,我的代码和他的一模一样啊这句话作为程序员的我们很熟悉!难到我要放弃吗?no no no,作为程序员的我怎么能轻言放弃呢!每个人都有这样的经历,蓝瘦过、香菇过,到最后我们都找到我们的错误
来我们仔细看下log,大概意思就是说:
android.usedeprecatedndk不再支持了
让使用cmake or ndk-build
然后还有链接
考虑使用cmake或ndk构建集成。要了解更多信息,请访问:
首先,您可以使用android的ndk构建脚本示例插件为您生成:
/users/apple/desktop/androidjnitest/app/build/intermediates/ndk/debug/android.mk
或者,你可以使用实验插件:
继续使用已弃用的ndk编译60天,设置
在gradle.properties
android.deprecatedndkcompilelease = 1512283120054(这个测试不起作用)
经过各种查资料,发现原来在gradle3.0以上以前这种方法不在支持
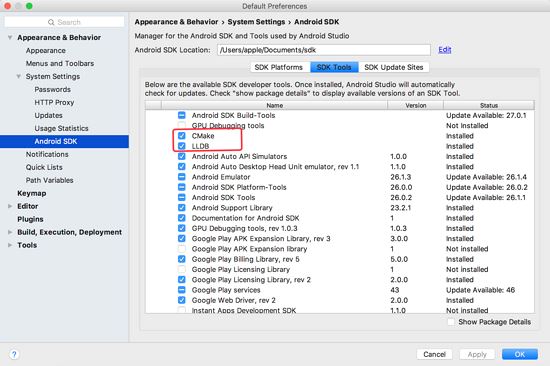
学习过程就不详细描述了,直接上结果:
先通过sdkmanager下载:cmake和lldb
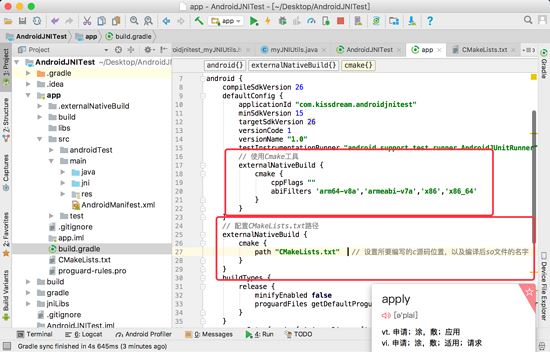
在build.gradle的defaultconfig节点下加入:
// 使用cmake工具
externalnativebuild {
cmake {
cppflags ""
//生成多个版本的so文件
abifilters 'arm64-v8a','armeabi-v7a','x86','x86_64'
}
}
在build.gradle的android节点下加入:
// 配置cmakelists.txt路径
externalnativebuild {
cmake {
path "cmakelists.txt" // 设置所要编写的c源码位置,以及编译后so文件的名字
}
}
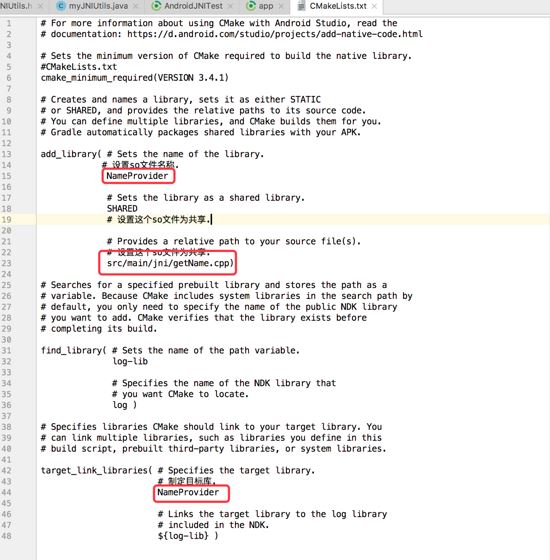
添加cmakelists.txt文件到build.gradle文件同级目录下,具体内容如下:
# for more information about using cmake with android studio, read the
# documentation: https://d.android.com/studio/projects/add-native-code.html
# sets the minimum version of cmake required to build the native library.
#cmakelists.txt
cmake_minimum_required(version 3.4.1)
# creates and names a library, sets it as either static
# or shared, and provides the relative paths to its source code.
# you can define multiple libraries, and cmake builds them for you.
# gradle automatically packages shared libraries with your apk.
add_library( # sets the name of the library.
# 设置so文件名称.
nameprovider
# sets the library as a shared library.
shared
# 设置这个so文件为共享.
# provides a relative path to your source file(s).
# 设置这个so文件为共享.
src/main/jni/getname.cpp)
# searches for a specified prebuilt library and stores the path as a
# variable. because cmake includes system libraries in the search path by
# default, you only need to specify the name of the public ndk library
# you want to add. cmake verifies that the library exists before
# completing its build.
find_library( # sets the name of the path variable.
log-lib
# specifies the name of the ndk library that
# you want cmake to locate.
log )
# specifies libraries cmake should link to your target library. you
# can link multiple libraries, such as libraries you define in this
# build script, prebuilt third-party libraries, or system libraries.
target_link_libraries( # specifies the target library.
# 制定目标库.
nameprovider
# links the target library to the log library
# included in the ndk.
${log-lib} )
至此,我们所有的流程都做完了,下面来检查一下我们的成果,见证奇迹的时候到了:
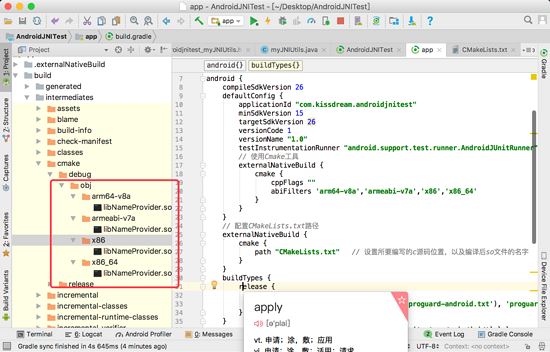
可以看到我们已经成功生成so文件,再来上个效果图:

以上就是本文的全部内容,希望对大家的学习有所帮助,也希望大家多多支持萬仟网。


 249
249


 被折叠的 条评论
为什么被折叠?
被折叠的 条评论
为什么被折叠?
 到【灌水乐园】发言


