


您现在访问的是微软AZURE全球版技术文档网站,若需要访问由世纪互联运营的MICROSOFT AZURE中国区技术文档网站,请访问 https://docs.azure.cn.
快速入门:在 Azure 门户中创建 Linux 虚拟机Quickstart: Create a Linux virtual machine in the Azure portal
06/25/2020
本文内容
可以通过 Azure 门户创建 Azure 虚拟机 (VM)。Azure virtual machines (VMs) can be created through the Azure portal. Azure 门户是基于浏览器的用户界面,用于创建 Azure 资源。The Azure portal is a browser-based user interface to create Azure resources. 本快速入门介绍如何使用 Azure 门户部署运行 Ubuntu 18.04 LTS 的 Linux 虚拟机 (VM)。This quickstart shows you how to use the Azure portal to deploy a Linux virtual machine (VM) running Ubuntu 18.04 LTS. 若要查看运行中的 VM,也可以通过 SSH 登录到该 VM 并安装 NGINX Web 服务器。To see your VM in action, you also SSH to the VM and install the NGINX web server.
如果没有 Azure 订阅,请在开始之前创建一个免费帐户。If you don't have an Azure subscription, create a free account before you begin.
登录 AzureSign in to Azure
如果尚未登录到 Azure 门户,请进行登录。Sign in to the Azure portal if you haven't already.
创建虚拟机Create virtual machine
在搜索中键入“虚拟机”。Type virtual machines in the search.
在“服务”下,选择“虚拟机” 。Under Services, select Virtual machines.
在“虚拟机”页上,选择“添加” 。In the Virtual machines page, select Add. 此时将打开“创建虚拟机”页。The Create a virtual machine page opens.
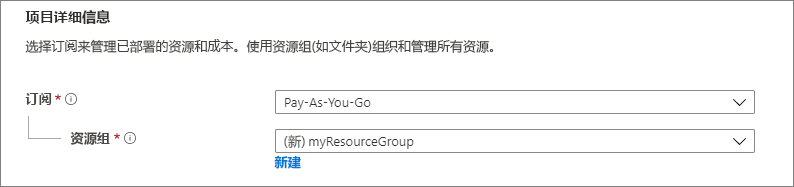
在“基本信息”选项卡中的“项目详细信息”下,确保选择了正确的订阅,然后选择 新建 资源组。In the Basics tab, under Project details, make sure the correct subscription is selected and then choose to Create new resource group. 对于名称.*,请键入 myResourceGroup。Type myResourceGroup for the name.*.
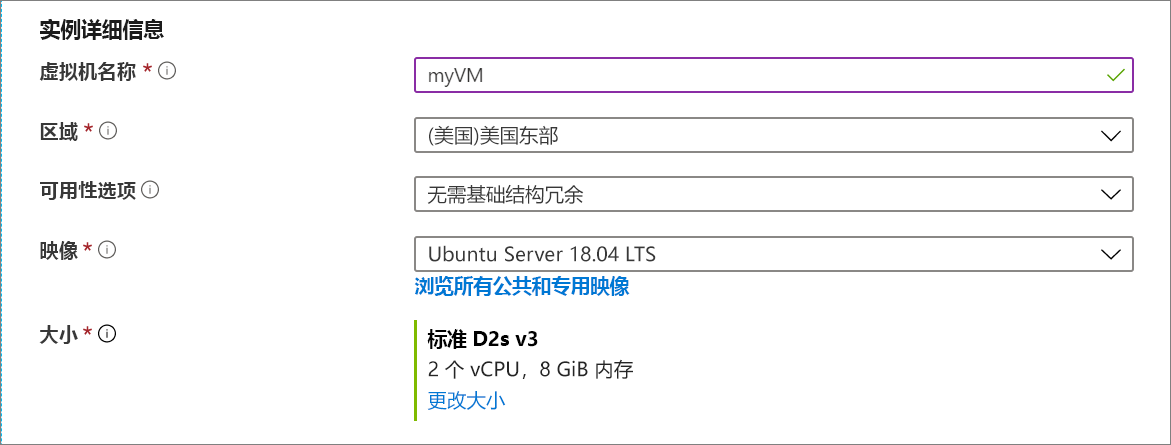
在“实例详细信息”下,键入“myVM”作为“虚拟机名称”,选择“美国东部”作为“区域”,并选择“Ubuntu 18.04 LTS”作为“映像”。Under Instance details, type myVM for the Virtual machine name, choose East US for your Region, and choose Ubuntu 18.04 LTS for your Image. 保留其他默认值。Leave the other defaults.
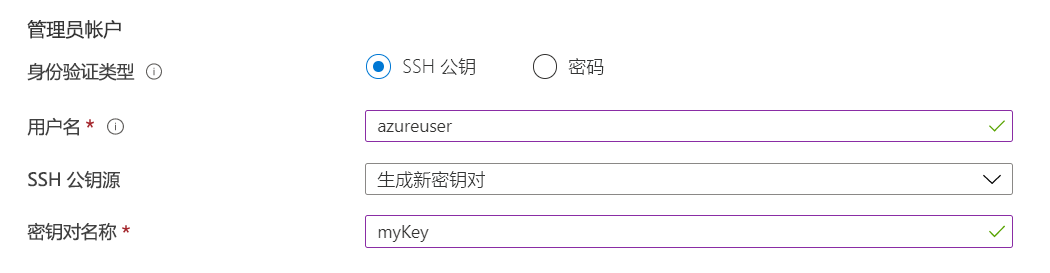
在“管理员帐户”下,选择“SSH 公钥” 。Under Administrator account, select SSH public key.
在“用户名”处键入 azureuser。In Username type azureuser.
对于“SSH 公钥源”,请保留默认的“生成新密钥对”,然后为“密钥对名称”键入 myKey 。For SSH public key source, leave the default of Generate new key pair, and then type myKey for the Key pair name.
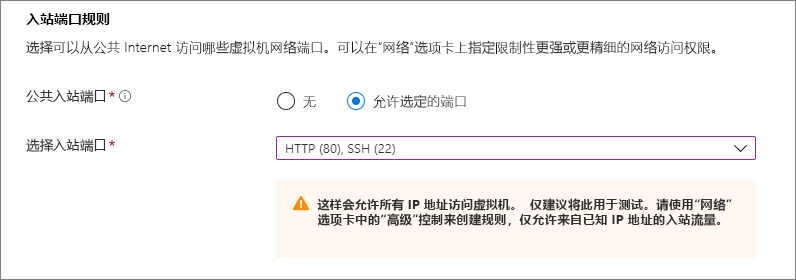
在“入站端口规则” > “公共入站端口”下,选择“允许所选端口”,然后从下拉列表中选择“SSH (22)”和“HTTP (80)”。Under Inbound port rules > Public inbound ports, choose Allow selected ports and then select SSH (22) and HTTP (80) from the drop-down.
保留其余默认值,然后选择页面底部的“查看 + 创建”按钮。Leave the remaining defaults and then select the Review + create button at the bottom of the page.
在“创建虚拟机”页上,可以查看要创建的 VM 的详细信息。On the Create a virtual machine page, you can see the details about the VM you are about to create. 准备好以后,选择“创建”。When you are ready, select Create.
“生成新密钥对”窗口打开时,选择“下载私钥并创建资源” 。When the Generate new key pair window opens, select Download private key and create resource. 下载的密钥文件将名为“myKey.pem”。Your key file will be download as myKey.pem. 请确保知道 .pem 文件的下载位置,下一步将需要该文件的路径。Make sure you know where the .pem file was downloaded, you will need the path to it in the next step.
部署完成后,选择“转到资源”。When the deployment is finished, select Go to resource.
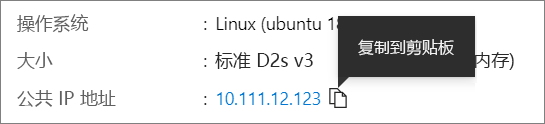
在新 VM 的页面上,选择公共 IP 地址并将其复制到剪贴板。On the page for your new VM, select the public IP address and copy it to your clipboard.
连接到虚拟机Connect to virtual machine
创建与 VM 的 SSH 连接。Create an SSH connection with the VM.
如果使用的是 Mac 或 Linux 计算机,请打开 Bash 提示符。If you are on a Mac or Linux machine, open a Bash prompt. 如果使用的是 Windows 计算机,请打开 PowerShell 提示符。If you are on a Windows machine, open a PowerShell prompt.
根据提示符,打开与虚拟机的 SSH 连接。At your prompt, open an SSH connection to your virtual machine. 将 IP 地址替换为 VM 中的 IP 地址,并将 .pem 的路径替换为密钥文件的下载路径。Replace the IP address with the one from your VM, and replace the path to the .pem with the path to where the key file was downloaded.
ssh -i .\Downloads\myKey1.pem azureuser@10.111.12.123
提示
下次在 Azure 中创建 VM 时,可以使用此次创建的 SSH 密钥。The SSH key you created can be used the next time your create a VM in Azure. 下次创建 VM 时,只需为“SSH 公钥源”选择“使用存储在 Azure 中的密钥” 。Just select the Use a key stored in Azure for SSH public key source the next time you create a VM. 你的计算机上已有私钥,因此无需下载任何内容。You already have the private key on your computer, so you won't need to download anything.
安装 Web 服务器Install web server
若要查看运行中的 VM,请安装 NGINX Web 服务器。To see your VM in action, install the NGINX web server. 在 SSH 会话中更新包源,然后安装最新的 NGINX 包。From your SSH session, update your package sources and then install the latest NGINX package.
sudo apt-get -y update
sudo apt-get -y install nginx
完成后,键入 exit 以离开 SSH 会话。When done, type exit to leave the SSH session.
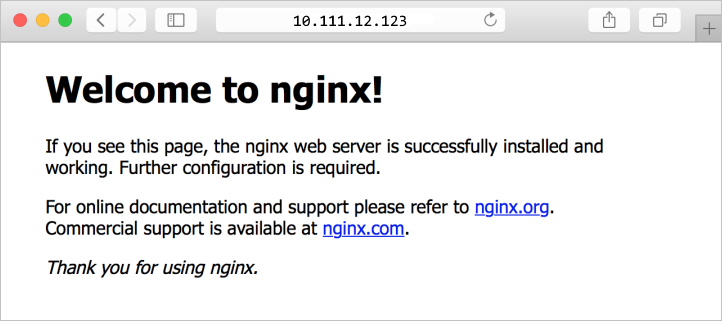
查看运行中的 Web 服务器View the web server in action
使用所选的 Web 浏览器查看默认的 NGINX 欢迎页。Use a web browser of your choice to view the default NGINX welcome page. 键入 VM 的公共 IP 地址作为 Web 地址。Type the public IP address of the VM as the web address. 可以在 VM 概览页上或此前使用过的 SSH 连接字符串中找到公共 IP 地址。The public IP address can be found on the VM overview page or as part of the SSH connection string you used earlier.
清理资源Clean up resources
当不再需要时,可以删除资源组、虚拟机和所有相关资源。When no longer needed, you can delete the resource group, virtual machine, and all related resources. 为此,请选择虚拟机的资源组,选择“删除”,然后确认要删除的资源组的名称。To do so, select the resource group for the virtual machine, select Delete, then confirm the name of the resource group to delete.
后续步骤Next steps
在本快速入门中,你部署了一台简单的虚拟机、一条网络安全组规则组和规则,并安装了一台基本 Web 服务器。In this quickstart, you deployed a simple virtual machine, created a Network Security Group and rule, and installed a basic web server. 若要详细了解 Azure 虚拟机,请继续学习 Linux VM 的教程。To learn more about Azure virtual machines, continue to the tutorial for Linux VMs.


 957
957


 被折叠的 条评论
为什么被折叠?
被折叠的 条评论
为什么被折叠?
 到【灌水乐园】发言


