


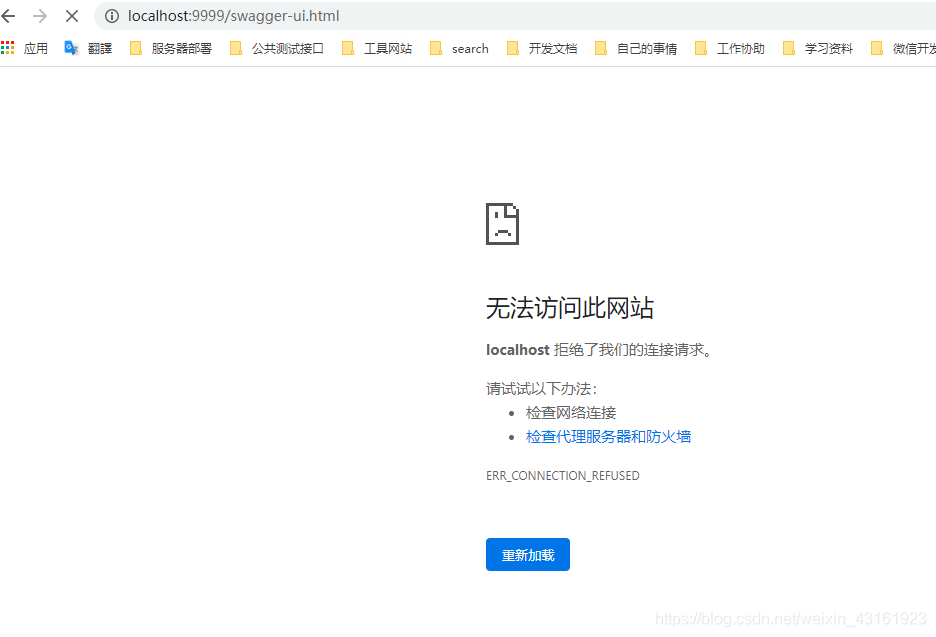
错误如下:
pom.xml
 <dependency>
            <groupId>io.springfox</groupId>
            <artifactId>springfox-swagger2</artifactId>
            <version>2.9.2</version>
        </dependency>
        <dependency>
            <groupId>io.springfox</groupId>
            <artifactId>springfox-swagger-ui</artifactId>
            <version>2.9.2</version>
        </dependency>
java代码
@Configuration
@EnableSwagger2
public class SwaggerConfig {
    @Bean
    public Docket api() {
        return new Docket(DocumentationType.SWAGGER_2)
                .host("localhost:9999")
                .apiInfo(apiInfo())
                .select()
                .apis(RequestHandlerSelectors.basePackage("com.southsoft.SmartGmis.controller"))
                .paths(PathSelectors.any())
                .build();
    }

    private ApiInfo apiInfo() {
        return new ApiInfoBuilder()
                .title("XXX管理系统")
                .description("XXX管理系统接口文档")
                .version("5.1")
                .build();
    }
打开http://localhost:9999/swagger-ui.html一直显示最上面的问题,找了好久才知道,这段代码中的host部分要与项目的IP端口保持一致,而我错误的以为swagger是作为一个软件服务需要新占用一个接口,改成项目的端口8080这里就可以正常访问了
改完之后,测试:
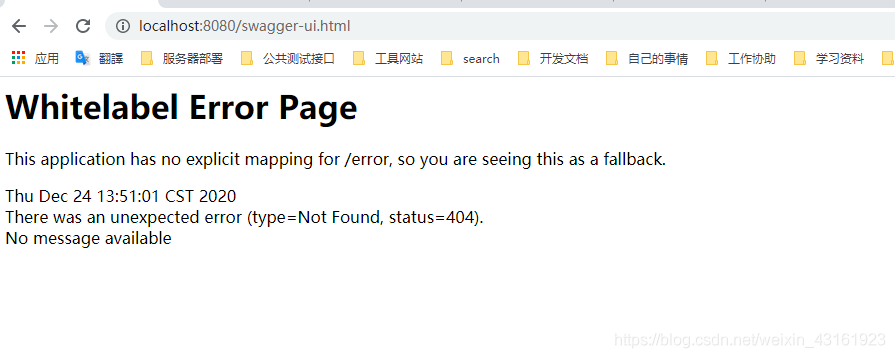
继续找原因:
发现请求swagger-ui.html被拦截器拦截了,解决思路有两个。
1) 一个是在全局拦截器中将我们的swagger-ui.html页面放开
2) 还有一种就是让swagger的配置类也继承WebMvcConfigurationSupport 可以做拦截配置。
方法二更改类如下:
@Configuration
@EnableSwagger2
public class SwaggerConfig extends WebMvcConfigurationSupport {
    @Bean
    public Docket api() {
        return new Docket(DocumentationType.SWAGGER_2)
                .host("localhost:8080")
                .apiInfo(apiInfo())
                .select()
                .apis(RequestHandlerSelectors.basePackage("com.southsoft.SmartGmis.controller"))
                .paths(PathSelectors.any())
                .build();
    }

    private ApiInfo apiInfo() {
        return new ApiInfoBuilder()
                .title("管理系统")
                .description("管理系统接口文档")
                .version("5.1")
                .build();
    }

    /**
     * 解决swagger-ui.html 404无法访问的问题
     */
    @Override
    protected void addResourceHandlers(ResourceHandlerRegistry registry) {
        // 解决静态资源无法访问
        registry.addResourceHandler("/**")
                .addResourceLocations("classpath:/static/");
        // 解决swagger无法访问
        registry.addResourceHandler("/swagger-ui.html")
                .addResourceLocations("classpath:/META-INF/resources/");
        // 解决swagger的js文件无法访问
        registry.addResourceHandler("/webjars/**")
                .addResourceLocations("classpath:/META-INF/resources/webjars/");
    }

}
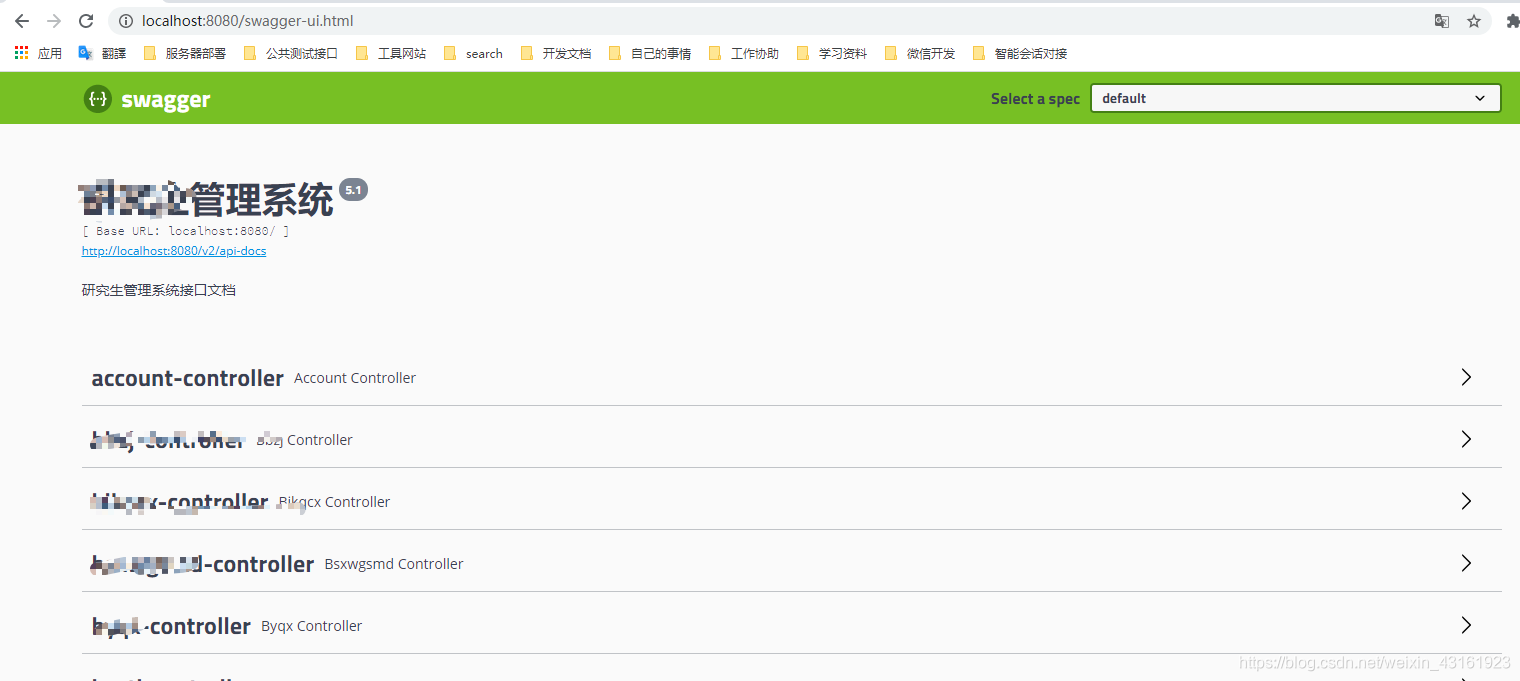
正常运行


 2172
2172


 被折叠的 条评论
为什么被折叠?
被折叠的 条评论
为什么被折叠?
 到【灌水乐园】发言


