


javascript 的事件委派/绑定/传播、拖拽、滚轮事件、键盘事件:
Ⅰ、事件的委派:
其一、代码为:
<!DOCTYPE html>
<html>
<head>
<meta charset="utf-8" />
<title></title>
<script type="text/javascript">
window.onload = function(){
var u1 = document.getElementById("u1");
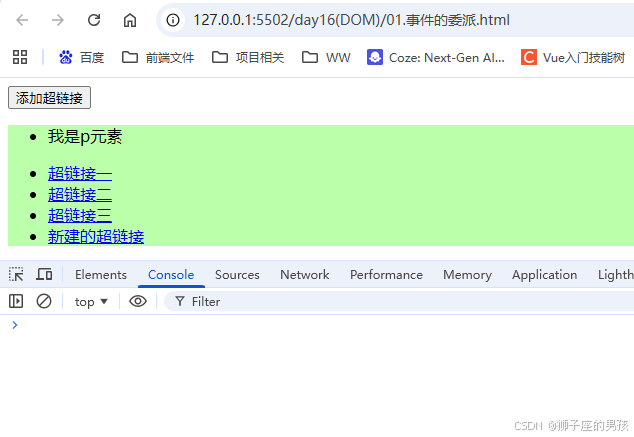
//点击按钮以后添加超链接
var btn01 = document.getElementById("btn01");
btn01.onclick = function(){
//创建一个 li
var li = document.createElement("li");
li.innerHTML = "<a href='javascript:;' class='link'>新建的超链接</a>";
//将 li 添加到 ul 中
u1.appendChild(li);
};
/*
* 为每一个超链接都绑定一个单击响应函数
* 这里我们为每一个超链接都绑定了一个单击响应函数,这种操作比较麻烦,
* 而且这些操作只能为已有的超链接设置事件,而新添加的超链接必须重新绑定
*/
//获取所有的 a
var allA = document.getElementsByTagName("a");
//遍历
/*for(var i=0 ; i<allA.length ; i++){
allA[i].onclick = function(){
alert("我是a的单击响应函数!!!");
};
}*/
/*
* 我们希望,只绑定一次事件,即可应用到多个的元素上,即使元素是后添加的
* 我们可以尝试将其绑定给元素的共同的祖先元素
*
* 事件的委派
* - 指将事件统一绑定给元素的共同的祖先元素,这样当后代元素上的事件触发时,会一直冒泡到祖先元素
* 从而通过祖先元素的响应函数来处理事件。
* - 事件委派是利用了冒泡,通过委派可以减少事件绑定的次数,提高程序的性能
*/
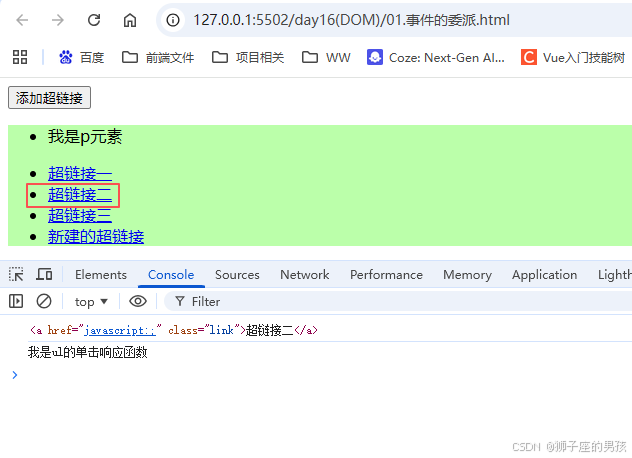
//为 ul 绑定一个单击响应函数
u1.onclick = function(event){
event = event || window.event;
/*
* target
* - event 中的 target 表示的触发事件的对象
*/
// alert(event.target);
console.log(event.target);// <a href="javascript:;" class="link">超链接三</a></li>(注意:动态变化的,但输出的是触发事件的对象)
//如果触发事件的对象是我们期望的元素,则执行否则不执行
if(event.target.className == "link"){//存在的问题:待触发元素的 class 可能不仅仅只有一个 link,但若修改或添加新的值,会导致该操作不执行(但本次 demo 不存在该问题);
// alert("我是ul的单击响应函数");
console.log("我是ul的单击响应函数");
}
};
};
</script>
</head>
<body>
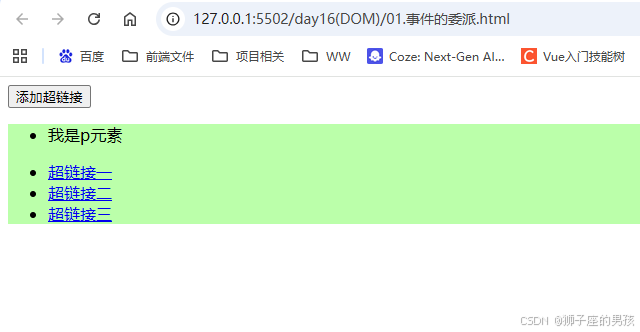
<button id="btn01">添加超链接</button>
<ul id="u1" style="background-color: #bfa;">
<li>
<p>我是p元素</p>
</li>
<li><a href="javascript:;" class="link">超链接一</a></li>
<li><a href="javascript:;" class="link">超链接二</a></li>
<li><a href="javascript:;" class="link">超链接三</a></li>
</ul>
</body>
</html>
其二、结果为:
// 一进入页面后的控制台:
// 点击添加超链接后的控制台:
// 点击超链接 a 标签后的控制台:
Ⅱ、事件的绑定:addEventListener、attachEvent(兼容IE8及以下)
其一、代码为:
<!DOCTYPE html>
<html>
<head>
<meta charset="UTF-8">
<title></title>
<script type="text/javascript">
window.onload = function(){
/*
* 点击按钮以后弹出一个内容
*/
//获取按钮对象
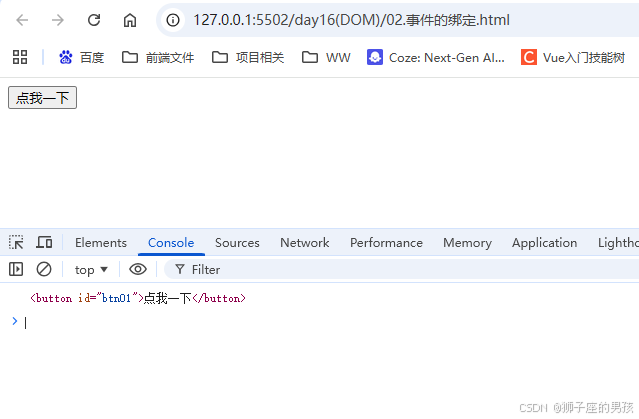
var btn01 = document.getElementById("btn01");
/*
* 使用 对象.事件 = 函数 的形式绑定响应函数,
* 它只能同时为一个元素的一个事件绑定一个响应函数,
* 不能绑定多个,如果绑定了多个,则后边会覆盖掉前边的
*/
//为 btn01 绑定一个单击响应函数
// btn01.onclick = function(){
// alert(1);
// };
//为 btn01 绑定第二个响应函数(此时绑定的同一个事件的多个响应函数:后面的响应函数会把前面的响应函数覆盖掉)
// btn01.onclick = function(){
// alert(2);
// };
/*
* addEventListener()
* - 通过这个方法也可以为元素绑定响应函数
* - 参数:
* 1.事件的字符串,不要 on
* 2.回调函数,当事件触发时该函数会被调用
* 3.是否在捕获阶段触发事件,需要一个布尔值,一般都传 false
*
* 使用 addEventListener() 可以同时为一个元素的相同事件同时绑定多个响应函数,
* 这样当事件被触发时,响应函数将会按照函数的绑定顺序执行
*
* 这个方法不支持 IE8 及以下的浏览器
*/
// btn01.addEventListener("click",function(){
// alert(1);
// },false);
// btn01.addEventListener("click",function(){
// alert(2);
// },false);
// btn01.addEventListener("click",function(){
// alert(3);
// },false);
/*
* attachEvent()
* - 在IE8中可以使用 attachEvent() 来绑定事件
* - 参数:
* 1.事件的字符串,要 on
* 2.回调函数
*
* - 这个方法也可以同时为一个事件绑定多个处理函数,
* 不同的是它是后绑定先执行,执行顺序和 addEventListener() 相反
*/
// btn01.attachEvent("onclick",function(){
// alert(1);
// });
// btn01.attachEvent("onclick",function(){
// alert(2);
// });
// btn01.attachEvent("onclick",function(){
// alert(3);
// });
// btn01.addEventListener("click",function(){
// // alert(this);
// console.log(this);// <button id="btn01">点我一下</button>
// },false);
// btn01.attachEvent("onclick",function(){
// alert(this);
// });
bind(btn01 , "click" , function(){
// alert(this);//在 ie8 内未处理之前,此时的 this 表示的是 window 对象,而需求是 this 表示的是 btn01 对象;
console.log(this);// <button id="btn01">点我一下</button>
});
};
//定义一个函数,用来为指定元素绑定响应函数
/*
* addEventListener() 中的 this,是绑定事件的对象
* attachEvent() 中的 this,是 window
* 需要统一两个方法 this(即:目标是 this 都表示绑定事件的对象)
*/
/*
* 参数:
* obj 要绑定事件的对象
* eventStr 事件的字符串(不要 on)
* callback 回调函数
*/
function bind(obj , eventStr , callback){
if(obj.addEventListener){//若 obj 中存在 addEventListener 事件,则返回值为 true
//大部分浏览器兼容的方式
obj.addEventListener(eventStr , callback , false);
}else{
/*
* this 是谁由调用方式决定
* callback.call(obj) //注意:调用方式是浏览器所决定的,个人可以通过 call() 方法来决定 this 的指向问题;
*/
//IE8 及以下
obj.attachEvent("on"+eventStr , function(){//此时直接传一个匿名函数(而非 callback 函数),此时再触发的就是匿名函数(即:就会直接执行该匿名函数中的内容);
//在匿名函数中调用回调函数(此时就是个人调用匿名函数,就能改变 this 的指向为 obj)
callback.call(obj);
});
}
}
</script>
</head>
<body>
<button id="btn01">点我一下</button>
</body>
</html>
其二、结果为:
// 一进入页面后点击点我一下的控制台:
Ⅲ、事件的传播:bind(obj , eventStr , callback)
其一、代码为:
<!DOCTYPE html>
<html>
<head>
<meta charset="UTF-8">
<title></title>
<style type="text/css">
#box1{
width: 300px;
height: 300px;
background-color: yellowgreen;
}
#box2{
width: 200px;
height: 200px;
background-color: yellow;
}
#box3{
width: 150px;
height: 150px;
background-color: skyblue;
}
</style>
<script type="text/javascript">
window.onload = function(){
/*
* 分别为三个 div 绑定单击响应函数
*/
var box1 = document.getElementById("box1");
var box2 = document.getElementById("box2");
var box3 = document.getElementById("box3");
/*
* 事件的传播
* - 关于事件的传播网景公司和微软公司有不同的理解
* - 微软公司认为事件应该是由内向外传播,也就是当事件触发时,应该先触发当前元素上的事件,
* 然后再向当前元素的祖先元素上传播,也就说事件应该在冒泡阶段执行。
*
* - 网景公司认为事件应该是由外向内传播的,也就是当前事件触发时,应该先触发当前元素的最外层的祖先元素的事件,
* 然后在向内传播给后代元素
*
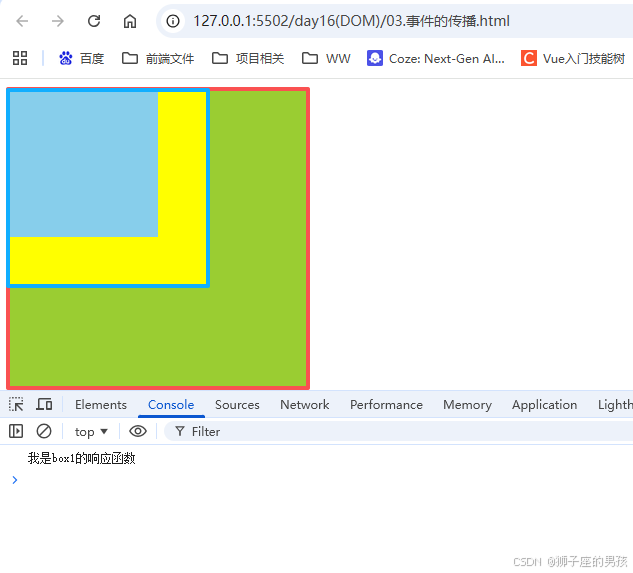
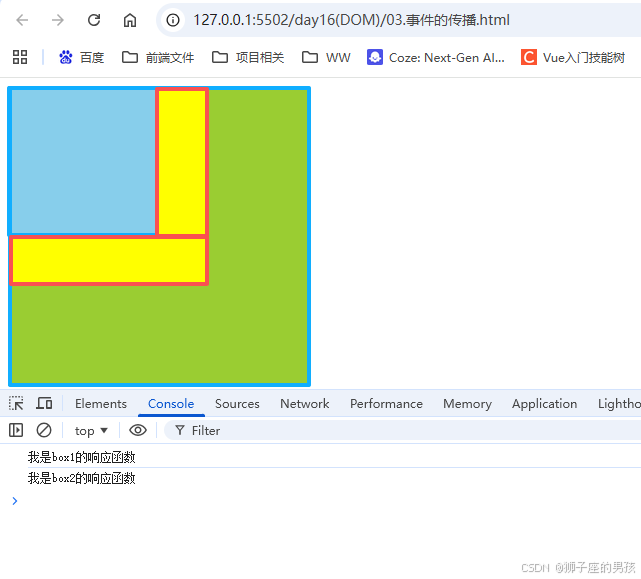
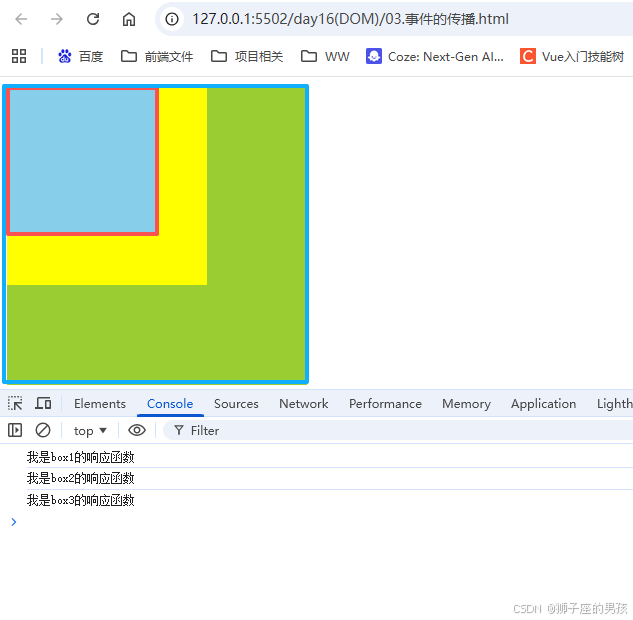
* - W3C综合了两个公司的方案,将事件传播分成了三个阶段
* 1.捕获阶段
* - 在捕获阶段时从最外层的祖先元素,向目标元素进行事件的捕获,但是默认此时不会触发事件
* 2.目标阶段
* - 事件捕获到目标元素,捕获结束开始在目标元素上触发事件
* 3.冒泡阶段
* - 事件从目标元素向他的祖先元素传递,依次触发祖先元素上的事件
*
* - 如果希望在捕获阶段就触发事件,可以将 addEventListener() 的第三个参数设置为 true
* 一般情况下我们不会希望在捕获阶段触发事件,所以这个参数一般都是 false
*
* - IE8 及以下的浏览器中没有捕获阶段
*/
bind(box1,"click",function(){
// alert("我是box1的响应函数")
console.log("我是box1的响应函数")// 点击 box1 后输出:我是box1的响应函数;
});
bind(box2,"click",function(){
// alert("我是box2的响应函数")
console.log("我是box2的响应函数")// 点击 box2 后输出:我是box1的响应函数,我是box2的响应函数(即:从外到内的捕获阶段触发事件,因为 addEventListener 的第三个参数设置成了 true);
});
bind(box3,"click",function(){
// alert("我是box3的响应函数")
console.log("我是box3的响应函数")// 点击 box3 后输出:我是box1的响应函数,我是box2的响应函数,我是box3的响应函数(即:从外到内的捕获阶段触发事件,因为 addEventListener 的第三个参数设置成了 true);
});
};
function bind(obj , eventStr , callback){
if(obj.addEventListener){
//大部分浏览器兼容的方式
obj.addEventListener(eventStr , callback , true);// true 表示:从捕获阶段就触发事件,false 表示:从冒泡阶段触发事件;
}else{
/*
* this 是谁由调用方式决定
* callback.call(obj)
*/
//IE8及以下
obj.attachEvent("on"+eventStr , function(){
//在匿名函数中调用回调函数
callback.call(obj);
});
}
}
</script>
</head>
<body>
<div id="box1">
<div id="box2">
<div id="box3"></div>
</div>
</div>
</body>
</html>
其二、结果为:
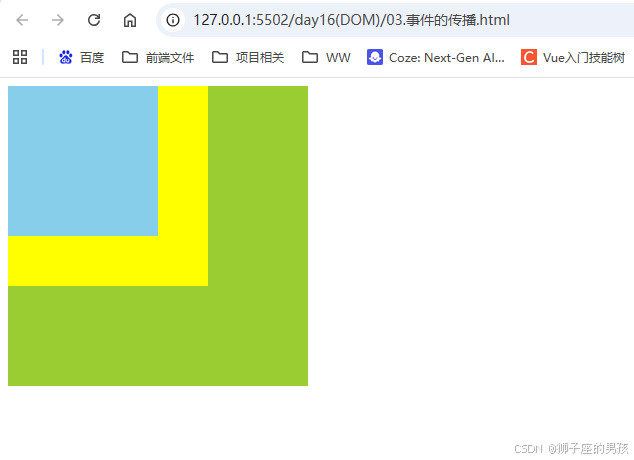
// 一进入页面后:
// 一进入页面点击box1后的控制台:
// 一进入页面点击box2后的控制台:
// 一进入页面点击box3后的控制台:
Ⅳ、拖拽:
其一、代码为:onmousedown、onmousemove、onmouseup
<!DOCTYPE html>
<html>
	<head>
		<meta charset="UTF-8">
		<title></title>
		<style type="text/css">

			#box1{
				width: 100px;
				height: 100px;
				background-color: red;
				position: absolute;
			}

			#box2{
				width: 100px;
				height: 100px;
				background-color: yellow;
				position: absolute;

				left: 200px;
				top: 200px;
			}

		</style>

		<script type="text/javascript">

			window.onload = function(){
				/*
				 * 拖拽 box1 元素
				 *  - 拖拽的流程
				 * 		1.当鼠标在被拖拽元素上按下时,开始拖拽   onmousedown
				 * 		2.当鼠标移动时被拖拽元素跟随鼠标移动     onmousemove
				 * 		3.当鼠标松开时,被拖拽元素固定在当前位置	onmouseup
				 */


				//获取 box1
				var box1 = document.getElementById("box1");
				//为 box1 绑定一个鼠标按下事件
				//当鼠标在被拖拽元素上按下时,开始拖拽  onmousedown
				box1.onmousedown = function(event){
					event = event || window.event;

					// 操作(ol,ot)目的:解决鼠标会直接跳到被拖拽元素左上角的问题(即:想要被拖拽元素直接随着鼠标拖拽,而不是被拖拽元素要下移)
					// 且该设置偏移量最好是在 onmousedown 事件中求出来,因为后面该值也不会再变化,且只求一次就行,若在其它事件中(如:onmousemove、onmouseup)需要一触发就求,需要求多次;
					// div 的偏移量 鼠标.clentX - 元素.offsetLeft
					// div 的偏移量 鼠标.clentY - 元素.offsetTop
					var ol = event.clientX - box1.offsetLeft;
					var ot = event.clientY - box1.offsetTop;


					// 为 document 绑定一个 onmousemove 事件
					// 注意:不能给 box1 直接绑定 onmousemove 事件,因为若直接给 box1 绑定,那么只能往下移动而不能回到原来的位置(即:不能随时获取被拖拽元素的坐标值)
					// document.onmousemove 事件一定要在 box1.onmousedown 里面的原因:是想要在 box1 中触发鼠标按下事件,整个元素才触发拖拽,而不是一进页面就触发拖拽;
					document.onmousemove = function(event){
						event = event || window.event;
						//当鼠标移动时被拖拽元素跟随鼠标移动 onmousemove
						//获取鼠标的坐标
						var left = event.clientX - ol;// 即:ol,ot 是解决鼠标会直接跳到被拖拽元素左上角的问题(不丝滑);
						var top = event.clientY - ot;

						//修改 box1 的位置
						box1.style.left = left+"px";
						box1.style.top = top+"px";

					};


					// 为 document 绑定一个鼠标松开事件
					// 注意:不能给 box1 直接绑定 onmouseup 事件,因为若直接给 box1 绑定,当被拖拽元素(鼠标)在 box2 上时,
					// 此时就是触发 box2.onmouseup 的事件而非 box1.onmouseup 的事件,就会发现该拖拽的 box1 元素就停不下来了,就达不到预想效果(且兄弟 div 也并不涉及冒泡);
					document.onmouseup = function(){
						//当鼠标松开时,被拖拽元素固定在当前位置	onmouseup
						//取消 document 的 onmousemove 事件
						//即:当鼠标按下的时候就触发 onmousemove 事件,从而元素可以被拖拽,而当鼠标松开的时候就取消 onmousemove 事件,从而元素不可被拖拽(即:document.onmousemove = null);
						document.onmousemove = null;
						//取消 document 的 onmouseup 事件(原因:此时的 onmouseup 并没有存在的意义,应该被取消)
						// 取消 onmousemove 事件和 onmouseup 事件,同时也表示着 onmouseup 事件是一次性事件(即:onmouseup 事件只会被触发一次);
						document.onmouseup = null;
					};
				};
			};


		</script>
	</head>
	<body>
		<div id="box1"></div>

		<div id="box2"></div>
	</body>
</html>
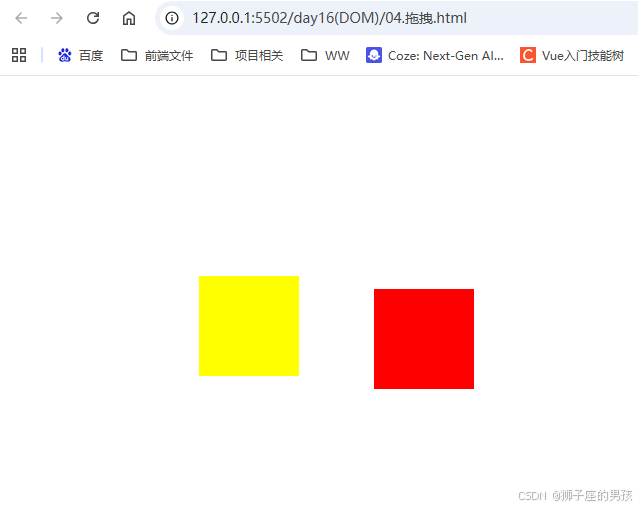
其二、结果为:
// 一进入页面后:
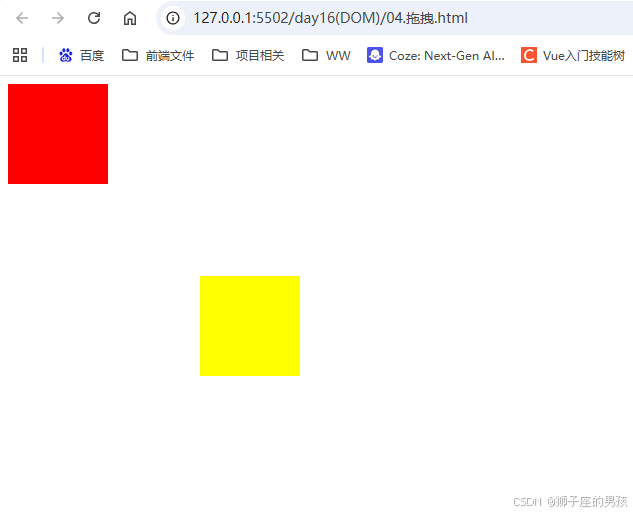
// 可以肆意拖动红色方块:
其三、代码为:setCapture/setCapture()、releaseCapture/releaseCapture()
<!DOCTYPE html>
<html>
	<head>
		<meta charset="UTF-8">
		<title></title>
		<style type="text/css">

			#box1{
				width: 100px;
				height: 100px;
				background-color: red;
				position: absolute;
			}

			#box2{
				width: 100px;
				height: 100px;
				background-color: yellow;
				position: absolute;

				left: 200px;
				top: 200px;
			}

		</style>

		<script type="text/javascript">

			window.onload = function(){
				/*
				 * 拖拽 box1 元素
				 *  - 拖拽的流程
				 * 		1.当鼠标在被拖拽元素上按下时,开始拖拽   onmousedown
				 * 		2.当鼠标移动时被拖拽元素跟随鼠标移动     onmousemove
				 * 		3.当鼠标松开时,被拖拽元素固定在当前位置	onmouseup
				 */


				//获取 box1
				var box1 = document.getElementById("box1");
				//为 box1 绑定一个鼠标按下事件
				//当鼠标在被拖拽元素上按下时,开始拖拽  onmousedown
				box1.onmousedown = function(event){
					event = event || window.event;

					// 操作(ol,ot)目的:解决鼠标会直接跳到被拖拽元素左上角的问题(即:想要被拖拽元素直接随着鼠标拖拽,而不是被拖拽元素要下移)
					// 且该设置偏移量最好是在 onmousedown 事件中求出来,因为后面该值也不会再变化,且只求一次就行,若在其它事件中(如:onmousemove、onmouseup)需要一触发就求,需要求多次;
					// div 的偏移量 鼠标.clentX - 元素.offsetLeft
					// div 的偏移量 鼠标.clentY - 元素.offsetTop
					var ol = event.clientX - box1.offsetLeft;
					var ot = event.clientY - box1.offsetTop;


					// 为 document 绑定一个 onmousemove 事件
					// 注意:不能给 box1 直接绑定 onmousemove 事件,因为若直接给 box1 绑定,那么只能往下移动而不能回到原来的位置(即:不能随时获取被拖拽元素的坐标值)
					// document.onmousemove 事件一定要在 box1.onmousedown 里面的原因:是想要在 box1 中触发鼠标按下事件,整个元素才触发拖拽,而不是一进页面就触发拖拽;
					document.onmousemove = function(event){
						event = event || window.event;
						//当鼠标移动时被拖拽元素跟随鼠标移动 onmousemove
						//获取鼠标的坐标
						var left = event.clientX - ol;// 即:ol,ot 是解决鼠标会直接跳到被拖拽元素左上角的问题(不丝滑);
						var top = event.clientY - ot;

						//修改 box1 的位置
						box1.style.left = left+"px";
						box1.style.top = top+"px";

					};


					// 为 document 绑定一个鼠标松开事件
					// 注意:不能给 box1 直接绑定 onmouseup 事件,因为若直接给 box1 绑定,当被拖拽元素(鼠标)在 box2 上时,
					// 此时就是触发 box2.onmouseup 的事件而非 box1.onmouseup 的事件,就会发现该拖拽的 box1 元素就停不下来了,就达不到预想效果(且兄弟 div 也并不涉及冒泡);
					document.onmouseup = function(){
						//当鼠标松开时,被拖拽元素固定在当前位置	onmouseup
						//取消 document 的 onmousemove 事件
						//即:当鼠标按下的时候就触发 onmousemove 事件,从而元素可以被拖拽,而当鼠标松开的时候就取消 onmousemove 事件,从而元素不可被拖拽(即:document.onmousemove = null);
						document.onmousemove = null;
						//取消 document 的 onmouseup 事件(原因:此时的 onmouseup 并没有存在的意义,应该被取消)
						// 取消 onmousemove 事件和 onmouseup 事件,同时也表示着 onmouseup 事件是一次性事件(即:onmouseup 事件只会被触发一次);
						document.onmouseup = null;
					};
				};
			};


		</script>
	</head>
	<body>
		<div id="box1"></div>

		<div id="box2"></div>
	</body>
</html>
其四、结果为:
// 一进入页面后:
// 可以肆意拖动红色方块(但不包含文字):
其五、代码为:抽取拖拽函数 drag()
<!DOCTYPE html>
<html>
<head>
<meta charset="UTF-8">
<title></title>
<style type="text/css">
#box1{
width: 100px;
height: 100px;
background-color: red;
position: absolute;
}
#box2{
width: 100px;
height: 100px;
background-color: yellow;
position: absolute;
left: 200px;
top: 200px;
}
</style>
<script type="text/javascript">
window.onload = function(){
/*
* 拖拽 box1 元素
* - 拖拽的流程
* 1.当鼠标在被拖拽元素上按下时,开始拖拽 onmousedown
* 2.当鼠标移动时被拖拽元素跟随鼠标移动 onmousemove
* 3.当鼠标松开时,被拖拽元素固定在当前位置 onmouseup
*/
//获取 box1
var box1 = document.getElementById("box1");
var box2 = document.getElementById("box2");
var img1 = document.getElementById("img1");
//开启 box1 的拖拽
drag(box1);
//开启 box2 的
drag(box2);
drag(img1);
};
/*
* 提取一个专门用来设置拖拽的函数
* 参数:开启拖拽的元素
*/
function drag(obj){
//当鼠标在被拖拽元素上按下时,开始拖拽 onmousedown
obj.onmousedown = function(event){
//设置 box1 捕获所有鼠标按下的事件
/*
* setCapture()
* - 只有 IE 支持,但是在火狐中调用时不会报错,
* 而如果使用 chrome 调用,会报错
*/
/*if(box1.setCapture){
box1.setCapture();
}*/
obj.setCapture && obj.setCapture();
event = event || window.event;
//div 的偏移量 鼠标.clentX - 元素.offsetLeft
//div 的偏移量 鼠标.clentY - 元素.offsetTop
var ol = event.clientX - obj.offsetLeft;
var ot = event.clientY - obj.offsetTop;
//为 document 绑定一个 onmousemove 事件
document.onmousemove = function(event){
event = event || window.event;
//当鼠标移动时被拖拽元素跟随鼠标移动 onmousemove
//获取鼠标的坐标
var left = event.clientX - ol;
var top = event.clientY - ot;
//修改 box1 的位置
obj.style.left = left+"px";
obj.style.top = top+"px";
};
//为 document 绑定一个鼠标松开事件
document.onmouseup = function(){
//当鼠标松开时,被拖拽元素固定在当前位置 onmouseup
//取消 document 的 onmousemove 事件
document.onmousemove = null;
//取消 document 的 onmouseup 事件
document.onmouseup = null;
//当鼠标松开时,取消对事件的捕获
obj.releaseCapture && obj.releaseCapture();
};
/*
* 当我们拖拽一个网页中的内容时,浏览器会默认去搜索引擎中搜索内容,
* 此时会导致拖拽功能的异常,这个是浏览器提供的默认行为,
* 如果不希望发生这个行为,则可以通过 return false 来取消默认行为
*
* 但是这招对 IE8 不起作用
*/
return false;
};
}
</script>
</head>
<body>
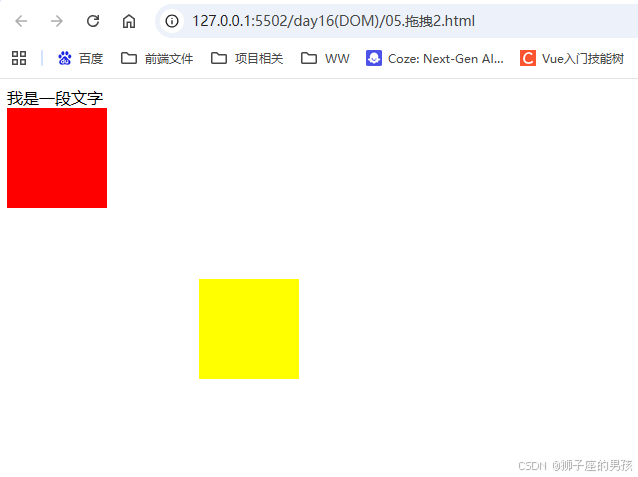
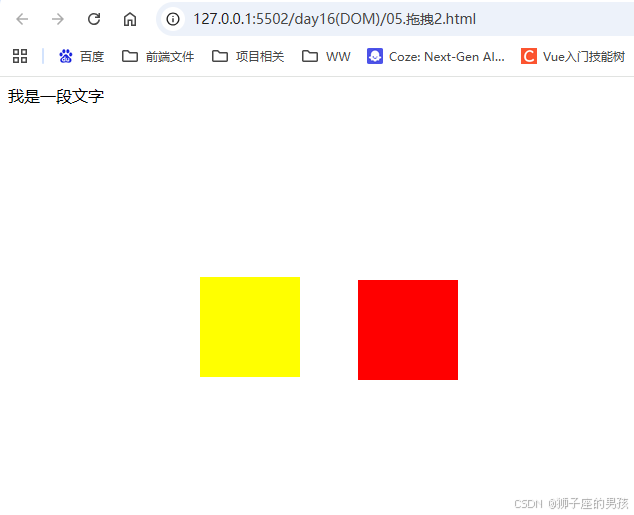
我是一段文字
<div id="box1"></div>
<div id="box2"></div>
<!-- 注意:图片需要开启绝对定位 -->
<img src="img/an.jpg" id="img1" style="position: absolute;"/>
</body>
</html>
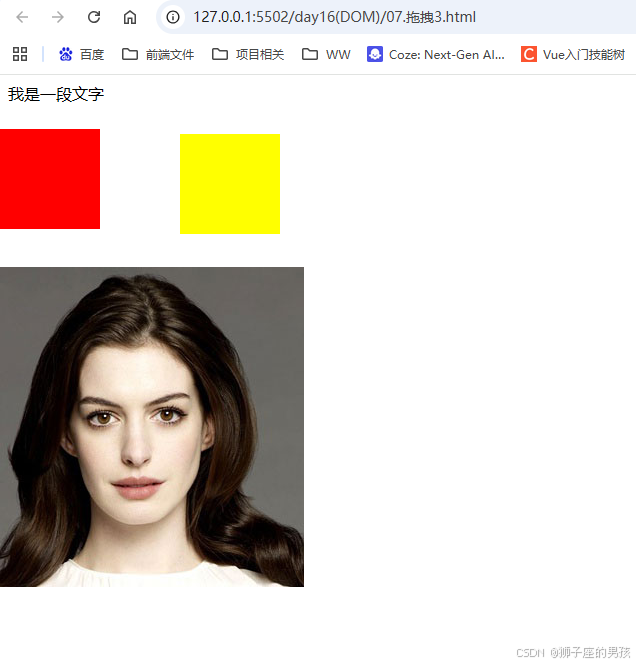
其六、待使用图片为:

其七、结果为:
// 一进入页面后:
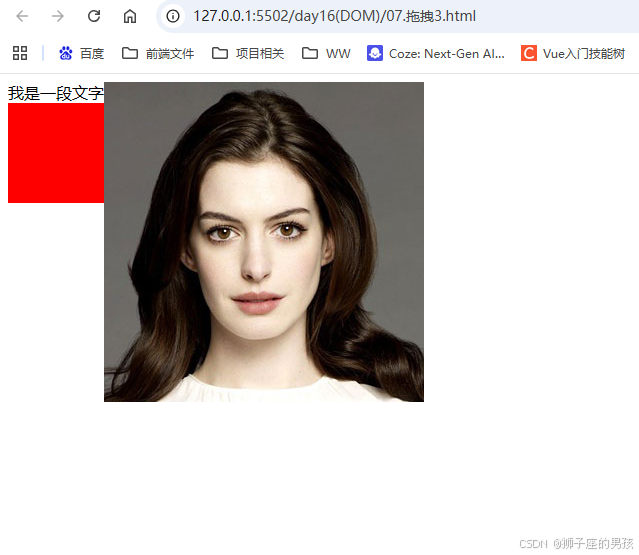
// 可以肆意拖动红色方块/黄色方块/图片:
Ⅴ、滚轮事件:
其一、代码为:onmousewheel/DOMMouseScroll、wheelDelta/detail、preventDefault/preventDefault()
<!DOCTYPE html>
<html>
	<head>
		<meta charset="UTF-8">
		<title></title>
		<style type="text/css">

			#box1{
				width: 100px;
				height: 100px;
				background-color: red;
			}

		</style>
		<script type="text/javascript">

			window.onload = function(){


				//获取 id 为 box1 的 div
				var box1 = document.getElementById("box1");

				//为 box1 绑定一个鼠标滚轮滚动的事件
				/*
				 * onmousewheel 鼠标滚轮滚动的事件,会在滚轮滚动时触发,
				 * 	但是火狐不支持该属性
				 *
				 * 在火狐中需要使用 DOMMouseScroll 来绑定滚动事件
				 * 	注意该事件需要通过 addEventListener() 函数来绑定
				 */


				box1.onmousewheel = function(event){

					event = event || window.event;


					//event.wheelDelta 可以获取鼠标滚轮滚动的方向
					//向上滚 120   向下滚 -120
					//wheelDelta 这个值我们不看大小,只看正负

					// alert(event.wheelDelta);
					// console.log(event.wheelDelta);// 120

					//wheelDelta 这个属性火狐中不支持
					//在火狐中使用 event.detail 来获取滚动的方向
					//向上滚 -3  向下滚 3
					//alert(event.detail);


					/*
					 * 当鼠标滚轮向下滚动时,box1 变长
					 * 	当滚轮向上滚动时,box1 变短
					 */
					//判断鼠标滚轮滚动的方向
					if(event.wheelDelta > 0 || event.detail < 0){
						//向上滚,box1 变短
						box1.style.height = box1.clientHeight - 10 + "px";//box1.clientHeight 表示:box1 元素现在的高度值;

					}else{
						//向下滚,box1 变长
						box1.style.height = box1.clientHeight + 10 + "px";
					}


					/*
					 * 使用 addEventListener() 方法绑定响应函数,取消默认行为时不能使用 return false(即:使用 return false 对火狐取消默认浏览器滚动条行为不生效)
					 * 需要使用 event 来取消默认行为 event.preventDefault();
					 * 但是 IE8 不支持 event.preventDefault(); 这个玩意,如果直接调用会报错
					 * (因此需要使用 event.preventDefault,需要再次做兼容:event.preventDefault && event.preventDefault())
					 */
					event.preventDefault && event.preventDefault();


					/*
					 * 当滚轮滚动时,如果浏览器有滚动条,滚动条会随之滚动,
					 * 这是浏览器的默认行为,如果不希望发生,则可以取消默认行为
					 */
					return false;


				};

				//为火狐绑定滚轮事件
				bind(box1,"DOMMouseScroll",box1.onmousewheel);


			};


			function bind(obj , eventStr , callback){
				if(obj.addEventListener){
					//大部分浏览器兼容的方式
					obj.addEventListener(eventStr , callback , false);
				}else{
					/*
					 * this 是谁由调用方式决定
					 * callback.call(obj)
					 */
					//IE8 及以下
					obj.attachEvent("on"+eventStr , function(){
						//在匿名函数中调用回调函数
						callback.call(obj);
					});
				}
			}

		</script>
	</head>
	<body style="height: 2000px;">

		<div id="box1"></div>

	</body>
</html>
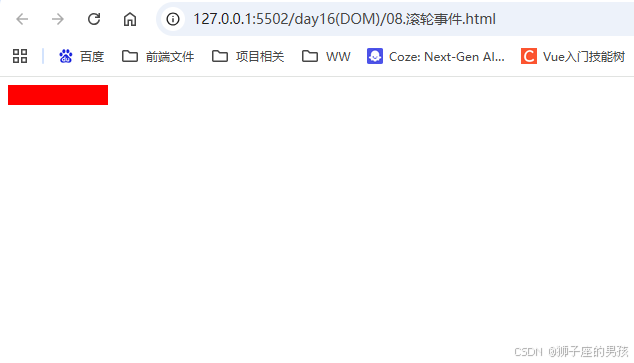
其二、结果为:
// 一进入页面后:
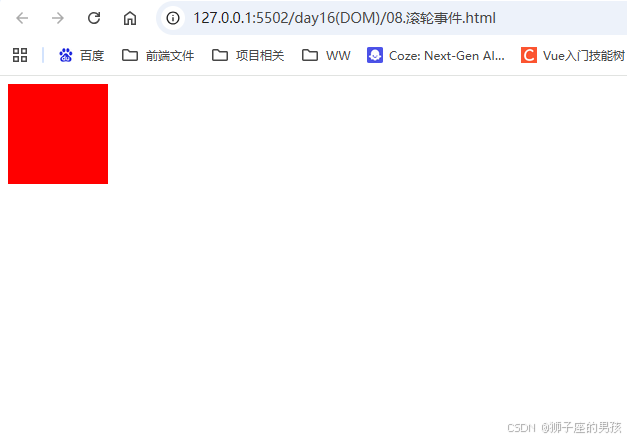
// 滚轮事件将红色方块拉长:
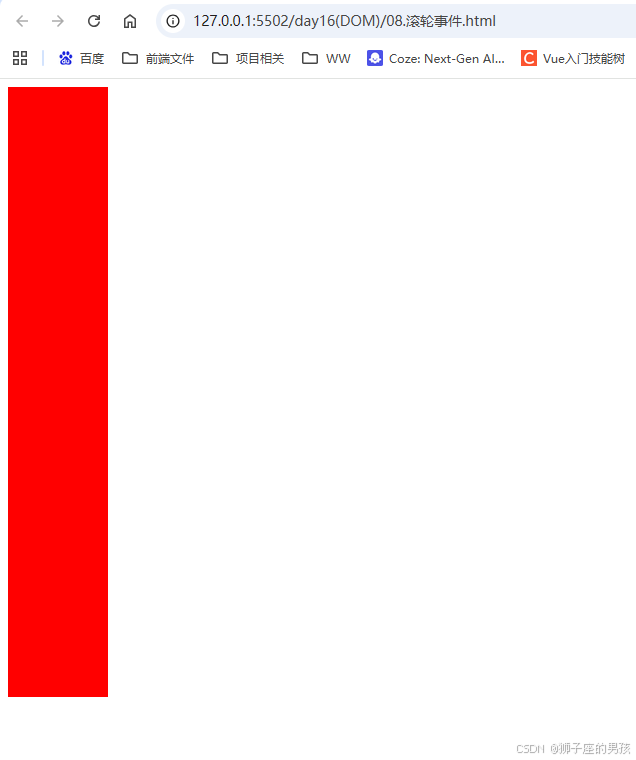
// 滚轮事件将红色方块拉短:
Ⅵ、键盘事件:onkeydown、onkeyup、keyCode(altKey/ctrlKey/shiftKey)
其一、代码为:
<!DOCTYPE html>
<html>
<head>
<meta charset="UTF-8">
<title></title>
<script type="text/javascript">
window.onload = function(){
/*
* 键盘事件:
* onkeydown
* - 按键被按下
* - 对于 onkeydown 来说如果一直按着某个按键不松手,则事件会一直触发
* - 当 onkeydown 连续触发时,第一次和第二次之间会间隔稍微长一点,其他的会非常的快
* 这种设计是为了防止误操作的发生(即:浏览器自带默认的防止误操作)。
* onkeyup
* - 按键被松开
*
* 键盘事件一般都会绑定给一些可以获取到焦点的对象或者是 document
*/
document.onkeydown = function(event){
event = event || window.event;
/*
* 可以通过 keyCode 来获取按键的编码
* 通过它可以判断哪个按键被按下
* 除了 keyCode,事件对象中还提供了几个属性
* altKey
* ctrlKey
* shiftKey
* - 这个三个用来判断 alt ctrl 和 shift 是否被按下
* 如果按下则返回 true,否则返回 false
*/
//console.log(event.keyCode);
//判断一个 y 是否被按下
//判断 y 和 ctrl 是否同时被按下
if(event.keyCode === 89 && event.ctrlKey){
console.log("ctrl和y都被按下了");// ctrl和y都被按下了(即:在 ctrl 和 y 键都被按下的时候,就会输出该语句)
}
};
/*document.onkeyup = function(){
console.log("按键松开了");
};*/
//获取 input
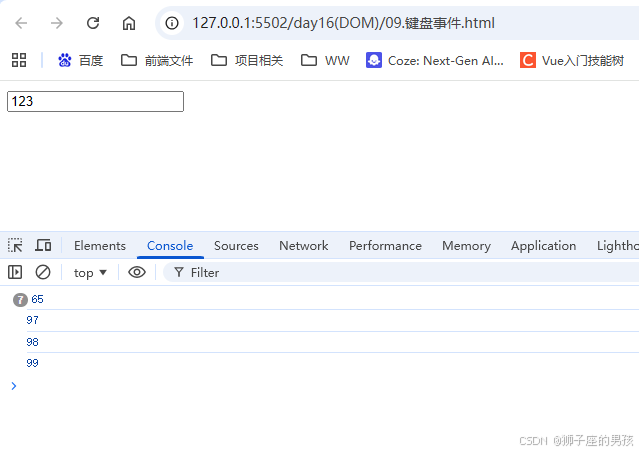
var input = document.getElementsByTagName("input")[0];
input.onkeydown = function(event){
event = event || window.event;
console.log(event.keyCode);// 65,此时只要 input 能捕获光标,则只要有按键动作,此值就会被动态输出;
//数字 48 - 57
//使文本框中不能输入a-z的字母(即:输入该字母有触发动作,但没值展示)
if(event.keyCode >= 65 && event.keyCode <= 90){
//在文本框中输入内容,属于 onkeydown 的默认行为
//如果在 onkeydown 中取消了默认行为,则输入的内容,不会出现在文本框中(即:return false; 的作用)
return false;
}
};
};
</script>
</head>
<body>
<input type="text" />
</body>
</html>
其二、结果为:
// 一进入页面后:
// 进入页面输入字符后的控制台(7次a和123):
Ⅶ、demo:方向键控制红色方框
其一、代码为:
<!DOCTYPE html>
<html>
	<head>
		<meta charset="UTF-8">
		<title></title>
		<style type="text/css">
			#box1{
				width: 100px;
				height: 100px;
				background-color: red;
				position: absolute;
			}


		</style>

		<script type="text/javascript">

			//使 div 可以根据不同的方向键向不同的方向移动
			/*
			 * 按左键,div 向左移
			 * 按右键,div 向右移
			 * 按上键,div 向上移
			 * 按下键,div 向下移
			 * 。。。
			 */
			window.onload = function(){//此时的 event.keyCode 值,既控制 div 移动又控制 div 方向,因此导致了有些卡顿;

				//为 document 绑定一个按键按下的事件
				document.onkeydown = function(event){
					event = event || window.event;

					//定义一个变量,来表示移动的速度
					var speed = 10;

					//当用户按了 ctrl 以后,速度加快
					if(event.ctrlKey){
						speed = 500;
					}

					/*
					 * 37 左
					 * 38 上
					 * 39 右
					 * 40 下
					 */
					switch(event.keyCode){
						case 37:
							//alert("向左"); left 值减小
							box1.style.left = box1.offsetLeft - speed + "px";
							break;
						case 39:
							//alert("向右");
							box1.style.left = box1.offsetLeft + speed + "px";
							break;
						case 38:
							//alert("向上");
							box1.style.top = box1.offsetTop - speed + "px";
							break;
						case 40:
							//alert("向下");
							box1.style.top = box1.offsetTop + speed + "px";
							break;
					}

				};

			};


		</script>
	</head>
	<body>
		<div id="box1"></div>
	</body>
</html>
其二、结果为:
// 一进入页面后:
// 四个方向键可以控制红色方框移动:

Ⅷ、小结:
其一、哪里有不对或不合适的地方,还请大佬们多多指点和交流!
其二、若有转发或引用本文章内容,请注明本博客地址(直接点击下面 url 跳转) https://blog.csdn.net/weixin_43405300,创作不易,且行且珍惜!
其三、有兴趣的话,可以多多关注这个专栏(Vue(Vue2+Vue3)面试必备专栏)(直接点击下面 url 跳转):https://blog.csdn.net/weixin_43405300/category_11525646.html?spm=1001.2014.3001.5482
其四、再有兴趣的话,也可以多多关注这个专栏(Java)(直接点击下面 url 跳转):https://blog.csdn.net/weixin_43405300/category_12654744.html?spm=1001.2014.3001.5482


 被折叠的 条评论
为什么被折叠?
被折叠的 条评论
为什么被折叠?
 到【灌水乐园】发言


