


使用设备
ZTFR开发板

人脸识别
首先简单介绍一下 K210 的 KPU。KPU 是 K210 内部一个神经网络处理器,简单来说就是 KPU 能加载和运行各种现成的 AI 算法模型,实现各种机器视 觉等功能。 MaixPy 中人脸识别本质是目标检测,主要通过在 K210 的 KPU 上跑 YOLO(You Only Look Once)目标检测算法来实现。我们来看一下 KPU 在 MaixPy 下的 用法。
构造函数
构造函数
import KPU as kpu
#常用的 KPU 模块导入方法。
使用方法
| 函数 | 参数 |
|---|---|
| kpu.load(offset or file_path) | 加载模型。【offset】模型存放在 flash 的偏移量,如 0x300000;【file_path】模型在文件系统为文件名,如“xxx.kmodel” |
| kpu.init_yolo2(kpu_net,threshold,nms_value,anchor_num,anchor) | 初始化 yolo2 网络;【kpu_net】kpu 网络对象【threshold】概率阈值;【nms_value】box_iou 门限;【anchor_num】描点数;【anchor】描点参数与模型参数一致。 |
| kpu.run_yolo2(kpu_net,image) | 运行 yolo2 网络;【kpu_net】从 kpu_load()中返回的网络对象;【image】从 sensor 中采集到的图像 |
| kpu.deinit(kpu_net) | 反初始化。【kpu_net】kpu 网络对象 |
导入模型
请按照以下步骤解锁人脸识别(滑稽)
1.下载模型模型地址
下载face_model_at_0x300000.kfpkg
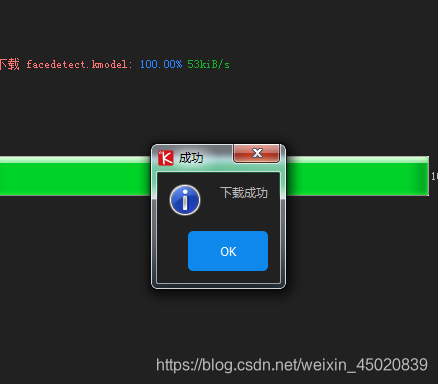
2.使用kflash浆把模型文件添加到开发板中,参数如下

3.下载成功就可以浪了
示例代码
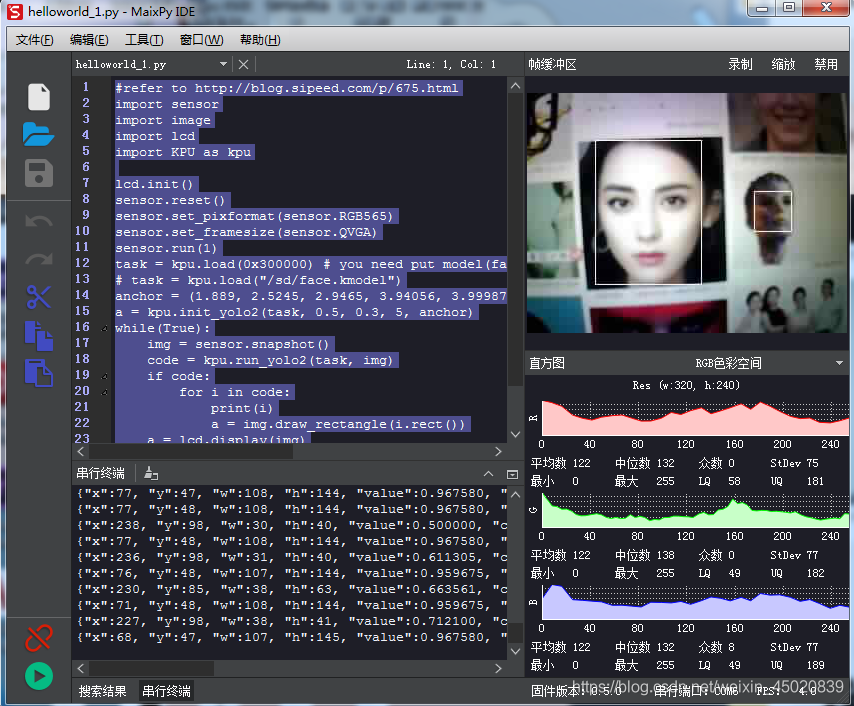
基础测试
#参考 http://blog.sipeed.com/p/675.html
import sensor,image,lcd
import KPU as kpu

lcd.init()
sensor.reset()
sensor.set_pixformat(sensor.RGB565)
sensor.set_framesize(sensor.QVGA)
sensor.run(1)
task = kpu.load(0x300000) #  你需要把模型(face.kfpkg)在闪存地址0x300000
# task = kpu.load("/sd/face.kmodel")#将模型放在 SD 卡中。
#模型描参数
anchor = (1.889, 2.5245, 2.9465, 3.94056, 3.99987, 5.3658, 5.155437, 6.92275, 6.718375, 9.01025)
#初始化 yolo2 网络
a = kpu.init_yolo2(task, 0.5, 0.3, 5, anchor)
while(True):
    img = sensor.snapshot()
    code = kpu.run_yolo2(task, img)#运行 yolo2 网络
    if code:
        for i in code:
            print(i)
            a = img.draw_rectangle(i.rect())
    a = lcd.display(img)
a = kpu.deinit(task)#反初始化
实现效果
炫酷识别
###############################################################
#ztfr_face1.py
#识别人脸并画出四个角标志
#
#
################################################################

import sensor, image, time
import lcd
import KPU as kpu

from Maix import GPIO
from fpioa_manager import fm
from board import board_info
KEY1=44
KEY2=46
fm.register(board_info.BOOT_KEY, fm.fpioa.GPIO3, force=True)
fm.register(KEY1, fm.fpioa.GPIO4, force=True)
fm.register(KEY2, fm.fpioa.GPIO5, force=True)

key_input = GPIO(GPIO.GPIO3, GPIO.IN)
key1_input = GPIO(GPIO.GPIO4, GPIO.IN)
key2_input = GPIO(GPIO.GPIO5, GPIO.IN)

lcd.init()
lcd.clear()

sensor.reset()
sensor.set_pixformat(sensor.RGB565)
sensor.set_framesize(sensor.QVGA)
sensor.skip_frames(time = 2000)


clock = time.clock()
img0 = image.Image()


sensor.run(1)
task = kpu.load(0x300000) #

anchor = (1.889, 2.5245, 2.9465, 3.94056, 3.99987, 5.3658, 5.155437, 6.92275, 6.718375, 9.01025)
a = kpu.init_yolo2(task, 0.5, 0.3, 5, anchor)

line_len=10

while(True):
    clock.tick()
    start = time.ticks_ms()
    img = sensor.snapshot()

    code = kpu.run_yolo2(task, img)
    if code:
       for i in code:
          print(i.rect())

          img.draw_string(i.rect()[0], i.rect()[1]-20, "real: %.2f"%(clock.fps()), color = (0, 255, 0), scale = 2, mono_space = False)
          #画四个角开始
          #左上角
          img.draw_line(i.rect()[0], i.rect()[1], i.rect()[0], i.rect()[1]+line_len, color = (0, 255, 0), thickness = 2)
          img.draw_line(i.rect()[0], i.rect()[1], i.rect()[0]+line_len, i.rect()[1], color = (0, 255, 0), thickness = 2)
          #左下角
          img.draw_line(i.rect()[0], i.rect()[1]+i.rect()[3], i.rect()[0], i.rect()[1]+i.rect()[3]-line_len, color = (0, 255, 0), thickness = 2)
          img.draw_line(i.rect()[0], i.rect()[1]+i.rect()[3], i.rect()[0]+line_len, i.rect()[1]+i.rect()[3], color = (0, 255, 0), thickness = 2)
          #右上角
          img.draw_line(i.rect()[0]+i.rect()[2], i.rect()[1], i.rect()[0]+i.rect()[2], i.rect()[1]+line_len, color = (0, 255, 0), thickness = 2)
          img.draw_line(i.rect()[0]+i.rect()[2], i.rect()[1], i.rect()[0]+i.rect()[2]-line_len, i.rect()[1], color = (0, 255, 0), thickness = 2)
          #右下角
          img.draw_line(i.rect()[0]+i.rect()[2], i.rect()[1]+i.rect()[3], i.rect()[0]+i.rect()[2], i.rect()[1]+i.rect()[3]-line_len, color = (0, 255, 0), thickness = 2)
          img.draw_line(i.rect()[0]+i.rect()[2], i.rect()[1]+i.rect()[3], i.rect()[0]+i.rect()[2]-line_len, i.rect()[1]+i.rect()[3], color = (0, 255, 0), thickness = 2)

    w = img.width()
    h = img.height()
    #在帧缓冲区中绘制图像。在这种情况下,绘制我们当前正在绘制的图像,
    #这会导致图形故障,但很酷。 传递可选的掩码图像以控制绘制的像素。
    #img0.draw_image(img, w//4, h//4, x_scale=0.5, y_scale=0.5)
    img0.draw_image(img, 0, 0, x_scale=0.9, y_scale=0.9)
    #画矩形是 x,y,w,h
    ##img0.draw_rectangle(180, 40, 60, 30, color = (128, 128, 128), thickness = 2, fill = False)


    img0.draw_line(0, 223, 320, 223, color = (128, 128, 128), thickness = 2)

    a = lcd.display(img0, oft=(0,0))
    end = time.ticks_ms()
    lcd.draw_string(0, 224, b'%f %d ms bootkey:%d,key1:%d,key2:%d'%(clock.fps(),end-start,key_input.value(),key1_input.value(),key2_input.value()), lcd.RED, lcd.BLACK)


a = kpu.deinit(task)
效果


 666
666


 被折叠的 条评论
为什么被折叠?
被折叠的 条评论
为什么被折叠?
 到【灌水乐园】发言


