


ejb入门案例(亲测OK)
运行环境:
wildFly10.x +jdk1.8
● EJB-MDB入門代码(亲测OK)
EJBproject - MDB(Queue And Topic)
deploy目录下3个文件:
1.webApp_wildFly.war
这个是利用URL来测试下面2个EJB程的,通过访问war包里的servlet来,给某个Queue发送数据,本例中是通过"http://localhost:8080/webApp_wildFly/TestQueue01"URL来访问"queue_sendMsg_Servlet"包下的"TestQueue01"servlet的
2.EJB_queue.jar
这个是EJB工程,它监视从"TestQueue01"队列中接受到的信息
3.EJB_topic.jar
这个也是EJB工程,它接受来自"TestTopic01"主题的信息
① EJB_queue.jar 工程结构如下,新建->EJBproject->.(不会的自己百度下)
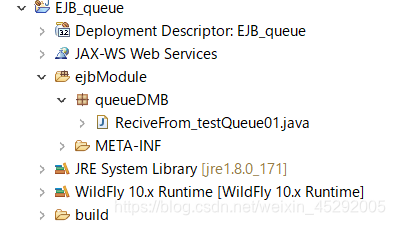
ReciveFrom_testQueue01.java代码
package queueDMB;

import javax.ejb.ActivationConfigProperty;
import javax.ejb.MessageDriven;
import javax.jms.JMSException;
import javax.jms.Message;
import javax.jms.MessageListener;
import javax.jms.TextMessage;

/**
 * Message-Driven Bean implementation class for: ReciveFrom_testQueue01
 */
@MessageDriven(activationConfig = {

		@ActivationConfigProperty(propertyName = "destinationType", propertyValue = "javax.jms.Queue"),
		@ActivationConfigProperty(propertyName = "destination", propertyValue = "queue/testQueue01") })
public class ReciveFrom_testQueue01 implements MessageListener {


	/**
	 * Default constructor.
	 */
	public ReciveFrom_testQueue01() {

	}

	@Override
	public void onMessage(Message rcvMessage) {

		TextMessage msg = null;
		try {

			if (rcvMessage instanceof TextMessage) {

				msg = (TextMessage) rcvMessage;
				System.out.println("Received Message from queue: " + msg.getText());
			} else {

				System.out.println("Not a valid message(TextMessage) for this Queue MDB");
			}
		} catch (JMSException e) {

			System.out.println(e.getMessage());
			e.printStackTrace();
		}
	}

}
测试给“TestQueue01”队列发送信息的客户端代码:
可以将该工程发布到deployment目录下,执行Java命令执行:
jar包执行命令:“java - jar jar包名” 执行客户端代码!
(注意:打包的时候一定要包所有引用的库文件都包含进去,也就是选择"Runnable JAR file"),见下图: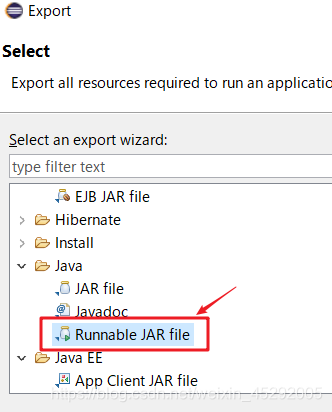
package queue_ClientApp;

import java.util.Properties;

import javax.jms.Connection;
import javax.jms.ConnectionFactory;
import javax.jms.Queue;
import javax.jms.JMSException;
import javax.jms.QueueSender;
import javax.jms.QueueSession;
import javax.jms.Session;
import javax.jms.TextMessage;
import javax.naming.Context;
import javax.naming.InitialContext;
import javax.naming.NamingException;

public class App_TestQueue01 {


	public static void main(String[] args) {


		final String QUEUE_LOOKUP = "queue/testQueue01";
		final String FACTORY = "jms/RemoteConnectionFactory";
		Context context = null;
		Connection queueConn = null;
		try {

			final Properties env = new Properties();
			env.put(Context.INITIAL_CONTEXT_FACTORY, "org.jboss.naming.remote.client.InitialContextFactory");
			env.put(Context.PROVIDER_URL, "http-remoting://localhost:8080");
			env.put(Context.SECURITY_PRINCIPAL, "guest");
			env.put(Context.SECURITY_CREDENTIALS, "guest123");
//			env.put("jboss.naming.client.ejb.context", true);

			context = new InitialContext(env);
			ConnectionFactory connectionFactory = (ConnectionFactory) context.lookup(FACTORY);
			Queue queue = (Queue) context.lookup(QUEUE_LOOKUP);
			queueConn = connectionFactory.createConnection("guest", "guest123");
			QueueSession queueSession = (QueueSession) queueConn.createSession(false, Session.AUTO_ACKNOWLEDGE);
			QueueSender queueSender = queueSession.createSender(queue);
			for (int i = 0; i < 1; i++) {

				TextMessage textMsg = queueSession.createTextMessage("queue example text_" + String.format("%02d", i));
				queueSender.send(textMsg);
			}
		} catch (NamingException | JMSException e) {

			e.printStackTrace();
		} finally {

			try {

				if (queueConn != null) {

					queueConn.close();
				}
				if (context != null) {

					context.close();
				}
			} catch (JMSException | NamingException e) {

				e.printStackTrace();
			}
		}
	}

}
下面是测试给“TestQueue01”队列发送信息的war包servlet代码:
访问URL:http://localhost:8080/工程名/servlet名
package queue_sendMsg_Servlet;

import java.io.IOException;
import java.io.PrintWriter;

import javax.jms.JMSException;
import javax.jms.Queue;
import javax.jms.QueueConnection;
import javax.jms.QueueConnectionFactory;
import javax.jms.QueueSender;
import javax.jms.QueueSession;
import javax.jms.TextMessage;
import javax.naming.Context;
import javax.naming.InitialContext;
import javax.naming.NamingException;
import javax.servlet.ServletException;
import javax.servlet.annotation.WebServlet;
import javax.servlet.http.HttpServlet;
import javax.servlet.http.HttpServletRequest;
import javax.servlet.http.HttpServletResponse;

/**
 * Servlet implementation class TestQueue01
 */
@WebServlet("/TestQueue01")
public class TestQueue01 extends HttpServlet {

	private static final long serialVersionUID = 2932240929345417181L;

	public TestQueue01() {

		super();
	}

	protected void doGet(HttpServletRequest request, HttpServletResponse response)
			throws ServletException, IOException {

		response.getWriter().append("Served at: ").append(request.getContextPath() + "<br>");
		PrintWriter out = response.getWriter();

		final String QUEUE_LOOKUP = "java:jboss/exported/queue/testQueue01"; // queue/testQueue01
		final String CONNECTION_FACTORY = "ConnectionFactory";
		Context context = null;
		QueueConnection queueConn = null;
		QueueSession queueSession = null;
		try {

			context = new InitialContext();
			Queue queue = (Queue) context.lookup(QUEUE_LOOKUP);
			QueueConnectionFactory cf = (QueueConnectionFactory) context.lookup(CONNECTION_FACTORY);
//			queueConn = cf.createConnection("guest", "guest123");
			queueConn = cf.createQueueConnection();
			queueSession = queueConn.createQueueSession(false, QueueSession.AUTO_ACKNOWLEDGE);

			QueueSender sender = queueSession.createSender(queue);

			// 1. Sending TextMessage to the Queue
			TextMessage message = queueSession.createTextMessage();
			message.setText("Hello EJB3 MDB Queue!!!");
			sender.send(message);
			out.println("Success Sent TextMessage to the Queue");
		} catch (NamingException | JMSException e) {

			e.printStackTrace();
		} finally {

			try {

				if (queueConn != null) {

					queueConn.close();
				}
				if (context != null) {

					context.close();
				}
				if (queueSession != null) {

					queueSession.close();
				}
			} catch (JMSException | NamingException e) {

				e.printStackTrace();
			}
		}
	}

	protected void doPost(HttpServletRequest request, HttpServletResponse response)
			throws ServletException, IOException {

		doGet(request, response);
	}

}
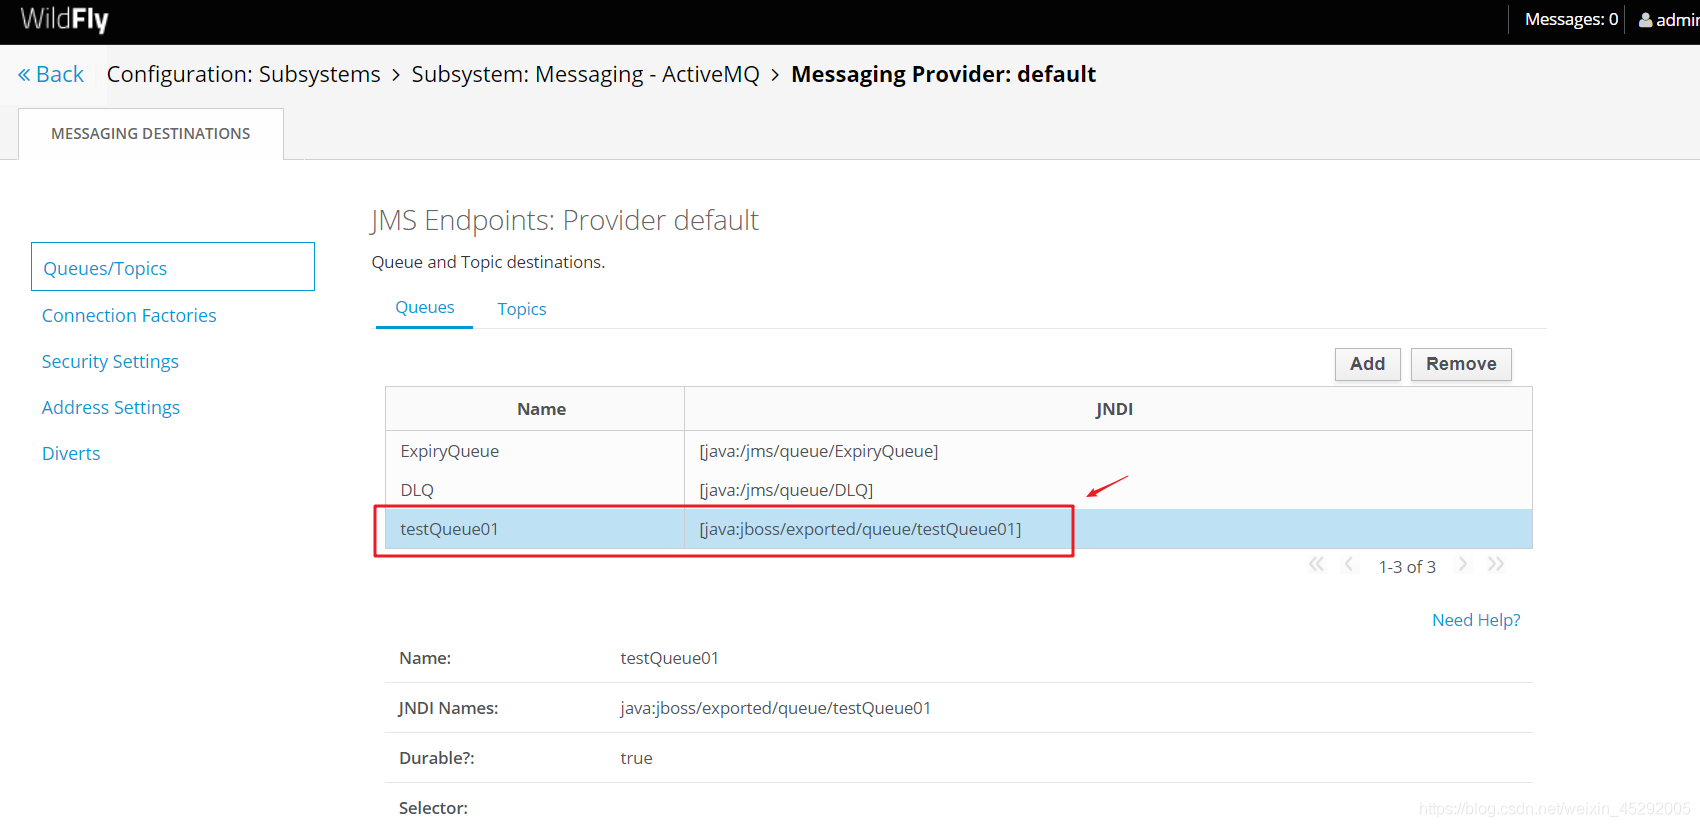
然后设置要送信的queue名:
同样的,也给下面要发送的TestTopic01设置topic:

下面的内容是关于MessageDrivenBean-Topic的案例(道理同Queue,不在赘述,直接上代码):
② EJB_topic.jar詳細
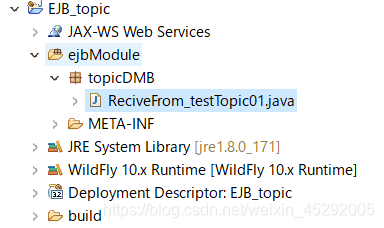
EJB_topic 代码:
package topicDMB;

import javax.ejb.ActivationConfigProperty;
import javax.ejb.MessageDriven;
import javax.jms.JMSException;
import javax.jms.Message;
import javax.jms.MessageListener;
import javax.jms.TextMessage;

/**
 * Message-Driven Bean implementation class for: ReciveFrom_testTopic01
 */
@MessageDriven(activationConfig = {

		@ActivationConfigProperty(propertyName = "destinationType", propertyValue = "javax.jms.Topic"),
		@ActivationConfigProperty(propertyName = "destination", propertyValue = "topic/testTopic01") }
最低0.47元/天 解锁文章


 166
166


 被折叠的 条评论
为什么被折叠?
被折叠的 条评论
为什么被折叠?
 到【灌水乐园】发言


