


nginx虚拟主机
1、虚拟主机的作用
- 虚拟主机提供了在同一台服务器上运行多个网站的功能。
2、虚拟主机的三种模式:
- 基于多域名方式配置虚拟主机
- 基于多端口配置虚拟主机
- 基于多IP配置虚拟主机
基于多ip配置 虚拟主机 基于多域名的虚拟主机是最常见的一种虚拟主机。
- 只需配置你的DNS服务器,将每个主机名映射到正确的IP地址,然后配置Nginx服务器,令其识别不同的主机名就可以了。
- 网域名称系统(DNS,Domain Name System,将域名和IP地址相互映射的一个分布式数据库)是因特网的 一项核心服务,它作为可以将域名和IP地址相互映射的一个分布式数据库,能够使人更方便地访问互联网,而不用去 记 住能够被机器直接读取的IP地址数串。
参考:https://baike.baidu.com/item/%E5%9F%9F%E5%90%8D/86062?fr=aladdin
基于多端口的虚拟主机,可以使用同一个ip,通过访问不同的端口来访问。
基于多IP的虚拟主机可以通过添加多个网卡或者在一块物理网卡上绑定多个IP地址来实现,
- ps:如果没有特殊要求,最好还是使用基于多域名的虚拟主机。
3、多域名虚拟主机配置:
3.1、修改nginx配置文件:
[root@localhost ~]# cd /usr/local/nginx/
[root@localhost nginx]# vim conf/nginx.conf
include /usr/local/nginx/conf/vhost/*.conf;
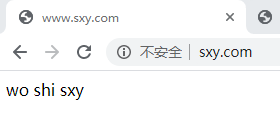
创建www.sxy.com虚拟主机
[root@localhost nginx]# vim conf/vhost/www.sxy.com.conf
server {
listen 80;
server_name www.sxy.com;
access_log logs/www.sxy.com.log main;
location / {
root /data/www/sxy/;
index index.html;
}
}
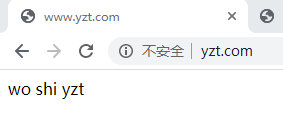
创建www.yzt.com虚拟主机
[root@localhost nginx]# vim conf/vhost/www.yzt.com.conf
server {
listen 80;
server_name www.yzt.com;
access_log logs/www.yzt.com.log main;
location / {
root /data/www/yzt/;
index index.html;
}
}
创建虚拟主机网页文件
[root@localhost nginx]# mkdir -p /data/www/{sxy,yzt}
[root@localhost nginx]# echo "wo shi sxy" > /data/www/sxy/index.html
[root@localhost nginx]# echo "wo shi yzt" > /data/www/yzt/index.html
[root@localhost nginx]# /usr/local/nginx/sbin/nginx -s reload 重新加载配置文件
3.3、修改Windows系统hosts文件
- hosts文件:在本机计算机上面,配置本地的ip地址和域名映射关系,通常用于测试。
C:\Windows\System32\drivers\etc\hosts
192.168.2.10 www.sxy.com www.yzt.com
3.4、验证
4、配置多端口虚拟主机:
server {
listen 8080;
server_name www.sxy.com;
location / {
root /usr/share/nginx/html/sxy;
index index.html;
}
}
5、配置多IP虚拟主机:
cp /etc/sysconfig/network-scripts/ifcfg-ens33{,:1}
vim /etc/sysconfig/network-scripts/ifcfg-ens33:1
修改以下信息:
NAME="ens33:1"
DEVICE="ens33:1"
IPADDR=192.168.1.100
重启服务:
systemctl restart network
vim  conf/nginx.conf
server {
listen 192.168.1.100:80;
server_name www.sxy.com;
location / {
root /usr/share/nginx/html/sxy;
index index.html;
}
}
重启服务
/usr/local/nginx/sbin/nginx  -s reload
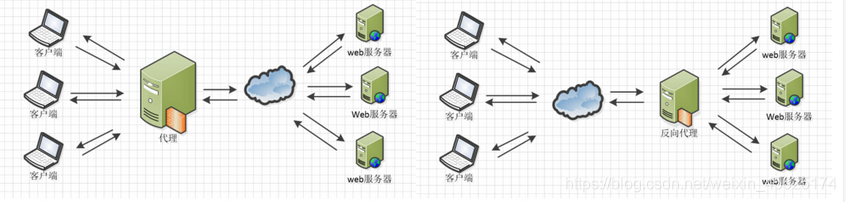
Nginx反向代理:
1、反向代理概念:
- 反向代理是nginx的一个重要功能,在编译安装时会默认编译该模块。在配置文件中主要配置proxy_pass指令。
- 代理服务器接受客户端的请求,然后把请求代理给后端真实服务器进行处理,然后再将服务器的响应结果返给客户端。
2、反向代理作用:
- 与正向代理(正向代理主要是代理客户端的请求)相反,反向代理主要是代理服务器返回的数据,所以它的作用主要有以下两点:
- 可以防止内部服务器被恶意攻击(内部服务器对客户端不可见)。
- 为负载均衡和动静分离提供技术支持。
3、反向代理语法:
Syntax: proxy_pass URL;
Default: —
Context: location, if in location,limit_except
- 代理服务器的协议,可支持http与https。
- 地址可以指定为域名或IP地址,以及可选端口。
- 例如:
proxy_pass http://localhost:9000/uri/;
proxy_pass http://192.168.0.188:8080;
proxy_pass http://192.168.0.188;
4、实例一:
- location和proxy_pass都不带uri路径
- 代理服务器:192.168.2.10
- 后端服务器:192.168.2.20
代理服务器的配置:
location / {
proxy_pass http://192.168.2.20;
}
[root@localhost nginx]# vim  html/index.html
   this is 192.168.2.20 page

[root@localhost nginx]# /usr/local/nginx/sbin/nginx -s reload
 proxy_pass 转发请求给后端服务器
后端服务器的配置:
location / {
echo $host;
root html;
index index.html index.htm;
}
# echo $host 这个主要是来看下后端接收到的Host是什么。
[root@localhost nginx]# /usr/local/nginx/sbin/nginx  -s reload
- 验证:
[root@localhost nginx]# curl 192.168.2.10
192.168.2.20
# 获取的请求Host是后端服务器ip,去掉该指令,验证请求结果。
[root@localhost nginx]# curl 192.168.2.10
this is 192.168.2.20 page
# 可以看到我们访问的是109,但是得到的结果是114的发布目录文件。
5、实例二:
- proxy_pass没有设置uri路径,但是代理服务器的location 有uri,那么代理服务器将把客户端请求的地址传递给后端服务器。
# 代理服务器的配置:
location   /data/ {
proxy_pass http://192.168.2.20;
}
[root@localhost nginx]# /usr/local/nginx/sbin/nginx -s reload
# 后端服务器的配置:
location / {
# echo  $host;
root    html/uri;
index   index.html index.htm;
}
[root@localhost nginx]# mkdir -p html/uri/data
[root@localhost nginx]# echo "this is /usr/local/nginx/html/uri/data/ test" > html/uri/data/index.html
[root@localhost nginx]# /usr/local/nginx/sbin/nginx -s reload
- 验证:
[root@localhost nginx]#  curl 192.168.0.109/document/data/
this is /usr/local/nginx/html/uri/data/ test
- 完整请求路径 是在后端服务器的/usr/local/nginx/html/uri 后追加客户端请求的路径/data/
6、实例三:
- 如果proxy_pass设置了uri路径,则需要注意,此时,proxy_pass指令所指定的uri会覆盖location的URI。
# 代理服务器的配置:
location / {
proxy_pass http://192.168.2.10/data/;
}
注意:这里http://1921.168.2.10/data/后面需要加/
[root@localhost nginx]# /usr/local/nginx/sbin/nginx -s reload

# 后端服务器的配置:
location / {
root  html;
index index.html index.htm;
}
[root@localhost nginx]# /usr/local/nginx/sbin/nginx -s reload
[root@localhost nginx]# mkdir html/data
[root@localhost nginx]# echo "this is /html/data/ test" > html/data/index.html
- 验证:
[root@localhost nginx]# curl  192.168.2.10
this is /html/data/ test
这样看好像很正常,但是稍作修改。
- 这次加上location的uri,后端服务器加个子目录:
代理服务器的配置:
location /document/ {
proxy_pass http://192.168.2.10/data/;
}
后端服务器的配置:
location / {
#echo $host;
root html;
index index.html index.htm;
}
- 再次验证:
[root@localhost nginx]# curl 192.168.2.10/document
this is /html/data/ test
该路径还是 proxy_pass 指定的uri路径,与location 没有关系了!
7、 获取远程客户端真实ip地址:
# 代理服务器配置:
location / {
proxy_pass http://192.168.2.20;
proxy_set_header Host $host;
proxy_set_header X-Real-IP $remote_addr;
}
# 后端服务器配置:
log_format main '$remote_addr - $remote_user [$time_local] "$request" '
'$status $body_bytes_sent "$http_referer" '
'"$http_user_agent" "$http_x_real_ip"';
access_log logs/access.log main;
- 验证:
在代理服务器上访问:
[root@localhost nginx]# curl 192.168.2.10
this is 192.168.2.20 page
在后端服务器上查看日志:
[root@localhost nginx]# cat logs/host.access.log
192.168.2.10 - - [25/Apr/2020:00:17:33 +0800] "GET / HTTP/1.0" 200 26 "-" "curl/7.29.0" "192.168.2.10"
从这里可以看到是哪台服务器访问我的资源
8、缓存代理服务器实战:
- 在代理服务器的磁盘中保存请求目标的内容,加快响应速度,减少应用服务器(后端服务器)上的资源开销,比如多客户端请求相同的资源,代理缓存命中后,对于应用服务器来说,只发生了一次资源调度。
- 而浏览器上的缓存配置,一般来说是用来减少本地IO的,请求目标的内容会存放在浏览器本地。
# 代理服务器配置:
proxy_cache_path /data/nginx/cache max_size=10g levels=1:2
keys_zone=nginx_cache:10m inactive=60m use_temp_path=off;
upstream nginx {
server 192.168.2.10;
}
server {
listen 80;
server_name localhost;
location / {
root html;
index index.html index.htm;
proxy_pass http://nginx;
proxy_set_header Host $host;
proxy_set_header X-Real-IP $remote_addr;
proxy_cache nginx_cache;
proxy_cache_key $host$uri$is_args$args;
proxy_cache_valid 200 304 302 1d;
}
}
[root@localhost nginx]# mkdir -p /data/nginx/cache/   创建缓存目录
[root@localhost nginx]# /usr/local/nginx/sbin/nginx -s reload   重新加载配置文件
#
- /data/nginx/cache #缓存资源存放路径
- levels : 设置缓存资源的递归级别,默认为levels=1:2,表示Nginx为将要缓存的资源 生成的key从后依次设置两级保存。
- key_zone : 在共享内存中设置一块存储区域来存放缓存的key和metadata,这样nginx可以快速判断一个request是否命中或者未命中缓存,1m可以存储8000个key,10m可以存储80000个key
- max_size: 最大cache空间,如果不指定,会使用掉所有disk space,当达到配额后,会删除不 活跃的cache文件
- inactive : 未被访问文件在缓存中保留时间,本配置中如果60分钟未被访问则不论状态是否为 expired,缓存控制程序会删掉文件。inactive默认是10分钟。需要注意的是,inactive和expired配置项的含义是不同的,expired只是缓存过期,但不会被删除,inactive是删除指定时间内未被访问的缓存文 件
- use_temp_path: 如果为off,则nginx会将缓存文件直接写入指定的cache文件中,而不是使用 temp_path存储,official建议为off,避免文件在不同文件系统中不必要的拷贝
- proxy_cache: 启用proxycache,并指定key_zone。如果proxy_cache off表示关闭掉缓存。


 950
950


 被折叠的 条评论
为什么被折叠?
被折叠的 条评论
为什么被折叠?
 到【灌水乐园】发言


