


前言:
苦兮兮的周一,经理突然说图片占了服务器太多内存,让我压缩一下图片再上传。
于是打开项目,启动,看着这祖传代码,头疼。
无从下手,不晓得项目经了多少前端同事的手,代码风格是真的太混乱了。
elemenui的upload文档:https://element.eleme.cn/#/zh-CN/component/upload
确定提交方式
1.自动上传
上传方法::action = ”##“

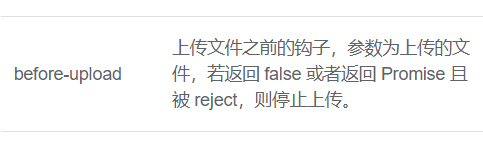
进行压缩的事件: before-upload
注意:
before-upload事件与auto-upload的状态相关:
auto-upload为true,before-upload事件有效
auto-upload为false,before-upload事件无效
html代码:
<el-upload
:action = "你的接口地址"
:auto-upload ="true"
list-type = "picture-card"
ref = "upload_ref"
:limit = "2"
:multiple = "true"
:before-upload = 'beforeUpload'
:on-error ="uploadError"
:on-success = "uploadSuccess"
:on-preview = "handlePictureCardPreview" >
</el-upload>
js代码:
beforeUpload (file){
        var that = this;
        return new Promise(function(resolve, reject){

          var image = new Image();
          image.src = URL.createObjectURL(file);

          image.onload = function(){
            var canvas = document.createElement('canvas')
            var ctx = canvas.getContext('2d')
            var initSize = image.src.length
            var { width } = image, { height } = image
            canvas. width = width
            canvas.height = height
            ctx.fillRect(0, 0, canvas.width, canvas.height)
            ctx.drawImage(image, 0, 0, width, height)

            // 进行最小压缩0.1
            var compressData = canvas.toDataURL('image/jpeg', 0.1)

            // 压缩后调用方法进行base64转Blob,方法写在下边
            var byteString;
            if(compressData.split(',')[0].indexOf('base64') >= 0) {
              byteString = atob(compressData.split(',')[1])
            }else {
              byteString = unescape(compressData.split(',')[1])
            }
            var mimeString = compressData
              .split(',')[0]
              .split(':')[1]
              .split(';')[0];
            var ia = new Uint8Array(byteString.length)
            for( var i = 0; i < byteString.length; i += 1) {
              ia[i] = byteString.charCodeAt(i)
            }

            var qwe = new Blob([ia], {type: mimeString});
            resolve(qwe)
            // console.log('压缩后的图片', qwe)
          };
        })
      },
踩坑:
由于是改同事的代码,真的脑瓜疼~
我的项目中需要手动提交(还需要携带图片以外的参数),但是同事把压缩的方法写在beforeUpload中,当然是没有无效的,然后俺自作聪明的把auto-upload 的状态改成了true,看似解决了
然后引起了更大的坑,因为图片已经上传了,导致后续操作都失效了…
注意:
- 使用action直接上传文件,
在上传成功前,除了在beforeUpload事件能修改文件信息(只有beforeUpload能使用Promise回调),其他事件内都是无法修改的。- 如果前端显示压缩成功了,但是on-success输出的文件信息还是原文,不用担心,并不代表失败了,想确认的话,可以与后端同事沟通,确认传到服务器的文件大小。
- 如果自动上传,还需要携带其他参数,使用
:data="uploadParams(你的参数)"
1.手动上传
上传方法: http-request(自定义上传事件)

进行压缩的事件: on-change

先写压缩方法,可以放在你的公共工具文件里啦
/** 图片压缩,默认同比例压缩
 *  @param {Object} fileObj
 *  图片对象
 *  回调函数有一个参数,base64的字符串数据
 */
export function compress(fileObj, callback) {
    // console.log('压缩前文件大小', fileObj.size)
    try {
        const image = new Image()
        image.src = URL.createObjectURL(fileObj)
        image.onload = function() {
            const that = this
            // 默认按比例压缩
            let w = that.width
            let h = that.height
            const scale = w / h
            w = fileObj.width || w
            h = fileObj.height || (w / scale)
            let quality = 0.7 // 默认图片质量为0.7
            // 生成canvas
            const canvas = document.createElement('canvas')
            const ctx = canvas.getContext('2d')
            // 创建属性节点
            const anw = document.createAttribute('width')
            anw.nodeValue = w
            const anh = document.createAttribute('height')
            anh.nodeValue = h
            canvas.setAttributeNode(anw)
            canvas.setAttributeNode(anh)
            ctx.drawImage(that, 0, 0, w, h)
            // 图像质量
            if (fileObj.quality && fileObj.quality <= 1 && fileObj.quality > 0) {
                quality = fileObj.quality
            }
            // quality值越小,所绘制出的图像越模糊
            const data = canvas.toDataURL('image/jpeg', quality)
            // 压缩完成执行回调
            const newFile = convertBase64UrlToBlob(data)
            callback(newFile)
            // console.log('压缩后文件信息', newFile)
        }
    } catch (e) {
        console.log('压缩失败!')
    }
}

// Base64 => 二进制(Blob)
function convertBase64UrlToBlob(urlData) {
    // 去掉url的头,并转换为byte
    const bytes = window.atob(urlData.split(',')[1])
    // 处理异常,将ascii码小于0的转换为大于0
    const ab = new ArrayBuffer(bytes.length)
    const ia = new Uint8Array(ab)
    for (let i = 0; i < bytes.length; i++) {
        ia[i] = bytes.charCodeAt(i)
    }
    return new Blob([ab], { type: 'image/png' })
}
html代码:
 <el-upload
 action=""   // 因为action是必选参数,不写会报错,为空就行
 :http-request="filesRequest"
 :limit="3"
 :multiple="true"
 ref='upload_ref1'
 :auto-upload="false"
 list-type="picture-card"
 :on-change="fileChange"
 :on-error="uploadErrorInCurrVue"
 :on-success="uploadSuccessInCurrVue"
 :on-preview="handlePictureCardPreview">
</el-upload>
<p class="g_signBtn" @click="submit">提交</p>
在需要使用的页面引入:
// 引入压缩图片方法
import { compress } from '../../../../utils/compression'
压缩:
fileChange(file, fileList) {
         const that = this
         // 回显
         this.dialogImageUrl = URL.createObjectURL(file.raw)
         // 调用自定义的压缩方法
         compress(file.raw, function (val) {
         // 图片格式: blob => file
         let newFile = new window.File([val], file.name, { type: file.raw.type });
         newFile.uid = file.uid;
         // 新增属性(file)并赋值 (that.uploadParams是俺自定义传给后端的值,根据自己项目情况赋值)
         that.$set(that.uploadParams, 'file', newFile)
         // // 查看压缩后的图片路径
         console.log('newFileURL', URL.createObjectURL(val))
         })
},
上传:
 filesRequest(file) {
        const formData = new FormData()
        formData.append('cellphone', this.uploadParams.cellphone)
        formData.append('code', this.uploadParams.code)
        formData.append('codeId', this.uploadParams.codeId)
        formData.append('codeType', this.uploadParams.codeType)
        formData.append('tenantCode', this.uploadParams.tenantCode)
        formData.append('file', this.uploadParams.file)

        // console.log('获取卸货车照的图片的地址', URL.createObjectURL(formData.get('file')))

       // 其他同事封装的请求参数都默认转成json了,所以重新写得axios,唉(根据自己项目情况写请求)
        const instance = Axios.create({
              baseURL: this.HOST
         })
        instance.post('confirmationUpload.do',formData).then(res => {
              })
        },
至于为什么要用Axios.create,因为formData传参一直没有数据
百度后找到了解决方法:https://www.yidianphp.com/archives/921
虽然以前从来没有碰到这种问题,唉,但是还是不敢对项目大改,真的怕牵一发而动全身。
提交:
  submit() {
      // 调用上传方法
      this.filesRequest()
  }
目前这些是俺解决压缩图片上传的心路历程了,改代码真的好让人奔溃啊~
如果有不足或者有问题,请多多交流哦~


 288
288


 被折叠的 条评论
为什么被折叠?
被折叠的 条评论
为什么被折叠?
 到【灌水乐园】发言


