


1. 依赖
<dependency>
            <groupId>org.springframework.boot</groupId>
            <artifactId>spring-boot-starter-mail</artifactId>
</dependency>
2. 在application.yml文件中配置JavaMail
spring:
mail:
# 邮箱服务器
host: smtp.qiye.aliyun.com
# 发送邮箱
username: xxxxx
# 发送邮箱授权码,不是登录密码
password: xxxxx
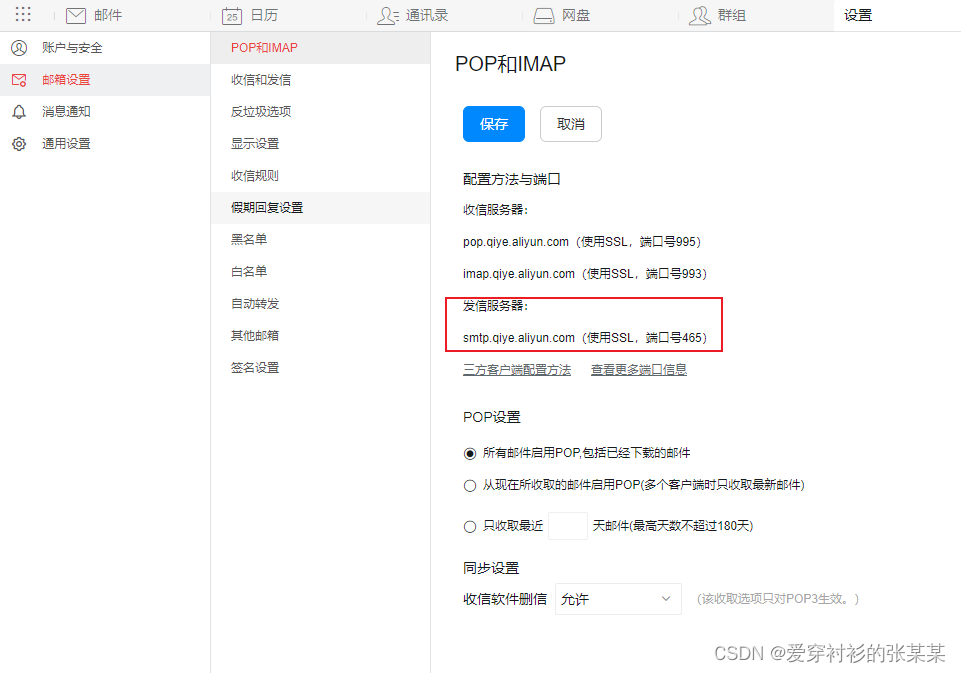
# linux 中部署时,需要加以下配置, 不同邮箱需要查询一下 (例: 阿里邮箱ssl配置, 下图所示)
port: 465
properties:
mail:
smtp:
auth: true
starttls:
enable: true
socketFactory:
port: 465
class: javax.net.ssl.SSLSocketFactory
fallback: false
# JavaMailSender 邮件发送的配置
spring.mail.host=smtp.china.com
spring.mail.username=service@jieyuechina.com
spring.mail.password=123456
spring.mail.test-connection=false
spring.mail.properties.mail.smtp.auth=true
spring.mail.properties.mail.smtp.starttls.enable=true
spring.mail.properties.mail.smtp.starttls.required=true

# ssl 配置
spring.mail.port=465
spring.mail.default-encoding=UTF-8
spring.mail.properties.mail.smtp.ssl.enable=true
spring.mail.properties.mail.imap.ssl.socketFactory.fallback=false
spring.mail.properties.mail.smtp.ssl.socketFactory.class=com.fintech.modules.base.util.mail.MailSSLSocketFactory
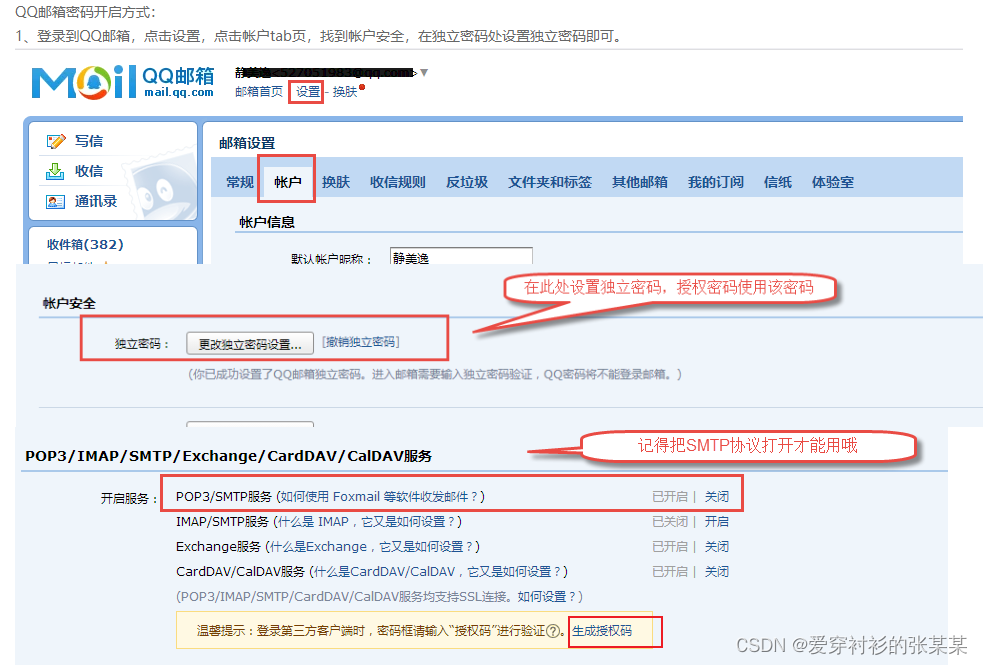
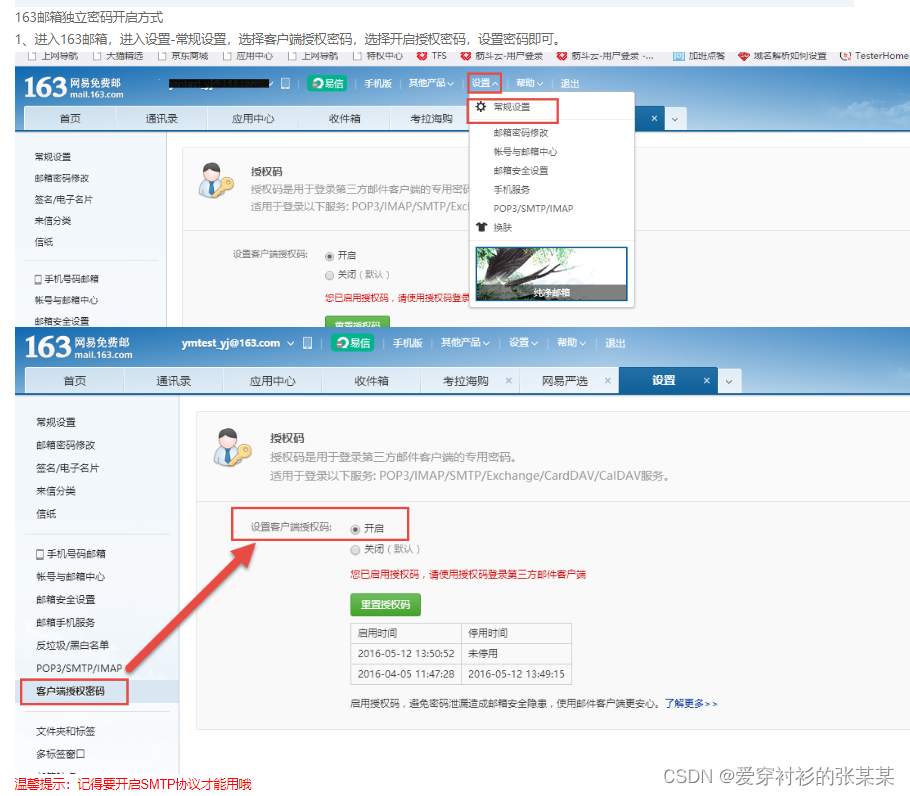
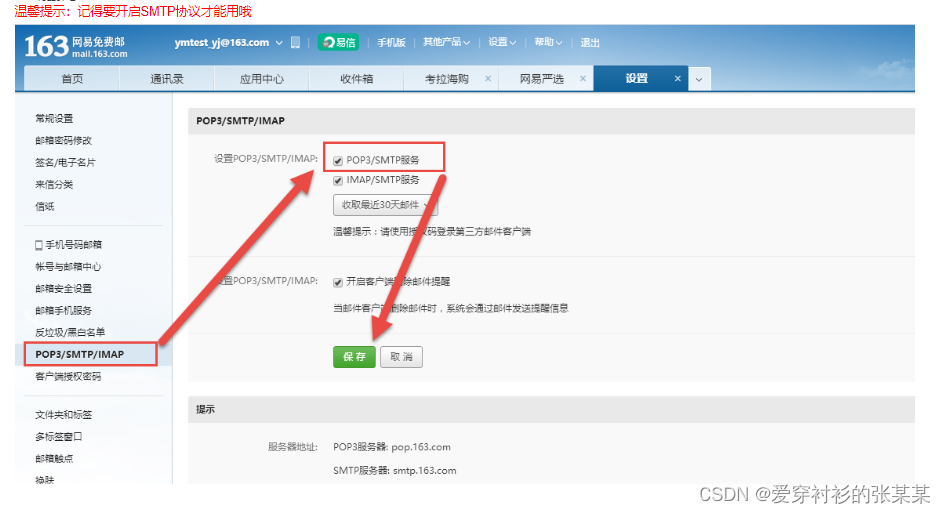
授权码获取
3. 无附件,简单内容发送
import com.itheima.service.SendMailService;
import org.springframework.beans.factory.annotation.Autowired;
import org.springframework.mail.SimpleMailMessage;
import org.springframework.mail.javamail.JavaMailSender;
import org.springframework.stereotype.Service;

@Service
public class SendMailServiceImpl implements SendMailService {
    @Autowired
    private JavaMailSender javaMailSender;
    //发送人
    private String from = "xxx@163.com";
    //接收人
    private String to = "xxx@qq.com";
    //标题
    private String subject = "测试邮件";
    //正文
    private String context = "测试邮件正文内容";
    @Override
    public void sendMail() {
        SimpleMailMessage message = new SimpleMailMessage();
        message.setFrom(from+"(小甜甜)");
        //接收人
        message.setTo(to);
        //抄送人
        //message.setCc(cc);
        message.setSubject(subject);
        message.setText(context);
        javaMailSender.send(message);
    }
}
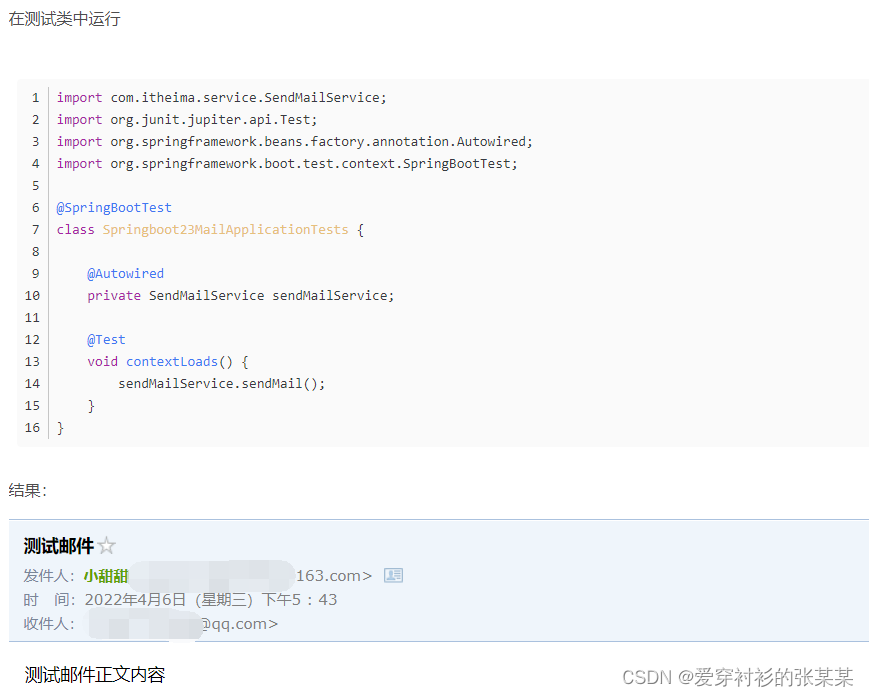
运行测试
4. 带附件,图片发送
import com.itheima.service.SendMailService;
import org.springframework.beans.factory.annotation.Autowired;
import org.springframework.mail.javamail.JavaMailSender;
import org.springframework.mail.javamail.MimeMessageHelper;
import org.springframework.stereotype.Service;
import javax.mail.internet.MimeMessage;
import java.io.File;

@Service
public class SendMailServiceImpl2 implements SendMailService {
    @Autowired
    private JavaMailSender javaMailSender;
    //发送人
    private String from = "xxx@163.com";
    //接收人
    private String to = "xxx@qq.com";
    //标题
    private String subject = "测试邮件";
    //正文
    private String context = "<img src='https://img-blog.csdnimg.cn/8774575ed57d48159111f8f505235f89.png?x-oss-process=image/resize,m_fixed,h_300,image/format,png'/><a href='https://www.baidu.com/'>点开有惊喜</a>";

    @Override
    public void sendMail() {
        try {
            MimeMessage message = javaMailSender.createMimeMessage();
            MimeMessageHelper helper = new MimeMessageHelper(message,true);
            helper.setFrom(from +"(小甜甜)");
            helper.setTo(to);
            helper.setSubject(subject);
            helper.setText(context,true);

            //添加附件
            File f1 = new File("E:\\guigu\\springbooot\\springboot_23_mail\\target\\classes\\logo.png");
            File f2 = new File("E:\\guigu\\test\\src\\mail\\word1.docx");

            helper.addAttachment(f1.getName(),f1);
            helper.addAttachment("最靠谱的培训结构.png",f2);

            javaMailSender.send(message);
        } catch (Exception e) {
            e.printStackTrace();
        }
    }
}
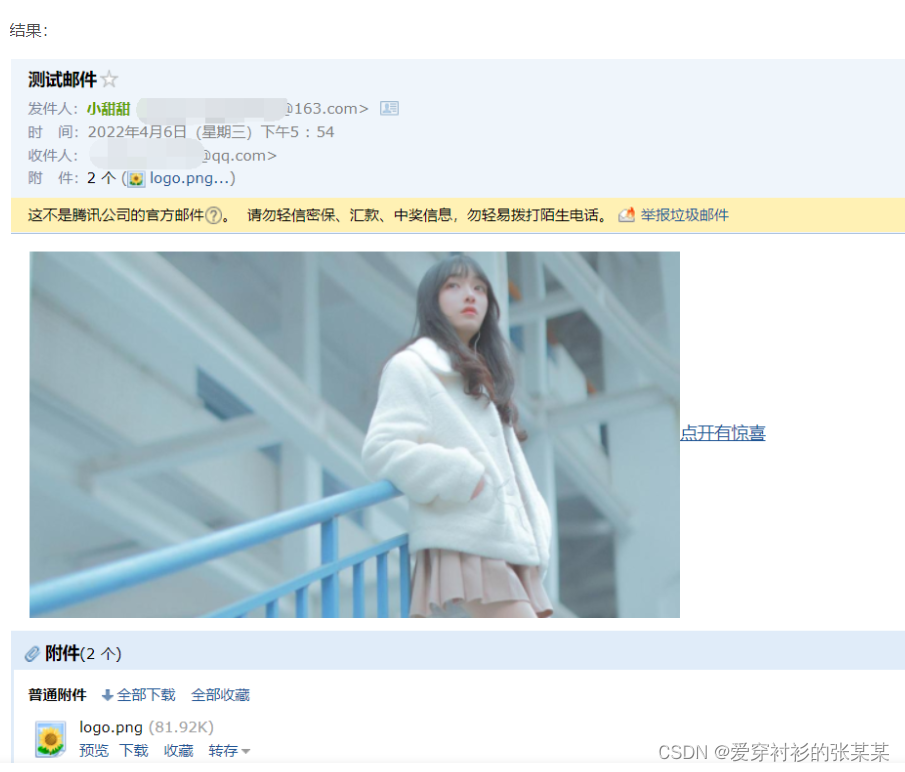
运行测试


 被折叠的 条评论
为什么被折叠?
被折叠的 条评论
为什么被折叠?
 到【灌水乐园】发言


