


 本文档详细介绍了在OpenStack环境中部署Placement组件的全过程,包括创建数据库实例和用户,配置Placement服务用户和API endpoint,安装服务,修改配置文件,导入数据库,设置Apache配置,重启服务以及进行测试。Placement服务主要用于资源管理,提供资源统计信息,其监听端口为8778。
OpenStack-Placement组件部署
继之前glance部署之后,继续部署Placement
创建数据库实例和数据库用户
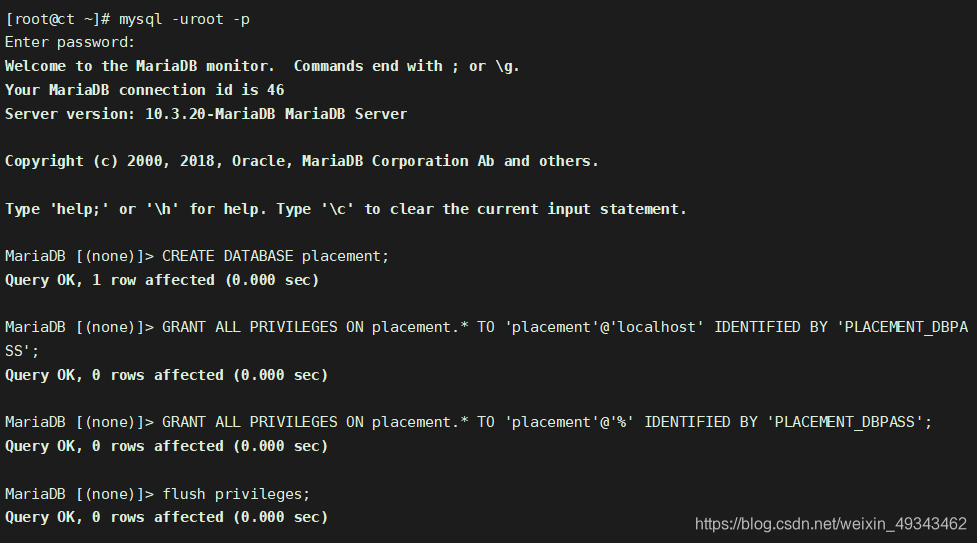
[root@ct ~]# mysql -uroot -p
MariaDB [(none)]> CREATE DATABASE placement;
MariaDB [(none)]> GRANT ALL PRIVILEGES ON placement.* TO 'placement'@'localhost' IDENTIFIED BY 'PLACEMENT_DBPASS';
MariaDB [(none)]> GRANT ALL PRIVILEGES ON placement.* TO 'placement'@'%' IDENTIFIED BY 'PLACEMENT_DBPASS';
MariaDB [(none)]> flush privileges;
MariaDB [(none)]> exit;
创建Placement服务用户和API的endpoint
1. 创建placement用户
[root@ct ~]# openstack user create --domain default --password PLACEMENT_PASS placement
+---------------------+----------------------------------+
| Field               | Value                            |
+---------------------+----------------------------------+
| domain_id           | default                          |
| enabled             | True                             |
| id                  | b80931301cea4ce8a65ac44a6180eac3 |
| name                | placement                        |
| options             | {}                               |
| password_expires_at | None                             |
+---------------------+----------------------------------+
2. 给与placement用户对service项目拥有admin权限
[root@ct ~]# openstack role add --project service --user placement admin
3. 创建一个placement服务,服务类型为placement
[root@ct ~]# openstack service create --name placement --description "Placement API" placement
+-------------+----------------------------------+
| Field       | Value                            |
+-------------+----------------------------------+
| description | Placement API                    |
| enabled     | True                             |
| id          | fba2464f7e064a7bb8ae0a0425b76917 |
| name        | placement                        |
| type        | placement                        |
+-------------+----------------------------------+
4. 注册API端口到placement的service中;注册的信息会写入到mysql中
[root@ct ~]# [root@ct ~]# openstack endpoint create --region RegionOne placement public http://ct:8778
+--------------+----------------------------------+
| Field        | Value                            |
+--------------+----------------------------------+
| enabled      | True                             |
| id           | 1be168ac2c0644138489527c22d5e8fe |
| interface    | public                           |
| region       | RegionOne                        |
| region_id    | RegionOne                        |
| service_id   | fba2464f7e064a7bb8ae0a0425b76917 |
| service_name | placement                        |
| service_type | placement                        |
| url          | http://ct:8778                   |
+--------------+----------------------------------+

[root@ct ~]# [root@ct ~]# openstack endpoint create --region RegionOne placement internal http://ct:8778
+--------------+----------------------------------+
| Field        | Value                            |
+--------------+----------------------------------+
| enabled      | True                             |
| id           | 32fc51e7d0fb4069b0f3bd75e3a31a19 |
| interface    | internal                         |
| region       | RegionOne                        |
| region_id    | RegionOne                        |
| service_id   | fba2464f7e064a7bb8ae0a0425b76917 |
| service_name | placement                        |
| service_type | placement                        |
| url          | http://ct:8778                   |
+--------------+----------------------------------+

[root@ct~]# [root@ct ~]# openstack endpoint create --region RegionOne placement admin http://ct:8778
+--------------+----------------------------------+
| Field        | Value                            |
+--------------+----------------------------------+
| enabled      | True                             |
| id           | 19db02869d5246c392ca079830347e6a |
| interface    | admin                            |
| region       | RegionOne                        |
| region_id    | RegionOne                        |
| service_id   | fba2464f7e064a7bb8ae0a0425b76917 |
| service_name | placement                        |
| service_type | placement                        |
| url          | http://ct:8778                   |
+--------------+----------------------------------+
5. 安装placement服务
[root@controller ~]# yum -y install openstack-placement-api
6. 修改placement配置文件
- 拷贝必要配置文件
[root@ct ~]# cp /etc/placement/placement.conf{,.bak}
[root@ct ~]# grep -Ev '^$|#' /etc/placement/placement.conf.bak > /etc/placement/placement.conf
- 修改配置文件
[root@ct ~]# openstack-config --set /etc/placement/placement.conf placement_database connection mysql+pymysql://placement:PLACEMENT_DBPASS@ct/placement
[root@ct ~]# openstack-config --set /etc/placement/placement.conf api auth_strategy keystone
[root@ct ~]# openstack-config --set /etc/placement/placement.conf keystone_authtoken auth_url  http://ct:5000/v3
[root@ct ~]# openstack-config --set /etc/placement/placement.conf keystone_authtoken memcached_servers ct:11211
[root@ct ~]# openstack-config --set /etc/placement/placement.conf keystone_authtoken auth_type password
[root@ct ~]# openstack-config --set /etc/placement/placement.conf keystone_authtoken project_domain_name Default
[root@ct ~]# openstack-config --set /etc/placement/placement.conf keystone_authtoken user_domain_name Default
[root@ct ~]# openstack-config --set /etc/placement/placement.conf keystone_authtoken project_name service
[root@ct ~]# openstack-config --set /etc/placement/placement.conf keystone_authtoken username placement
[root@ct ~]# openstack-config --set /etc/placement/placement.conf keystone_authtoken password PLACEMENT_PASS
- 查看placement配置文件
[root@ct ~]# cd /etc/placement/
[root@ct placement]# cat placement.conf
[DEFAULT]
[api]
auth_strategy = keystone
[cors]
[keystone_authtoken]
auth_url = http://ct:5000/v3  //指定keystone地址
memcached_servers = ct:11211  //session信息是缓存放到了memcached中
auth_type = password
project_domain_name = Default
user_domain_name = Default
project_name = service
username = placement
password = PLACEMENT_PASS
[oslo_policy]
[placement]
[placement_database]
connection = mysql+pymysql://placement:PLACEMENT_DBPASS@ct/placement
[profiler]
7. 导入数据库
[root@ct ~]# su -s /bin/sh -c "placement-manage db sync" placement
/usr/lib/python2.7/site-packages/pymysql/cursors.py:170: Warning: (1280, u"Name 'alembic_version_pkc' ignored for PRIMARY key.")
  result = self._query(query)
8. 修改Apache配置文件: 00-placemenct-api.conf(安装完placement服务后会自动创建该文件-虚拟主机配置 )
- 虚拟主机配置文件
[root@ct ~]# cd /etc/httpd/conf.d/
[root@ct conf.d]# cat 00-placement-api.conf   //安装完placement会自动创建此文件

[root@ct conf.d]# vim 00-placement-api.conf
Listen 8778

<VirtualHost *:8778>
  WSGIProcessGroup placement-api
  WSGIApplicationGroup %{GLOBAL}
  WSGIPassAuthorization On
  WSGIDaemonProcess placement-api processes=3 threads=1 user=placement group=placement
  WSGIScriptAlias / /usr/bin/placement-api
  <IfVersion >= 2.4>
    ErrorLogFormat "%M"
  </IfVersion>
  ErrorLog /var/log/placement/placement-api.log
  #SSLEngine On
  #SSLCertificateFile ...
  #SSLCertificateKeyFile ...
</VirtualHost>

Alias /placement-api /usr/bin/placement-api
<Location /placement-api>
  SetHandler wsgi-script
  Options +ExecCGI
  WSGIProcessGroup placement-api
  WSGIApplicationGroup %{GLOBAL}
  WSGIPassAuthorization On
</Location>
<Directory /usr/bin>                    //此处是bug,必须添加下面的配置来启用对placement api的访问,否则在访问apache的
<IfVersion >= 2.4>                              //api时会报403;添加在文件的最后即可
        Require all granted
</IfVersion>
<IfVersion < 2.4>                               //apache版本;允许apache访问/usr/bin目录;否则/usr/bin/placement-api将不允许被
访问
        Order allow,deny
        Allow from all                  //允许apache访问
</IfVersion>
</Directory>
9. 重新启动apache
[root@ct ~]# systemctl restart httpd
10. 测试
① curl 测试访问
[root@ct placement]# curl ct:8778
{"versions": [{"status": "CURRENT", "min_version": "1.0", "max_version": "1.36", "id": "v1.0", "links": [{"href": "", "rel": "self"}]}]}

② 查看端口占用(netstat、lsof)
[root@ct placement]# netstat -natp | grep 8778
tcp6       0      0 :::8778                 :::*                    LISTEN      72994/httpd
③ 检查placement状态
[root@ct ~]# placement-status upgrade check
+----------------------------------+
| Upgrade Check Results            |
+----------------------------------+
| Check: Missing Root Provider IDs |
| Result: Success                  |
| Details: None                    |
+----------------------------------+
| Check: Incomplete Consumers      |
| Result: Success                  |
| Details: None                    |
+----------------------------------+
至此,placement部署完成
总结
- Placement提供了placement-apiWSGI脚本,用于与Apache,nginx或其他支持WSGI的Web服务器一起运行服务(通过nginx或apache实现python入口代理)。
- 根据用于部署OpenStack的打包解决方案,WSGI脚本可能位于/usr/bin 或中/usr/local/bin
Placement服务是从 S
版本,从nova服务中拆分出来的组件,作用是收集各个node节点的可用资源,把node节点的资源统计写入到mysql,Placement服务会被nova
scheduler服务进行调用 Placement服务的监听端口是8778
需修改的配置文件:
- placement.conf
主要修改思路:
Keystone认证相关(url、HOST:PORT、域、账号密码等)
对接数据库(位置) - 00-placement-api.conf
主要修改思路:
Apache权限、访问控制


 2184
2184

 被折叠的 条评论
为什么被折叠?
被折叠的 条评论
为什么被折叠?
 到【灌水乐园】发言


