


上篇文章主要介绍了spring中缓存的使用,不过文中的案例都是以本地内存作为存储介质的,但是实际上我们的项目上线之后,基本上都会采用集群的方式进行部署,如果将数据存储在本地内存中,集群之间是无法共享的,我们可以将数据存储在redis中,从而实现缓存的共享,下面我们一起来看下Spring中@EnableCaching如何对接redis。
安装redis
下载地址:https://redis.io/download
pom.xml中引入redis配置
<dependency>
    <groupId>org.redisson</groupId>
    <artifactId>redisson</artifactId>
    <version>3.13.3</version>
</dependency>
项目中创建redis配置文件
新建com/javacode2018/cache/demo2/redis.yml,内容如下:
singleServerConfig:
  address: "redis://127.0.0.1:6379"
  password: null
  clientName: null
  database: 7 #选择使用哪个数据库0~15
  idleConnectionTimeout: 10000
  connectTimeout: 10000
  timeout: 3000
codec:
  class: "org.redisson.codec.JsonJacksonCodec"
创建redis相关的bean
package com.javacode2018.cache.demo2;
import org.redisson.Redisson;
import org.redisson.api.RedissonClient;
import org.redisson.config.Config;
import org.redisson.spring.cache.RedissonSpringCacheManager;
import org.springframework.cache.CacheManager;
import org.springframework.cache.annotation.EnableCaching;
import org.springframework.context.annotation.Bean;
import org.springframework.context.annotation.ComponentScan;
import java.io.IOException;
import java.io.InputStream;
import java.util.Arrays;
@ComponentScan
@EnableCaching //@1
public class MainConfig2 {
    @Bean //@2
    public CacheManager cacheManager() throws IOException {
        RedissonSpringCacheManager cacheManager = new RedissonSpringCacheManager(this.redissonClient());
        cacheManager.setCacheNames(Arrays.asList("cache1"));
        return cacheManager;
    }
    @Bean //@3
    public RedissonClient redissonClient() throws IOException {
        InputStream is = MainConfig2.class.getResourceAsStream("/com/javacode2018/cache/demo2/redis.yml");
        Config config = Config.fromYAML(is);
        return Redisson.create(config);
    }
}
@1:开启spring cache功能。
@2:自定义spring中cache管理器,这个地方我们定义了一个redis类型的管理器,底层使用redis来作为缓存的存储介质。
@3:通过redis.yml配置文件来创建一个RedissonClient,用于和redis进行交互。
来个测试类
package com.javacode2018.cache.demo2;
import org.springframework.cache.annotation.Cacheable;
import org.springframework.stereotype.Component;
import java.util.Arrays;
import java.util.List;
@Component
public class BookService {
    @Cacheable(cacheNames = "cache1", key = "#root.targetClass.name+'-'+#root.method.name")
    public List<String> list() {        System.out.println("---模拟从db中获取数据---");
        return Arrays.asList("java高并发", "springboot", "springcloud");
    }}
测试用例
@Test
public void test7() {
    AnnotationConfigApplicationContext context = new AnnotationConfigApplicationContext(MainConfig2.class);
    BookService bookService = context.getBean(BookService.class);
    System.out.println(bookService.list());    System.out.println(bookService.list());    {        System.out.println("下面打印出cache1缓存中的key列表");
        RedissonSpringCacheManager cacheManager = context.getBean(RedissonSpringCacheManager.class);
        RedissonCache cache1 = (RedissonCache) cacheManager.getCache("cache1");
        cache1.getNativeCache().keySet().stream().forEach(System.out::println);    }}
运行输出
---模拟从db中获取数据---
[java高并发, springboot, springcloud]
[java高并发, springboot, springcloud]
下面打印出cache1缓存中的key列表
com.javacode2018.cache.demo2.BookService-list
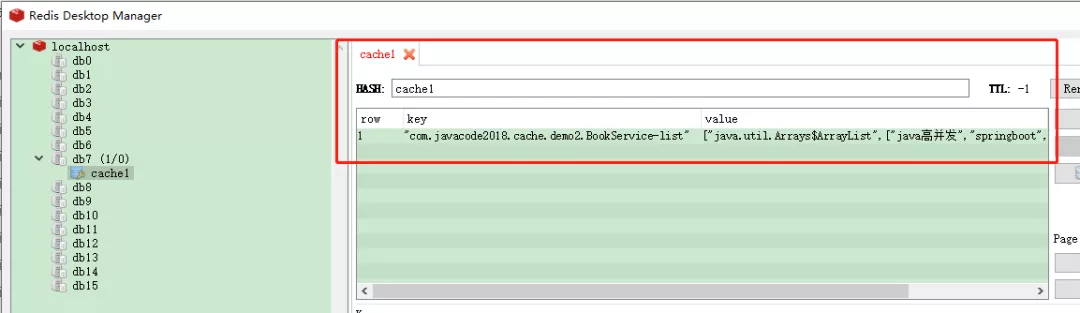
此时数据已经进入redis了,我们用redis客户端工具RedisDesktopManager来看一下。
RedisDesktopManager下载地址
链接:https://pan.baidu.com/s/1WCd-tk8dDDJnFIKciVIQsA
提取码:x728
解压之后,点击下面的直接运行
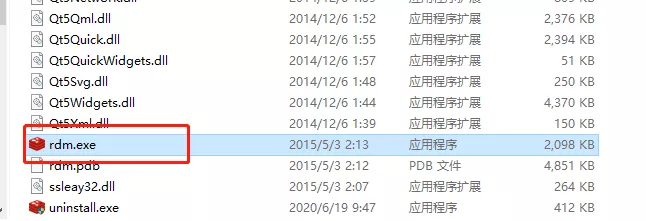


 1586
1586


 被折叠的 条评论
为什么被折叠?
被折叠的 条评论
为什么被折叠?
 到【灌水乐园】发言


