


tips:
仅做笔记参考,侵权即删。
参考文档:
https://github.com/AUTOMATIC1111/stable-diffusion-webui
https://developer.aliyun.com/article/1292793
其他报错处理:
https://github.com/AUTOMATIC1111/stable-diffusion-webui/issues/4165
组成部分:
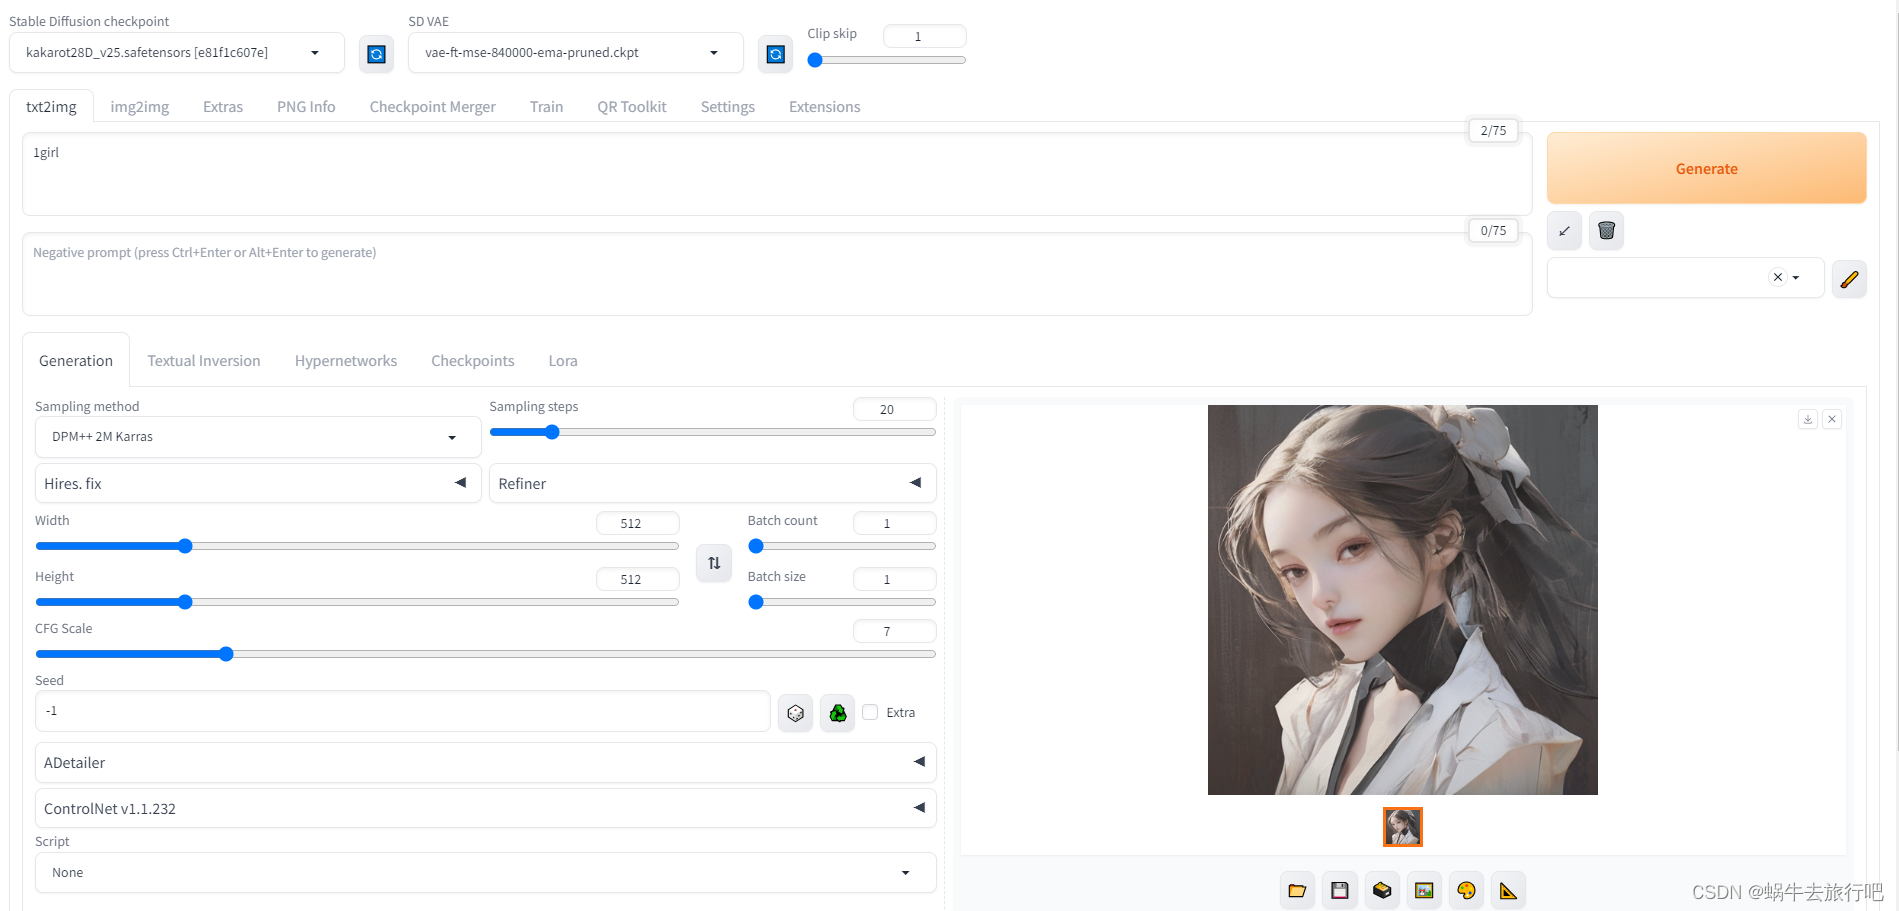
本地部署sd
插件:
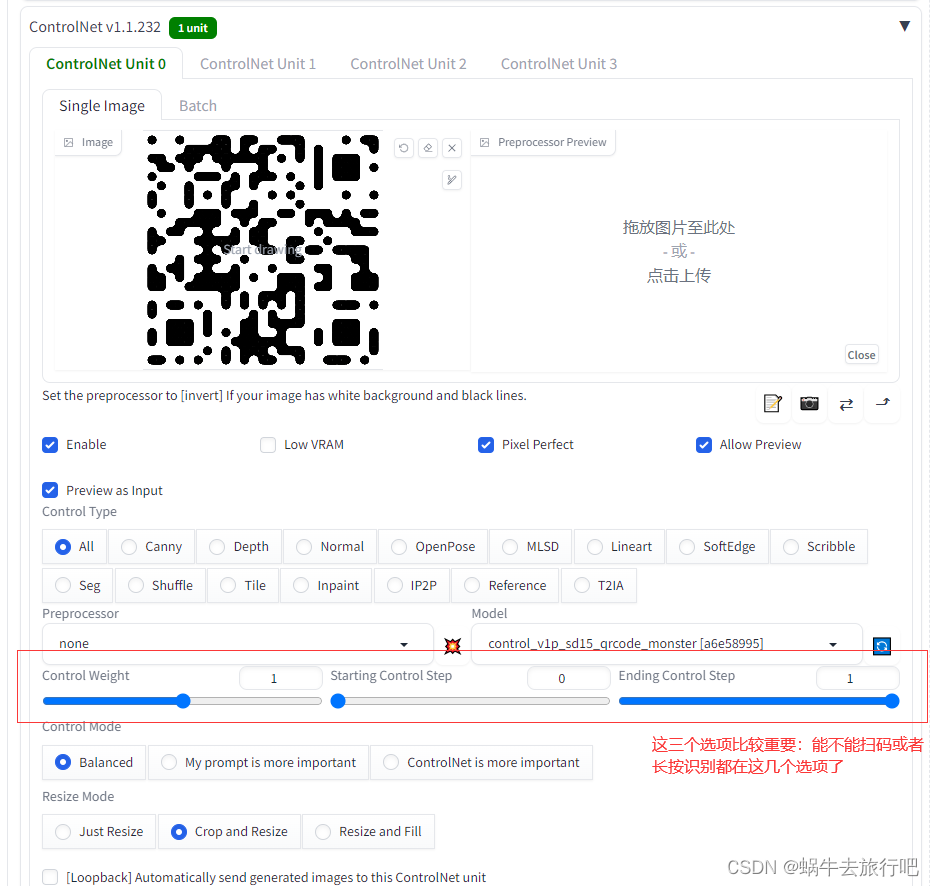
controlnet 控制网
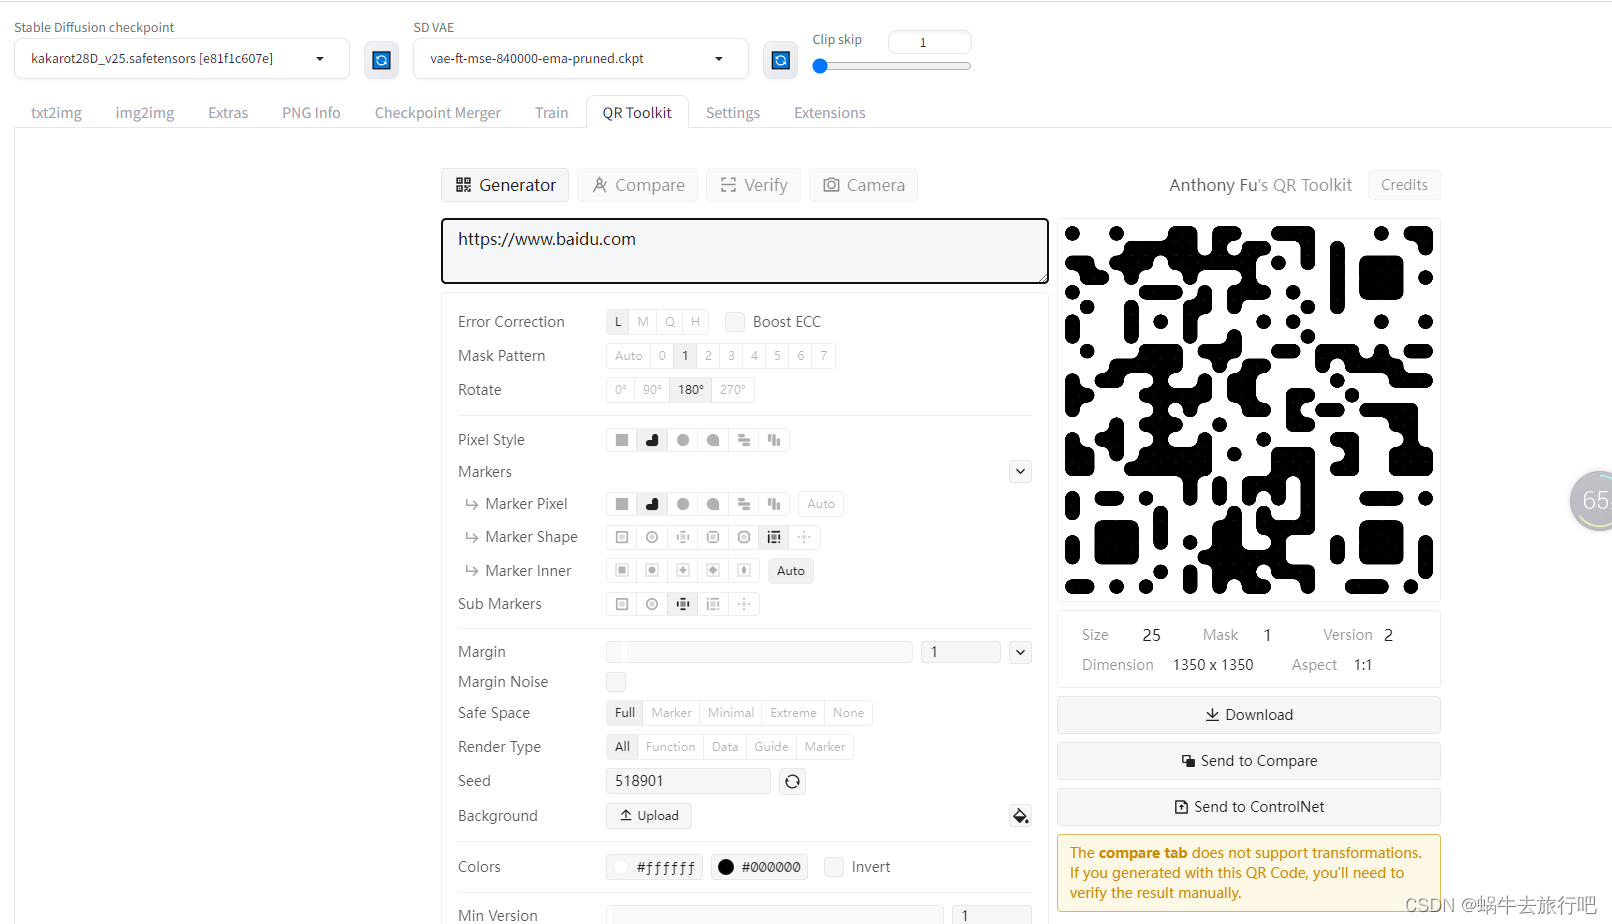
qrtoolkit 二维码编辑器
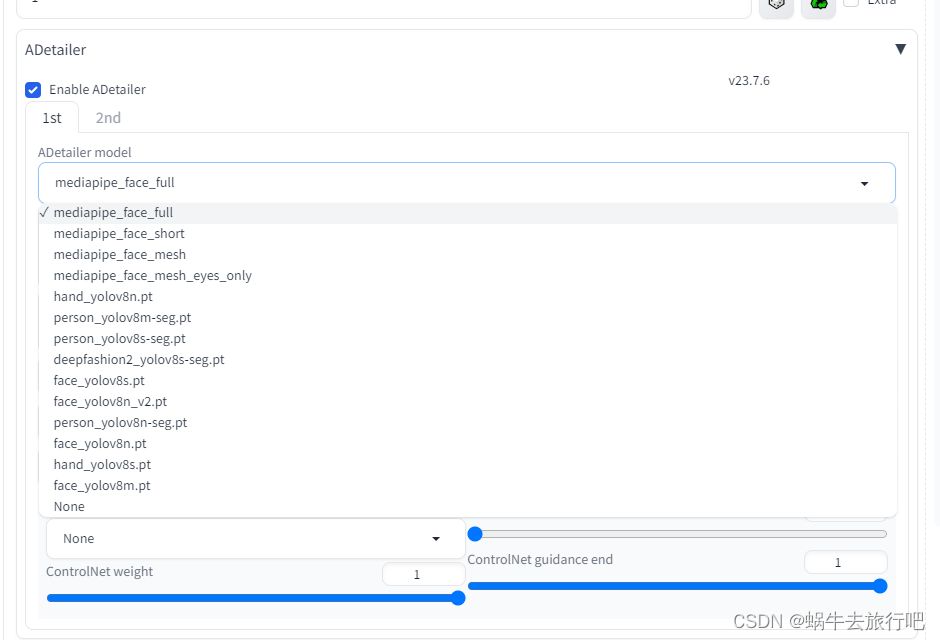
adetailer 局部修复
模型 model
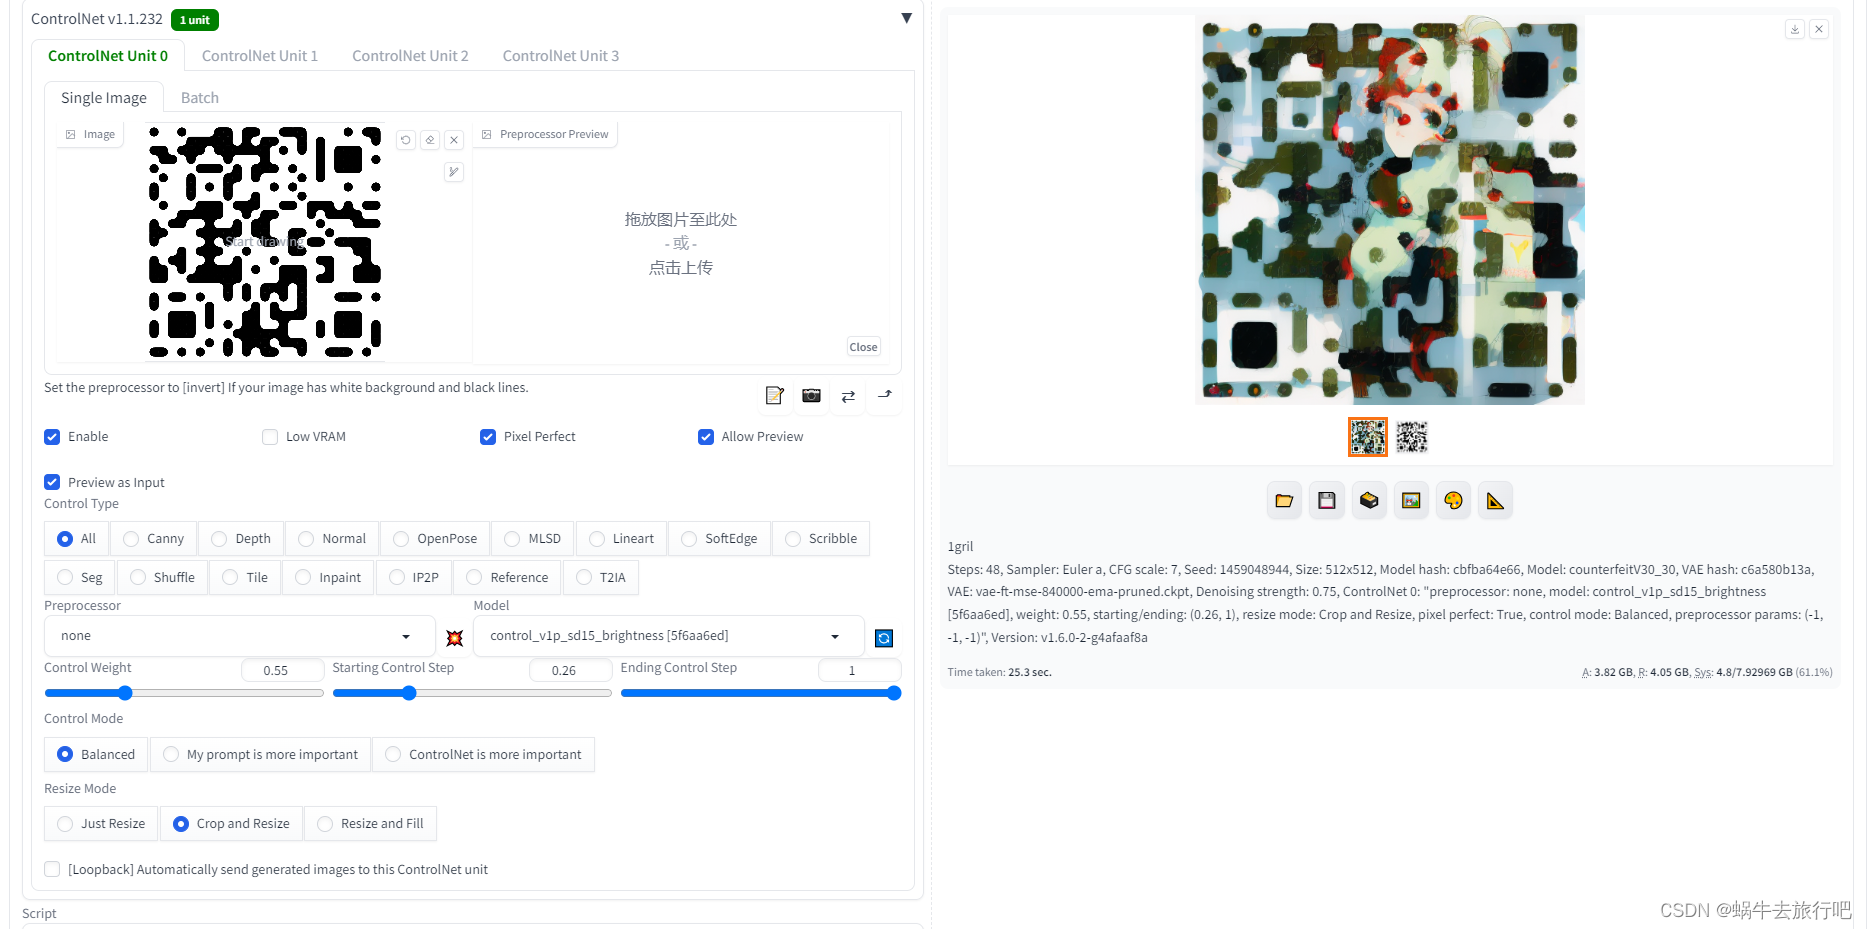
qrcode monster
brightness
参考install
Installation and Running
Make sure the required dependencies are met and follow the instructions available for:
NVidia (recommended)
AMD GPUs.
Intel CPUs, Intel GPUs (both integrated and discrete) (external wiki page)
Alternatively, use online services (like Google Colab):


windows安装:
List of Online Services
Installation on Windows 10/11 with NVidia-GPUs using release package
Download sd.webui.zip from v1.0.0-pre and extract it's contents.
Run update.bat.
Run run.bat.
For more details see Install-and-Run-on-NVidia-GPUs

Automatic Installation on Windows
Install Python 3.10.6 (Newer version of Python does not support torch), checking "Add Python to PATH".
Install git.
Download the stable-diffusion-webui repository, for example by running git clone https://github.com/AUTOMATIC1111/stable-diffusion-webui.git.
Run webui-user.bat from Windows Explorer as normal, non-administrator, user.


linux安装
Automatic Installation on Linux
Install the dependencies:
# Debian-based:
sudo apt install wget git python3 python3-venv libgl1 libglib2.0-0
# Red Hat-based:
sudo dnf install wget git python3
# Arch-based:
sudo pacman -S wget git python3
Navigate to the directory you would like the webui to be installed and execute the following command:
wget -q https://raw.githubusercontent.com/AUTOMATIC1111/stable-diffusion-webui/master/webui.sh
Run webui.sh.
Check webui-user.sh for options.
如果运行报错的话需要修改配置脚本:
运行之后本地其他主机打不开修改:webui-user.sh
修改参数 export COMMANDLINE_ARGS=“–listen --enable-insecure-extension-access”
启动:[-] ADetailer: Failed to load model ‘face_yolov8n.pt’ from huggingface
加上 ./webui.sh --ad-no-huggingface
报错:
[遇到的错误信息]
OSError: Can’t load tokenizer for ‘openai/clip-vit-large-patch14’. If you were trying to load it from ‘https://huggingface.co/models’, make sure you don’t have a local directory with the same name. Otherwise, make sure ‘openai/clip-vit-large-patch14’ is the correct path to a directory containing all relevant files for a CLIPTokenizer tokenizer.
[原因]
clip-vit-large-patch14 国内已经不能访问了
需要手动创建openai 目录并把 下载后解压的资源拖入到openai目录下面
科学上网下载:
https://huggingface.co/openai/clip-vit-large-patch14
二次元或者其他模板下载
https://civitai.com/
页面启动:
 qrtookit
用到的扩展:

模板下载:
 参考:
参考:
https://www.youtube.com/watch?v=MaSbKzCiATE  感谢ai小王子
模板下载:
下载链接一:https://pan.quark.cn/s/ec185b55f53a
所有课程内资源提取地址+AI资料(用手机打开):https://pan.quark.cn/g/ba237c0ecd

下载链接二:https://pan.baidu.com/s/172hPYeR7-T67...
提取码:axwz

其他模板:
https://huggingface.co/models
配置项添加:
参考:
https://juejin.cn/post/7258469240734056509

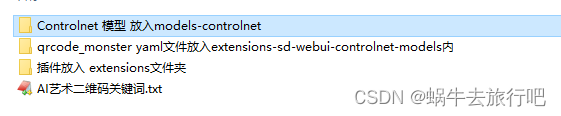
目录结构:
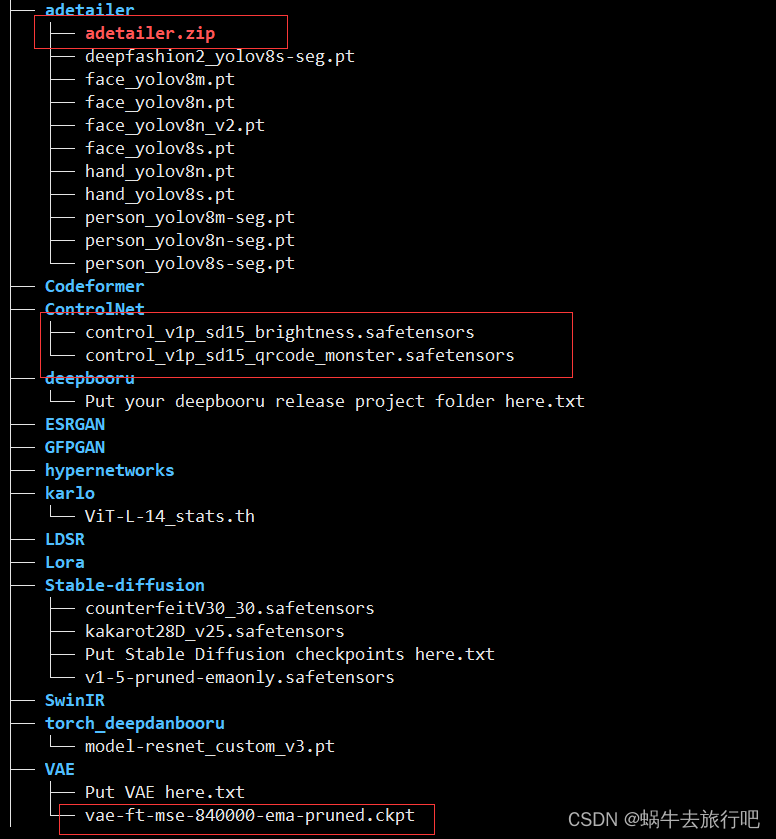
adetailer
controlnet 控制网
把刚刚在qrtookit生成的二维码上传过来,开始制作艺术二维码
演示结果:我选择的是图生图
难点:
要分清楚扩展和模块,丢到对应的目录才可以。


 被折叠的 条评论
为什么被折叠?
被折叠的 条评论
为什么被折叠?
 到【灌水乐园】发言


