


 本文详细介绍了如何在C#中使用ImageList控件,包括获取项目目录、编程方式添加和手动加载图片,以及移除单个图像和清空图片列表的方法。
目录
(1)用Application.StartupPath.Substring()方法获得文件目录
ImageList控件(存储图像控件)用于存储图像资源,然后在控件上显示出来,这样就简化了对图像的管理。ImageList控件的主要属性是Images,它包含关联控件将要使用的图片。每个单独的图像可通过其索引值或其键值来访问。所有图像都将以同样的大小显示,该大小由ImageSize属性设置,较大的图像将缩小至适当的尺寸。
向ImageList组件中存储图片时,可以通过该组件的ImageSize属性设置图片的尺寸,其默认尺寸是 16×16,最大尺寸是256×256。
一、在ImageList控件中添加图像
使用ImageList控件的Images属性的Add()方法,可以以编程的方式向ImageList控件中添加图像。
关键在于图片文件所在的目录的创建,习惯于把图片文件储存在项目根目录下,如何获得项目的根目录呢?
1.获得项目所在目录
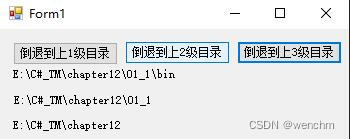
可执行文件存储在Debug目录下,举例:E:\C#_TM\chapter12\01\bin\Debug,那么项目文件所在目录就是:E:\C#_TM\chapter12\01。
通过可执行文件所在目录向上倒退到项目所在目录的软件方法:
(1)用Application.StartupPath.Substring()方法获得文件目录
//Form1.cs
//测试返回上级目录
using System;
using System.Collections.Generic;
using System.ComponentModel;
using System.Data;
using System.Drawing;
using System.Linq;
using System.Text;
using System.Threading.Tasks;
using System.Windows.Forms;

namespace _01_1
{
    public partial class Form1 : Form
    {
        public string Path,Path1,Path2,Path3;

        public Form1()
        {
            InitializeComponent();
        }

        private void Form1_Load(object sender, EventArgs e)
        {
            button1.AutoSize = true;
            button2.AutoSize = true;
            button3.AutoSize = true;

            //倒退到上级目录
            button1.Text = "倒退到上1级目录";
            button2.Text = "倒退到上2级目录";
            button3.Text = "倒退到上3级目录";

            /// <summary>
            /// Path.LastIndexOf("\\"),解释为:
            /// 从右向左直至遇到\\为止,截取字符后剩余字符串的index值,
            /// 返回值int index
            /// </summary>
            Path = Application.StartupPath; //Debug目录(exe启动目录)
            Path1 = Application.StartupPath.Substring(0, Path.LastIndexOf(@"\"));
            Path2 = Application.StartupPath.Substring(0, Path1.LastIndexOf(@"\"));
            Path3 = Application.StartupPath.Substring(0, Path2.LastIndexOf(@"\"));
        }

        /// <summary>
        /// 倒退到上1级目录
        /// </summary>
        private void Button1_Click(object sender, EventArgs e)
        {

            label1.Text = Path1;
        }

        /// <summary>
        /// 倒退到上2级目录
        /// </summary>
        private void Button2_Click(object sender, EventArgs e)
        {
            label2.Text = Path2;
        }

        /// <summary>
        /// 倒退到上3级目录
        /// </summary>
        private void Button3_Click(object sender, EventArgs e)
        {
            label3.Text = Path3;
        }
    }
}
(2)生成后的效果
2.加载图片
(1)定义图片文件的临时变量
根据图片所在目录,定义图片文件的临时变量。
Image image01 = Image.FromFile(Path2 + @"\01.jpg");
Image image02 = Image.FromFile(Path2 + @"\02.jpg");
(2)编程方法加载图片
使用Add()方法向ImageList控件加载图片。编程方法不对Form1.Designer.cs产生影响。
imageList1.Images.Add(image01);
imageList1.Images.Add(image02);
(3)手动方法加载图片
当然,可以选择手动方法向ImageList控件加载图片。关于手动方法,已经在作者已经发布的其他文章叙述过,不再赘述。为了程序具有更好的可维护性、可移植性,推荐使用编程的方法加载图片。手动方法自动影响Form1.Designer.cs。
3.源码
//Form1.cs
//加载指定目录下的图片
using System;
using System.Collections.Generic;
using System.ComponentModel;
using System.Data;
using System.Drawing;
using System.Linq;
using System.Text;
using System.Threading.Tasks;
using System.Windows.Forms;
namespace _01
{
public partial class Form1 : Form
{
public string Path, Path1, Path2;
public Form1()
{
InitializeComponent();
}
private void Form1_Load(object sender, EventArgs e)
{
button1.Text = "加载图片1";
button2.Text = "加载图片2";
groupBox1.Text = "图片展示窗"; //把图片放到容器里的意义是增加标题显示
groupBox1.ForeColor = Color.Blue;
/// <summary>
/// Path.LastIndexOf("\\"),解释为:
/// 从右向左直至遇到\\为止,截取字符后剩余字符串的index值,
/// 返回值int index
/// </summary>
Path = Application.StartupPath; //Debug目录(exe启动目录)
Path1 = Application.StartupPath.Substring(0, Path.LastIndexOf("\\"));
Path2 = Application.StartupPath.Substring(0, Path1.LastIndexOf("\\")); //此为向上1级目录的迭代
Image image01 = Image.FromFile(Path2 + @"\01.jpg");
Image image02 = Image.FromFile(Path2 + @"\02.jpg");
imageList1.Images.Add(image01);
imageList1.Images.Add(image02);
imageList1.ImageSize = new Size(200, 165); //图片尺寸
/// <summary>
/// 图片的位置:以图片大小自动填充pictureBox
/// 流程:Form1.AutoSize = true;→groupBox1.AutoSize = true;
/// →pictureBox1.Dock填满,→pictureBox1尺寸=图片尺寸
/// 思考:图片如何居中显示
/// </summary>
groupBox1.AutoSize = true;
pictureBox1.Dock = DockStyle.Fill;
pictureBox1.Width = image01.Width;
pictureBox1.Height = image02.Height;
label1.Text = Path2;
}
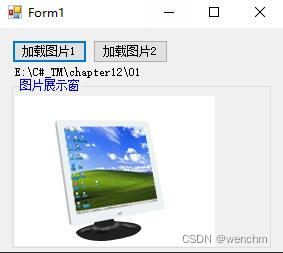
private void Button1_Click(object sender, EventArgs e)
{
pictureBox1.Image = imageList1.Images[0];
}
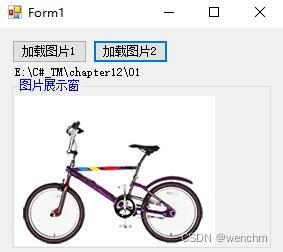
private void Button2_Click(object sender, EventArgs e)
{
pictureBox1 .Image = imageList1.Images[1];
}
}
}4.生成结果
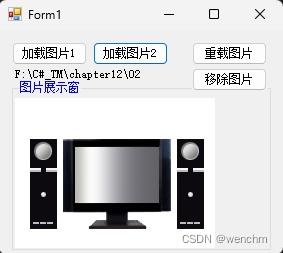
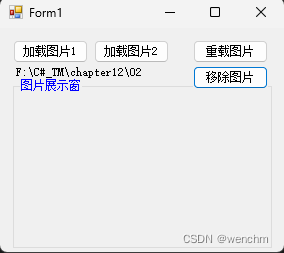
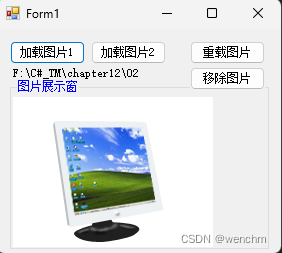
二、在ImageList控件中移除图像
在ImageList控件中可以使用RemoveAt()方法移除单个图像或可以使用Clear()方法清除图像列表中的所有图像。
在上述例子中,增加2个按钮,一个按钮的作用是移除图片框控件某个图片或清空图片,领一个按钮的作用是重载图片。
1.源码
//Form1.cs
//加载指定目录下的图片
//移除图片
using System;
using System.Collections.Generic;
using System.ComponentModel;
using System.Data;
using System.Drawing;
using System.Linq;
using System.Text;
using System.Threading.Tasks;
using System.Windows.Forms;

namespace _02
{
    public partial class Form1 : Form
    {
        public string Path, Path1, Path2;
        public System.Drawing.Image image01, image02;

        public Form1()
        {
            InitializeComponent();
        }

        private void Form1_Load(object sender, EventArgs e)
        {
            button1.Text = "加载图片1";
            button2.Text = "加载图片2";
            button3.Text = "重载图片";
            button4.Text = "移除图片";
            groupBox1.Text = "图片展示窗";   //把图片放到容器里的意义是增加标题显示
            groupBox1.ForeColor = Color.Blue;

            /// <summary>
            /// Path.LastIndexOf("\\"),解释为:
            /// 从右向左直至遇到\\为止,截取字符后剩余字符串的index值,
            /// 返回值int index
            /// </summary>
            Path = System.Windows.Forms.Application.StartupPath; //Debug目录(exe启动目录)
            Path1 = System.Windows.Forms.Application.StartupPath.Substring(0, Path.LastIndexOf("\\"));
            Path2 = System.Windows.Forms.Application.StartupPath.Substring(0, Path1.LastIndexOf("\\"));  //此为向上1级目录的迭代
            label1.Text = Path2;

            /// <summary>
            /// 图片的位置:以图片大小自动填充pictureBox
            /// 流程:Form1.AutoSize = true;→groupBox1.AutoSize = true;
            /// →pictureBox1.Dock填满,→pictureBox1尺寸=图片尺寸
            /// 思考:图片如何居中显示
            /// </summary>
            imageList1.ImageSize = new Size(200, 165);  //图片尺寸
            groupBox1.AutoSize = true;
            pictureBox1.Dock = DockStyle.Fill;
        }

        /// <summary>
        /// 加载图片1
        /// </summary>
        private void Button1_Click(object sender, EventArgs e)
        {
            image01 = System.Drawing.Image.FromFile(Path2 + @"\01.jpg");
            imageList1.Images.Add(image01);
            pictureBox1.Image = imageList1.Images[0];
        }

        /// <summary>
        /// 加载图片2
        /// </summary>
        private void Button2_Click(object sender, EventArgs e)
        {
            image02 = System.Drawing.Image.FromFile(Path2 + @"\02.jpg");
            imageList1.Images.Add(image02);
            //当图片框控件空并且先按下按钮2时,if有必要了,否则警告
            if (pictureBox1.Image != null)
            {
                pictureBox1.Image = imageList1.Images[1];
            }
            else
            {
                pictureBox1.Image = imageList1.Images[0];
            }
        }

        /// <summary>
        /// 重载图片1、图片2
        /// </summary>
        private void Button3_Click(object sender, EventArgs e)
        {
            imageList1.Images.Add(image01);
            pictureBox1.Image = imageList1.Images[0];
            imageList1.Images.Add(image02);
            pictureBox1.Image = imageList1.Images[1];
        }

        /// <summary>
        /// 移除图片
        /// </summary>
        private void Button4_Click(object sender, EventArgs e)
        {
            //imageList1.Images.RemoveAt(0);
            //imageList1.Images.RemoveAt(1);
            imageList1.Images.Clear();    //可用Clear()代替上2行
            pictureBox1.Image = null;
        }
    }
}
2.生成效果


 318
318

 被折叠的 条评论
为什么被折叠?
被折叠的 条评论
为什么被折叠?
 到【灌水乐园】发言


