


 本文介绍如何在OpenGL应用中实现橡胶带效果,通过启用逻辑操作并设置为XOR模式来绘制和擦除矩形,用于选择对象。提供了一个C++类jxglTracker,包括绘制跟踪矩形和跟踪功能。
Introduction
This article shows how we can perform rubber-banding in an OpenGL application.
Background
Rubber-banding is frequently used by drawing programs. The objective is to draw something such as a rectangle, then erase it without disturbing what has already been rendered. The rubber-banding rectangle can then be used for selecting objects. For an OpenGL application, rubber-banding can be achieved by rendering with the logic op enabled and set to XOR mode.
The source code here includes a simple C++ class called jxglTracker. The two main member functions in the class areDrawTrackRect() and
Track(). In the DrawTrackRect() function, the logic op is enabled by callingglEnable(GL_COLOR_LOGIC_OP) and the XOR mode is set by calling
glLogicOp(GL_XOR). The rubber-banding rectangle is drawn using
glRecti().
void jxglTracker::DrawTrackRect(int x1, int y1, int x2, int y2)
{
    CRect rectClient;
    m_pWnd->GetClientRect(&rectClient);

    glEnable(GL_COLOR_LOGIC_OP);
    glLogicOp(GL_XOR);
    // drawing different rubber-banding rectangle
    // depending on the mouse movement x-direction
    if(x1 < x2)
    {
        glColor4f(0.0, 0.0, 1.0, 0.5);
    }
    else
    {
        glColor4f(1.0, 0.0, 0.0, 0.5);
    }
    glPolygonMode(GL_FRONT_AND_BACK, GL_LINE);
    // OpenGL window coordinates are different from GDI's
    glRecti(x1, rectClient.Height() - y1, x2,
                rectClient.Height() - y2);
    glPolygonMode(GL_FRONT_AND_BACK, GL_FILL);
    glFlush(); // must flush here
    glDisable(GL_COLOR_LOGIC_OP);
}
In the Track() function, we first set the drawing buffer to the front-buffer instead of the default back-buffer. This is needed because we do not want to disturb what has already been drawn (which could be expensive to redraw) while the rubber-banding
rectangle is constantly being drawn and erased. Here, we also set up a convenient projection matrix so the pixels on the window client rectangle corresponds to the OpenGL model coordinate system. TheDrawTrackRect() is called in an infinite
for loop untilWM_LBUTTONUP, WM_RBUTTONDOWN or the ESC
WM_KEYDOWN message is received. TheTrack() function takes
CWnd* pWnd and CPoint point as parameters, and is generally called from theWM_LBUTTONDOWN message handler of the client window
pWnd.
BOOL jxglTracker::Track(CWnd* pWnd, CPoint point)
{
    m_pWnd = pWnd;
    ASSERT(m_pWnd != 0);
    CRect rectClient;
    m_pWnd->GetClientRect(&rectClient);

    // set drawing mode to front-buffer
    glDrawBuffer(GL_FRONT);

    // set up a convenient projection matrix
    glMatrixMode(GL_PROJECTION);
    glPushMatrix();
    glLoadIdentity();
    glOrtho(0, rectClient.Width(), 0,
               rectClient.Height(), -1, 1);
    glViewport(-1, -1, rectClient.Width() + 2,
                       rectClient.Height() + 2);

    if (::GetCapture() != NULL)
    {
        return FALSE;
    }

    // set mouse capture because we
    // are going to work on this window
    pWnd->SetCapture();
    ASSERT(pWnd == CWnd::GetCapture());
    pWnd->UpdateWindow();

    BOOL bMoved = FALSE;
    CPoint ptOld = point;
    CRect rectOld = CRect(ptOld, ptOld);
    CPoint ptNew;

    BOOL bStop = FALSE;
    for (;;)
    {
        // loop forever until LButtonUp,
        // RButtonDown or ESC keyDown
        MSG msg;
        VERIFY(::GetMessage(&msg, NULL, 0, 0));

        if (CWnd::GetCapture() != pWnd)
        {
            break;
        }

        if(msg.message == WM_LBUTTONUP || msg.message == WM_MOUSEMOVE)
        {
            ptNew.x = (int)(short)LOWORD(msg.lParam);
            ptNew.y = (int)(short)HIWORD(msg.lParam);
            m_rect = CRect(ptOld, ptNew);

            if (bMoved)
            {
                m_bErased = TRUE;
                DrawTrackRect(&rectOld);
            }
            rectOld = m_rect;
            if (msg.message != WM_LBUTTONUP)
            {
                bMoved = TRUE;
            }

            if (msg.message == WM_MOUSEMOVE)
            {
                m_bErased = FALSE;
                DrawTrackRect(&m_rect);
            }
            else
            {
                bStop = TRUE;
                ASSERT(msg.message == WM_LBUTTONUP);
            }
        }
        else if(msg.message == WM_KEYDOWN)
        {
            if (msg.wParam == VK_ESCAPE)
            {
                bStop = TRUE;
            }
        }
        else if(msg.message == WM_RBUTTONDOWN)
        {
            bStop = TRUE;
        }
        else
        {
            DispatchMessage(&msg);
        }

        if(bStop)
        {
            break;
        }

    } // for (;;)

    // release mouse capture
    ReleaseCapture();

    if(!m_bErased)
    {
        // do a final erase if needed
        DrawTrackRect(m_rect);
    }

    glPopMatrix();
    // restore drawing mode to back-buffer
    glDrawBuffer(GL_BACK);

    return TRUE;
}
Using the Code
The jxglTracker class can be simply used inside the WM_LBUTTONDOWN message handler like shown below:
void COglRubberBandView::OnLButtonDown(UINT nFlags, CPoint point)
{
    CPaintDC dc(this); // device context for painting
    wglMakeCurrent(dc.m_hDC, m_hRC);

    jxglTracker tracker;
    tracker.Track(this, point);

    CView::OnLButtonDown(nFlags, point);
}
Points of Interest
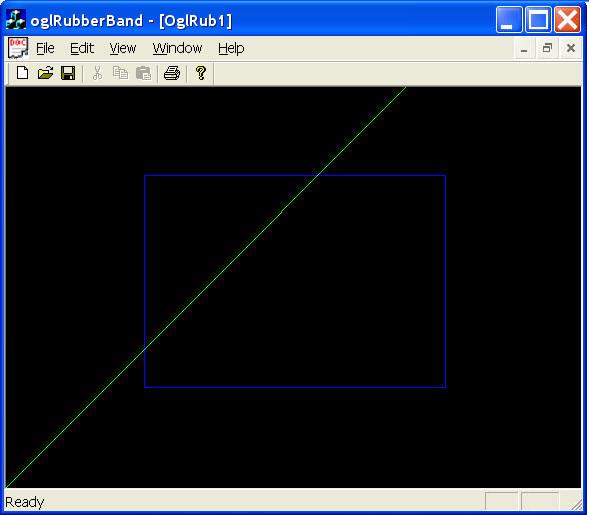
An MDI MFC-OpenGL application (oglRubberBand) is used to test thejxglTracker rubber-banding class. This application is generated by the MFC AppWizard (accepting default settings) using VC++ 6.0. It is beyond the scope of this article
to explain the details of setting up OpenGL. The main logic is contained in the view class (COglRubberBandView) and should be pretty easy to follow. Of course, thejxglTracker.h and
jxglTracker.cpp files are added to the project. OpenGL libraries are linked through#pragma comment(lib,"opengl32.lib") etc. in the
stdafx.h file.
Depending on the graphics card speed of your system, you can change the number of geometry entities to draw, as shown below. Notice that the drawing speed of the rubber-banding should not be affected by the number of entities already drawn.
void COglRubberBandView::OnPaint()
{
    //...
    const int nLines = 10000; // let's draw quite a few lines
    //...
}
Happy coding!


 2044
2044

 被折叠的 条评论
为什么被折叠?
被折叠的 条评论
为什么被折叠?
 到【灌水乐园】发言


