


本文原始地址:IOS 5新增API介绍及使用
1.UIStepper
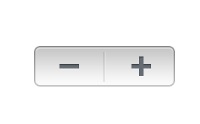
- UIStepper *stepper = [[UIStepper alloc] initWithFrame:CGRectMake(200, 100, 0, 0)];
- [stepper sizeToFit];
- stepper.value = 0;
- stepper.minimumValue = 0;
- stepper.maximumValue = 1;
- stepper.stepValue = 0.1;
- [stepper addTarget:self action:@selector(stepperAction:) forControlEvents:UIControlEventValueChanged];
- [self.view addSubview:stepper];
- [stepper release];
- - (void)stepperAction:(UIStepper *)stepper
- {
- NSLog(@"stepper value:%f",stepper.value);
- }
2.UIAlertView样式
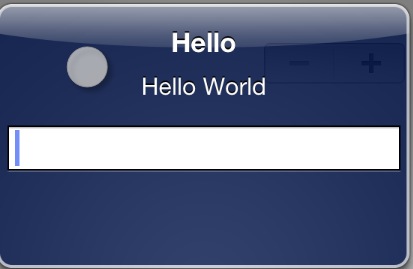
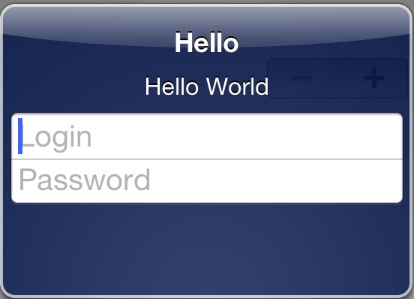
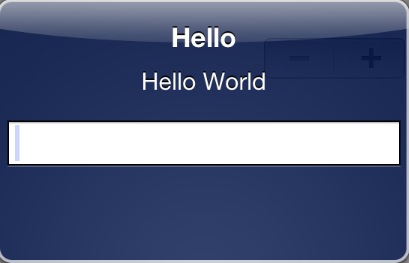
- UIAlertView *alert = [[UIAlertView alloc] initWithTitle:@"Hello" message:@"Hello World" delegate:nil cancelButtonTitle:nil otherButtonTitles:nil, nil];
- //第一张图 alert.alertViewStyle = UIAlertViewStylePlainTextInput;
- //第二张图 alert.alertViewStyle = UIAlertViewStyleLoginAndPasswordInput;
- //第三张图 alert.alertViewStyle = UIAlertViewStyleSecureTextInput;
- [alert show];
- [alert release];
- //返回指定索引值的TextField ,这个API仅存在于IOS5.0以上
- - (UITextField *)textFieldAtIndex:(NSInteger)textFieldIndex
- {
- return textField;
- }
3 UIScreen调节亮度
- UIScreen *mainScreen = [UIScreen mainScreen];
- //设置屏幕亮度为50%
- mainScreen.brightness = 0.5;
- //默认是NO。如果YES,可以通过wantsSoftwareDimming属性来声明此应用需要将屏幕亮度调整到比中等亮度偏暗的级别。(需要注意的是,打开wantsSoftwareDimming可能会对性能有影响,因为这种昏暗是通过软件来实现的。)
- mainScreen.wantsSoftwareDimming = YES;
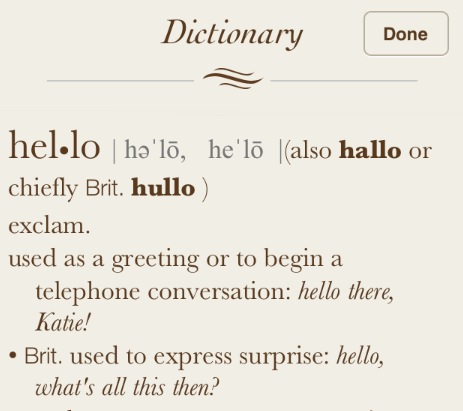
- NSString *key = @"hello";
- //判断任何已经安装的字典里有key的定义
- if ([UIReferenceLibraryViewController dictionaryHasDefinitionForTerm:key])
- {
- UIReferenceLibraryViewController *controller = [[UIReferenceLibraryViewController alloc] initWithTerm:key];
- //只是切换方式
- [controller setModalTransitionStyle:UIModalTransitionStyleCrossDissolve];
- [self presentModalViewController:controller animated:YES];
- [controller release];
- }
- //这个delegate方法是被发送到你的delegate询问在特定方向下你想要左侧做什么,因此它把自己传递给你,还有左侧,它会问在这个方向你想要我对左侧做什么。要隐藏就返回YES,要保留在屏幕上就返回NO
- - (BOOL)splitViewController:(UISplitViewController *)svc shouldHideViewController:(UIViewController *)vc inOrientation:(UIInterfaceOrientation)orientation
- {
- return YES;
- }
- //为tableview注册一个nib
- UINib *nib = [UINib nibWithNibName:@"MyCell" bundle:nil];
- [self.tableView registerNib:nib forCellReuseIdentifier:@"identifier"];
- - (UITableViewCell *)tableView:(UITableView *)tableView cellForRowAtIndexPath:(NSIndexPath *)indexPath
- {
- //重用前面注册过的cell
- UITableViewCell *cell = [tableView dequeueReusableCellWithIdentifier:@"identifier"];
- //other code
- return cell;
- }
8 UIAppearance应用于全部属性
- //程序中所有slider改为红色
- [[UISlider appearance] setMinimumTrackTintColor:[UIColor redColor]];
控件为我们提供了一种像翻书效果的一种控件。我们可以通过使用UIPageViewController控件,来完成类似图书一样的翻页控制方式。
10 UIDocument
11 管理资源库
ALAssetsLibrary提供了我们对iOS设备中的相片、视频的访问。
可以通过valueForProperty获取到图片的信息,包括类型, Location , 时长,方向,日期,格式 , URL地址。
- self.view.backgroundColor = [UIColor whiteColor];
- self.assetsLibrary = [[ALAssetsLibrary alloc] init];
- dispatch_queue_t dispatchQueue = dispatch_get_global_queue(DISPATCH_QUEUE_PRIORITY_DEFAULT, 0);
- dispatch_async(dispatchQueue, ^(void)
- {
- // 遍历所有相册
- [self.assetsLibrary enumerateGroupsWithTypes:ALAssetsGroupAll
- usingBlock:^(ALAssetsGroup *group, BOOL *stop)
- {
- // 遍历每个相册中的项ALAsset
- [group enumerateAssetsUsingBlock:^(ALAsset *result, NSUInteger index,BOOL *stop)
- {
- __block BOOL foundThePhoto = NO;
- if (foundThePhoto)
- {
- *stop = YES;
- }
- // ALAsset的类型
- NSString *assetType = [result valueForProperty:ALAssetPropertyType];
- //如果是照片的话
- //ALAssetTypeVideo
- //ALAssetTypeUnknown
- if ([assetType isEqualToString:ALAssetTypePhoto])
- {
- foundThePhoto = YES;
- *stop = YES;
- //封装了ALAsset,包含了一个资源文件中的很多属性。(可以说是ALAsset的不同的表示方式,本质上都表示同一个资源文件)
- ALAssetRepresentation *assetRepresentation = [result defaultRepresentation];
- CGFloat imageScale = [assetRepresentation scale];
- UIImageOrientation imageOrientation = (UIImageOrientation)[assetRepresentation orientation];
- dispatch_async(dispatch_get_main_queue(), ^(void)
- {
- CGImageRef imageReference = [assetRepresentation fullResolutionImage];
- // 对找到的图片进行操作
- UIImage *image = [[UIImage alloc] initWithCGImage:imageReference scale:imageScale orientation:imageOrientation];
- if (image != nil)
- {
- //呈现
- self.imageView = [[UIImageView alloc] initWithFrame:self.view.bounds];
- self.imageView.contentMode = UIViewContentModeScaleAspectFit;
- self.imageView.image = image;
- [self.view addSubview:self.imageView];
- } else
- {
- NSLog(@"Failed to create the image.");
- }
- });
- }
- }];
- }
- failureBlock:^(NSError *error)
- {
- //读取失败的处理
- }];
- });
12 GLKit
13 Core Image
14 Core Data
参考:http://blog.163.com/const_yixinyiyi/blog/static/180088172201301522234553/


 155
155

 被折叠的 条评论
为什么被折叠?
被折叠的 条评论
为什么被折叠?
 到【灌水乐园】发言


