Update: This tutorial only works for Xcode 4.6 or lower. If you’ve upgraded to Xcode 5, please check out the updated Hello World tutorial.
I hope you have configured your development environment properly with Xcode installed. If you haven’t done so, check out our previous article about what you need to begin iOS programming. We’ll use Xcode 4.3.2 to work on the tutorial. However, you can also Xcode 4.2 to build the app in case you can’t upgrade to the latest version of Xcode.
You may have heard of “Hello World” program if you have read any programming book before. It has become the traditional program for first-time learner to create. It’s a very simple program that usually outputs “Hello, World” on the display of a device. In this tutorial, let’s follow the programming tradition and create a “Hello World” app using Xcode. Despite its simplicity, the “Hello World” program serves a few purposes:
- It gives you a better idea about the syntax and structure of Objective C, the programming language of iOS.
- It also gives you a basic introduction of the Xcode environment. You’ll learn how to create a Xcode project and create user interface with the built-in interface builder.
- You’ll learn how to compile a program, build the app and test it using the Simulator.
- Lastly, it makes you think programming is not difficult. I don’t want to scare you away.

Take a Look at Your First App
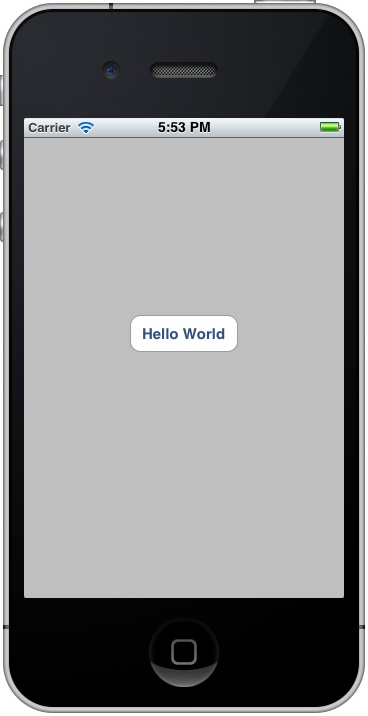
Before we go into the coding part, let’s first take a look at our version of the “Hello World” app. The final deliverable will look like this:

Your First iPhone App - Hello World
It’s very simple and shows only a “Hello World” button. When tapped, the app prompts you a message. That’s it. Nothing complex but it helps you kick off your iOS programming journey.
Start Coding!
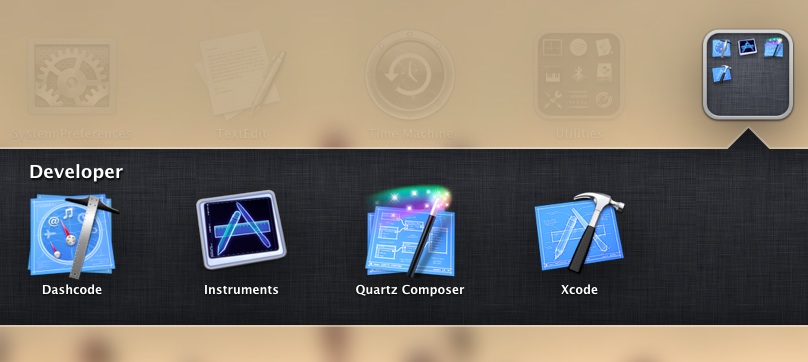
First, launch Xcode. If you’ve installed Xcode via Mac App Store, you should be able to locate Xcode in the LaunchPad. Just click on the Xcode icon to start it up.
Once launched, Xcode displays a welcome dialog. From here, choose “Create a new Xcode project” to start a new project:

Xcode - Welcome Dialog
Xcode shows you various project template for selection. For your first app, choose “Single View Application” and click “Next”.

Xcode Project Template Selection
This brings you to another screen to fill in all the necessary options for your project.

Project Options for Hello World App
You can simply fill in the options as follows:
- Product Name: HelloWorld – This is the name of your app.
- Company Identifier: com.appcoda – It’s actually the domain name written the other way round. If you have a domain, you can use your own domain name. Otherwise, you may use mine or just fill in “edu.self”.
- Class Prefix: HelloWorld – Xcode uses the class prefix to name the class automatically. In future, you may choose your own prefix or even leave it blank. But for this tutorial, let’s keep it simple and use “HelloWorld”.
- Device Family: iPhone – Just use “iPhone” for this project.
- Use Storyboards: [unchecked] – Do not select this option. You do not need Storyboards for this simple project.
- Use Automatic Reference Counting: [checked] – By default, this should be enabled. Just leave it as it is.
- Include Unit Tests: [unchecked] – Leave this box unchecked. For now, you do not need the unit test class.
Click “Next” to continue. Xcode then asks you where you saves the “Hello World” project. Pick any folder (e.g. Desktop) on your Mac. You may notice there is an option for Source Control. Just deselect it. We’ll discuss about this option in the later tutorials. Click “Create” to continue.

Pick a Folder to Save Your Project
As you confirm, Xcode automatically creates the “Hello World” project based on all the options you provided. The screen will look like this:

Main Xcode Window for Hello World Project
Familiarize with Xcode Workspace
Before we move on to code your app, let’s take a few minutes to have a quick look at the Xcode workspace environment. On the left pane, it’s the project navigator. You can find all your files under this area.

Project Navigator in Workspace
The center part of the workspace is the editor area. You do all the editing stuffs (such as edit project setting, class file, user interface, etc) in this area depending on the type of file selected.

Editor and Utility Area in Xcode
The rightmost pane is the utility area. This area displays the properties of the file and allows you to access Quick Help. If Xcode doesn’t show this area, you can select the rightmost view button in the toolbar to enable it.
Lastly, it’s the toolbar. It provides various functions for you to run your app, switch editor and the view of the workspace.

Toolbar in Workspace
Run Your App for the First Time
Even you haven’t written any code, you can run your app to try out the Simulator. This gives an idea how you build and test your app in Xcode. Simply hit the “Run” button in the toolbar.

Run Button in Xcode
Xcode automatically builds the app and runs it in the Simulator. This is how the Simulator looks like:

The Simulator
A gray screen with nothing inside?! That’s normal. As your app is incomplete, the Simulator just shows a blank screen. To terminate the app, simply hit the “Stop” button in the toolbar.

Terminate the Running App
Back to Code
Okay, let’s move on and start to add the Hello World button to our app. Go back to the Project Navigator and select “HelloWorldViewController.xib”.

Select HelloWorld XIB File
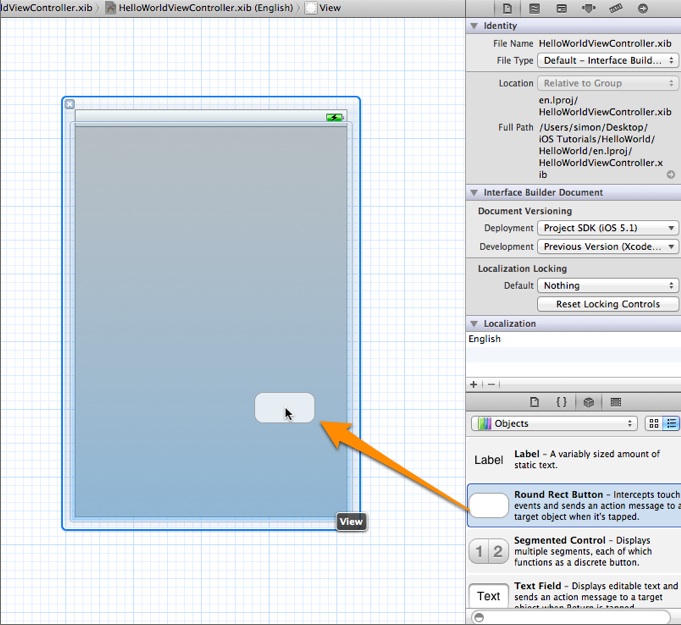
As you select the file, the editor changes to an Interface Builder and displays an empty view of your app like below:

Interface Builder in Xcode
In the lower part of the utility area, it shows the Object library. From here, you can choose any of the UI Controls, drag-and-drop it into the view. For the Hello World app, let’s pick the “Round Rect Button” and drag it into the view. Try to place the button at the center of the view.
To edit the label of the button, double-click it and name it “Hello World”.

Try to run the app again and you should have an app like this:

Now Hello World with a Button
For now, if you tap the button, it does nothing. We’ll need to add the code for displaying the “Hello, World” message.
Coding the Hello World Button
In the Project Navigator, select the “HelloWorldViewController.h”. The editor area now displays the source code of the selected file. Add the following line of code before the “@end” line:
|
1
|
-
(IBAction
)showMessage;
|
Your code should look like this after editing:

Next, select the “HelloWordViewController.m” and insert the following code before the “@end” line:
|
1
2 3 4 5 6 7 8 |
-
(IBAction
)showMessage
{ UIAlertView *helloWorldAlert = [ [UIAlertView alloc ] initWithTitle : @ "My First App" message : @ "Hello, World!" delegate : nil cancelButtonTitle : @ "OK" otherButtonTitles : nil ]; // Display the Hello World Message [helloWorldAlert show ]; } |
After editing, your code should look like below:

Source Code of HelloWorldViewController After Editing
Forget about the meaning of the above Objective-C code. I’ll explain to you in the next post. For now, just think of “showMessage” as an action and this action instructs iOS to display a “Hello World” message on screen.
Connecting Hello World Button with the Action
But here is the question:
How can the “Hello World” button know which action to invoke when someone taps on it?
Next up, you’ll need to establish a connection between the “Hello World” button and the “showMessage” action you’ve just added. Select the “HelloWorldViewController.xib” file to go back to the Interface Builder. Press and hold the Control key on your keyboard, click the “Hello World” button and drag to the “File’s Owner”. Your screen should look like this:

Release both buttons and a pop-up shows the “showMessage” action. Select it to make a connection between the button and “showMessage” action.

Send Event Pop-up from File's Owner
Test Your App
That’s it! You’re now ready to test your first app. Just hit the “Run” button. If everything is correct, your app should run properly in the Simulator.
Congratulation! You’ve built your first iPhone app. It’s a simple app however, I believe you already have a better idea about Xcode and how an app is developed.
In the next post, I’ll further explain the Objective-C code we’ve done here and how the HelloWorld app actually works. Stay tuned.
As always, if you come across any problem while creating your app, head over to our AppCoda Community forum and post your question.
Update: You can download the Xcode project here.


 804
804

 被折叠的 条评论
为什么被折叠?


