


2 开发第一个应用
2.1 项目骨架
从本章开始,我们要开发一个简单的reading-list应用,用来维护一个reading-list,包括录入书的信息,查看阅读列表,删除书等操作。
技术上,Spring MVC处理Web请求,Thymeleaf作为模板引擎编写页面,Spring Data JPA操作数据库,使用内置H2数据库,用Gradle管理项目。
使用Spring Initializer生成
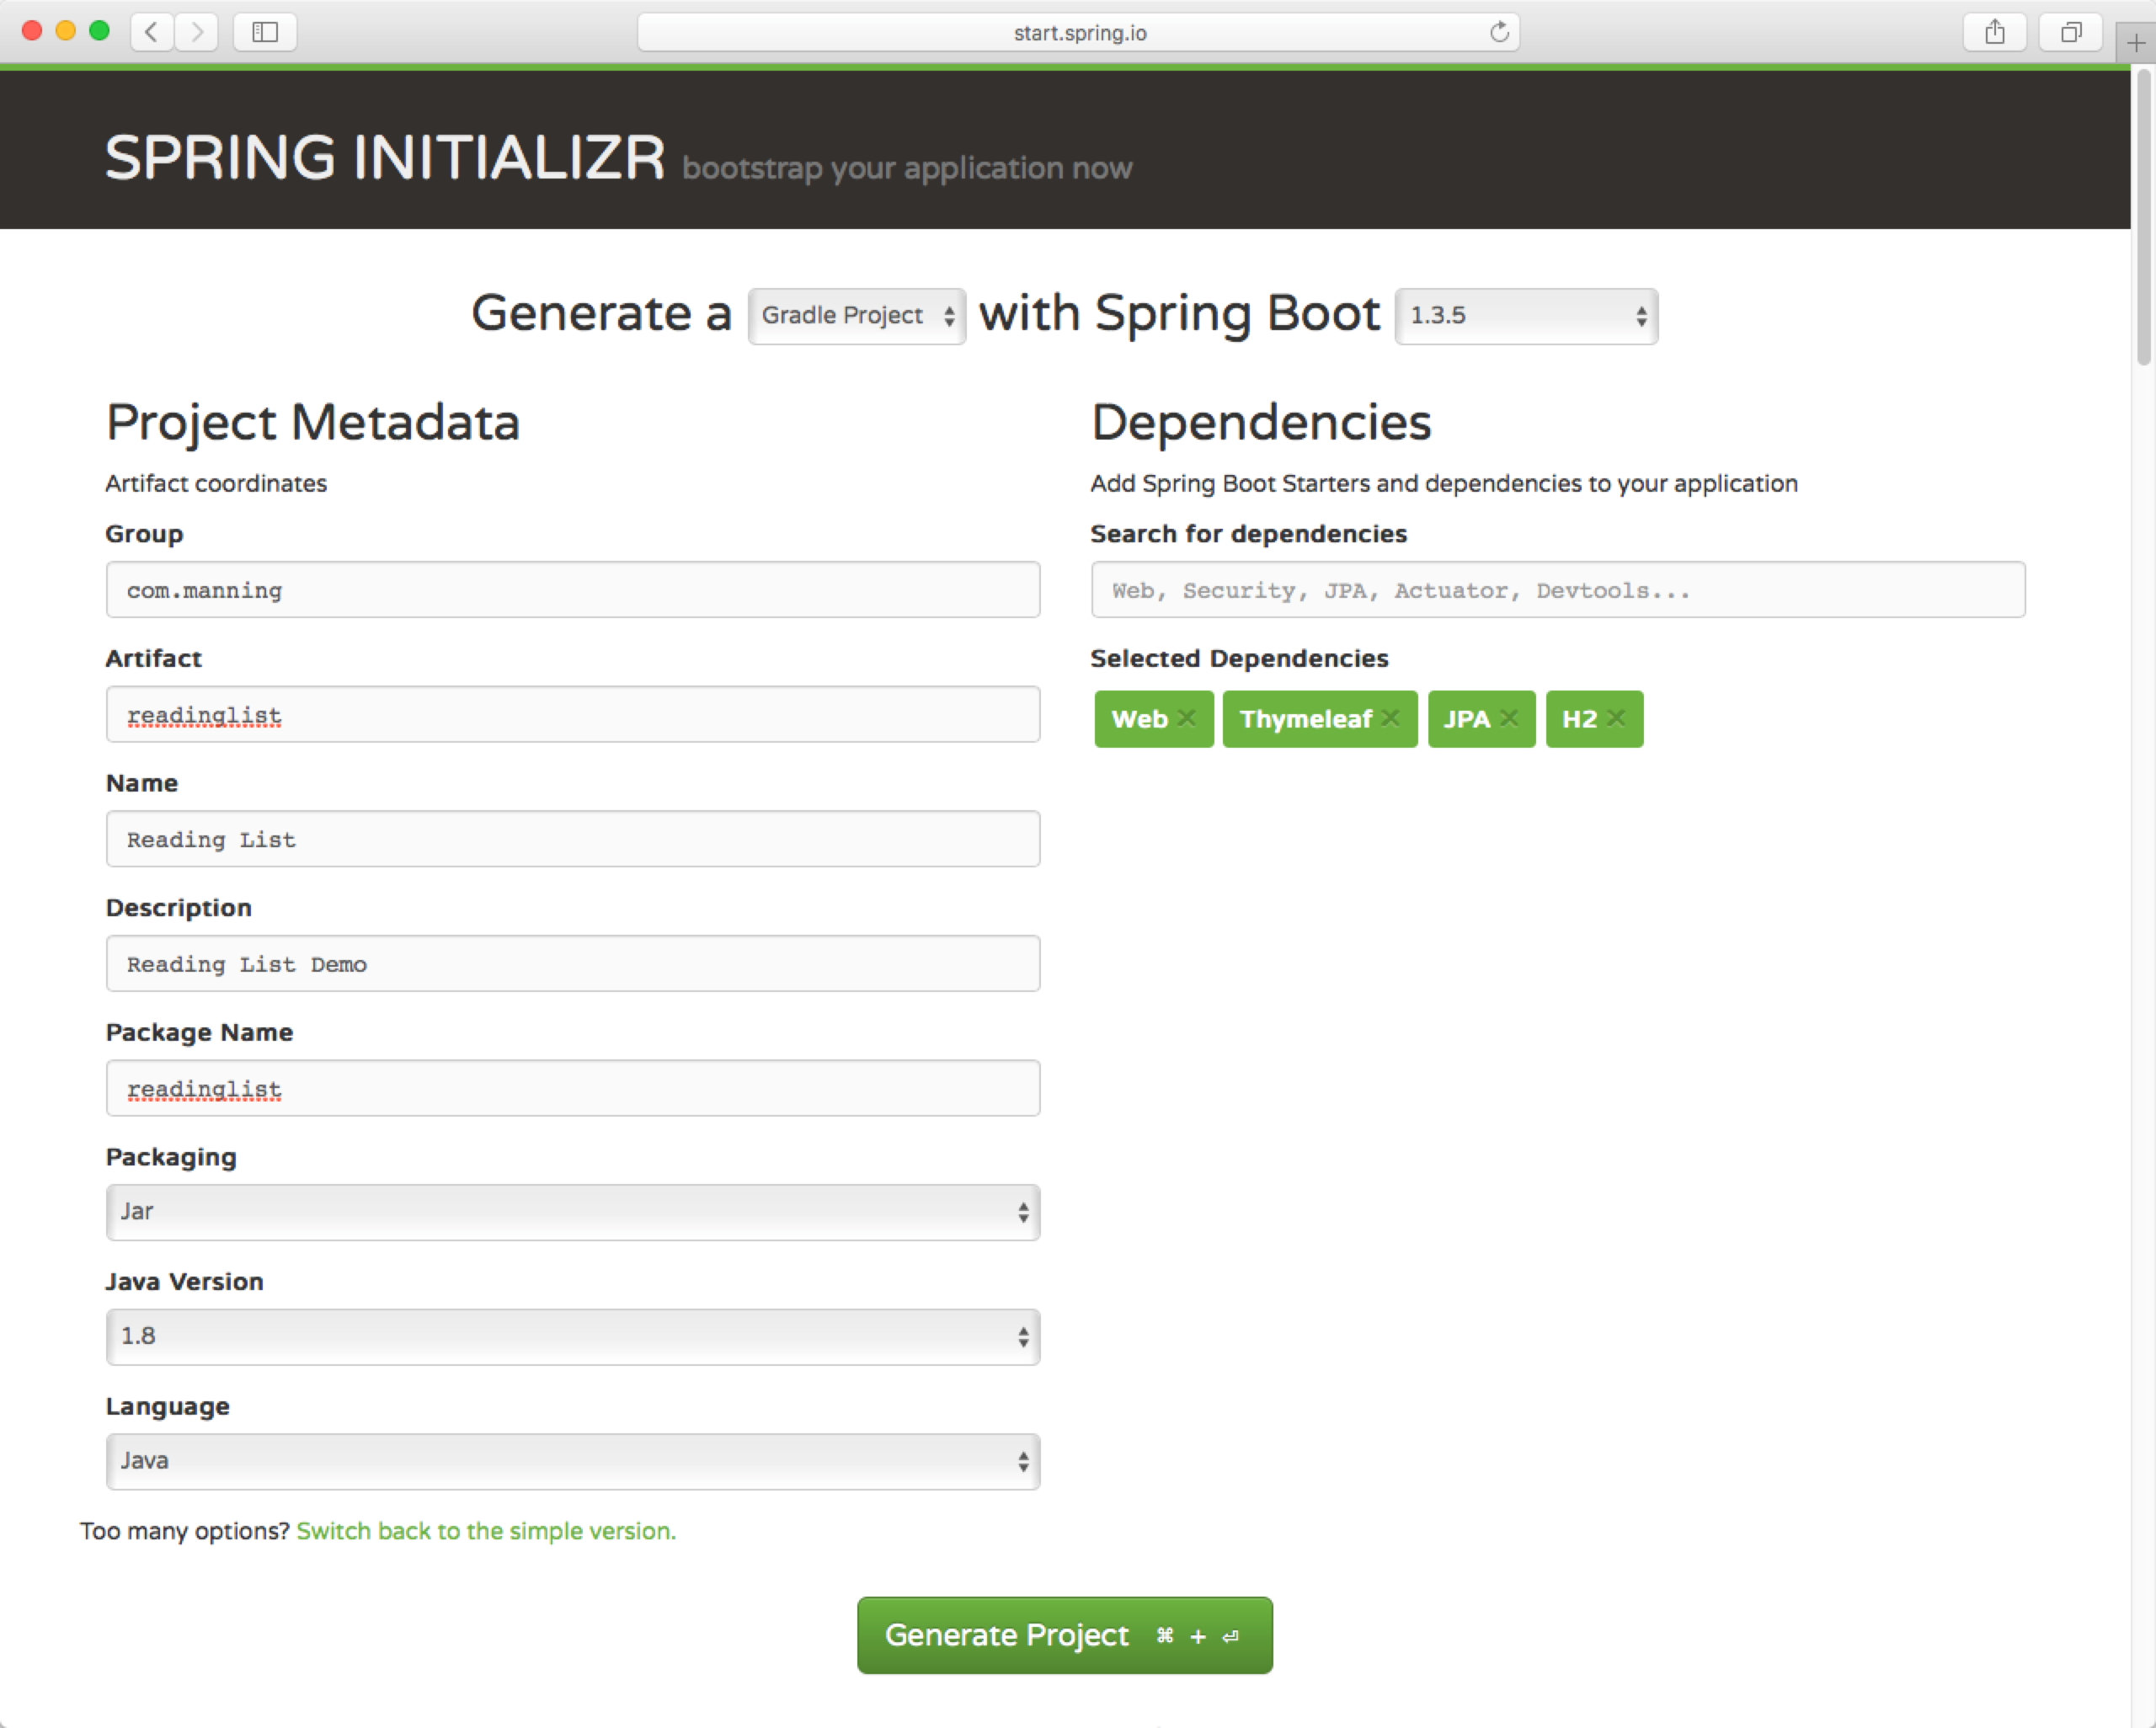
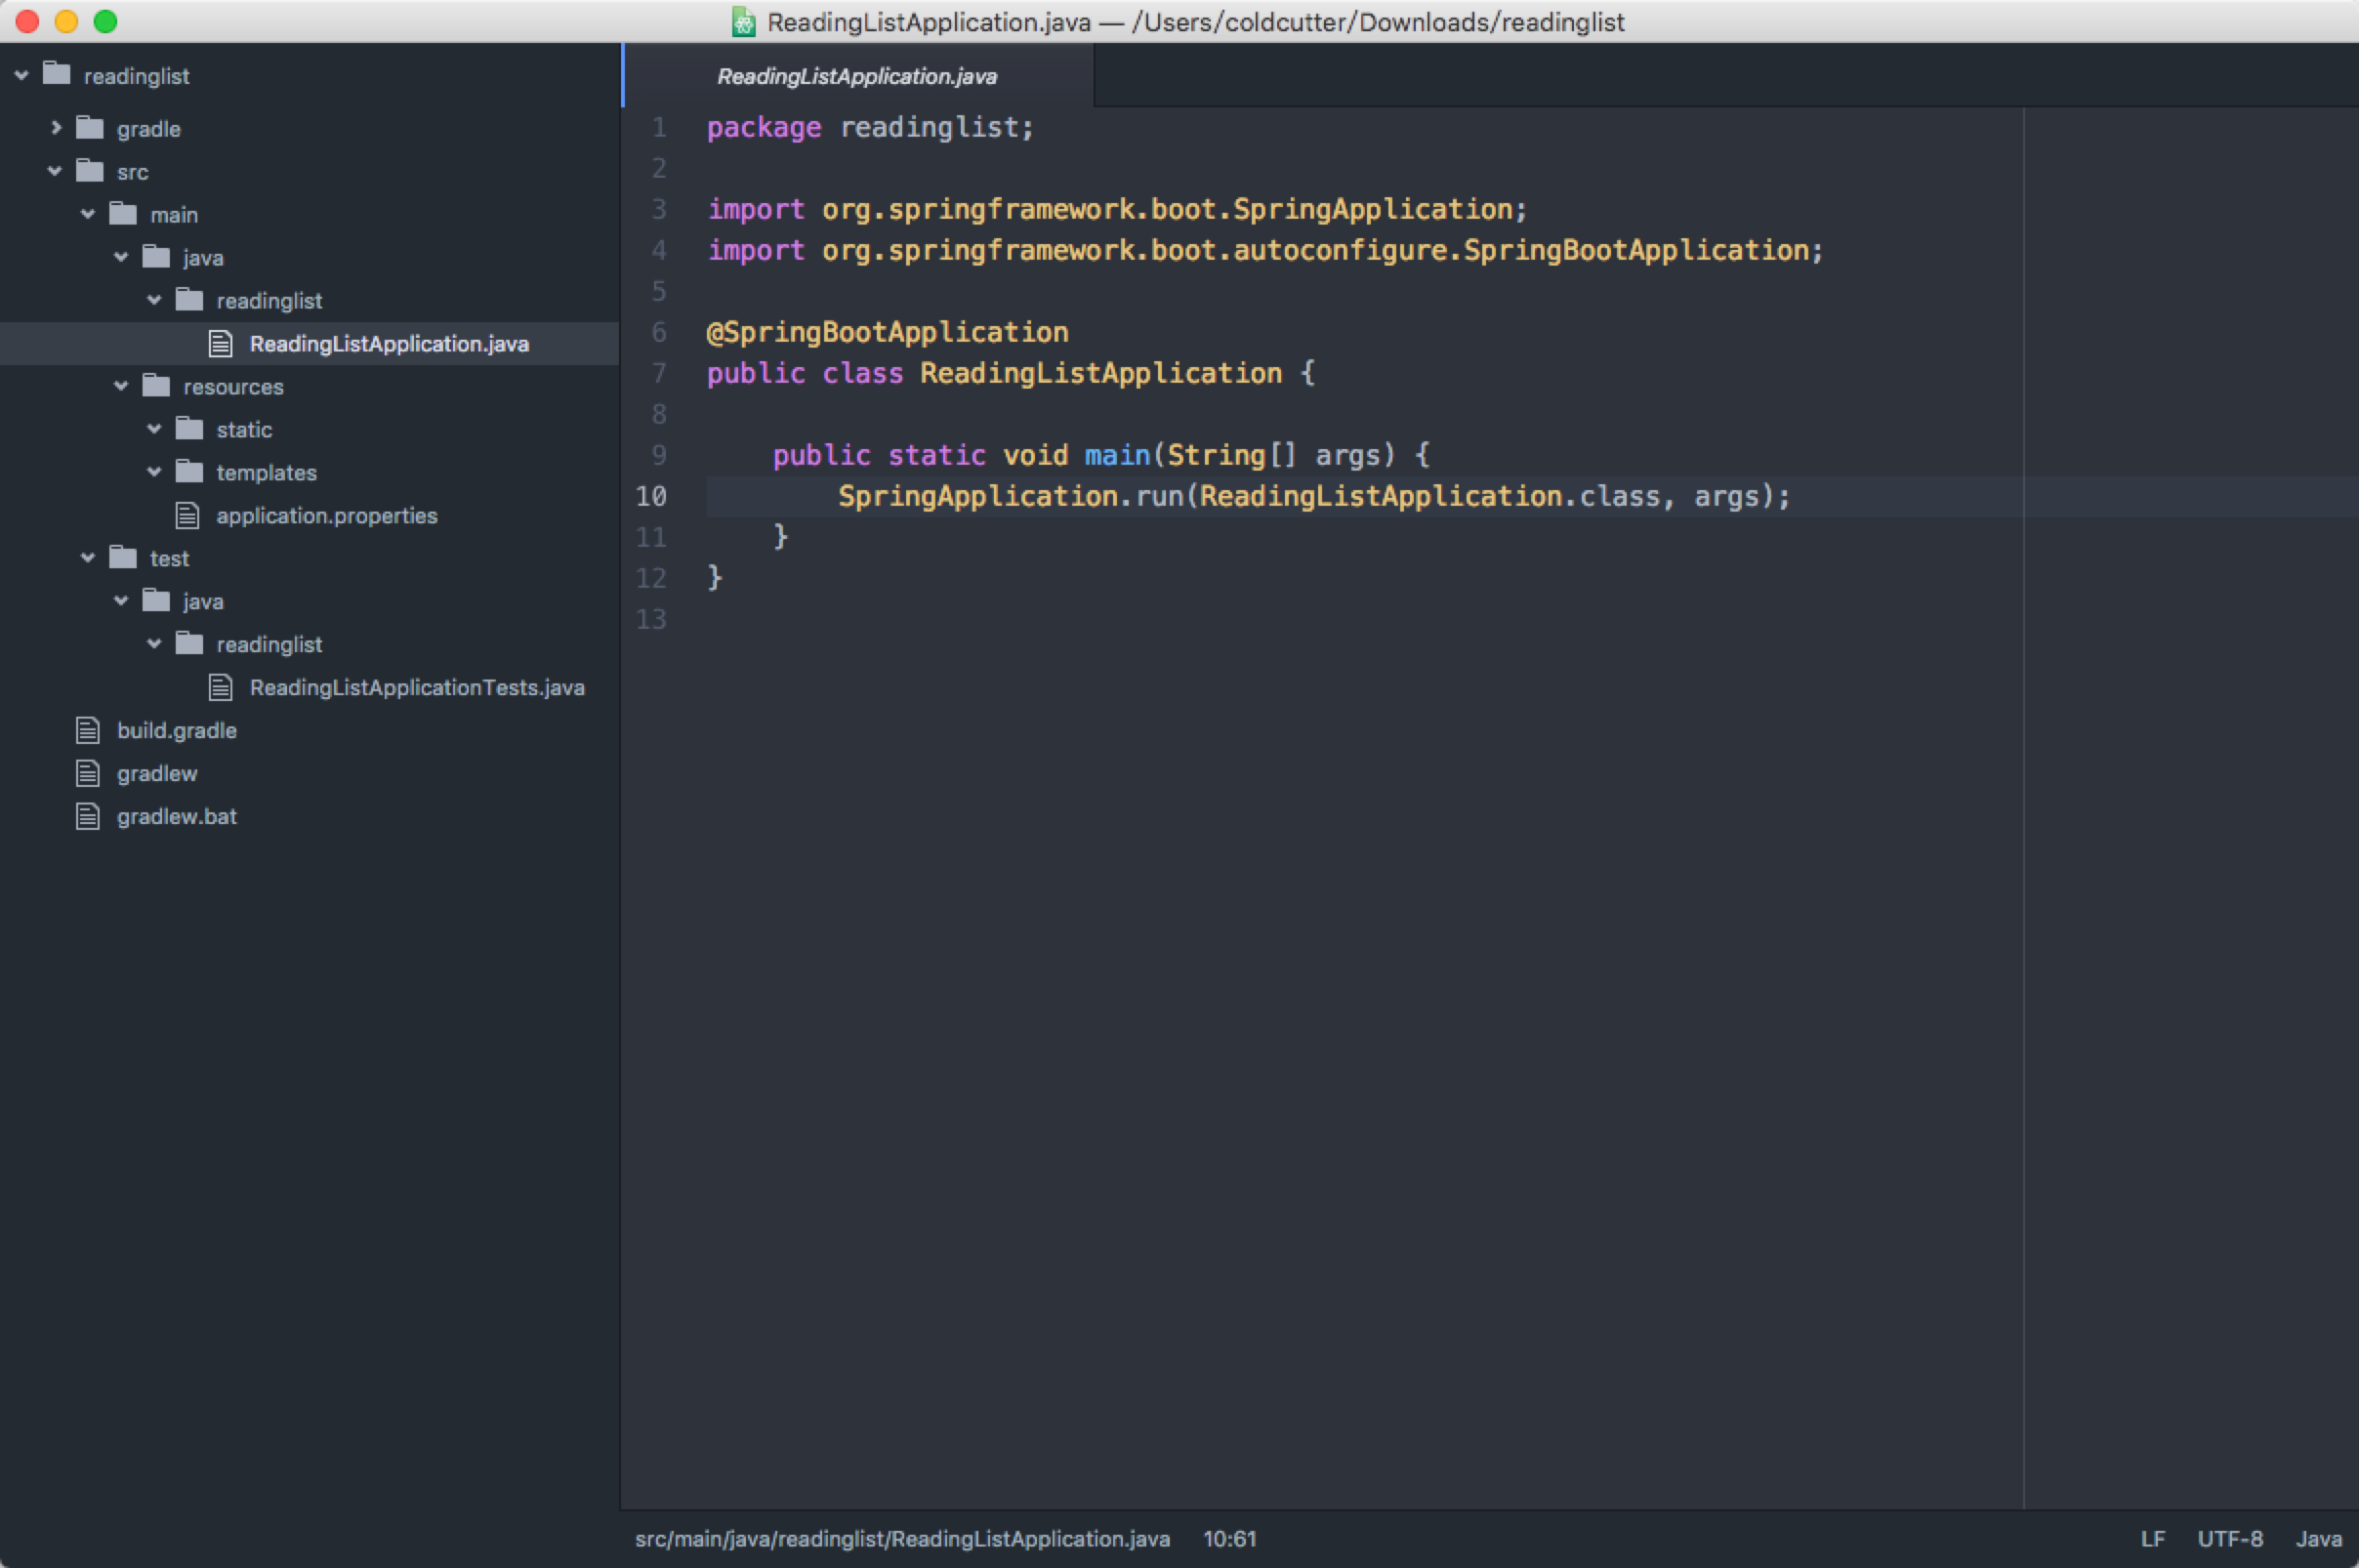
生成的项目结构
项目结构符合Gradle或者Maven的一般规范:
- 主代码位于/src/main/java
- 主资源位于/src/main/resources
- 测试代码位于/src/test/java
- 测试资源位于/src/test/resources
ReadingListApplication类有两个作用:主配置类和启动类。尽管Spring Boot自动配置特性能减少许多配置,但是至少需要有一个配置类来激活自动配置,@SpringBootApplication注解组合了其他三个有用的注解:
- Spring的@Configuration注解,指派该类成为配置类
- Spring的@ComponentScan注解,激活组件扫描功能,因此Web控制器类(@Controller)以及其他组件(如@Component,@Service等)可以自动注册为Spring application context中的beans
- Spring Boot的@EnableAutoConfiguration注解,激活自动配置
如何运行呢?有三种方法:
1. 直接运行
如果你在IDEA里,直接右键ReadingListApplication.java,点击Run就可以运行了(多亏了main函数)
2. Gradle或Maven
使用Spring Boot Gradle Plugin提供的bootRun task:
gradle bootRun或者Maven goal:
mvn spring-boot:run3. 打包运行
gradle build
java -jar build/libs/readinglist-0.0.1-SNAPSHOT.jar
正常情况下应用启动,访问localhost:8080,不过目前还没有Controller,所以会是HTTP 404 Not Found
注:如果有其他的配置,建议放到其他的@Configuration配置类中,独立于ReadingListApplication类
测试
ReadingListApplicationTests类是测试类:
package readinglist;

import org.junit.Test;
import org.junit.runner.RunWith;
import org.springframework.boot.test.SpringApplicationConfiguration; import org.springframework.test.context.junit4.SpringJUnit4ClassRunner; import org.springframework.test.context.web.WebAppConfiguration;

import readinglist.ReadingListApplication;

@RunWith(SpringJUnit4ClassRunner.class)
@SpringApplicationConfiguration(classes = ReadingListApplication.class)
@WebAppConfiguration
public class ReadingListApplicationTests {
  @Test
  public void contextLoads() {
  }
}在一般的Spring测试类中,你都会用注解@ContextConfiguration来加载Spring应用上下文,不过在Spring Boot测试类中,你用注解@SpringApplicationConfiguration来代替。此类目前只有contextLoads()一个测试方法,用来验证ReadingListApplication这个配置类是否没有问题。
配置应用属性
你可以在application.properties文件中加入一行:
server.port=8000这样内置Tomcat服务器就会监听8000端口了(默认是8080)。这个文件自动会被载入,不用我们管。
如何构建
Spring Boot为Gradle何Maven提供了构建插件,以Gradle为例:
buildscript {
  ext {
    springBootVersion = '1.3.5.RELEASE'
  }
  repositories {
    mavenCentral()
  }
  dependencies {
    classpath("org.springframework.boot:spring-boot-gradle-plugin:${springBootVersion}")
  }
}

apply plugin: 'java'
apply plugin: 'idea'
apply plugin: 'spring-boot'

jar {
  baseName = 'readinglist'
  version = '0.0.1-SNAPSHOT'
}
sourceCompatibility = 1.8
targetCompatibility = 1.8

repositories {
  mavenCentral()
}

dependencies {
  compile('org.springframework.boot:spring-boot-starter-data-jpa')
  compile('org.springframework.boot:spring-boot-starter-thymeleaf')
  compile('org.springframework.boot:spring-boot-starter-web')
  runtime('com.h2database:h2')
  testCompile('org.springframework.boot:spring-boot-starter-test')
}

task wrapper(type: Wrapper) {
  gradleVersion = '1.12'
}
构建插件的主要作用是能把所有依赖包打进一个user-JAR包,并且加入了manifest,使之能够用java -jar运行。
上面的依赖都没有指定版本,因为starter的版本和Spring Boot的版本是一样的,你可以使用gradle dependencies(或mvn dependency:tree)来查看项目的依赖版本。
如果你想排除starter中的某个传递性依赖,比如Jackson JSON library(from web starter),你可以exclude它:
compile("org.springframework.boot:spring-boot-starter-web") {
  exclude group: 'com.fasterxml.jackson.core'
}
类似的,如果你想用另一个版本的Jackson,也是可以的,但是Gradle和Maven的传递性依赖解析机制是不一样,在Maven中,总是选择最近的依赖(直接依赖优先级高于传递性依赖),所以直接引入一个Jackson依赖就可以了,它会覆盖传递性依赖,在Gradle中则不同,Gradle会选择更高版本的依赖,所以如果你选择的Jackson版本高于starter中的版本,那没什么问题,如果低于starter中的版本,那就必须先像上面一样exclude掉了。
2.2 写代码
定义领域对象
package readinglist;

import javax.persistence.Entity;
import javax.persistence.GeneratedValue;
import javax.persistence.GenerationType;
import javax.persistence.Id;

@Entity
public class Book {

  @Id
  @GeneratedValue(strategy=GenerationType.AUTO)
  private Long id;
  private String reader;
  private String isbn;
  private String title;
  private String author;
  private String description;

  // getters and setters
}
@Entity定义了这是一个JPA实体类,@Id指定了这个实体的identity,@GeneratedValue说明这个字段会自动生成。
定义Repository接口
package readinglist;

import java.util.List;
import org.springframework.data.jpa.repository.JpaRepository;

public interface ReadingListRepository extends JpaRepository<Book, Long> {
  List<Book> findByReader(String reader);
}
只需要定义一个继承Spring Data JPA的JpaRepository的接口,ReadingListRepository继承了18个通用的持久化操作,JpaRepository的两个参数Book和Long,分别指明了domain类型和这个domain的id类型,我们添加了一个findByReader方法,提供一个reader的名字,就能找出相关的Book列表,不用担心,当应用启动的时候,Spring Data会自动实现这个接口,你什么也不用做。
定义Spring MVC Controller
package readinglist;

import org.springframework.beans.factory.annotation.Autowired;
import org.springframework.stereotype.Controller;
import org.springframework.ui.Model;
import org.springframework.web.bind.annotation.PathVariable;
import org.springframework.web.bind.annotation.RequestMapping;
import org.springframework.web.bind.annotation.RequestMethod;

import java.util.List;

@Controller
@RequestMapping("/")
public class ReadingListController {

  @Autowired
  private ReadingListRepository readingListRepository;

  @RequestMapping(value = "/{reader}", method = RequestMethod.GET)
  public String readersBooks(@PathVariable("reader") String reader, Model model) {
    List<Book> readingList = readingListRepository.findByReader(reader);
    if (readingList != null) {
      model.addAttribute("books", readingList);
    }
    return "readingList";
  }

  @RequestMapping(value = "/{reader}", method = RequestMethod.POST)
  public String addToReadingList(@PathVariable("reader") String reader, Book book) {
    book.setReader(reader);
    readingListRepository.save(book);
    return "redirect:/{reader}";
  }
}
编写页面
readersBooks()方法返回一个逻辑视图名“readingList”,所以我们在src/main/resources/templates目录下建一个readingList.html,内容如下:
<html>
  <head>
    <title>Reading List</title>
    <link rel="stylesheet" th:href="@{/style.css}"></link>
  </head>

  <body>
    <h2>Your Reading List</h2>
    <div th:unless="${#lists.isEmpty(books)}">
      <dl th:each="book : ${books}">
        <dt class="bookHeadline">
          <span th:text="${book.title}">Title</span> by
          <span th:text="${book.author}">Author</span>
          (ISBN: <span th:text="${book.isbn}">ISBN</span>)
        </dt>
        <dd class="bookDescription">
          <span th:if="${book.description}"
                th:text="${book.description}">Description</span>
          <span th:if="${book.description eq null}">
                No description available</span>
        </dd>
      </dl>
    </div>
    <div th:if="${#lists.isEmpty(books)}">
      <p>You have no books in your book list</p>
    </div>

    <hr/>

    <h3>Add a book</h3>
    <form method="POST">
      <label for="title">Title:</label>
        <input type="text" name="title" size="50"></input><br/>
      <label for="author">Author:</label>
        <input type="text" name="author" size="50"></input><br/>
      <label for="isbn">ISBN:</label>
        <input type="text" name="isbn" size="15"></input><br/>
      <label for="description">Description:</label><br/>
        <textarea name="description" cols="80" rows="5">
        </textarea><br/>
      <input type="submit"></input>
    </form>

  </body>
</html>
添加css
在src/main/resources/static目录下建一个style.css:
body {
    background-color: #cccccc;
    font-family: arial,helvetica,sans-serif;
}

.bookHeadline {
    font-size: 12pt;
    font-weight: bold;
}

.bookDescription {
    font-size: 10pt;
}

label {
    font-weight: bold;
}
至此,一个完整的项目就写完了,几乎没有什么配置,我们写的完全都是业务代码。这是如何做到的呢?
Spring Boot会引入一个包spring-boot-autoconfigure,里面有各种Configuration类,Spring Boot利用了Spring 4.0引入的条件配置(conditional configuration)来实现自动配置,你可以自己写条件,只要实现Condition接口,覆盖它的matches()方法即可,比如:
package readinglist;
import org.springframework.context.annotation.Condition;
import org.springframework.context.annotation.ConditionContext;
import org.springframework.core.type.AnnotatedTypeMetadata;

public class JdbcTemplateCondition implements Condition {
  @Override
  public boolean matches(ConditionContext context, AnnotatedTypeMetadata metadata) {
    try {
      context.getClassLoader().loadClass("org.springframework.jdbc.core.JdbcTemplate");
      return true;
    } catch (Exception e) {
      return false;
    }
  }
}

@Conditional(JdbcTemplateCondition.class)
public MyService myService() {
  // ...
}
MyService bean只有在JdbcTemplate类在classpath的情况下才会被创建。


 612
612

 被折叠的 条评论
为什么被折叠?
被折叠的 条评论
为什么被折叠?
 到【灌水乐园】发言


