


1、安装
下载CodeIgniter之后,解压,放到网站的根目录,就完成安装了
2、修改system和application文件夹
为了安全性起见,我们通常要修改默认的system和application文件夹
<1>改为自己想要名字,比如改为mysystem和myapplication
<2>把他挪到webroot以外,这个以外的意思,可以是和webroot并列路径创建一个文件夹,把这两个文件夹丢进去,这样他都不会在web服务器文件目录里
<3>然后要在index.php里面修改路径:
$system_path = '../xxx/mysystem';
$application_folder = '../xxx/myapplication';
3、url重写,把路径中的index.php去掉
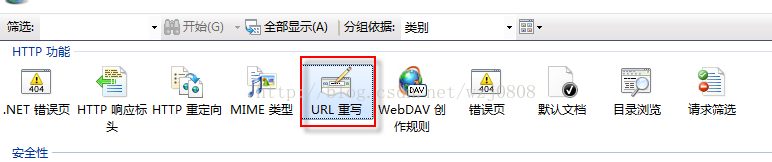
<1>下载iis的重写模块:https://www.microsoft.com/zh-cn/download/confirmation.aspx?id=5747
需要x86或者x64的模块可以在微软官网上搜索
<2>导入规则

<3>编写一个xx.htaccess文件把规则写进去,然后导入
RewriteRule ^(?!/index.php)(?!/themes)(?!/upload)(?!/static)(?!/application)(?!/st_plugins)(.*)$ /index.php/$1 [I]
<4>在index.php修改
$view_folder = '';将这个变量的值置为空
<5>上面的方法使用过程中发现问题,他并不能真正过滤掉不想添加index.php的路径,比如static里面存放的静态文件。
找了很多方法最终找到了一个:
在web.config里面配置,把下面这段代码粘贴到system.webserver里面:
        <rewrite>
			<rules>
			<rule name="OrgPage" stopProcessing="true">
			<match url="^(.*)$" />
			<conditions logicalGrouping="MatchAll">
			<add input="{HTTP_HOST}" pattern="^(.*)$" />
			<add input="{REQUEST_FILENAME}" matchType="IsFile" negate="true" />
			<add input="{REQUEST_FILENAME}" matchType="IsDirectory" negate="true" />
			</conditions>
			<action type="Rewrite" url="index.php/{R:1}" />
			</rule>
			</rules>
		</rewrite>
发现他会自动在rewrite模块里添加规则,这个规则竟然非常好用,静态文件直接过滤。
4、修改路由,把不想要的路径隐藏
比如,如果我们所有的页面都放在pages/view里面,那么我们也可以不显示这两个字段,在application/config/routes.php修改:
$route['default_controller'] = 'pages/view';
$route['(:any)'] = 'pages/view/$1';
5、修改数据库配置
CI的数据库配置文件在application/config/database.php,做如下修改:
$db['default'] = array(
	'dsn'	=> '',
	'hostname' => '127.0.0.1',//必填主机名,注意,这个填写为localhost网上有人说会慢100倍,没有考证过。
	'username' => 'root',//账户名
	'password' => '123456',//密码
	'database' => 'testphp',//数据库名
	'dbdriver' => 'mysqli',
	'dbprefix' => '',
	'pconnect' => FALSE,
	'db_debug' => (ENVIRONMENT !== 'production'),
	'cache_on' => FALSE,
	'cachedir' => '',
	'char_set' => 'utf8',
	'dbcollat' => 'utf8_general_ci',
	'swap_pre' => '',
	'encrypt' => FALSE,
	'compress' => FALSE,
	'stricton' => FALSE,
	'failover' => array(),
	'save_queries' => TRUE
);
6、设置url
<1>设置base_url
在application/config/config.php设置:
$config['base_url'] = 'http://yourdomain.com';
$config['index_page'] = '';
注意这个url必须带http的,否则不能识别。
注意:
由于服务器跟测试环境用的域名可能不一样,那么这个一直改来改去就很麻烦了,我们可以让他自动获取:
$config['base_url'] = 'https://'.$_SERVER['SERVER_NAME'];
注意:后面由于使用php-cli访问页面,出现$_SERVER['SERVER_NAME']未定义的报错,所以改回了直接hardcode。
<2>在页面中使用base_url还是site_url?
比如这样拼一个url:
site_url('news/home');=>http://domain.com/index.php/news/home
base_url('news/home');=>http://domain.com/news/home
可以看到,base_url不会加上index.php,而site_url则会自己加上index.php
对于我们已经做过url rewrite的网站来说,要使用base_url以避免出现index.php。
<3>获取url
uri_string(),获取到域名后面那部分;
current_url(),获取全部url,不是真实的url,包括config里面的base_url+uri_string;
注意,这两个都不会把参数带进来,我们可以利用这点,取到当前的url以后,redirect一下,可以去掉所有参数。
<4>跳转url
redirect($url):如果$url是域名后面的uri,则在本站内跳转;如果是全地址,则可以跳到站外。
7、routes
$route['news'] = 'news';
//http://yourdomain/news 访问到controller类news的index函数
$route['news/(:any)'] = 'news/view/$1';
//这个(:any)对应的是$1
//(:any)可以是一个参数,也可以是n个参数,可以是数字,也可以是字母
//比如http://yourdomain/news/t1/t2对应news类的view函数的第一个参数和第二个参数
$route['news/(:num)'] = 'news/view/$1';
//只允许传入数字
简洁明了的路由器设计:
$route['url_1/url_2/test/(:any)'] = 'url_1/url_2/test/index/$1';
每个路径真实的对应一个同名controller,再对应一个真实的同名view。
controller里面只有index方法,而不要用其他的方法。
index可以传参数进去。
以上说的都对,但是这种一一对应的关系是不需要设置路由的,这个是默认路由的,当然前提是没有被设置的路由规则截取了。
默认路由就是一一对应的,比如说:
/test_routes Test_routes.php=>index()
/test_routes/test2 Test_routes.php=>test2()
这些都是默认的,我们不需要设置,并且使用这种一一对应的关系会让我们的逻辑更清晰,不会找东西的时候一头雾水。
因此就使用默认的路由,不要用到routes设置就好了。
注意:
<1>首页使用default_controller
还要注意一点,由于首页是没有路由的,只要访问域名就可以显示了,那么就有一个默认路由,在routes.php里要保留这个:
$route['default_controller'] = 'home';
然后在controller里创建一个Home.php:
<?php

/**
 * Created by PhpStorm.
 * Date: 2017/2/22
 * Time: 14:45
 */
class Home extends CI_Controller
{
    public function __construct()
    {
        parent::__construct();
    }

    public function index()
    {
        $this->load->view('home');
    }

}
这里假设我们已经创建了home的页面,这index里面指向就可以了。
那么我们就可以通过http://yourdomain.com/或者http://yourdomain.com/home访问首页了。
<2>项目首页也要设路由
项目通常在某文件夹下面,比如a/b/page1.php,a/b/page2.php等多个页面。
我们通常访问a/b/这个路径,需要看到项目home页面,那么我们能做一个名字为b.php的页面放在跟b文件夹同路径下面吗?
答案是不可以,有了b.php他就不会去找文件夹下面的东西了。
所以我们要在b文件夹下面做一个home.php,然后通过路由定位,让a/b/指向home.php,
比如:
$route['a/b'] = 'a/b/home';
就可以了
8、存放静态文件
在url rewrite里面我们看到,static文件夹是不会被自动添加index.php路径的,因此我们可以把静态文件添加到static文件夹里。
在index.php同目录下,创建static文件夹,然后再创建js文件夹,把jquery的文件放到里面。
在php页面这样引用就可以了:
src="static/js/jquery-3.1.1.min.js"
他会请求到:http://yourdomain.com/static/js/jquery-3.1.1.min.js
9、调用自定义类
<1>libraries方式
自定义类放在libraries文件夹里,这样定义自定义类:
<?php
	defined('BASEPATH') OR exit('No direct script access allowed');
	/**
	*
	*/
	class Testzphp
	{
		public function __construct($parsms)
		{
			// 如果类不需要带参数,这个构造函数可以省略
		}
		// 这个参数可以直接传递进来
		public function test($param)
		{
			return "hello TestZphp!".$param;
		}
	}
?>
注意点:
1、类名必须和文件名一致;
2、首字母必须大写;
3、默认是不能调用$this的,如果需要调用$this需要这样处理:
    class Test_lib
    {
        protected $CI;

        public function __construct()
        {
            $this->CI =& get_instance();//将根实例赋给CI,注意这个是'=&',千万不要搞错了!!!
        }
        public function somefunc()
        {
            $this->CI->load->model('redis_model');//用$this->CI取代原来的$this
        }
    }
在controller调用
			$this->load->library('zphp/Testzphp');
			$data['zphp'] = $this->testzphp->test(235);
几个 注意点:
1、libraries里面可以放文件夹,调用就是'文件夹名/类名';
2、load进来之后调用的时候不需要那个文件夹名;
3、类名首字母必须改为小写。
类带参数
	$params = array('type' => 'large', 'color' => 'red');
	$this->load->library('zphp/Testzphp', $params);
再次注意:
load的时候按原类名,load进来之后生成的实例名全部是小写:
        $this->load->library('CommonOrderCreater');
        $this->commonordercreater->setPlatform('jd');
        echo $this->commonordercreater->getPlatform();
原生的php可以用new的方式实例化一个类(直接实例化),但是CI的自定义类放在libiary,不能直接new,一种是用上面load的方法;另一种是在自定义类里面添加方法如下:
    public static function getInstance()
    {
        return new WeidianApiRequest();
    }
*测试表明,在cli模式下,这种方式获取对象也是不行的。
可以通过静态的方式获取到实例。
注意这两种方式的区别:如果是用load的方式,这个类是一个单例,你甚至可以在autoload里面进行加载(如果带参则不可以),这样你可以直接$this->xxx来使用这个实例。
这种load的方式问题也在于单例,如果我们需要多个实例来保持不同的状态,这就不适用了;如果我们在一时间只需要一个实例,那么我们也要注意每次使用的时候要初始化,把原来的数据清理干净!
关于这部分有更详细的整理见此文:https://blog.csdn.net/wzj0808/article/details/82891235
<2>include方式
另一种调用方式。
<3>调用third_party方式
在third_party下面创建文件夹libraries;
在libraries下创建MyTest类:
<?php

/**
 * Created by PhpStorm.
 * Date: 2017/6/24
 * Time: 19:50
 */
class MyTest
{
    function getValue()
    {
        return 'hello';
    }
}
在controller里调用:
        $this->load->add_package_path(APPPATH.'third_party/');
        $this->load->library('MyTest','','myTest');
        $val = $this->myTest->getValue();
10、使用helper
helper是类似于自定义类的一种方式,但是他没有定义类,只有方法。
<1>创建helper
在application/helpers下创建一个php文件,文件名取为mytest_helper.php,文件名必须以_helper结尾。
<?php
/**
 * Created by PhpStorm.
 * Date: 2017/2/8
 * Time: 21:08
 * @param $data
 * @return string
 */
function test_helper($data)
{
    return 'the data is'.$data;
}
?>
<2>在controller里这样调用:
            $this->load->helper('mytest');
            echo test_helper('hello');
<3>创建子文件夹
helper同样可以在子文件夹里创建,只需要调用的时候用"文件夹名/类名"调用就可以了。
在helpers/hep下创建:
<?php defined('BASEPATH') OR exit('No direct script access allowed');
/**
 * Created by PhpStorm.
 * Date: 2017/2/9
 * Time: 10:09
 * @param $data
 * @return string
 */
function testhep($data)
{
    return 'the helper under hep data is '.$data;
}
在controller里调用:
            $this->load->helper('hel/myhep');
            echo testhep('world');
11、controller的继承
通常需要有一个base页面来处理登录鉴权等基础事务,每个页面单独处理显然是不合适的。因此我们需要用到controller继承。
在application/core下面创建MY_Controller.php文件:
<?php

/**
 * Created by PhpStorm.
 * User:
 * Date: 2017/2/15
 * Time: 14:29
 */
class MY_Controller extends CI_Controller
{
    public function __construct()
    {
        parent::__construct();

        $this->load->library('session');
        if (!isset($_SESSION['views']))
            exit("登录已超时,请重新登录!");
    }
}
?>
注意,这个MY_Controller不需要写index函数,当然也可以写,也可以添加其他函数供子类调用。意思是说,一个子类controller必定需要index或者其他函数(路由访问),但是这个是个例外,不需要。
在controllers里添加一个测试类Testcontroller::
<?php
/**
 * Created by PhpStorm.
 * User:
 * Date: 2017/2/15
 * Time: 14:31
 */
class Testcontroller extends MY_Controller
{
    public function __construct()
    {
        parent::__construct();
    }
    public function index()
    {
        //echo "world!";
        //$this->load->library('session');
        //$this->session->views = "hello_new_session";
        echo $_SESSION['views'];
    }

}
?>
注意:
<1>MY_Controller只能有一个,怎么适应不同页面的需要?
可以通过在MY_Controller定义一个属性,然后通过子类给这个属性设定值,父类根据这个设定的值判断要做什么处理,比如,
在MY_Controller里:
<?php

/**
 * Created by PhpStorm.
 * Date: 2017/2/15
 * Time: 14:29
 */
class MY_Controller extends CI_Controller
{
    protected $type = '';
    public function __construct()
    {
        parent::__construct();
        switch ($this->type)
        {
            case 'type1':
                echo 'type1';
                break;
            default:
                echo 'default';
                break;
        }
        $this->load->library('session');
        if (!isset($_SESSION['views']))
            exit("登录已超时,请重新登录!");
    }
}
?>
在子类赋值:
    public function __construct()
    {
        $this->type='type1';
        parent::__construct();
    }
这样父类就可以根据这个不同的值,来做不同的处理。
12、参考资料
PHP项目中CodeIgniter使用的一些建议
https://segmentfault.com/a/1190000004551793
13、使用curl
这个curl本来是php的,不属于CI的,写在这里方便查阅。
首先,在php.ini要设置extension=php_curl.dll为开启,然后重启服务器。
在代码里面这样用:
        /**
         * https请求,支持Get和Post
         * @param $url
         * @param null $data
         * @return mixed
         */
        public function https_request($url,$data = null)
        {
            $curl = curl_init();
            curl_setopt($curl,CURLOPT_URL,$url);
            curl_setopt($curl,CURLOPT_SSL_VERIFYPEER,FALSE);
            curl_setopt($curl,CURLOPT_SSL_VERIFYHOST,FALSE);
            if (!empty($data))
            {
                curl_setopt($curl,CURLOPT_POST,1);
                curl_setopt($curl,CURLOPT_POSTFIELDS,$data);
            }
            curl_setopt($curl,CURLOPT_RETURNTRANSFER,1);
            $output = curl_exec($curl);
            curl_close($curl);
            return $output;
        }
下面这个是更完善的写法
        public static function https_request($url,$data = null,$header = null)
        {
            $curl = curl_init();
            curl_setopt($curl,CURLOPT_URL,$url);
            curl_setopt($curl,CURLOPT_SSL_VERIFYPEER,FALSE);
            curl_setopt($curl,CURLOPT_SSL_VERIFYHOST,FALSE);
            // 携带数据方式1:data
            if (!empty($data))
            {
                curl_setopt($curl,CURLOPT_POST,1);
                curl_setopt($curl,CURLOPT_POSTFIELDS,$data);
            }
            // 携带数据方式2:header
            // 如果有header
            if (!empty($header))
            {
                curl_setopt($curl, CURLOPT_FOLLOWLOCATION, true);
                curl_setopt($curl, CURLOPT_FAILONERROR, false);

                curl_setopt($curl, CURLOPT_HEADER, false);
                curl_setopt($curl, CURLOPT_HTTPHEADER, $header);
            }
            // 注意超时的设置:此设置非常重要;
            // 通过本机断开wifi来测试timeout是否必要,是不正确的测试方式;
            // 如果没有设置timeout,当连接已经建立但是远程主机没有恰当返回的时候,会一直卡在那里
            // 设置了timeout这种情况则不会发生
            curl_setopt($curl,CURLOPT_TIMEOUT,10);// 设置超时秒数,注意这个参数是秒
            curl_setopt($curl,CURLOPT_RETURNTRANSFER,1);
            $output = curl_exec($curl);
            curl_close($curl);
            return $output;
        }
14、调用静态函数
比如静态函数,在libraries里面:
<?php
    defined('BASEPATH') OR exit('No direct script access allowed');
    /**
     * Created by PhpStorm.
     * Date: 2017/2/16
     * Time: 15:48
     */
    class CurlRequest
    {
        /**
         * https请求,支持Get和Post
         * @param $url
         * @param null $data
         * @return mixed
         */
        public static function https_request($url,$data = null)
        {
            $curl = curl_init();
            curl_setopt($curl,CURLOPT_URL,$url);
            curl_setopt($curl,CURLOPT_SSL_VERIFYPEER,FALSE);
            curl_setopt($curl,CURLOPT_SSL_VERIFYHOST,FALSE);
            if (!empty($data))
            {
                curl_setopt($curl,CURLOPT_POST,1);
                curl_setopt($curl,CURLOPT_POSTFIELDS,$data);
            }
            curl_setopt($curl,CURLOPT_RETURNTRANSFER,1);
            $output = curl_exec($curl);
            curl_close($curl);
            return $output;
        }
    }
?>
在controller里面使用:
如果是普通函数:
            $this->load->library('CurlRequest');
            $res = $this->curlrequest->https_request($url);
但是静态函数这样用:
            $this->load->library('CurlRequest');
            $str = CurlRequest::https_request($url);
15、自定义配置文件
在application/config里面添加my_config.php,在文件里面添加自定义的参数:
$config['hello'] = 'world';
在controller里这样用:
            //测试自定义config
            $this->config->load('my_config');
            echo $this->config->item('hello');
16、autoload
使用autoload才能避免每次使用都要用$this->load->...来加载资源,而且他是全局 应用的。
使用方法:
在application/config/autoload.php里面找到对应的数组添加进去,比如说:
$autoload['libraries'] = array('类名1,不需要带.php','类名2,不需要带.php');
$autoload['helper'] = array();
$autoload['config'] = array();
$autoload['model'] = array();
找到对应的类目,将类名填到括号里,多个就用逗号隔开。
注意:这个autoload跟我们普通的$this->load效果是一样,也就是说$this->load也是全局的,只加载一次,再次load其实不执行。
但是我们不知道是否已经load过了,只好每次load一下。autoload不存在这个问题。
再次注意:model里面全部用小写!全部用小写!全部用小写!
17、json_decode
            $str = '{"result":{"access_token":"xx","expire_in":90000,"refresh_token":"yyy","openid":"hhh","shop_name":"jjj","scope":3,"shop_logo":"uuu"},"status":{"status_code":0,"status_reason":"success"}}';
            $obj = json_decode($str);
            if ($obj->{'status'}->{'status_code'}==0)
            {
                echo '授权成功';
            }else
            {
                echo '授权失败';
            }
使用方法,通过->一级级往下走就行了。
如果字符串里面有gb2312编码,则decode会失败,他只接收utf8编码,因此,要做如此转换:
$newStr = iconv("GB2312","UTF-8//IGNORE",$str);
18、json_encode
这是php的一个工具函数,把值对转为json串,
规则:json_encode里面的参数必须是一个array,这个array里面如果是值对,那么转为一个object,如果是并列排放的一些object,则转为一个数组
例如:
        $arr1 = array('id'=>1,'name'=>'Item 1','price'=>'$100');
        json_encode($arr1);//{'id':1,'name':'Item 1','price':'$100'}
        $arr2 = array('id'=>2,'name'=>'Item 2','price'=>'$200');
        json_encode($arr2);//{'id':2,'name':'Item 2','price':'$200'}
        echo json_encode(array(array('id'=>1,'name'=>'Item 1','price'=>'$100'),array('id'=>2,'name'=>'Item 2','price'=>'$200')));
        //[{'id':1,'name':'Item 1','price':'$100'},{'id':2,'name':'Item 2','price':'$200'}]
19、实例化
ci的这种load的方法,其实是单例模式,一旦load了一个类,就不会再次实例化,那么如果我们每次使用都想创建一个新的实例应该怎么做?
在类里面写一个静态函数:
public static function getInstance()
{
	return new MyClass();
}
调用的时候这样:
MyClass::getInstance ()->my_func();
每次调用都会生成一个新的实例。
20、ajax请求
1、页面设计
codeigniter的ajax请求非常简单,没有其他语言那种弯弯绕绕的感觉,比如什么?method=xx,CI呢就是跟平常页面访问一样的,但是页面访问会返回view,ajax请求则直接返回数据就可以了。因为controller每个方法都对应着一个uri,所以也不用method=xx这种写法,而是直接请求这个uri就可以了,也就是restful风格的请求。
但是程序还是可以知道这个访问是ajax请求还是http请求,我们可以这样判断:
$this->input->is_ajax_request()
有些东西的处理是不一样的,比如说,如果是http请求,当没有登录的时候我们会让他跳到登录页面;如果是ajax我们就不能这样处理了,这样会返回空,我们应该返回提示他没有登录的错误信息。
我们可以在controller的基类判断是否为ajax请求,然后做不同的处理,比如:
在MY_Controller里:
    public function __construct()
    {
        parent::__construct();
        switch ($this->type)
        {
            case 'xxx':
                // do sth.
                if ($this->input->is_ajax_request())
                    $this->xxx_ajax();
                else
                    $this->xxx();
                break;
            default:
                exit('未设置controller-type!');
        }
    }
这样就两种请求分流到两个func里了,对于ajax我们要做的是,判断他有没有登录,有登录则不用做任何处理,基类执行完毕会自动跑到子类执行他应该做的;
如果没有登录则用exit('')返回错误信息并退出。
2、处理post数据
(1)两种post方式?
这是以前所不知道的,post数据竟然有两种方式?真的有
一种叫做form data,是值对类型的,比如$.post()这种post方法默认就是用这种方式
一种叫做request payload,这种就是post一个json,所有的数据都在一个json里面,比如bootstrap-table就是用这种方式post
如果用jquery的request payload应该这样做:
$.ajax({
        type:"POST",
        url:"xxx/xxx/",
        dataType:"json",
        data:{"email":email,"password":password},
        success:function(){
                alert('Success');
                return true;
        },
        error:function(){
                alert('Failed');
                return false;
        }
});
可以看到这里的data不是用那种值对的方式了,而是整个就是一个json。
(2)如何获取?
第一种很简单,就是:
$this->input->post('data');第二种就不一样了:
        $request_body = file_get_contents('php://input');
        $data = json_decode($request_body);
        $val = $data->{'abc'};//取值
21、数据库的安全性
CI在数据库防止注入方面不遗余力。
所有的数据库封装函数都做了安全性过滤,比如以下:
$this->db->delete	//删除
$this->db->update	//更新
$this->db->insert	//插入
$this->db->get_where	//查询
等等,使用这些函数都会自动做安全性过滤。
包括,查询绑定:
$sql = "SELECT * FROM some_table WHERE id = ? AND status = ? AND author = ?";
$this->db->query($sql, array(3, 'live', 'Rick'));

$sql = "SELECT * FROM some_table WHERE id IN ? AND status = ? AND author = ?";
$this->db->query($sql, array(array(3, 6), 'live', 'Rick'));
都是安全的。
唯一可能发生危险,没有做安全检查的是:
直接使用query,并且没有做任何绑定,直接在里面拼语句,把参数连接进去。
22、数据库查询的返回对象
$query->num_rows();//返回行数
$query->num_fields();//返回字段数

$arrObj = $query->result();//对象数组
foreach($arrObj as $row)
{
	echo $row->title;
	echo $row->name;
}

$arrDict = $query->result_array();//关联数组集(存放关联数组的数组)
foreach($arrDict as $row)
{
	echo $row['title'];
	echo $row['name'];
}
count($arrDict);//获取行数,在返回json的时候可以通过这个方法设定total的值

$rowObj = $query->row();//当前请求的第一行数据作为object返回(对象数组的第一行)
echo $rowObj->title;
echo $rowObj->name;


$rowDict = $query->row_array();//关联数组的第一行
echo $rowDict['title'];
echo $rowDict['name'];


$rowObj = $query->row(4);//返回第四行,不存在则返回第0行
$rowObj = $query->first_row();
$rowObj = $query->last_row();
$rowObj = $query->next_row();
$rowObj = $query->previous_row();
23、添加动态数据
添加动态数据就是给view传入数据,根据这些数据的有无及特点进行不同的展示
注意:当你使用对象时,对象中的变量会转换为数组元素。
<?php
class Blog extends CI_Controller {
public function index()
{
$data['title'] = "My Real Title";
$data['heading'] = "My Real Heading";
$this->load->view('blogview', $data);
}
}
<html>
<head>
<title><?php echo $title;?></title>
</head>
<body>
<h1><?php echo $heading;?></h1>
</body>
</html>


 2257
2257


 被折叠的 条评论
为什么被折叠?
被折叠的 条评论
为什么被折叠?
 到【灌水乐园】发言


