


Main layout (main.xml):
<?xml version="1.0" encoding="utf-8"?>
<LinearLayout
    xmlns:android="http://schemas.android.com/apk/res/android"
    android:id="@+id/vertical_container"
    android:orientation="vertical"
    android:layout_width="fill_parent"
    android:layout_height="fill_parent">
</LinearLayout>
test_view.xml
<?xml version="1.0" encoding="utf-8"?>
<TextView
    xmlns:android="http://schemas.android.com/apk/res/android"
    android:layout_width="25dip"
    android:layout_height="25dip"
    android:background="#ff0000" android:text="smallred" />
Inflater参数的区别
public class InflaterTest extends Activity {
     private View view;
    @Override
    public void onCreate(Bundle savedInstanceState) {
        super.onCreate(savedInstanceState);
        setContentView(R.layout.main);
        ViewGroup parent = (ViewGroup) findViewById(R.id.vertical_container);

        // result: layout_height=wrap_content layout_width=match_parent
        view = LayoutInflater.from(getBaseContext()).inflate(R.layout.test_view, null);
        parent.addView(view);

        // result: layout_height=100 layout_width=100
        view = LayoutInflater.from(getBaseContext()).inflate(R.layout.test_view, null);
        parent.addView(view, 100, 100);

        // result: layout_height=25dip layout_width=25dip
        // view=textView due to attachRoot=false
        view = LayoutInflater.from(getBaseContext()).inflate(R.layout.test_view, parent, false);
        parent.addView(view);

        // result: layout_height=25dip layout_width=25dip
        // parent.addView not necessary as this is already done by attachRoot=true
        // view=root due to parent supplied as hierarchy root and attachRoot=true
        view = LayoutInflater.from(getBaseContext()).inflate(R.layout.test_view, parent, true);
        //inflater(resId,parent,true)报错了
    }
}
从上面的分析已经可以看出:
Inflate(resId , null ) 只创建temp ,返回temp
Inflate(resId , parent, false )创建temp,然后执行temp.setLayoutParams(params);返回temp
Inflate(resId , parent, true ) 创建temp,然后执行root.addView(temp, params);最后返回root
由上面已经能够解释:
Inflate(resId , null )不能正确处理宽和高是因为:layout_width,layout_height是相对了父级设置的,必须与父级的LayoutParams一致。而此temp的getLayoutParams为null
Inflate(resId , parent,false ) 可以正确处理,因为temp.setLayoutParams(params);这个params正是root.generateLayoutParams(attrs);得到的。
Inflate(resId , parent,true )不仅能够正确的处理,而且已经把resId这个view加入到了parent,并且返回的是parent,和以上两者返回值有绝对的区别
进一步的解析
主布局文件:
<Button xmlns:android="http://schemas.android.com/apk/res/android"
    xmlns:tools="http://schemas.android.com/tools"
    android:id="@+id/id_btn"
    android:layout_width="120dp"
    android:layout_height="120dp"
    android:text="Button" >
</Button>
主Activity:
package com.example.zhy_layoutinflater;

import android.app.ListActivity;
import android.os.Bundle;
import android.util.Log;
import android.view.LayoutInflater;
import android.view.View;
import android.view.ViewGroup;

public class MainActivity extends ListActivity
{


    private LayoutInflater mInflater;

    @Override
    protected void onCreate(Bundle savedInstanceState)
    {
        super.onCreate(savedInstanceState);

        mInflater = LayoutInflater.from(this);

        View view1 = mInflater.inflate(R.layout.activity_main, null);
        View view2 = mInflater.inflate(R.layout.activity_main,
                (ViewGroup)findViewById(android.R.id.content), false);
        View view3 = mInflater.inflate(R.layout.activity_main,
                (ViewGroup)findViewById(android.R.id.content), true);

        Log.e("TAG", "view1 = " + view1  +" , view1.layoutParams = " + view1.getLayoutParams());
        Log.e("TAG", "view2 = " + view2  +" , view2.layoutParams = " + view2.getLayoutParams());
        Log.e("TAG", "view3 = " + view3  );

    }

}
可以看到我们的主Activity并没有执行setContentView,仅仅执行了LayoutInflater的3个方法。
注:parent我们用的是Activity的内容区域:即android.R.id.content,是一个FrameLayout,我们在setContentView(resId)时,其实系统会自动为了包上一层FrameLayout(id=content)。
按照我们上面的说法:
view1的layoutParams 应该为null
view2的layoutParams 应该不为null,且为FrameLayout.LayoutParams
view3为FrameLayout,且将这个button添加到Activity的内容区域了(因为R.id.content代表Actvity内容区域)
下面看一下输出结果,和Activity的展示:
07-27 14:17:36.703: E/TAG(2911): view1 = android.widget.Button@429d1660 , view1.layoutParams = null
07-27 14:17:36.703: E/TAG(2911): view2 = android.widget.Button@42a0e120 , view2.layoutParams = android.widget.FrameLayout$LayoutParams@42a0e9a0
07-27 14:17:36.703: E/TAG(2911): view3 = android.widget.FrameLayout@42a0a240
效果图:
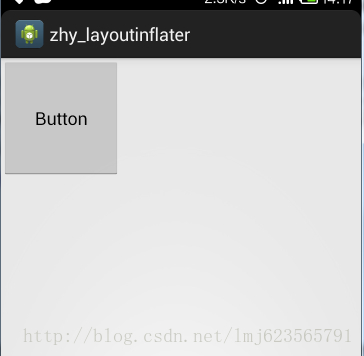
可见,虽然我们没有执行setContentView,但是依然可以看到绘制的控件,是因为
View view3 = mInflater.inflate(R.layout.activity_main,(ViewGroup)findViewById(android.R.id.content), true);
这个方法内部已经执行了root.addView(temp , params); 上面已经解析过了。
也可以看出:和我们的推测完全一致,到此已经完全说明了inflate3个重载的方法的区别。相信大家以后在使用时也能选择出最好的方式。


 500
500


 被折叠的 条评论
为什么被折叠?
被折叠的 条评论
为什么被折叠?
 到【灌水乐园】发言


