qwt安装调试linux

http://chen84769797.blog.163.com/blog/static/111620934201321101753721/


安装

=======
Qwt使用qmake编译所有的组件和示例。
qmake是Qt发布中的一部分。


qmake读取工程文件,工程文件包含了如何工程选项和如何编译特定工程的规则。一个工程文件是以"*.pro"结尾的。
以"*.pri"结尾的文件都是被工程文件包含的,该文件包含了几个工程文件通用的定义。


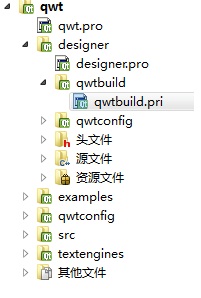
qwtconfig.pri和qwtbuild.pri被Qwt包中的所有工程读取。q当你编译自己的应用程序时,qwtconfig.pri同样被qwt.prf读取。
因此第一步就是编辑*.pri文件使其满足你的需求。


qmake的子目录template是解决在路径名中使用空格的情况。因此最好不要在包含空格的路径名下编译Qwt。(否则你可能就需要
在所有的子目录下手动的运行qmake)。


======

文档

======
Qwt包含了一个类文档,提供了该文档的多种格式:
-Html文档
-PDF文档
-Qt压缩帮助文档(*.qch),针对Qt assistant或者creator。
 你可以通过 "Edit Preferences" -> "Documentation" -> "Add..."加载该文档。
-Man帮助文档(仅UNIX)


======

编译Qwt

======
最简单的编译Qwt的方式就是在命令行中--但是如果你坚持使用IDE,那么就请别忘记"make install"这一步。
A)Unix
------
qmake
make
make install
如果你已经安装了一个共享库,并且该路径已经被你的操作系的的运行时连接器知道。在Linux系统上读取"man ldconfig"
(或者是通过谷歌搜索它)。另一个选择就是使用LD_LIBRARY_PATH(在一些系统上,使用LIBPATH代替,
在MacOSX是DYLD_LIBRARY_PATH)环境变量。
如果你仅仅是想获取Qwt的示例而不想安装任何东西,那么你可以设置LD_LIBRARY_PATH为你本地编译的库路径。


如果你没有在qwtconfig.pri中使能自动编译示例程序,那么你必须如下编译示例程序:
cd examples
qmake
make


B)Win32/MSVC
------
确保你的Qt版本是使用MSVC编译的--而不是MinGW!
请阅读qmake的文档获知如何将你的*.pro文件转换为适合你的开发环境。
例如:使用MSVC的nmake:
qmake qwt.pro
nmake
nmake install


如果你没有在qwtconfig.pri中使能自动编译示例程序,那么你必须如下编译示例程序:
cd examples
qmake examples.pro
nmake


Windows不会混合调试模式和发布模式的二进制程序。绝大多是使用Qwt设计师插件的问题都是因为试图在发行版本的设计师
程序中加载调试版本的Qwt库。


不可能将使用MinGW编译的设计师插件导入由MSVC编译的Qt Designer/Creator。当使用预先编译好的Qt Creator时,那是一个
常见的问题。


C)Win32/MinGW
------
确保你的Qt版本是使用MinGW编译的--而不是MSVC!
在安装了Qt的环境下启动一个Shell。(例如"Programs->Qt by Trolltech ...->Qt 4.x.x Command Prompt")。
确保你可以执行"make"或者是其它类似"mingw32-make"的命令。


qmake qwt.pro
make
make install


如果你没有在qwtconfig.pri中使能自动编译示例程序,那么你必须如下编译示例程序:
cd examples
qmake examples.pro
make


Windows不会混合调试模式和发布模式的二进制程序。绝大多是使用Qwt设计师插件的问题都是因为试图在发行版本的设计师
程序中加载调试版本的Qwt库。


不要忘记告诉qmake在哪里查找qwt.prf:
qmake -set QMAKEFEATURES ...


D)MacOSX
------
好吧,其实Mac是另一个Unix系统。因此请阅读A)中的安装步骤。
在最近发布的Qt4发行版本中,qmake默认的目标是生成XCode过程文件而不是makefiles。因此你可能需要如下操作:
qmake -spec macx-g++
...


E)Qt Embedded
------
我仅仅在Linux系统上的qvfb(Virtual Framebuffer Devivce)模拟器中测试了Qwt在Qt Embedded环境下运行。为模拟器编译Qwt
就如同为一般的Unix编译一样简单。


F)Symbian
------
我从未在该平台上测试过。


======

使用Qwt

======
使用qmake编译一个Qwt程序使用Qwt配置的特性,这些特性已经使用"make install"安装了。当qmake 可以找到它
(http://doc.qt.nokia.com/4.7/qmake-advanced-usage.html#adding-new-configuration-features)你可以仅仅在你自己的
工程文件中加入"CONFIG += qwt"。


如果你不使用qmake,你就必须在你编译器选项中设置Qwt的头文件路径,并且将Qwt的库路径添加到你连接器列表中。
当你在Windows上使用Qwt-DLLS时,不要忘记将QWT_DLL添加到你的编译器标志中。


当你使用Qwt设计师插件时,你需要配置你的Qt designer/creator使得它们可以找到这些插件。这可以通过设置QT_PLUGIN_PATH
或者是使用一个qt.conf文件(查看http://doc.qt.nokia.com/4.7/deployment-plugins.html)。除了插件外,Qwt的库文件本身也
需要被Designer/Creator知道(可以设置LD_LIBRARY_PATH, PATH ...)。

///

QWT的简介,见百度百科:
http://baike.baidu.com/view/2622589.htm?fr=ala0_1

QWT的主页:
http://qwt.sourceforge.net/index.html
下载源码就在这页的download的project page里,点进去就可以(http://sourceforge.net/projects/qwt/)

一、QWT 在windows下的编译:

前提是,已经安装了qt creator和qt windows的sdk,官网下载,直接安装。

首先,将qwt-5.2.1解压到C盘的根目录下.

解压到某个目录下之后,需要修改qwt根目录下的qwtconfig.pri文件中的如下代码:
win32 {
    INSTALLBASE    = C:/Qwt-5.2.1
}

并将
win32 {
        # On Windows you can’t mix release and debug libraries.
        # The designer is built in release mode. If you like to use it
        # you need a release version. For your own application development you
        # might need a debug version.
        # Enable debug_and_release + build_all if you want to build both.

        CONFIG          += debug     # release/debug/debug_and_release
        #CONFIG           += debug_and_release
        #CONFIG           += build_all
    }

修改成为

    win32 {
        # On Windows you can’t mix release and debug libraries.
        # The designer is built in release mode. If you like to use it
        # you need a release version. For your own application development you
        # might need a debug version.
        # Enable debug_and_release + build_all if you want to build both.

        #CONFIG            += debug     # release/debug/debug_and_release
        #CONFIG           += debug_and_release
        CONFIG           += build_all
    }
    else {
        CONFIG           += release     # release/debug
    }

打开Qt Command prompt ,cd到qwt-5.2.1中,运行

qmake qwt.pro
mingw32-make

这里,如果喜欢,可以不用Qt Command prompt , 直接在Qt creator中打开qwt.pro,然后编译,不用qmake和mingw32-make,等着就行了。

运行之后,在c:\qwt-5.2.1文件夹中会生成一个lib文件夹,里面有libqwt5.a和qwt5.dll两个文件;

将libqwt2.a复制到x:\xx\2010.02.1\qt\lib中;
将qwt5.dll复制到x:\xx\2010.02.1\qt\bin中;

然后到c:\qwt-5.2.1\designer\plugins\designer文件夹中,把两个文件复制到相应的x:\xx\2010.02.1\qt\plugins\designer文件夹中;

然后到c:\qwt-5.2.1\src中把所有的头文件(.h)复制到x:\xx\2010.02.1\qt\include\qwt文件夹中,这里的qwt文件夹是自己建的。

二、通过QT creator使用qwt插件:

打开Qt Creator ,打开一个要用qwt的工程,点projects模式(左边侧栏),点build Environment的details,在PATH中加上:x:\xx\2010.02.1\qt\include\qwt,就是上文提到的拷贝过去的文件。其实不加应该也可以。

在.pro文件中加上2句话:
LIBS += -L"E:/Qt/2010.02.1/qt/lib" -lqwt5(这里也有可能是-lqwtd5,这个是debug的意思,看你qt编译的结果)
INCLUDEPATH += E:/Qt/2010.02.1/qt/include/qwt

可以在程序中包含所需的头文件,如#include <qwt/qwt_curve_fitter.h>, 然后写你需要的程序了。

//

环境:
windows xp
qt creator2.3.1
qt  opensource 4.7.3  (MinGw)

首按照qwt的install说明,编译好QWT,然后会出现个lib文件夹,将QWT下的LIB目录中的 这四个dll文件复制到C:\Qt\2010.05\qt\bin目录中,将*.a文件复制到C:\Qt\2010.05\qt\lib中,

最后将designer目录下的plugins/designer中的所有文件复制到C:\Qt\2010.05\qt\plugins\designer下,在C:\Qt\2010.05\qt\include下新建文件夹QWT,将QWT下的src里的头文件复制至

该文件夹中,做完上面几个步骤,在QTDesigner中可以使用QWT了。


然后要用的时候,把pro文件加入

DEFINES    += QT_DLL QWT_DLL

CONFIG(debug,debug|release):LIBS += -L”D:/Qt/4.7.3/lib/” -lqwtd

          else:LIBS += -L”D:/Qt/4.7.3/lib/” -lqwt

INCLUDEPATH+= D:/Qt/4.7.3/include/qwt

目录自己改,就可以用了。

/

A) 简介

1、QWT是一个基于LGPL版权协议的开源项目, 可生成各种统计图。它为具有技术专业背景的程序提供GUI组件和一组实用类,其目标是以基于2D方式的窗体部件来显示数据, 数据源以数值,数组或一组浮点数等方式提供, 输出方式可以是Curves(曲线),Slider(滚动条),Dials(圆盘),Compasses(仪表盘)等等。该工具库基于Qt开发,所以也继承了Qt的跨平台特性。

2、QWT官方网址:http://qwt.sourceforge.net/

     QWT6.0.1官方下载地址:http://sourceforge.net/projects/qwt/

3、安装步骤如下:


注意:安装文件目录不许出现空格。详细请看QWT帮助文档 install


B) Win32/MSVC  VS2008+Qt4.7下的QWT安装方法

打开Qt命令窗口Qt4.7.4 command prompt,进入你的解压文件目录:

Cpp代码 复制代码  收藏代码Qwt安装 - chen - 迈进ARM的世界
  1. cd D:\qt\qwt   
  2. qmake qwt.pro   
  3. nmake   
  4. ---------------------   
  5.   
  6. cd designer   
  7. qmake designer.pro   
  8. nmake   
  9. ---------------------   
  10. cd ..   
  11. cd examples   
  12. qmake examples.pro   
  13. nmake  
cd D:\qt\qwt
qmake qwt.pro
nmake
---------------------

cd designer
qmake designer.pro
nmake
---------------------
cd ..
cd examples
qmake examples.pro
nmake


执行完上面的命令后,qwt组件就编译完成了(实际通过VS2008打开如上项目,可以自动编译,省手动敲命令了)。

1、将D:\Qt\Qwt\lib的qwtd.dll 、qwt.dll拷贝到C:\Qt\4.7.4\bin,将qwtd.lib、qwt.lib拷贝C:\Qt\4.7.4\lib(以qt安装在C:\Qt\4.7.4目录下为例)目录下。qwtd.dll是我们在Debug模式需要设置的lib文件

2、再将D:\Qt\Qwt\designer\plugins\designer目录下的qwt_designer_plugin.dll和qwt_designer_plugin.lib拷贝到C:\Qt\4.7.4\plugins\designer目录下。

3、再将D:\Qt\Qwt\include目录下的所有文件拷贝到C:\Qt\4.7.4\include目录下。这样就完成了Qwt的编译和配置工作了。

在Designer中绘制用户界面时,就可以看到界面左侧的ToolBox工具箱中增加了“Qwt”类型的控件。我们在设计用户界面时就可以像使用其它Qt控件一样使用Qwt组件了。程序中要增加库文件qwt.lib,在编译后会自动的把包含的头文件包含到程序中。


为了能顺利编译项目,我们必须在项目中引入头文件和lib文件。

在VS2008下打开项目,需要在项目属性中,加入头文件和lib文件。

    All Configurations模式下在C/C++ /General/Addtional Include Directories 中加入C:\Qt\4.7.4\include\qwt

    Debug配置模式下,在Linker/input/Additional Dependencies中加入 qwtd.lib

    Release模式下:在Linker/input/Additional Dependencies中加入 qwt.lib

这样可以顺利编译,并可以出界面。

在QtCreator下打开工程文件pro需要加

LIBS += -L”C:\Qt\4.7.4\lib” -lqwtd INCLUDEPATH += C:\Qt\4.7.4\include\qwt


/
.先装SVN(因为QWT是用SVN进行版本控制的,只能用SVN下载)
  1. #sudo apt-get install svn
2.下载QWT 源代码
  1. # svn co https://qwt.svn.sourceforge.net/svnroot/qwt/trunk/qwt
3.打开qtcreator
 open projects->找到解压后的qwt-6.0.1中的qwt.pro文件->open。

4.
Qwt安装 - chen - 迈进ARM的世界
修改
Qwt安装 - chen - 迈进ARM的世界

5.build->clean all->run qmake。clean all的作用是防止你以前编译失败的文件运行,该步主要生成了makefile文件。

6.rebuild qwt。

7.
1)将源码lib目录下的*.dll【qwt-6.0.1\lib】复制到QT SDK的bin目录下【2010.05\qt\bin】
2)将源码lib目录下的*.a【qwt-6.0.1\lib】复制到QT SDK的lib目录下【2010.05\qt\lib】
3)将编译后生成目录里的 libqwt_designer_plugin.a 和 qwt_designer_plugin.dll 【qwt-build-desktop\designer\plugins\designer】复制到QT SDK的designer目录下【2010.05\qt\plugins\designer】
4)在QT SDK的include目录里面新建个叫QWT的文件夹【2010.05\qt\include\QWT】,将源码src目录下所有文件复制进去这个文件夹 【qwt-6.0.1\src】

8.在qwt的工程文件中加入:
  1. LIBS += -L”c:/Qt/2010.05/qt/lib” -lqwt INCLUDEPATH += c:/Qt/2010.05/qt/include/qwt
9.重新打开qtcreator 就可以看见qdesigner里面就有了QWT的控件了。
Qwt安装 - chen - 迈进ARM的世界
在qt designer 左边 widget box 拖到最后 就有了 qwt 控件了
Qwt安装 - chen - 迈进ARM的世界

Qwt安装 - chen - 迈进ARM的世界

WIN7 里运行 效果如下图
Qwt安装 - chen - 迈进ARM的世界

在s3c2440 ARM-linux里运行效果如下图
Qwt安装 - chen - 迈进ARM的世界

linux下qwt安装
qwt的安装与使用

  安装好qt开发环境后,先去其主页下载qwt库源代码。

  以我下载的qwt-6.0.1.zip为例,解压得到qwt-6.0.1。

1.安装qwt-6.0.1

  执行下面的命令:

1 cd qwt-6.0.1
2 qmake
3 make
4 make install

   这样就完成qwt-6.0.1的安装了,安装的路径是/usr/local/qwt-6.0.1。

2.添加qwt库路径到链接器的路径当中

  使用了qwt库的程序会链接到libqwt.so库,而这个库安装路径并不在

系统环境变量内,所以要自己添加其路径。编辑~/.bashrc在最后一行加上:

export LD_LIBRARY_PATH=/usr/local/qwt-6.0.1/lib

3.编译示例程序

  由于上面的编译过程没有自动编译示例程序,需要我们手动编译

所有示例程序都放在qwt-6.0.1/examples/目录下,执行下面的命令:

1 cd examples
2 qmake 
3 make

编译后的所有可执行程序就放在qwt/examples/bin/目录下。

4.在自己的程序中使用qwt库

  只需要修改一下.pro文件即可,加上如下两句:

INCLUDEPATH += /usr/local/qwt-6.0.1/include
LIBS += -L"/usr/local/qwt-6.0.1/lib/" -lqwt

这样就可以在自己的程序中使用qwt提供的类了。


///

求教高手Qwt 交叉编译出错(已解决)

我把qwt移植到QT4.5中实现了,但是想移植到QtEmbeded-4.50-arm中,编译出错,我的初衷是想把基于qwt开发的QT界面,在2440开发板上显示,不知道哪位大侠做过,给点指导,这样大家才能更多的进步啊 先谢谢了!!出错信息:
make[1]: 正在进入目录 `/opt/qwt-5.2.1/designer'
compiling qwt_designer_plugin.cpp
qwt_designer_plugin.cpp:17:40: error: QDesignerFormEditorInterface: 没有该文件或目录
qwt_designer_plugin.cpp:18:40: error: QDesignerFormWindowInterface: 没有该文件或目录
qwt_designer_plugin.cpp:19:46: error: QDesignerFormWindowCursorInterface: 没有该文件或目录
qwt_designer_plugin.cpp:20:29: error: QExtensionManager: 没有该文件或目录
In file included from qwt_designer_plugin.cpp:23:
qwt_designer_plugin.h:23:42: error: QDesignerCustomWidgetInterface: 没有该文件或目录
qwt_designer_plugin.h:24:38: error: QDesignerTaskMenuExtension: 没有该文件或目录
qwt_designer_plugin.h:25:29: error: QExtensionFactory: 没有该文件或目录
qwt_designer_plugin.h:32: error: expected class-name before ‘{’ token
qwt_designer_plugin.h:49: error: ‘QDesignerFormEditorInterface’ has not been declared
qwt_designer_plugin.h:66: error: expected class-name before ‘{’ token
qwt_designer_plugin.h:73: error: ‘QDesignerCustomWidgetInterface’ was not declared in this scope
qwt_designer_plugin.h:73: error: template argument 1 is invalid
qwt_designer_plugin.h:76: error: ‘QDesignerCustomWidgetInterface’ was not declared in this scope
qwt_designer_plugin.h:76: error: template argument 1 is invalid
qwt_designer_plugin.h:210: error: expected class-name before ‘{’ token
qwt_designer_plugin.h:214: error: expected `)' before ‘*’ token
qwt_designer_plugin.h:210: warning: ‘class QwtDesignerPlugin::TaskMenuFactory’ has virtual functions but non-virtual destructor
qwt_designer_plugin.h:223: error: expected class-name before ‘{’ token
qwt_designer_plugin.cpp:102: error: variable or field ‘initialize’ declared void
qwt_designer_plugin.cpp:102: error: ‘int QwtDesignerPlugin::CustomWidgetInterface::initialize’ is not a static member of ‘class QwtDesignerPlugin::CustomWidgetInterface’
qwt_designer_plugin.cpp:102: error: ‘QDesignerFormEditorInterface’ was not declared in this scope
qwt_designer_plugin.cpp:102: error: ‘formEditor’ was not declared in this scope
qwt_designer_plugin.cpp:103: error: expected ‘,’ or ‘;’ before ‘{’ token
qwt_designer_plugin.cpp: In constructor ‘QwtDesignerPlugin::CustomWidgetCollectionInterface::CustomWidgetCollectionInterface(QObject*)’:
qwt_designer_plugin.cpp:413: error: request for member ‘append’ in ‘((QwtDesignerPlugin::CustomWidgetCollectionInterface*)this)->QwtDesignerPlugin::CustomWidgetCollectionInterface::d_plugins’, which is of non-class type ‘int’
qwt_designer_plugin.cpp:414: error: request for member ‘append’ in ‘((QwtDesignerPlugin::CustomWidgetCollectionInterface*)this)->QwtDesignerPlugin::CustomWidgetCollectionInterface::d_plugins’, which is of non-class type ‘int’
qwt_designer_plugin.cpp:418: error: request for member ‘append’ in ‘((QwtDesignerPlugin::CustomWidgetCollectionInterface*)this)->QwtDesignerPlugin::CustomWidgetCollectionInterface::d_plugins’, which is of non-class type ‘int’
qwt_designer_plugin.cpp:419: error: request for member ‘append’ in ‘((QwtDesignerPlugin::CustomWidgetCollectionInterface*)this)->QwtDesignerPlugin::CustomWidgetCollectionInterface::d_plugins’, which is of non-class type ‘int’
qwt_designer_plugin.cpp:420: error: request for member ‘append’ in ‘((QwtDesignerPlugin::CustomWidgetCollectionInterface*)this)->QwtDesignerPlugin::CustomWidgetCollectionInterface::d_plugins’, which is of non-class type ‘int’
qwt_designer_plugin.cpp:421: error: request for member ‘append’ in ‘((QwtDesignerPlugin::CustomWidgetCollectionInterface*)this)->QwtDesignerPlugin::CustomWidgetCollectionInterface::d_plugins’, which is of non-class type ‘int’
qwt_designer_plugin.cpp:422: error: request for member ‘append’ in ‘((QwtDesignerPlugin::CustomWidgetCollectionInterface*)this)->QwtDesignerPlugin::CustomWidgetCollectionInterface::d_plugins’, which is of non-class type ‘int’
qwt_designer_plugin.cpp:423: error: request for member ‘append’ in ‘((QwtDesignerPlugin::CustomWidgetCollectionInterface*)this)->QwtDesignerPlugin::CustomWidgetCollectionInterface::d_plugins’, which is of non-class type ‘int’
qwt_designer_plugin.cpp:424: error: request for member ‘append’ in ‘((QwtDesignerPlugin::CustomWidgetCollectionInterface*)this)->QwtDesignerPlugin::CustomWidgetCollectionInterface::d_plugins’, which is of non-class type ‘int’
qwt_designer_plugin.cpp:425: error: request for member ‘append’ in ‘((QwtDesignerPlugin::CustomWidgetCollectionInterface*)this)->QwtDesignerPlugin::CustomWidgetCollectionInterface::d_plugins’, which is of non-class type ‘int’
qwt_designer_plugin.cpp:428: error: request for member ‘append’ in ‘((QwtDesignerPlugin::CustomWidgetCollectionInterface*)this)->QwtDesignerPlugin::CustomWidgetCollectionInterface::d_plugins’, which is of non-class type ‘int’
qwt_designer_plugin.cpp: At global scope:
qwt_designer_plugin.cpp:431: error: ‘QDesignerCustomWidgetInterface’ was not declared in this scope
qwt_designer_plugin.cpp:431: error: template argument 1 is invalid
qwt_designer_plugin.cpp:437: error: expected `)' before ‘*’ token
qwt_designer_plugin.cpp: In member function ‘QObject* QwtDesignerPlugin::TaskMenuFactory::createExtension(QObject*, const QString&, QObject*) const’:
qwt_designer_plugin.cpp:445: error: ‘QDesignerTaskMenuExtension’ was not declared in this scope
qwt_designer_plugin.cpp:445: error: ‘Q_TYPEID’ was not declared in this scope
qwt_designer_plugin.cpp:457: error: ‘QExtensionFactory’ has not been declared
qwt_designer_plugin.cpp: In member function ‘void QwtDesignerPlugin::TaskMenuExtension::applyProperties(const QString&)’:
qwt_designer_plugin.cpp:509: error: ‘QDesignerFormWindowInterface’ was not declared in this scope
qwt_designer_plugin.cpp:509: error: ‘formWindow’ was not declared in this scope
qwt_designer_plugin.cpp:510: error: ‘QDesignerFormWindowInterface’ is not a class or namespace
make[1]: *** [obj/qwt_designer_plugin.o] 错误 1
make[1]:正在离开目录 `/opt/qwt-5.2.1/designer'
make: *** [sub-designer-make_default-ordered] 错误 2

guhao2010-06-26 09:11
问题已解决,交叉编译的时候在qwt的文件夹下,在qwtconfig.pri文件中注释掉#CONFIG     += QwtDesigner即可

  • 0
    点赞
  • 0
    收藏
    觉得还不错? 一键收藏
  • 0
    评论
评论
添加红包

请填写红包祝福语或标题

红包个数最小为10个

红包金额最低5元

当前余额3.43前往充值 >
需支付:10.00
成就一亿技术人!
领取后你会自动成为博主和红包主的粉丝 规则
hope_wisdom
发出的红包
实付
使用余额支付
点击重新获取
扫码支付
钱包余额 0

抵扣说明:

1.余额是钱包充值的虚拟货币,按照1:1的比例进行支付金额的抵扣。
2.余额无法直接购买下载,可以购买VIP、付费专栏及课程。

余额充值