


第四章 创建一个应用程序框架
每种编程语言或环境都会以一个通用的“ Hello, World!”来展示:你可以使用这种编程语言来创建程序,而不必知道细节。然而,典型的“ Hello, World!”应用出没有交互性(例如:仅仅在控制台输出字符),所以没什么实际用处。
本章展示一个简单的工程,但是使用了先进的 Push-Button技术和当前时间,向你展示一个简单的 Android Activity是如何工作的。
开始
编写 Android应用程序,你需要创建工程。如果你愿意,使用普通的 Java,你可以把程序写在一个单独的文件里,使用 javac来编译,用 java来运行,不需要其他任何的支持。 Android很复杂,但是为了便于管理, Google提供了创建工程的工具。如果你正在使用支持 Android的 IDE,比如安装了 Android插件的 Eclipse,你就可以在 IDE里面创建一个工程(例如,选择 File>New>Project,然后选择 Android>Android Projects)。
如果你使用的工具不支持 Android,你可以使用 activitycreator脚本,这个脚本就在你的 SDK安装目录的 tools目录下面。 Activitycreator仅需要你想要创建的 Activity的名字作为参数和一个 —out开关来确定新生成的工程文件位置。例如:
activitycreator --out /path/to/my/project/dir /
com . commonsware . android . Now
你会看到一些上一章描述的预先生成的文件。
本书中的示例,你可以在 CommonsWare Web site 下载工程的 zip 文件。这些文件已经准备好供你使用,你不需要在那些解压缩过的示例上运行 activitycreator 脚本。
The Activity
工程的 src/目录包含着标准的 Java风格的目录树,这个目录树是基于在创建工程时你选择的 Java包(例如, com.commonsware.android的目录树结构是 src/com/commonsware/android/ )。在目录的最里层,你可以看到预先生成的源文件 Now.java,这个源文件里面是你的第一个 Activity。
在你的编辑器里面打开 Now.java文件,代码如下:
package com . commonsware . android . skeleton ;
import android . app . Activity ;
import android . os . Bundle ;
import android . view . View ;
import android . widget . Button ;
import java . util . Date ;
public class Now extends Activity implements View . OnClickListener {
Button btn ;
@Override
public void onCreate ( Bundle icicle ) {
super . onCreate ( icicle );
btn = new Button ( this );
btn . setOnClickListener ( this );
updateTime ();
setContentView ( btn );
}
public void onClick ( View view ) {
updateTime ();
}
private void updateTime () {
btn . setText ( new Date (). toString ());
}
}
如果你直接从网站下载了源文件,你可以直接使用这个工程。
解剖 Activity
让我们一段一段的解释代码:
package com . commonsware . android . skeleton ;
import android . app . Activity ;
import android . os . Bundle ;
import android . view . View ;
import android . widget . Button ;
import java . util . Date ;
包的声明需要和你在创建工程时使用的一样。并且,和其他 Java工程一样,你需要 import你引用的类。大多数 Android类都在 android包里面。
请记住,不是每一个 Java SE类都可以在 Android程序里使用!请阅读 Android class reference确定哪个类可以使用。
public class Now extends Activity implements View . OnClickListener {
Button btn ;
Activity 是一个 public 类,继承了 android.Activity 基类。在本例中, Activity 有一个按钮( btn )。因为我们需要在 Activity 中捕捉所有按钮点击,所以我们实现了 OnClikListener 接口。
@Override
public void onCreate ( Bundle icicle ) {
super . onCreate ( icicle );
btn = new Button ( this );
btn . setOnClickListener ( this );
updateTime ();
setContentView ( btn );
}
onCreate 方法在 Activity 启动时候调用。在 onCreate 方法里,第一件应该做的事情就是调用父类的 onCreate 方法,这样,父类的初始化可以完成。
接下来,在我们的实现中,创建了一个按钮的实例( new Button(this) ),并告诉它传送所有的点击事件到 Activity 实例本身(通过 setOnClickListener() ),调用 updateTime() 方法(下面介绍),然后,设置 Activity 的内容视图为按钮本身(通过( setContentView ))。
我们将会在后面的章节讨论神奇的 bundle icicle 。暂时的,我们认为它是所以 Activity 创建时候需要传入的不透明的句柄。
public void onClick ( View view ) {
updateTime ();
}
在 Swing 中,一个 JButton 点击会产生一个 ActionEvent 事件,这个事件会传递给按钮配置好的 ActionListener 。在 Android 中,按钮的点击会引起按钮配置好的 OnClickListener 调用 onClick 事件。视图提供接听器( listener )触发点击(本例中是按钮)。这里我们所作的就是调用 updateTime ()方法:
private void updateTime () {
btn . setText ( new Date (). toString ());
}
当我们打开一个 Activity ( onCreate() )或者按钮被点击( onClick() ),我们就会通过调用 setText() 方法,把当前时间设置为按钮的标签。
创建和运行 Activity
为了创建 Activity ,你需要使用 IDE 内置的 Android 打包工具,或者在你工程的目录下运行 ant 。然后,就可以运行 Activity:
· 启动模拟器(例如,在你 Android SDK 安装目录下,运行 tools/emulator )
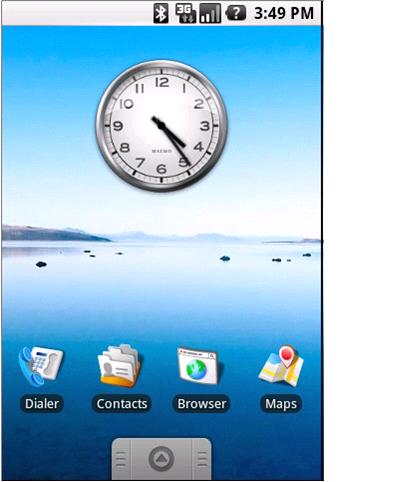
图 1. Android 主 屏幕
· 安装包(例如,从你的 Android SDK 目录,运行 tools/adb 安装 /path/to/this/example/bin/Now.apk )
· 在模拟器中找到你安装的应用程序
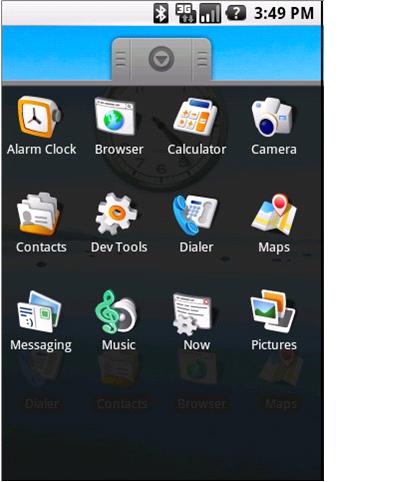
图 2. Android 应用程序“启动器”
· 打开应用程序
你会看到一个 Activity 屏幕类似于:
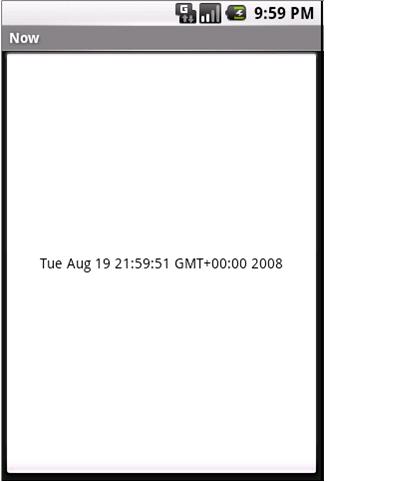
图 3. Now 演示 Activity
点击按钮 — 换句话说,点击屏幕的任何地方 — 可以更新按钮标签上的时间。
注意,标签现在居中,这是按钮的默认显示风格。我们可以控制显示格式,这将在后面章节介绍。
当你看完了令人敬畏的 Advanced Push-Button 技术之后,你可以点击模拟器的后退按钮返回应用程序启动器。


 1382
1382

 被折叠的 条评论
为什么被折叠?
被折叠的 条评论
为什么被折叠?
 到【灌水乐园】发言


