


一、为什么需要搭建APT源
原因如下:
1、在公司内网离线情况下,ubuntu无法通过apt原生源进行下载
2、有些源国内无法正常访问,需要翻墙
基于以上原因,需要自建APT源
二、准备条件
- 需要能够上网的电脑,最好能够登录github、google等外网电脑
- 需要一台ubuntu的机器,磁盘要足够大
三、APT环境搭建
3.1、安装apt-mirror软件
sudo apt-get install apt-mirror
3.2、修改mirror.list配置文件
sudo mkdir -p /var/www/html
sudo vi /etc/apt/mirror.list
我的配置文件如下:
############# config ##################
# 设置数据存储目录,路径必须提前存在
# set base_path    /var/spool/apt-mirror
set base_path /var/www/html

# 设置镜像存储位置
# set mirror_path  $base_path/mirror

# 设置临时下载索引位置
# set skel_path    $base_path/skel

# 设置日志,URLs和MD5校验信息存储位置
# set var_path     $base_path/var

# 配置删除过期源脚本位置(默认不删除,方便安装旧版本软件)
# set cleanscript $var_path/clean.sh

# 设置默认架构,i386/amd64,默认下载与本机相同的架构
# set defaultarch  <running host architecture>
set defaultarch amd64

# 设定下载后运行的脚本位置
# set postmirror_script $var_path/postmirror.sh

# 设置是否执行 下载后的脚本操作,默认是1(但是默认没有postmirror.sh脚本)
# set run_postmirror 0

# 设置下载线程数
set nthreads     20

# 是否替换URL中的波浪线,替换成%7E(HTML代码),否则会跳过不进行下载
set _tilde 0
#
############# end config ##############

# ubuntu的APT软件源
#deb https://mirrors.ustc.edu.cn/ubuntu/ bionic main restricted universe multiverse
#deb-src https://mirrors.ustc.edu.cn/ubuntu/ bionic main restricted universe multiverse
#deb https://mirrors.ustc.edu.cn/ubuntu/ bionic-updates main restricted universe multiverse
#deb-src https://mirrors.ustc.edu.cn/ubuntu/ bionic-updates main restricted universe multiverse
#deb https://mirrors.ustc.edu.cn/ubuntu/ bionic-backports main restricted universe multiverse
#deb-src https://mirrors.ustc.edu.cn/ubuntu/ bionic-backports main restricted universe multiverse
#deb https://mirrors.ustc.edu.cn/ubuntu/ bionic-security main restricted universe multiverse
#deb-src https://mirrors.ustc.edu.cn/ubuntu/ bionic-security main restricted universe multiverse
#deb https://mirrors.ustc.edu.cn/ubuntu/ bionic-proposed main restricted universe multiverse
#deb-src https://mirrors.ustc.edu.cn/ubuntu/ bionic-proposed main restricted universe multiverse

#clean http://mirrors.ustc.edu.cn ubuntu

# nvidia-docker2 源
#deb https://nvidia.github.io/libnvidia-container/stable/ubuntu18.04/$(ARCH) /
#直接使用nvidia-docker2 源地址会有问题,需要修改如下才可以
deb https://nvidia.github.io/libnvidia-container/stable/ubuntu18.04/amd64 /
#deb https://nvidia.github.io/libnvidia-container/experimental/ubuntu18.04/$(ARCH) /
deb https://nvidia.github.io/nvidia-container-runtime/stable/ubuntu18.04/amd64 /
#deb https://nvidia.github.io/nvidia-container-runtime/experimental/ubuntu18.04/$(ARCH) /
deb https://nvidia.github.io/nvidia-docker/ubuntu18.04/amd64 /

# docker-ce源
deb https://mirrors.tuna.tsinghua.edu.cn/docker-ce/linux/ubuntu bionic stable

# ros源
deb http://mirrors.tuna.tsinghua.edu.cn/ros/ubuntu/ bionic main

# vscode源
#deb [arch=amd64,arm64,armhf] http://packages.microsoft.com/repos/code stable main

# bazel源
deb [arch=amd64] https://storage.googleapis.com/bazel-apt stable jdk1.8

clean https://nvidia.github.io ubuntu
clean https://mirrors.tuna.tsinghua.edu.cn ubuntu
clean http://mirrors.tuna.tsinghua.edu.cn/ros/ubuntu
clean http://packages.microsoft.com/repos/code
3.3、开始下载镜像软件
sudo apt-miiror
下载镜像过程时间比较长,需要耐心等待。执行过程如下:
root@HANZHIWEI02:~# apt-mirror
Downloading 57 index files using 20 threads...
Begin time: Fri Jan 28 14:20:18 2022
[20]... [19]... [18]... [17]... [16]... [15]... [14]... [13]... [12]... [11]... [10]... [9]... [8]... [7]... [6]... [5]... [4]... [3]... [2]... [1]... [0]...
End time: Fri Jan 28 14:20:29 2022Processing translation indexes: [TTTTTT]
Downloading 0 translation files using 0 threads...
Begin time: Fri Jan 28 14:20:29 2022
[0]...
End time: Fri Jan 28 14:20:29 2022Processing DEP-11 indexes: [DDDDDD]
Downloading 0 dep11 files using 0 threads...
Begin time: Fri Jan 28 14:20:29 2022
[0]...
End time: Fri Jan 28 14:20:29 2022Processing indexes: [PPPPPP]
2.2 GiB will be downloaded into archive.
Downloading 707 archive files using 20 threads...
Begin time: Fri Jan 28 14:20:30 2022
[20]... [19]... [18]... [17]... [16]... [15]... [14]... [13]... [12]... [11]... [10]... [9]... [8]... [7]... [6]... [5]... [4]... [3]... [2]... [1]... [0]...
End time: Fri Jan 28 14:31:46 20224.1 GiB in 1406 files and 2 directories can be freed.
Run /mnt/e/ubuntu-apt/var/clean.sh for this purpose.Running the Post Mirror script ...
(/var/www/html/var/postmirror.sh)Post Mirror script has completed. See above output for any possible errors.
3.4、安装nginx
sudo apt-get install nginx
3.5、配置nginx的服务
sudo vi /etc/nginx/sites-available/default
我的配置文件如下:
##
# You should look at the following URL's in order to grasp a solid understanding
# of Nginx configuration files in order to fully unleash the power of Nginx.
# https://www.nginx.com/resources/wiki/start/
# https://www.nginx.com/resources/wiki/start/topics/tutorials/config_pitfalls/
# https://wiki.debian.org/Nginx/DirectoryStructure
#
# In most cases, administrators will remove this file from sites-enabled/ and
# leave it as reference inside of sites-available where it will continue to be
# updated by the nginx packaging team.
#
# This file will automatically load configuration files provided by other
# applications, such as Drupal or Wordpress. These applications will be made
# available underneath a path with that package name, such as /drupal8.
#
# Please see /usr/share/doc/nginx-doc/examples/ for more detailed examples.
##

# Default server configuration
#
server {
    listen 80 default_server;
        # 设置中文编码支持
    charset utf-8;
    # listen [::]:80 default_server;

    # SSL configuration
    #
    #listen 443 ssl default_server;
    #listen [::]:443 ssl default_server;
    #
    # Note: You should disable gzip for SSL traffic.
    # See: https://bugs.debian.org/773332
    #
    # Read up on ssl_ciphers to ensure a secure configuration.
    # See: https://bugs.debian.org/765782
    #
    # Self signed certs generated by the ssl-cert package
    # Don't use them in a production server!
    #
    # include snippets/snakeoil.conf;

    #ssl_certificate   /mnt/e/ubuntu-apt/key/server.crt;
    #ssl_certificate_key  /mnt/e/ubuntu-apt/key/server.key;
    #ssl_session_timeout 5m;
    #ssl_protocols TLSv1 TLSv1.1 TLSv1.2;
    #ssl_ciphers AESGCM:ALL:!DH:!EXPORT:!RC4:+HIGH:!MEDIUM:!LOW:!aNULL:!eNULL;
    #ssl_prefer_server_ciphers  on;

    #ssl_ciphers  HIGH:!aNULL:!MD5;


    # 显示目录
    autoindex on;

    # 镜像所在的目录
    root /var/www/html;

    # Add index.php to the list if you are using PHP
    index index.html index.htm index.nginx-debian.html;

    # server_name _;
    server_name <本机ip地址>;

    location / {
        # First attempt to serve request as file, then
        # as directory, then fall back to displaying a 404.
        try_files $uri $uri/ =404;
        #autoindex on;
                #autoindex_exact_size off;
                #autoindex_localtime on;
    }

    # pass PHP scripts to FastCGI server
    #
    #location ~ \.php$ {
    #   include snippets/fastcgi-php.conf;
    #
    #   # With php-fpm (or other unix sockets):
    #   fastcgi_pass unix:/var/run/php/php7.0-fpm.sock;
    #   # With php-cgi (or other tcp sockets):
    #   fastcgi_pass 127.0.0.1:9000;
    #}

    # deny access to .htaccess files, if Apache's document root
    # concurs with nginx's one
    #
    #location ~ /\.ht {
    #   deny all;
    #}
}


# Virtual Host configuration for example.com
#
# You can move that to a different file under sites-available/ and symlink that
# to sites-enabled/ to enable it.
#
#server {
#   listen 80;
#   listen [::]:80;
#
#   server_name example.com;
#
#   root /var/www/example.com;
#   index index.html;
#
#   location / {
#       try_files $uri $uri/ =404;
#   }
#}
3.6、重启 nginx 服务
sudo service nginx restart
在浏览器打开http://IP,能够考到以下页面,这表示搭建成功
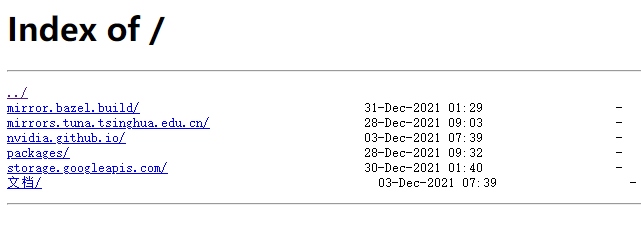
image-20220128144010463
四、修改内网APT源
经过第三章内容, 已经搭建好了简易的APT镜像源,现在只需要将内网电脑上的APT源修改为自己搭建的源即可
修改/etc/apt/sources.list文件
sudo vi /etc/apt/sources.list
将下面内容:
deb https://repo.t3caic.com/repository/apt-aliyun/ bionic main restricted universe multiverse
deb https://repo.t3caic.com/repository/apt-aliyun/ bionic-security main restricted universe multiverse
deb https://repo.t3caic.com/repository/apt-aliyun/ bionic-updates main restricted universe multiverse
deb https://repo.t3caic.com/repository/apt-aliyun/ bionic-proposed main restricted universe multiverse
deb https://repo.t3caic.com/repository/apt-aliyun/ bionic-backports main restricted universe multiverse# docker
#deb [arch=amd64] https://mirrors.tuna.tsinghua.edu.cn/docker-ce/linux/ubuntu bionic stable# nvidia-docker2
deb https://nvidia.github.io/libnvidia-container/stable/ubuntu18.04/$(ARCH) /deb https://nvidia.github.io/libnvidia-container/experimental/ubuntu18.04/$(ARCH) /
deb https://nvidia.github.io/nvidia-container-runtime/stable/ubuntu18.04/$(ARCH) /
deb https://nvidia.github.io/nvidia-container-runtime/experimental/ubuntu18.04/$(ARCH) /
deb https://nvidia.github.io/nvidia-docker/ubuntu18.04/$(ARCH) /
# ros
deb https://mirrors.tuna.tsinghua.edu.cn/ros/ubuntu/ bionic main# vscode
deb [arch=amd64,arm64,armhf] https://packages.microsoft.com/repos/code stable main# bazel
deb [arch=amd64] https://storage.googleapis.com/bazel-apt stable jdk1.8
替换为以下内容即可:
- 在url中添加自己的ip地址
https需要替换为http,因为搭建的nginx服务没有启用ssl验证
deb https://repo.t3caic.com/repository/apt-aliyun/ bionic main restricted universe multiverse
deb https://repo.t3caic.com/repository/apt-aliyun/ bionic-security main restricted universe multiverse
deb https://repo.t3caic.com/repository/apt-aliyun/ bionic-updates main restricted universe multiverse
deb https://repo.t3caic.com/repository/apt-aliyun/ bionic-proposed main restricted universe multiverse
deb https://repo.t3caic.com/repository/apt-aliyun/ bionic-backports main restricted universe multiverse# docker
#deb [arch=amd64] http://<自己搭建的ip地址>/mirrors.tuna.tsinghua.edu.cn/docker-ce/linux/ubuntu bionic stable# nvidia-docker2
deb http://<自己搭建的ip地址>/nvidia.github.io/libnvidia-container/stable/ubuntu18.04/$(ARCH) /deb http://<自己搭建的ip地址>/nvidia.github.io/libnvidia-container/experimental/ubuntu18.04/$(ARCH) /
deb http://<自己搭建的ip地址>/nvidia.github.io/nvidia-container-runtime/stable/ubuntu18.04/$(ARCH) /
deb http://<自己搭建的ip地址>/nvidia.github.io/nvidia-container-runtime/experimental/ubuntu18.04/$(ARCH) /
deb http://<自己搭建的ip地址>/nvidia.github.io/nvidia-docker/ubuntu18.04/$(ARCH) /
# ros
deb http://<自己搭建的ip地址>/mirrors.tuna.tsinghua.edu.cn/ros/ubuntu/ bionic main# vscode
deb [arch=amd64,arm64,armhf] http://<自己搭建的ip地址>/packages.microsoft.com/repos/code stable main# bazel
deb [arch=amd64] http://<自己搭建的ip地址>/storage.googleapis.com/bazel-apt stable jdk1.8
经过以上步骤,被隔离在内网的电脑能够通过可以访问外网服务电脑来安装所需的apt。
五、rosdep离线源的搭建部署
5.1、解决rosdep init问题
在内网离线执行rosdep init的时候有可能会遇到以下问题:
hanzhiwei@T4-046:~$ sudo rosdep init
ERROR: cannot download default sources list from:
https://raw.githubusercontent.com/ros/rosdistro/master/rosdep/sources.list.d/20-default.list
Website may be down.
解决方案一:
-
将
20-default.list下载下来 -
将
20-default.list文件放到/etc/ros/rosdep/sources.list.d目录即可,如果该目录不存在可以新建
解决方案二:
-
将
20-default.list下载下来 -
按照apt源的方式,放到nginx的
/var/www/html/raw.githubusercontent.com/ros/rosdistro/master/rosdep/sources.list.d目录下 -
修改
/usr/lib/python2.7/dist-packages/rosdep2/sources_list.py文件,将:DEFAULT_SOURCES_LIST_URL = 'https://raw.githubusercontent.com/ros/rosdistro/master/rosdep/sources.list.d/20-default.list'
修改为:
DEFAULT_SOURCES_LIST_URL = 'http://<自己搭建的ip地址>/raw.githubusercontent.com/ros/rosdistro/master/rosdep/sources.list.d/20-default.list'
即可
5.2、解决rosdep update问题
在内网环境新执行rosdep update汇报以下问题:
hanzhiwei@T4-046:~$ rosdep update
reading in sources list data from /etc/ros/rosdep/sources.list.d
ERROR: unable to process source [https://raw.githubusercontent.com/ros/rosdistro/master/rosdep/osx-homebrew.yaml]:
<urlopen error [Errno 0] Error> (https://raw.githubusercontent.com/ros/rosdistro/master/rosdep/osx-homebrew.yaml)
ERROR: unable to process source [https://raw.githubusercontent.com/ros/rosdistro/master/rosdep/base.yaml]:
<urlopen error [Errno 0] Error> (https://raw.githubusercontent.com/ros/rosdistro/master/rosdep/base.yaml)
ERROR: unable to process source [https://raw.githubusercontent.com/ros/rosdistro/master/rosdep/python.yaml]:
<urlopen error [Errno 0] Error> (https://raw.githubusercontent.com/ros/rosdistro/master/rosdep/python.yaml)
ERROR: unable to process source [https://raw.githubusercontent.com/ros/rosdistro/master/rosdep/ruby.yaml]:
<urlopen error [Errno 0] Error> (https://raw.githubusercontent.com/ros/rosdistro/master/rosdep/ruby.yaml)
解决方法如下:
-
将以下内容下载下来,按照APT源搭建方式,放到nginx
/var/www/html下的对应目录下https://raw.githubusercontent.com/ros/rosdistro/master/rosdep/osx-homebrew.yaml
https://raw.githubusercontent.com/ros/rosdistro/master/rosdep/base.yaml
https://raw.githubusercontent.com/ros/rosdistro/master/rosdep/python.yaml
https://raw.githubusercontent.com/ros/rosdistro/master/rosdep/ruby.yaml
https://raw.githubusercontent.com/ros/rosdistro/master/releases/fuerte.yaml
https://raw.githubusercontent.com/ros/rosdistro/master/index-v4.yaml
https://raw.github.com/ros/rosdistro/master/releases/targets.yaml
-
修改
20-default.list文件内容sudo vi /etc/ros/rosdep/sources.list.d/20-default.list将以下内容:
# os-specific listings first
yaml https://raw.githubusercontent.com/ros/rosdistro/master/rosdep/osx-homebrew.yaml osx# generic
yaml https://raw.githubusercontent.com/ros/rosdistro/master/rosdep/base.yaml
yaml https://raw.githubusercontent.com/ros/rosdistro/master/rosdep/python.yaml
yaml https://raw.githubusercontent.com/ros/rosdistro/master/rosdep/ruby.yaml
gbpdistro https://raw.githubusercontent.com/ros/rosdistro/master/releases/fuerte.yaml fuerte# newer distributions (Groovy, Hydro, ...) must not be listed anymore, they are being fetched from the rosdistro index.yaml instead
修改为:
# os-specific listings first
yaml http://<自己搭建的ip地址>/raw.githubusercontent.com/ros/rosdistro/master/rosdep/osx-homebrew.yaml osx# generic
yaml http://<自己搭建的ip地址>/raw.githubusercontent.com/ros/rosdistro/master/rosdep/base.yaml
yaml http://<自己搭建的ip地址>/raw.githubusercontent.com/ros/rosdistro/master/rosdep/python.yaml
yaml http://<自己搭建的ip地址>/raw.githubusercontent.com/ros/rosdistro/master/rosdep/ruby.yaml
gbpdistro http://<自己搭建的ip地址>/raw.githubusercontent.com/ros/rosdistro/master/releases/fuerte.yaml fuerte# newer distributions (Groovy, Hydro, ...) must not be listed anymore, they are being fetched from the rosdistro index.yaml instead
-
修改
rep3.py文件sudo vi /usr/lib/python2.7/dist-packages/rosdep2/rep3.py将以下内容:
REP3_TARGETS_URL = 'https://raw.github.com/ros/rosdistro/master/releases/targets.yaml'
修改为:
REP3_TARGETS_URL = 'http://<自己搭建的ip地址>/raw.github.com/ros/rosdistro/master/releases/targets.yaml'
-
修改
__init__.py文件sudo vi /usr/lib/python2.7/dist-packages/rosdistro/__init__.py将以下内容:
DEFAULT_INDEX_URL = 'https://raw.githubusercontent.com/ros/rosdistro/master/index-v4.yaml'
修改为:
DEFAULT_INDEX_URL = 'http://<自己搭建的ip地址>/raw.githubusercontent.com/ros/rosdistro/master/index-v4.yaml'
-
已上修改好后,如果直接执行
rosdep update,会发现以下错误root@T4-046:~# rosdep update
reading in sources list data from /etc/ros/rosdep/sources.list.d
Warning: running 'rosdep update' as root is not recommended.
You should run 'sudo rosdep fix-permissions' and invoke 'rosdep update' again without sudo.
Hit http://<自己搭建的ip地址>/raw.githubusercontent.com/ros/rosdistro/master/rosdep/osx-homebrew.yaml
Hit http://<自己搭建的ip地址>/raw.githubusercontent.com/ros/rosdistro/master/rosdep/base.yaml
Hit http://<自己搭建的ip地址>/raw.githubusercontent.com/ros/rosdistro/master/rosdep/python.yaml
Hit http://<自己搭建的ip地址>/raw.githubusercontent.com/ros/rosdistro/master/rosdep/ruby.yaml
Hit http://<自己搭建的ip地址>/raw.githubusercontent.com/ros/rosdistro/master/releases/fuerte.yaml
Query rosdistro index http://<自己搭建的ip地址>/raw.githubusercontent.com/ros/rosdistro/master/index-v4.yaml
Add distro "ardent"
ERROR: error loading sources list:
HTTP Error 404: Not Found (http://<自己搭建的ip地址>/raw.githubusercontent.com/ros/rosdistro/master/ardent/distribution.yaml) -
这是因为在
index-v4.yaml文件中还有部分文件需要进行下载,根据错误提示和对index-v4.yaml文件进行内容解读,发现还需要下载以下文件,并放到nginx/var/www/html下的对应目录下https://raw.githubusercontent.com/ros/rosdistro/master/ardent/distribution.yaml
https://raw.githubusercontent.com/ros/rosdistro/master/bouncy/distribution.yaml
https://raw.githubusercontent.com/ros/rosdistro/master/crystal/distribution.yaml
https://raw.githubusercontent.com/ros/rosdistro/master/dashing/distribution.yaml
https://raw.githubusercontent.com/ros/rosdistro/master/eloquent/distribution.yaml
https://raw.githubusercontent.com/ros/rosdistro/master/foxy/distribution.yaml
https://raw.githubusercontent.com/ros/rosdistro/master/galactic/distribution.yaml
https://raw.githubusercontent.com/ros/rosdistro/master/groovy/distribution.yaml
https://raw.githubusercontent.com/ros/rosdistro/master/hydro/distribution.yaml
https://raw.githubusercontent.com/ros/rosdistro/master/indigo/distribution.yaml
https://raw.githubusercontent.com/ros/rosdistro/master/jade/distribution.yaml
https://raw.githubusercontent.com/ros/rosdistro/master/kinetic/distribution.yaml
https://raw.githubusercontent.com/ros/rosdistro/master/lunar/distribution.yaml
https://raw.githubusercontent.com/ros/rosdistro/master/melodic/distribution.yaml
https://raw.githubusercontent.com/ros/rosdistro/master/noetic/distribution.yaml
https://raw.githubusercontent.com/ros/rosdistro/master/rolling/distribution.yaml -
以上文件下载好后,再执行
rosdep update即可完成相关操作,执行过程如下root@T4-046:~# rosdep update
reading in sources list data from /etc/ros/rosdep/sources.list.d
Warning: running 'rosdep update' as root is not recommended.
You should run 'sudo rosdep fix-permissions' and invoke 'rosdep update' again without sudo.
Hit http://<自己搭建的ip地址>/raw.githubusercontent.com/ros/rosdistro/master/rosdep/osx-homebrew.yaml
Hit http://<自己搭建的ip地址>/raw.githubusercontent.com/ros/rosdistro/master/rosdep/base.yaml
Hit http://<自己搭建的ip地址>/raw.githubusercontent.com/ros/rosdistro/master/rosdep/python.yaml
Hit http://<自己搭建的ip地址>/raw.githubusercontent.com/ros/rosdistro/master/rosdep/ruby.yaml
Hit http://<自己搭建的ip地址>/raw.githubusercontent.com/ros/rosdistro/master/releases/fuerte.yaml
Query rosdistro index http://<自己搭建的ip地址>/raw.githubusercontent.com/ros/rosdistro/master/index-v4.yaml
Add distro "ardent"
Add distro "bouncy"
Add distro "crystal"
Add distro "dashing"
Add distro "eloquent"
Add distro "foxy"
Add distro "galactic"
Add distro "groovy"
Add distro "hydro"
Add distro "indigo"
Add distro "jade"
Add distro "kinetic"
Add distro "lunar"
Add distro "melodic"
Add distro "noetic"
Add distro "rolling"
updated cache in /root/.ros/rosdep/sources.cache
5.3、nginx下的目录结构
下载对应文件,存放在nginx目录结构如下,仅供参考:
└── var
└── www
└── html
├── raw.github.com
│ └── ros
│ └── rosdistro
│ └── master
│ └── releases
│ └── targets.yaml
└── raw.githubusercontent.com
└── ros
└── rosdistro
└── master
├── ardent
│ └── distribution.yaml
├── bouncy
│ └── distribution.yaml
├── crystal
│ └── distribution.yaml
├── dashing
│ └── distribution.yaml
├── eloquent
│ └── distribution.yaml
├── foxy
│ └── distribution.yaml
├── galactic
│ └── distribution.yaml
├── groovy
│ └── distribution.yaml
├── hydro
│ └── distribution.yaml
├── index-v4.yaml
├── indigo
│ └── distribution.yaml
├── jade
│ └── distribution.yaml
├── kinetic
│ └── distribution.yaml
├── lunar
│ └── distribution.yaml
├── melodic
│ └── distribution.yaml
├── noetic
│ └── distribution.yaml
├── releases
│ └── fuerte.yaml
├── rolling
│ └── distribution.yaml
└── rosdep
├── base.yaml
├── osx-homebrew.yaml
├── python.yaml
├── ruby.yaml
└── sources.list.d
└── 20-default.list
参考文档
http://t.zoukankan.com/superbi-p-13409529.html
https://www.cnblogs.com/zhjblogs/p/14875296.html


 6213
6213

 被折叠的 条评论
为什么被折叠?
被折叠的 条评论
为什么被折叠?
 到【灌水乐园】发言


