


里的分享和第三方登录主要是用shareSDK实现。对于如何下载、集成shareSDK在shareSDK都有详细说明:http://wiki.mob.com/Android_%E5%BF%AB%E9%80%9F%E9%9B%86%E6%88%90%E6%8C%87%E5%8D%97
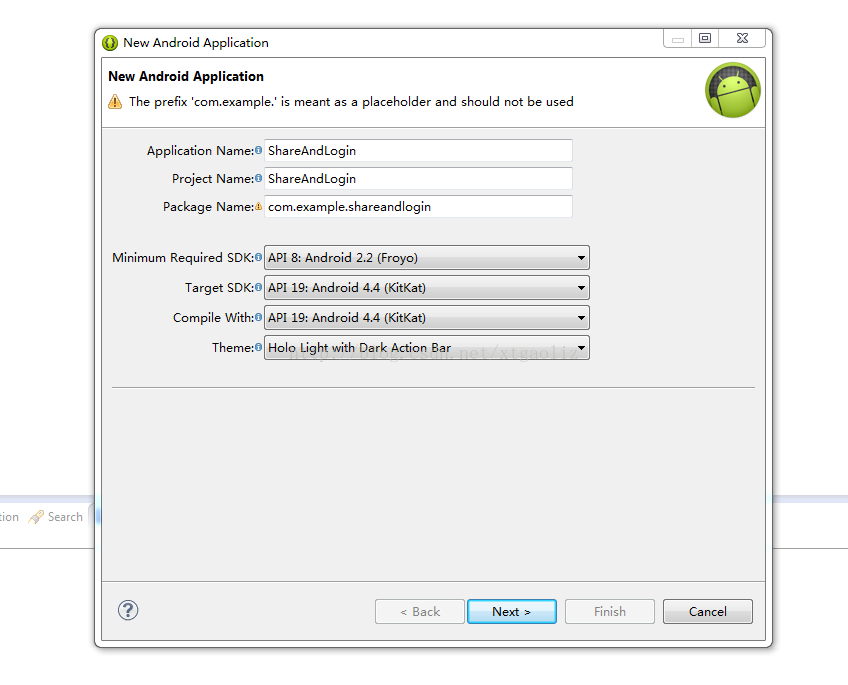
一、第一步我们先创建android项目
二、集成shareSDK到我们的项目:
到官网http://sharesdk.mob.com/Download下载shareSDK,然后进入ShareSDK解压目录,打开“Share SDK for Android”目录,可以找到“QuickIntegrater.jar”,这个就是快速集成ShareSDK的工具
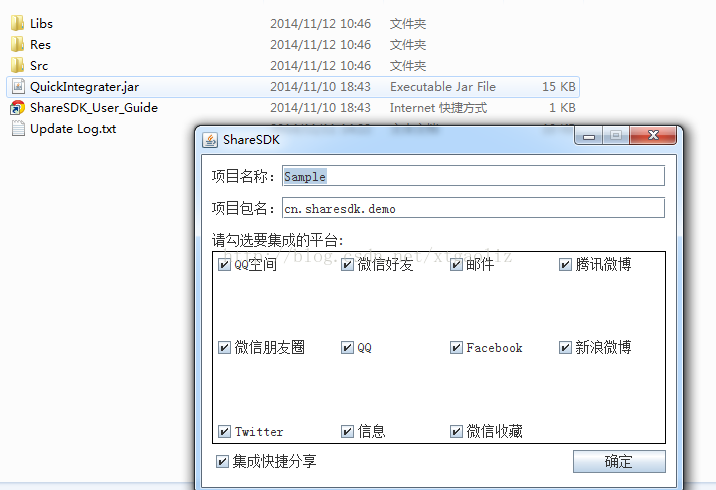
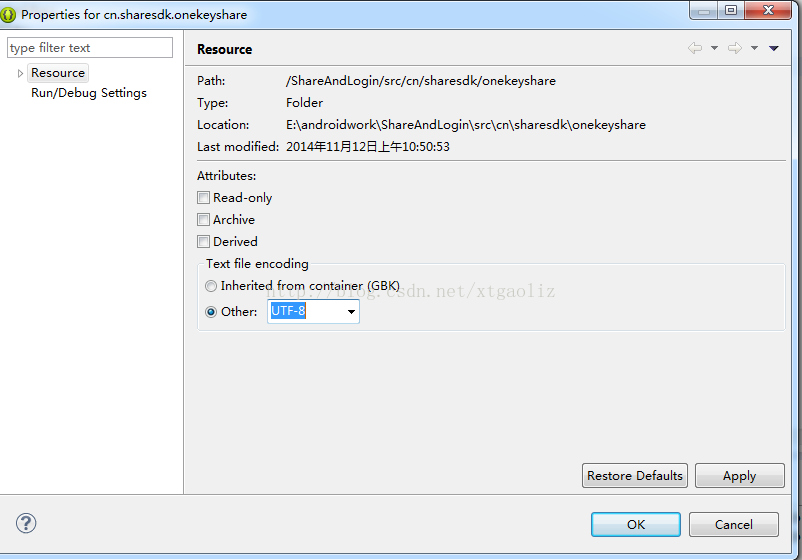
点击确定后会生成Sample文件夹,在该文件夹下会有四个文件夹,我们直接将这四个文件夹复制粘贴到我们的项目中即可,将文件复制到我们工程中可能会有错误提示(主要是编码错误,右键点击有错误的包,选择properties,将编码方式改为UTF-8
三、配置清单文件AndroidManifest.xml
1、添加权限
<uses-permission android:name="android.permission.INTERNET" />
<uses-permission android:name="android.permission.ACCESS_WIFI_STATE" />
<uses-permission android:name="android.permission.ACCESS_NETWORK_STATE" />
<uses-permission android:name="android.permission.CHANGE_WIFI_STATE" />
<uses-permission android:name="android.permission.WRITE_EXTERNAL_STORAGE" />
<uses-permission android:name="android.permission.READ_PHONE_STATE" />
<uses-permission android:name="android.permission.MANAGE_ACCOUNTS"/>
<uses-permission android:name="android.permission.GET_ACCOUNTS"/>
2、添加activity信息
android:name="cn.sharesdk.framework.ShareSDKUIShell"
android:theme="@android:style/Theme.Translucent.NoTitleBar"
android:configChanges="keyboardHidden|orientation|screenSize"
android:screenOrientation="portrait"
android:windowSoftInputMode="stateHidden|adjustResize" >
<intent-filter>
<data android:scheme="tencent100371282" />
<action android:name="android.intent.action.VIEW" />
<category android:name="android.intent.category.BROWSABLE" />
<category android:name="android.intent.category.DEFAULT" />
</intent-filter>
</activity>
3、如果您集成了微信或者易信,还需要添加下面两个Activity
<activity
android:name=".wxapi.WXEntryActivity"
android:theme="@android:style/Theme.Translucent.NoTitleBar"
android:configChanges="keyboardHidden|orientation|screenSize"
android:exported="true"
android:screenOrientation="portrait" />
<!--易信分享回调 -->
<activity
android:name=".yxapi.YXEntryActivity"
android:theme="@android:style/Theme.Translucent.NoTitleBar"
android:configChanges="keyboardHidden|orientation|screenSize"
android:exported="true"
android:screenOrientation="portrait" />
android:layout_width="fill_parent"
android:layout_height="wrap_content"
android:layout_marginTop="5dp"
android:text="分享"
/>
private void share() {
ShareSDK.initSDK(this);
OnekeyShare oks = new OnekeyShare();
//关闭sso授权
oks.disableSSOWhenAuthorize();
// 分享时Notification的图标和文字
oks.setNotification(R.drawable.ic_launcher, getString(R.string.app_name));
// title标题,印象笔记、邮箱、信息、微信、人人网和QQ空间使用
oks.setTitle(getString(R.string.share));
// titleUrl是标题的网络链接,仅在人人网和QQ空间使用
oks.setTitleUrl("http://sharesdk.cn");
// text是分享文本,所有平台都需要这个字段
oks.setText("我是分享文本");
// imagePath是图片的本地路径,Linked-In以外的平台都支持此参数
oks.setImagePath("/sdcard/test.jpg");
// url仅在微信(包括好友和朋友圈)中使用
oks.setUrl("http://sharesdk.cn");
// comment是我对这条分享的评论,仅在人人网和QQ空间使用
oks.setComment("我是测试评论文本");
// site是分享此内容的网站名称,仅在QQ空间使用
oks.setSite(getString(R.string.app_name));
// siteUrl是分享此内容的网站地址,仅在QQ空间使用
oks.setSiteUrl("http://sharesdk.cn");
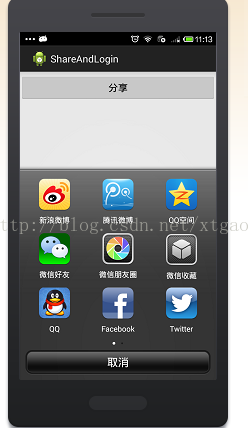
// 启动分享GUI
oks.show(this);
}
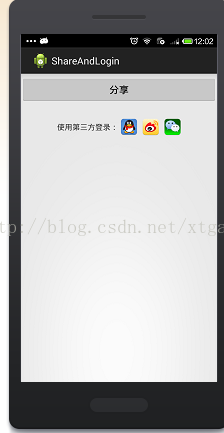
六、下面我们来完成第三方登录功能(qq、微信和新浪微博)首先在布局文件中先添加这几个登录图标:
<LinearLayout xmlns:android="http://schemas.android.com/apk/res/android"
xmlns:tools="http://schemas.android.com/tools"
android:id="@+id/container"
android:layout_width="match_parent"
android:layout_height="match_parent"
tools:context="com.example.shareandlogin.MainActivity"
android:orientation="vertical"
>
<Button android:id="@+id/share"
android:layout_width="fill_parent"
android:layout_height="wrap_content"
android:layout_marginTop="5dp"
android:text="分享"
/>
<LinearLayout android:layout_width="fill_parent"
android:layout_height="wrap_content"
android:layout_marginTop="30dp"
android:orientation="horizontal"
android:gravity="center">
<TextView
android:layout_width="wrap_content"
android:layout_height="wrap_content"
android:text="使用第三方登录:"
android:gravity="center"/>
<ImageView
android:id="@+id/qqlogin"
android:layout_width="30dp"
android:layout_height="30dp"
android:src="@drawable/logo_qq"
android:contentDescription="qq登录"
android:layout_marginLeft="5dp"
/>
<ImageView
android:id="@+id/weibologin"
android:layout_width="30dp"
android:layout_height="30dp"
android:src="@drawable/logo_sinaweibo"
android:contentDescription="新浪微博登录"
android:layout_marginLeft="10dp"
/>
<ImageView
android:id="@+id/wechatlogin"
android:layout_width="30dp"
android:layout_height="30dp"
android:src="@drawable/logo_wechat"
android:contentDescription="微信登录"
android:layout_marginLeft="10dp"
/>
</LinearLayout>
</LinearLayout>
1.下面我们以新浪微博登录为例,要使用新浪微博实现第三方登录我们首先需要在微博开放平台http://open.weibo.com/注册成为开发者
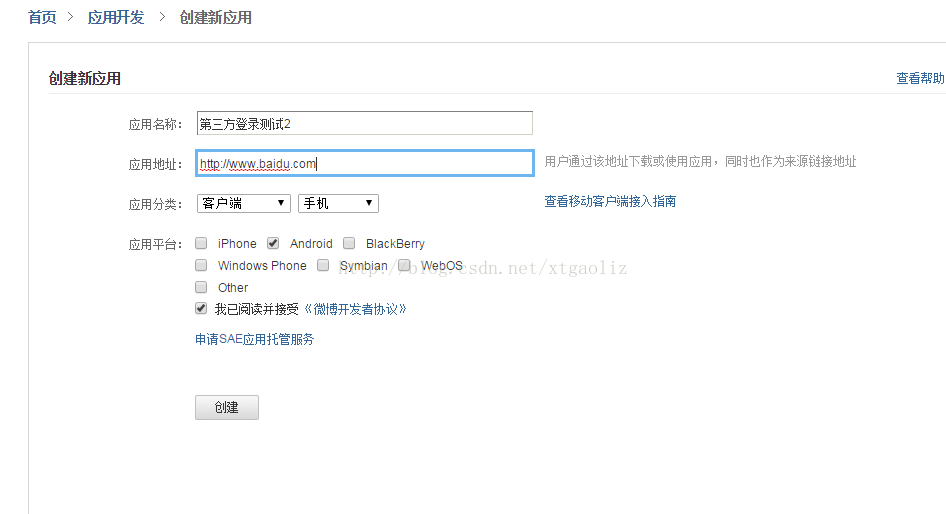
成为开发者之后我们就能在这里接入自己的应用了。我们可以选择微连接->移动应用,然后点击创建应用就可以创建自己的应用了。
如果你只进行了注册还没有身份验证,这时会提示你进行身份验证,在身份认证中会要求你添加自己的姓名,身份证号以及上传自己的身份证照片。
只有当系统审核通过后你才可以创建应用。因为我们是进行测试所以应用地址可以随便填写一个
创建应用完成后我们就能拿到appKey和appSecret
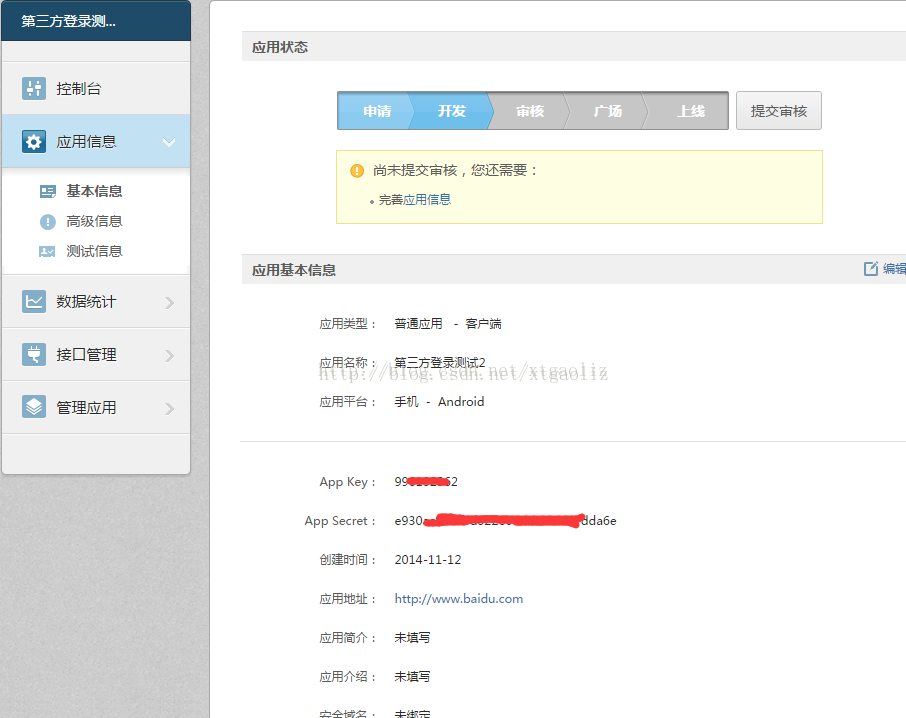
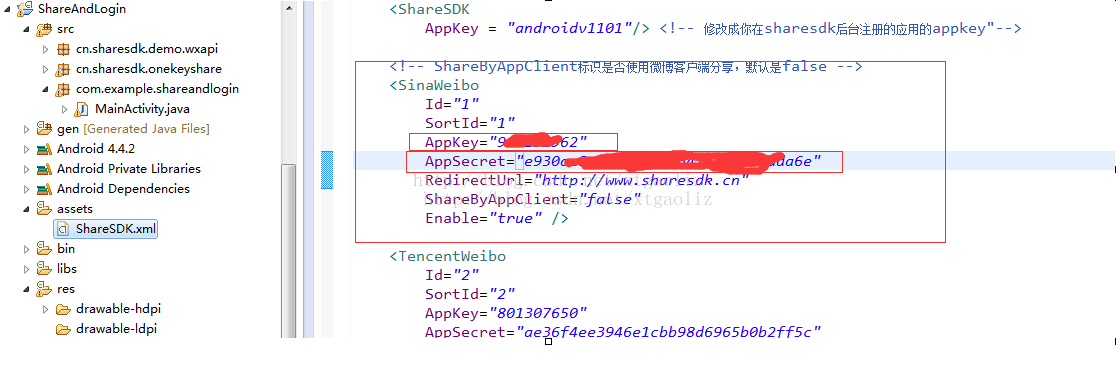
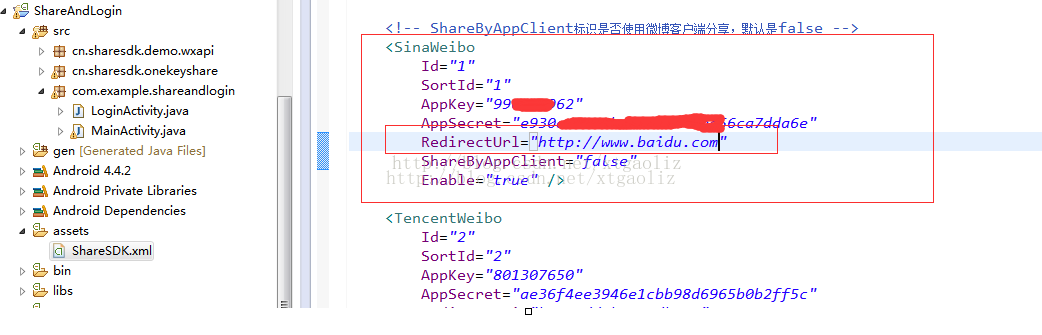
拿到appKey和appSecret后我们就可以在项目asserts目录下的shareSDK.xml文件中使用了
做完上面的工作后我们要在MainActivity中为这新浪微博登录做监听,当点击微博登录按钮时调用goWeiboLogin()方法
登录成功后跳转到LoginActivity页面展示我们拿到微博返回给我们的信息
Handler hanlder=new Handler(){
public void handleMessage(Message msg) {
Intent intent =new Intent();
intent.setClass(MainActivity.this, LoginActivity.class);
HashMap<String, Object> map=(HashMap<String, Object>) msg.obj;
JSONObject json=new JSONObject(map);
intent.putExtra("userId",json.toString());
startActivity(intent);
};
};
private void goWeiboLogin() {
ShareSDK.initSDK(this);
Platform platform=ShareSDK.getPlatform(SinaWeibo.NAME);
authorize(platform);
}
private void authorize(Platform platform) {
if(platform==null){
return ;
}
if(platform.isValid()){
String userId=platform.getDb().getUserId();
//Toast.makeText(this, userId, 1).show();
platform.removeAccount();
}
platform.setPlatformActionListener(new PlatformActionListener() {
@Override
public void onError(Platform arg0, int arg1, Throwable arg2) {
// TODO Auto-generated method stub
}
//这个是登录完成后进行的操作
@Override
public void onComplete(Platform arg0, int arg1, HashMap<String, Object> arg2) {
Message msg=Message.obtain();
msg.obj=arg2;
hanlder.sendMessage(msg);
}
@Override
public void onCancel(Platform arg0, int arg1) {
// TODO Auto-generated method stub
}
});
platform.SSOSetting(true);
platform.showUser(null);
}
做完这些工作后我们来运行我们的程序
点击新浪微博图标后会报下面错误
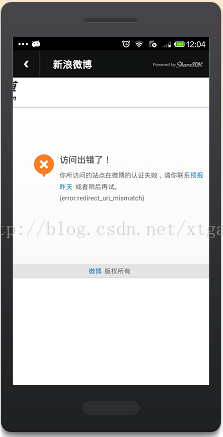
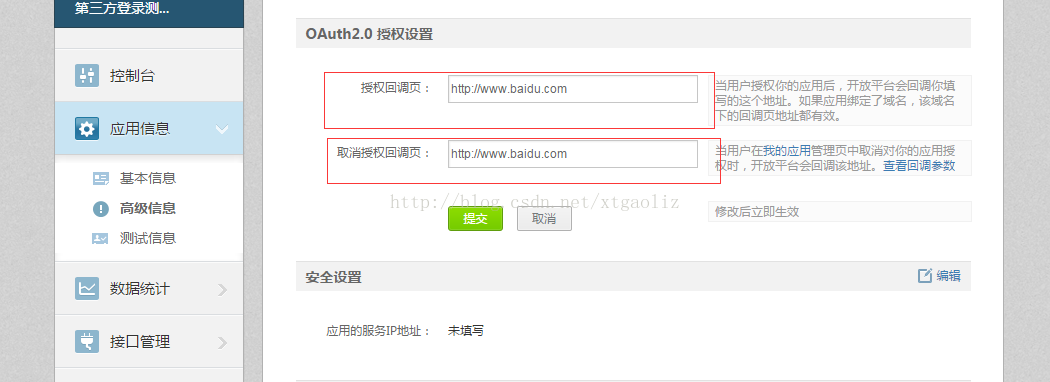
这个错误主要是我们在创建应用时没有指定回调函数导致的,我们需要在高级信息中设置回调地址,这里的回调地址暂时我们可以随便填写 我这里填写的是http://www.baidu.com.。
在这里填写后还需要在我们在assets目录下ShareSDK.xml文件中填写微博的回调地址
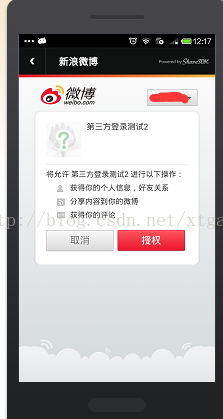
接下来我们再运行我们的程序我们会看到如下界面,其中红色框内显示的名称使我们在微博平台上创建的应用的名称
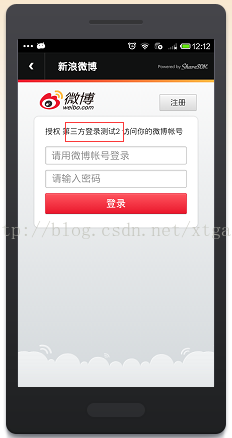
填写自己的微博账号和密码后,点击授权就可以了获取到微博返回给我们的信息了,
我们拿到这些信息后就可以使用这些信息来自动注册到我们自己应用的服务器上了,
下次登录时只需要根据这些返回的信息来判断我们数据库中是否有该用户信息即可,
如果有就登录如果没有就进行自动注册
最后点击授权后,这是微博返回给我们的数据
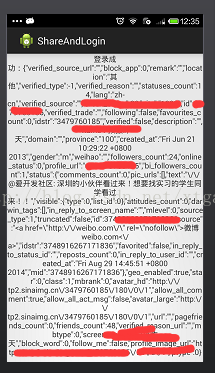
最后说一下其实qq登录和微信登录和微博登录过程是一样的,都需要先申请appKey。其中微信登录有点特殊,我们必须在本地安装微信客户端之后才能使用微信的第三方登录,否则会报错。
有什么不对的地方或欠缺的地方欢迎大家指正。


 495
495


 被折叠的 条评论
为什么被折叠?
被折叠的 条评论
为什么被折叠?
 到【灌水乐园】发言


